click to enlarge
click to enlarge
There are many beautiful flowers everywhere around our home , parks ,shopping malls, nursery stores, flower shops, etc. They are in various shapes and colors. The author wanted to combine their beauty with elegant 3D object developed by Jun Mitani, and this 3 classes are prepared to share my experience with many Origamists who may be interested in expressing natural beauty of flowers in 3D origami forms. You choose your favorite flower and build it into paper object, which you can place on your desk to enjoy with no need of watering. At the end of this site, many flower images are listed for your usage. Hope you will enjoy !! |
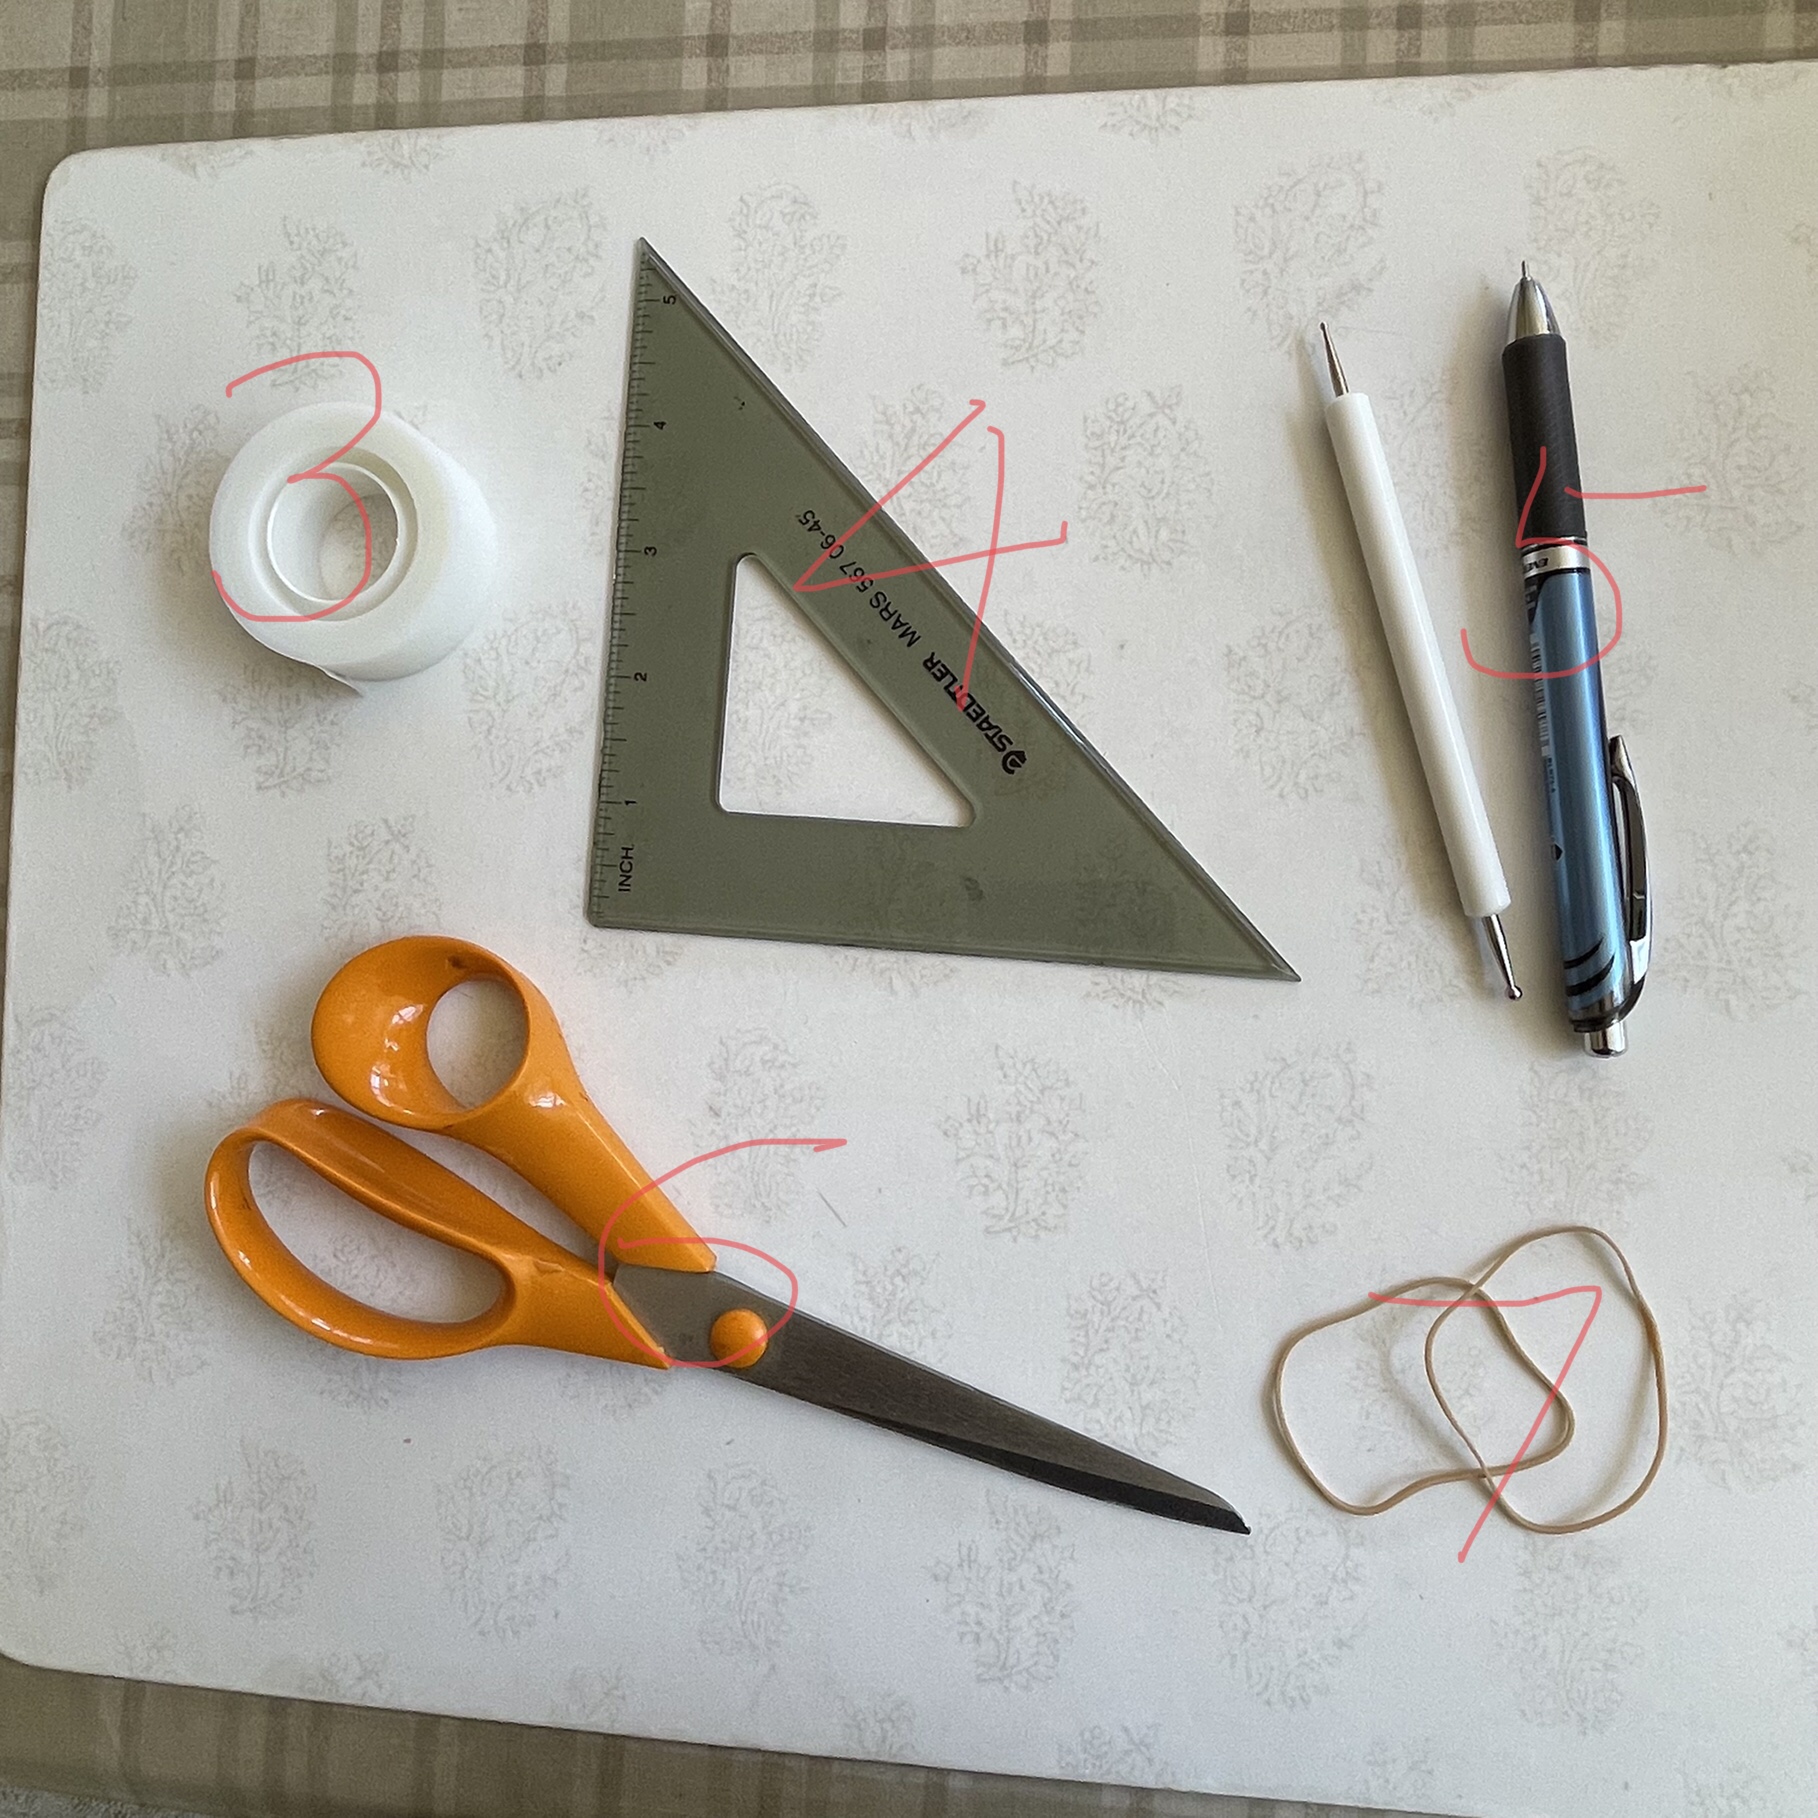
 For creating  "Jun Mitani"-style 3D art, the following setup and tools are required.
  Refer to the pictures shown below.

1. origami working plate
2. cushion paper to help to make slight dent during scoring.
	one sheet of 32-lb weight paper is used here,  but a few layers of
        printer paper ,or a pamphlet, magazine will work as well.
3. tape to hold working paper . This stabilizes scoring action.
4. any straight edge to help scoring straight lines.
5. scoring tool( ball point pen, manicure pen,etc)
     In all 3 classes, we use the liquid gel-ink needle tip pen
     (0.5 mm or 0.02") during the class.
6. a scissors
7. a rubber band (in class-2 , #16 rubber band will be used )
|
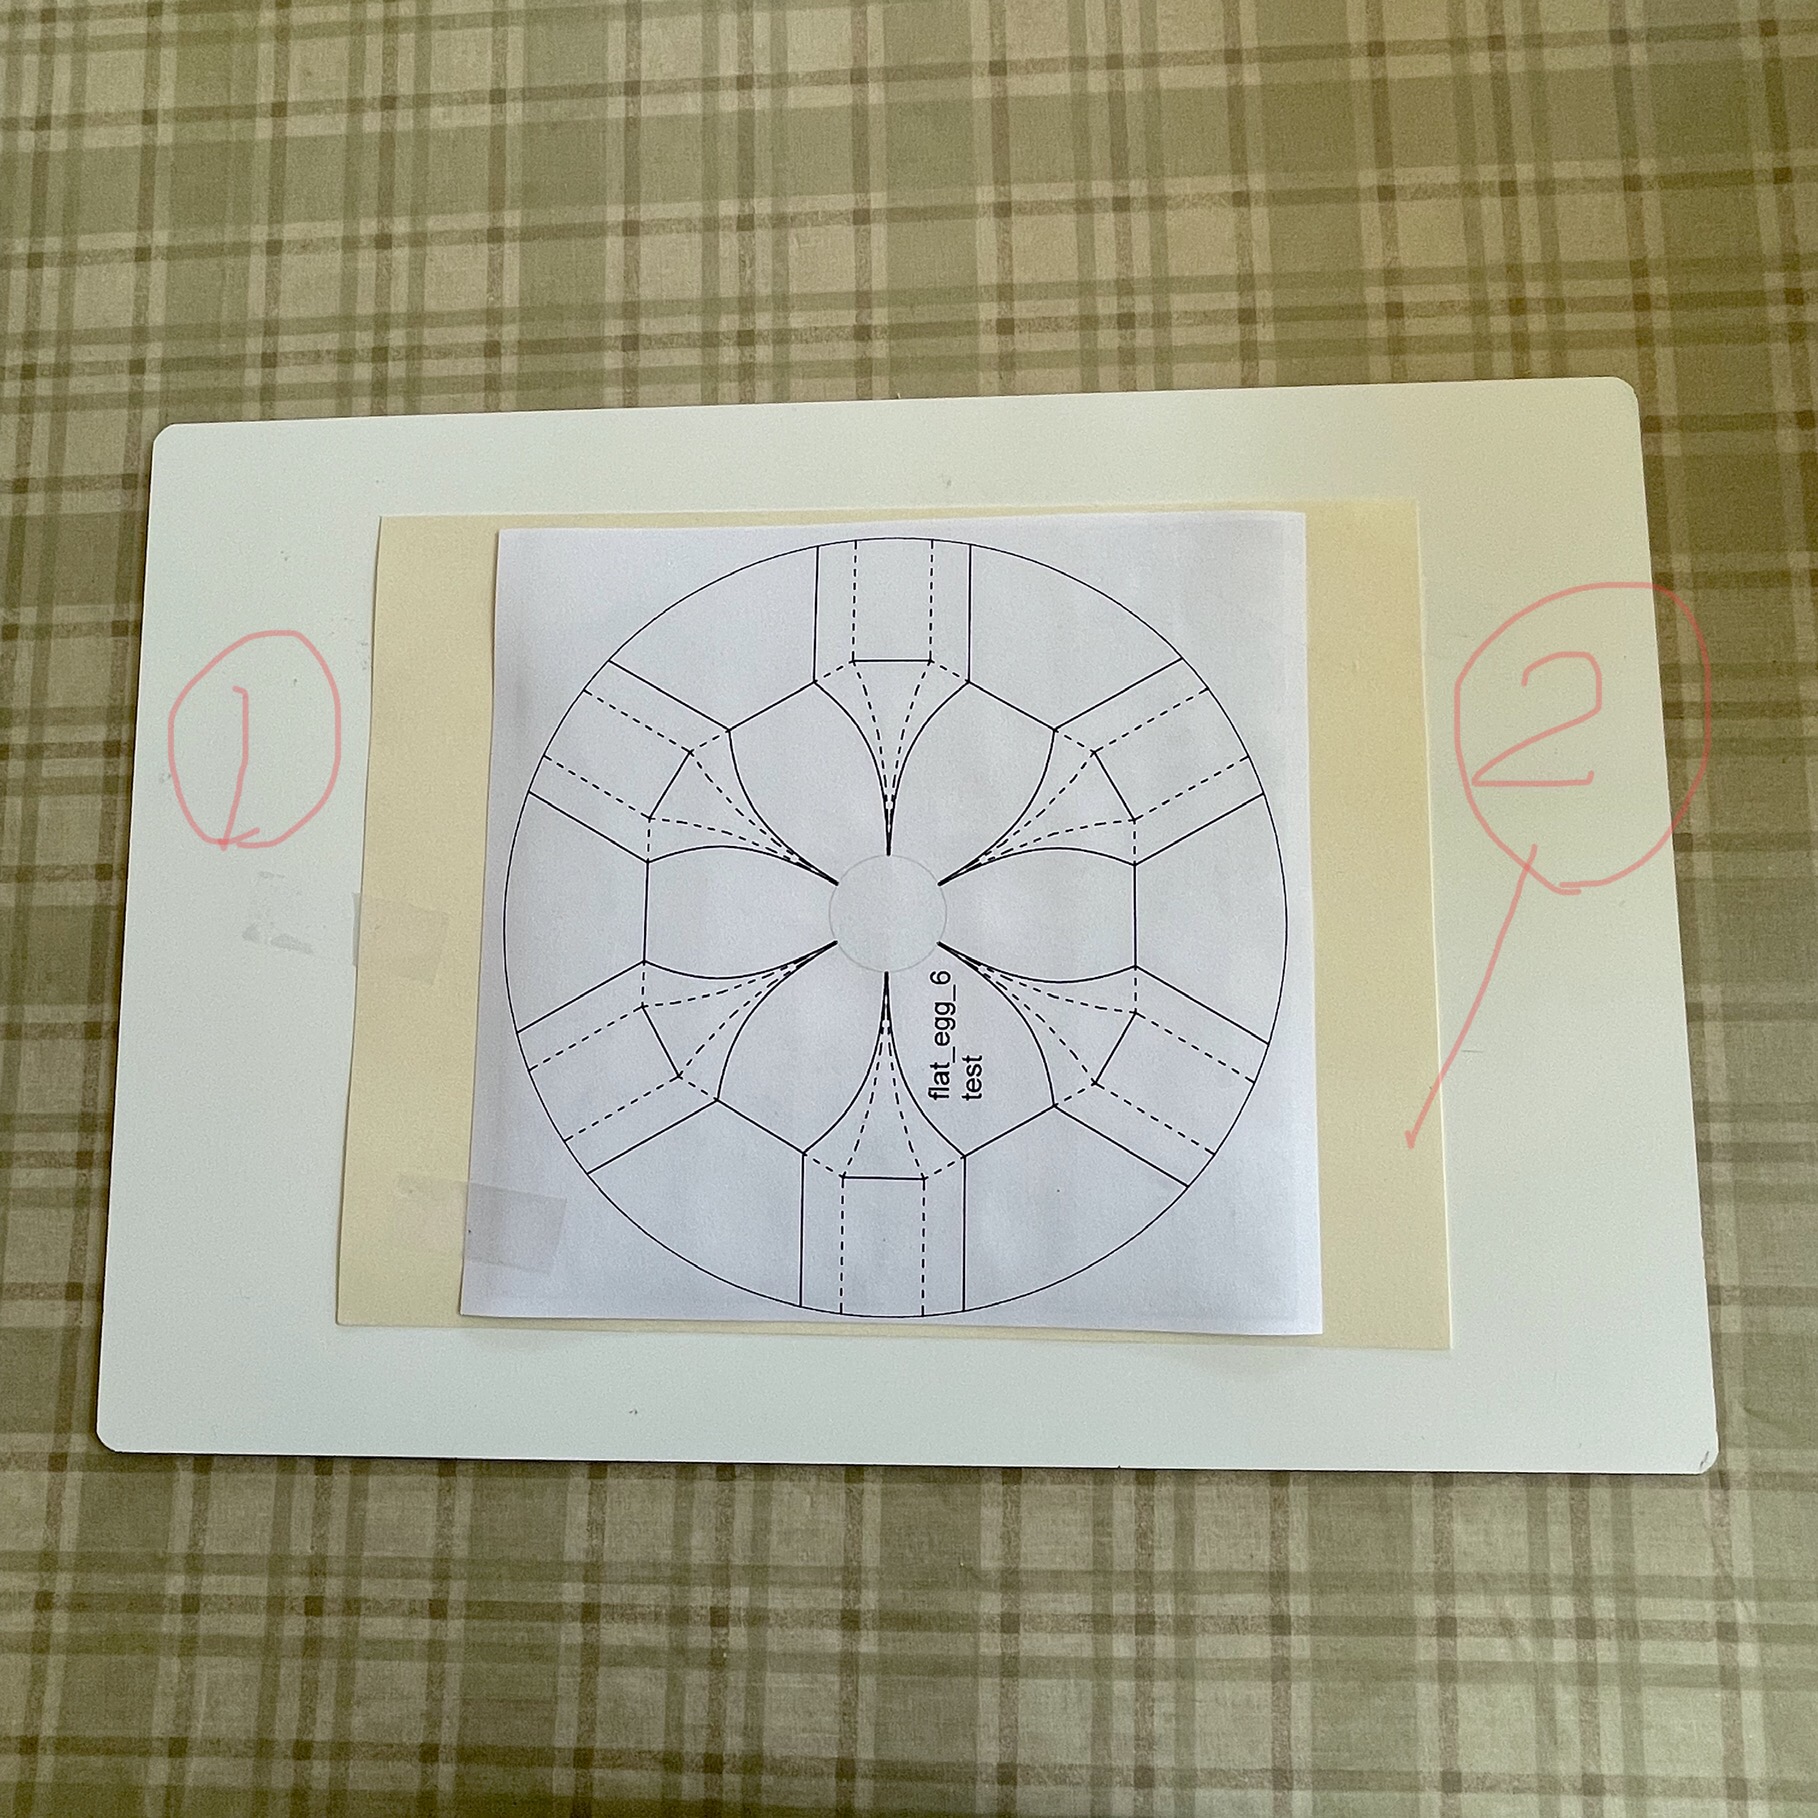
| ------ Work Area Setup ------ click to enlarge |
------ Tools Required ------ click to enlarge |
Class attendants will be provided with the paper(s) already
printed on both sides. This note is for those who want to try
to create model by themselves.
Choice of paper used: Cotton Linnen paper 32 lb. weight
reasons: photo quality printing and strength
Size of paper : US letter size (8.5" x 11")
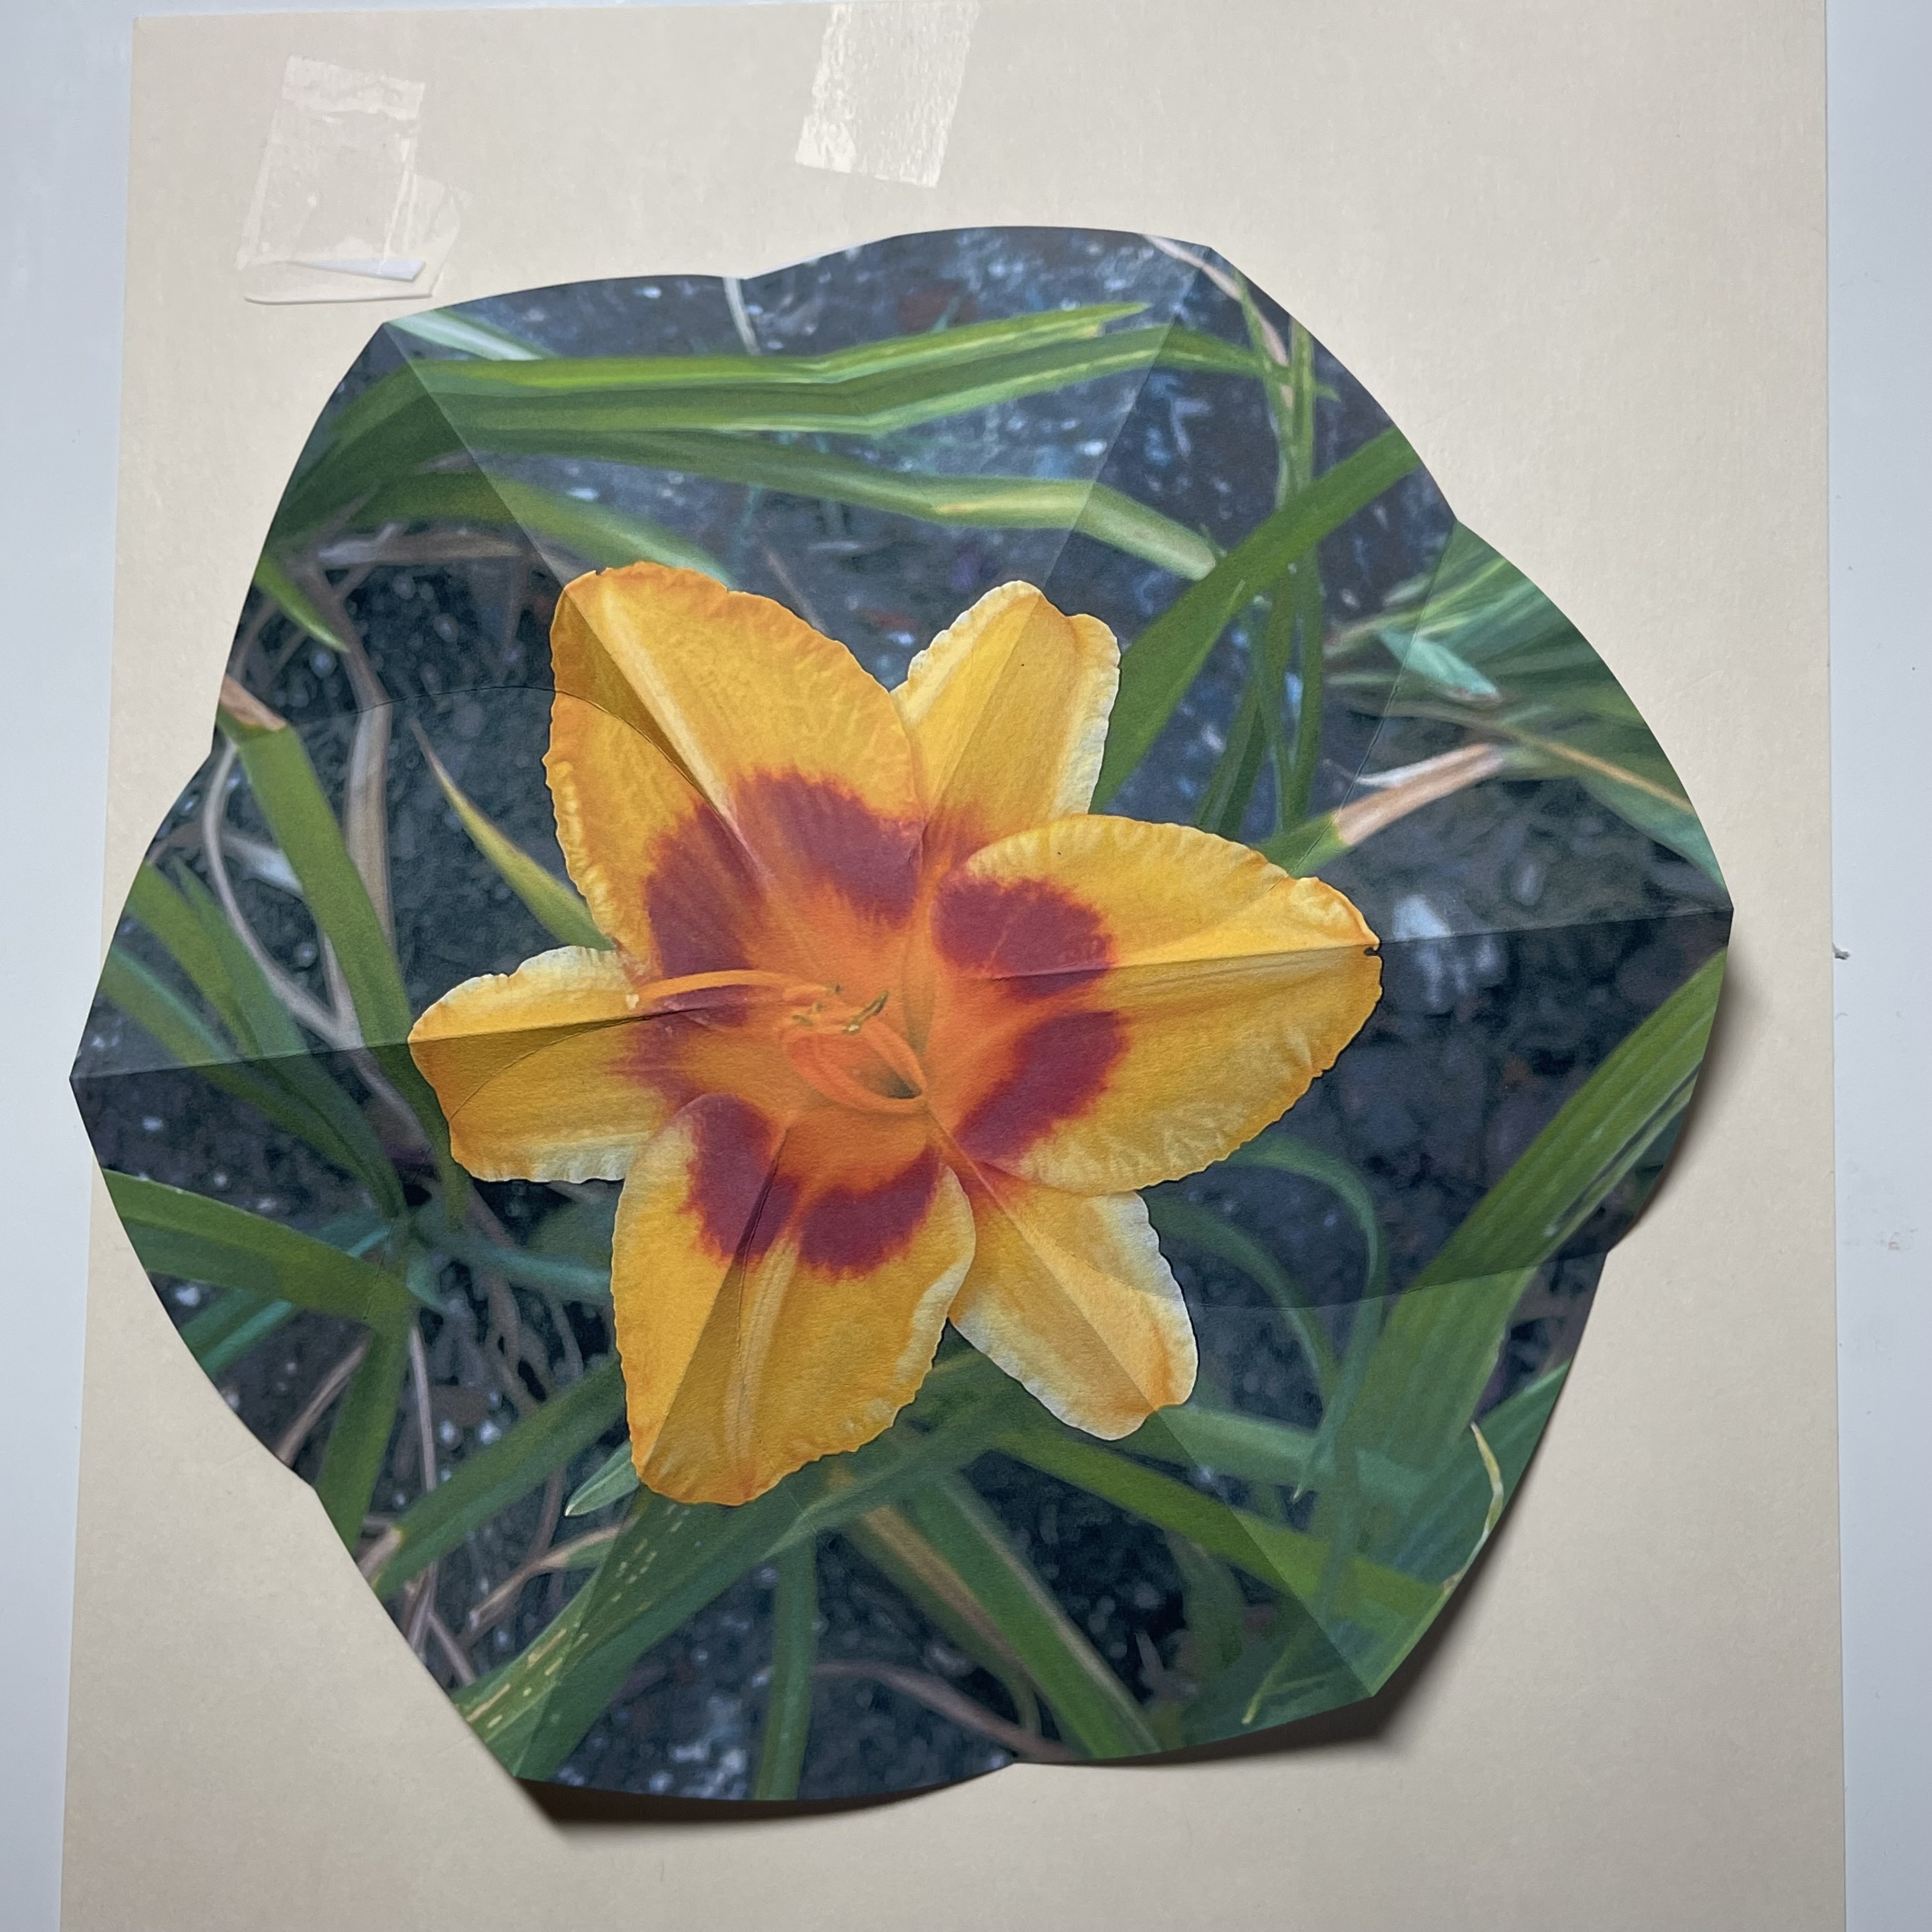
It is important to print crease pattern on one side and flower image
on the other with their center points being concentric.
Note:You also need a good quality photo printer.
The author also tried 24, 28,& 32 lb. weight regular white printer
papers. It works OK, but extra care is required to avoid breaking
when sharp creasing is applied.It also requires longer time to dry
after printing flower images.
Most of the printers do not work well if paper weight exceeds 32 lb.
|
In this class we make 2 three dimensional objects according to Jun Mitani's "Egg Wrapping" scheme. Models are axi-symmetric solid flat headed surface with upper surface being an elongated ellipsoid , and the lower half , a sphere. One is 6 axis , and the second one, 7 axis. Its construction may be called 3-d version of 2-d "twist folding", and once built properly, the shape stays stable. As shown below, The flower image is printed on front side and the crease pattern,on the back. They must be concentric so that the result will be aethetically acceptable. Although the crease lines are mix of linear and curved portions,scoring them (linear parts using a straight edge, and curved portion by "Free Hand") is not that difficult because they are printed with line width of 0.5 mm (or 0.02")and for scoring, we use the liquid gel-ink needle tip pen (0.5 mm) during the class. |
| Crease Pattern (6 axes) click to enlarge 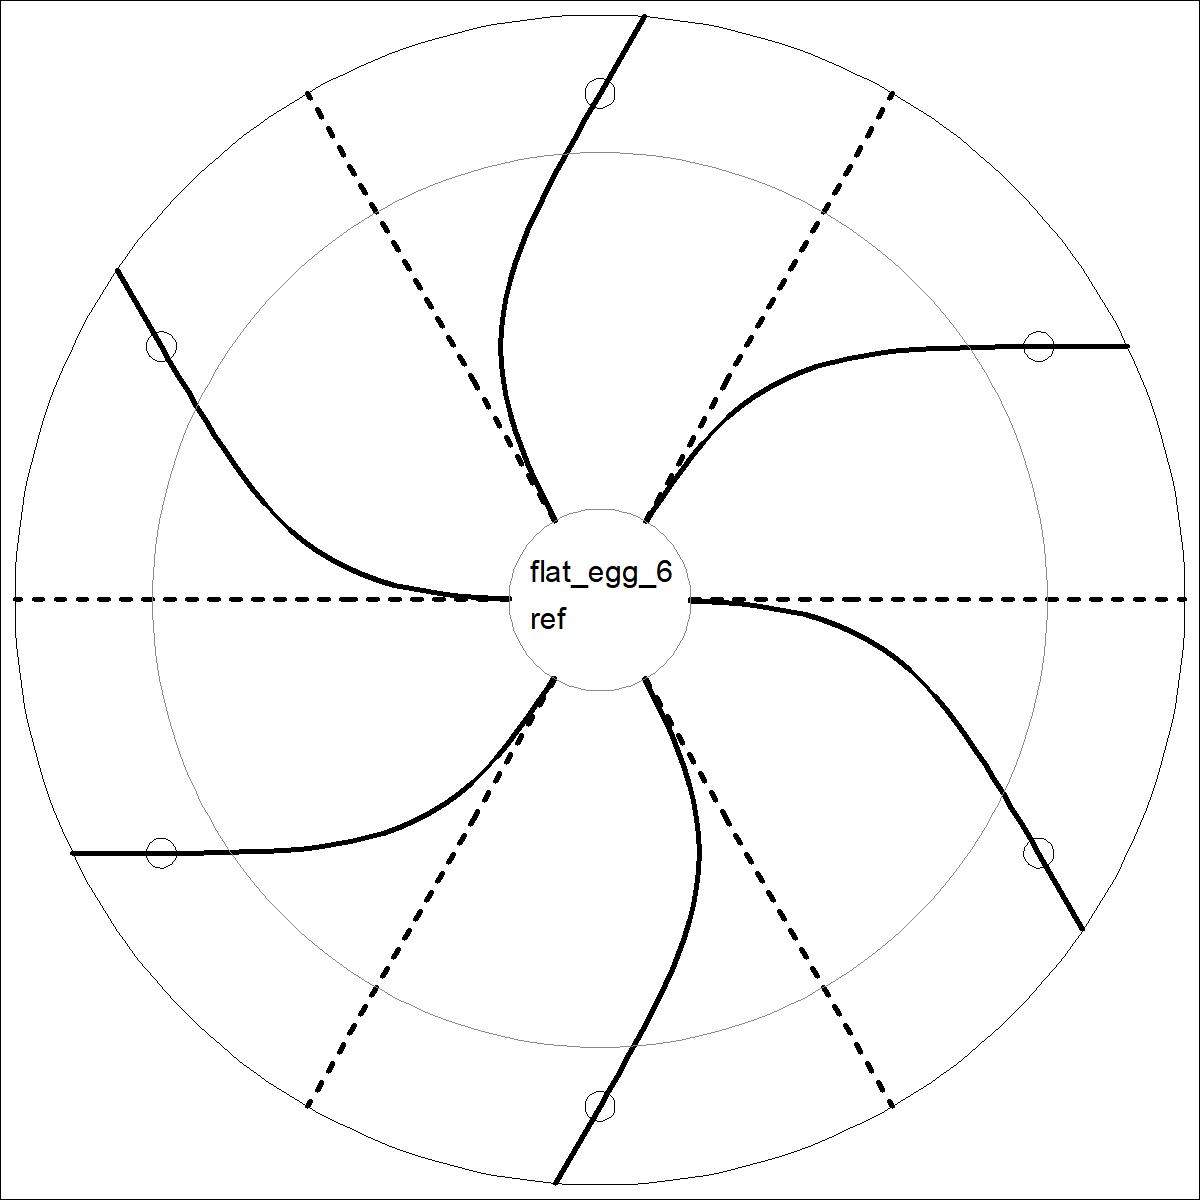
|
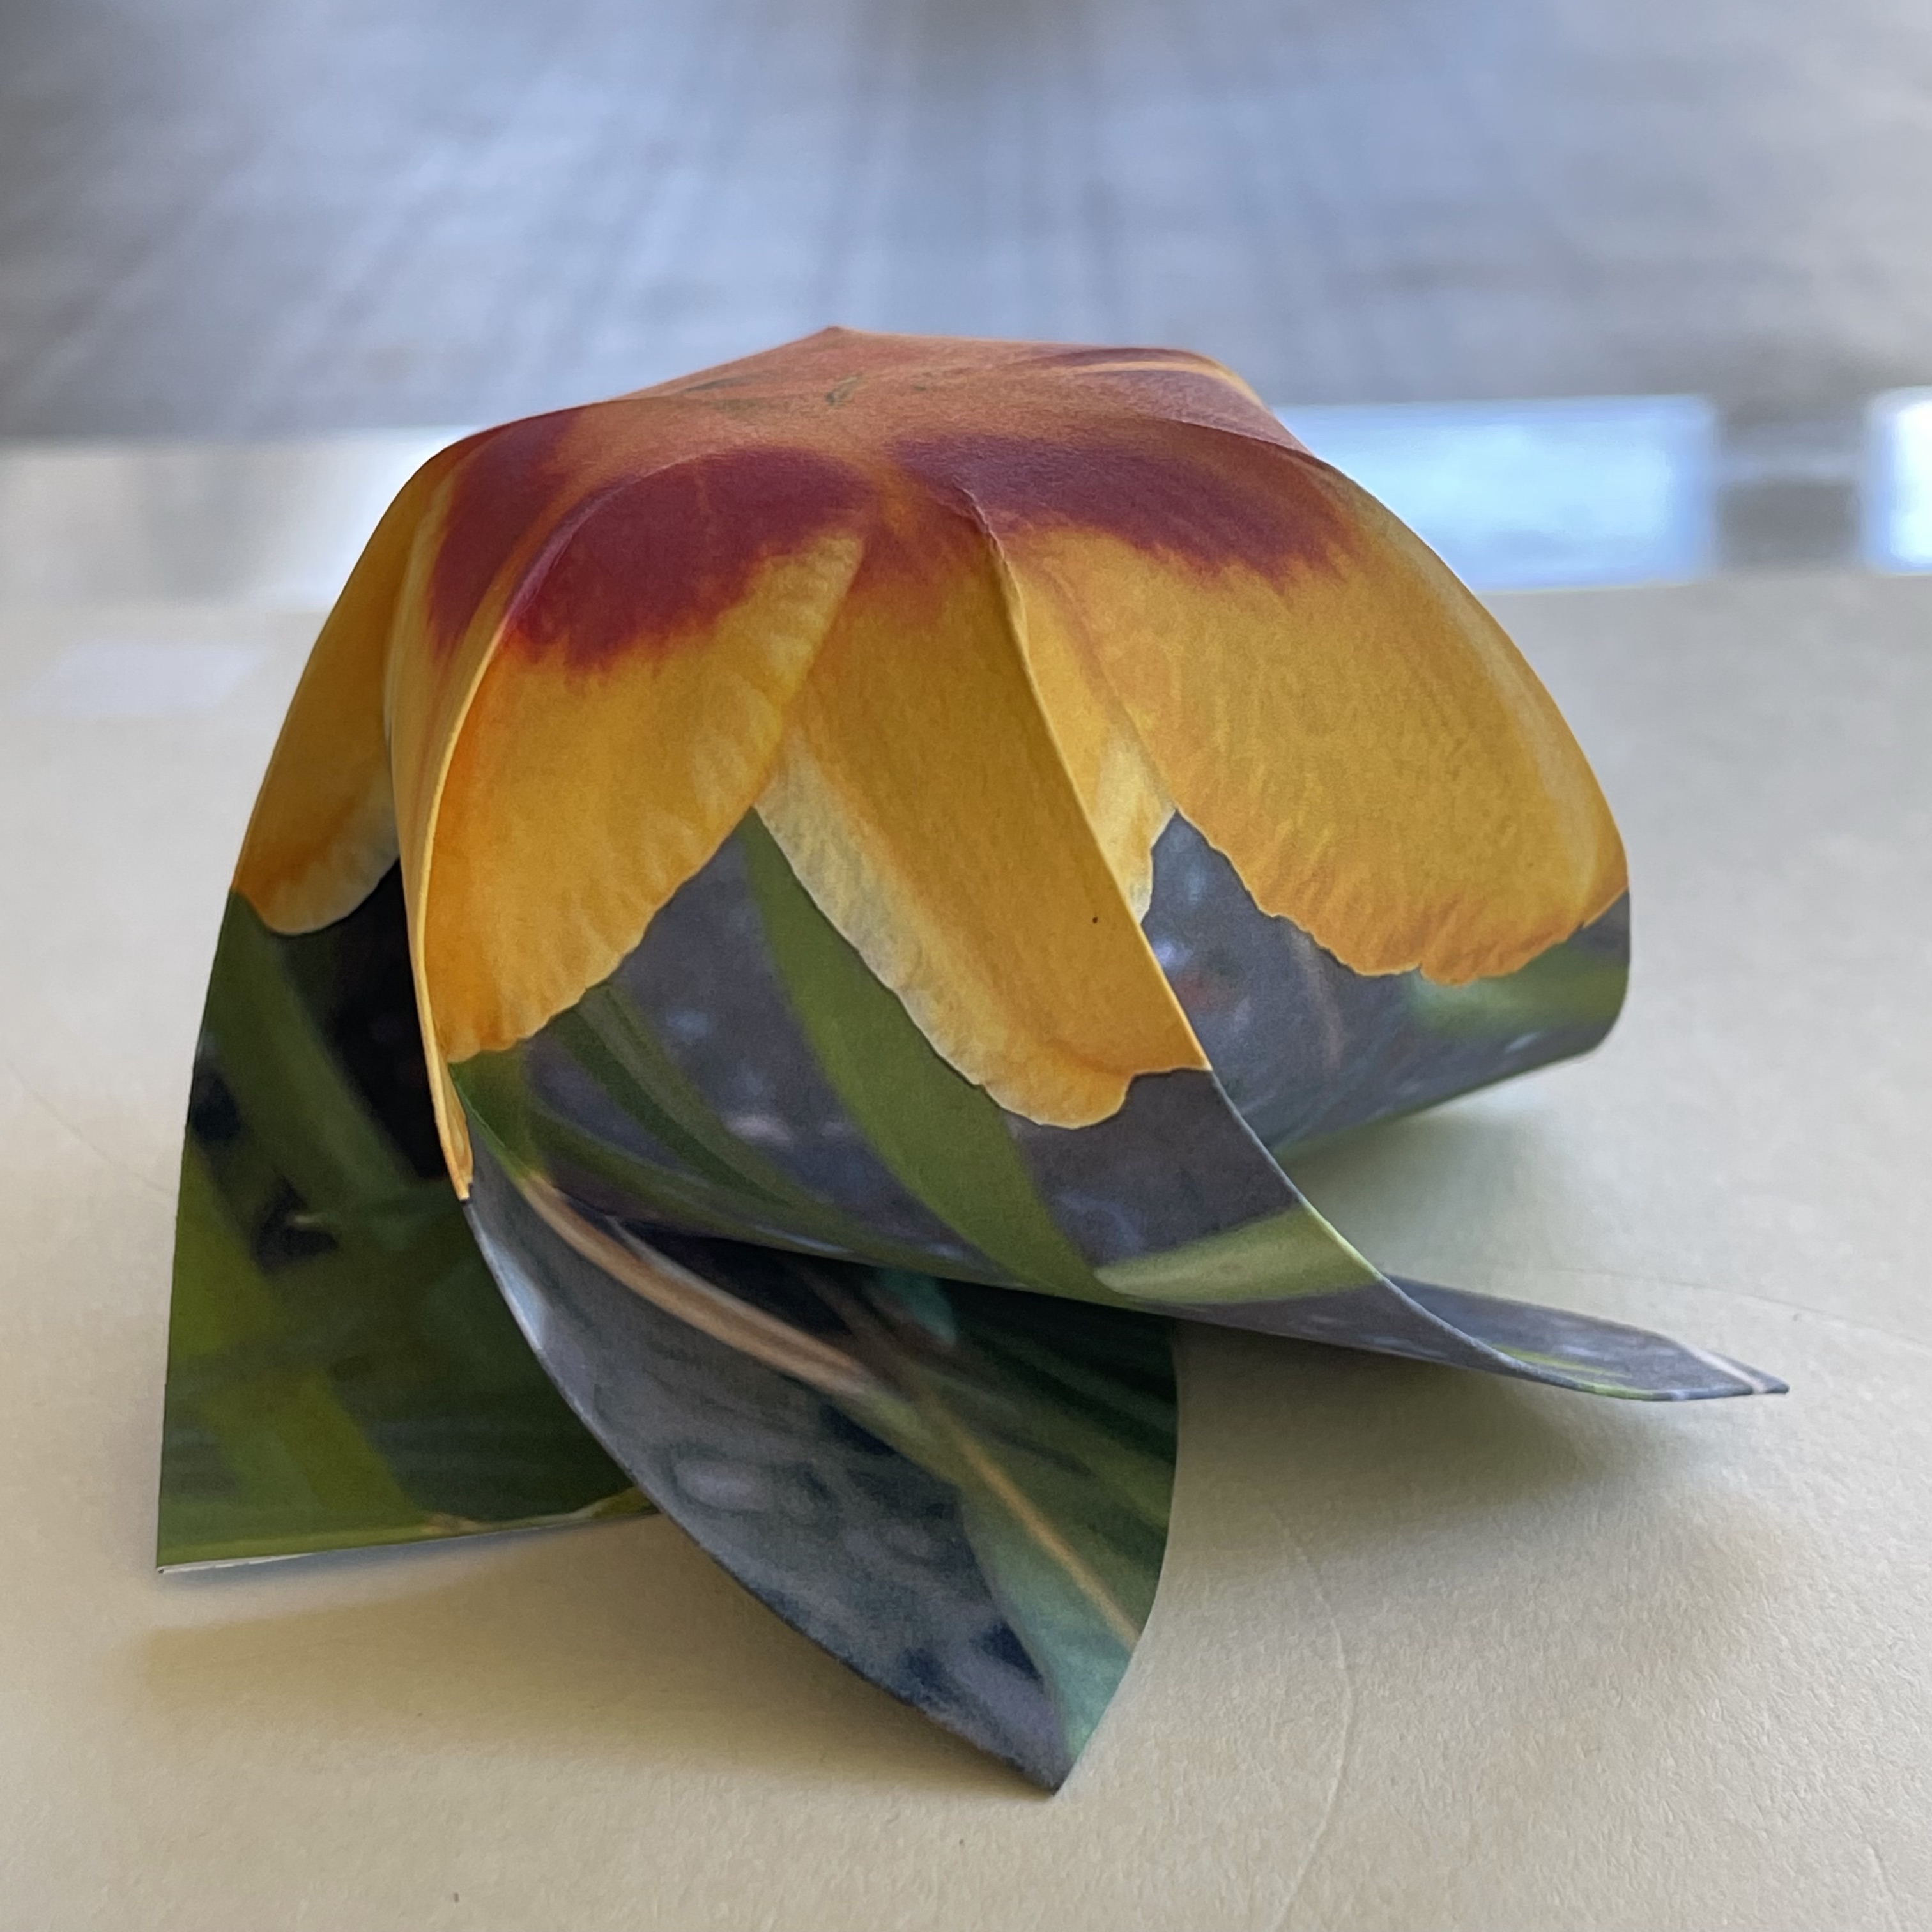
Image of Lily click to enlarge 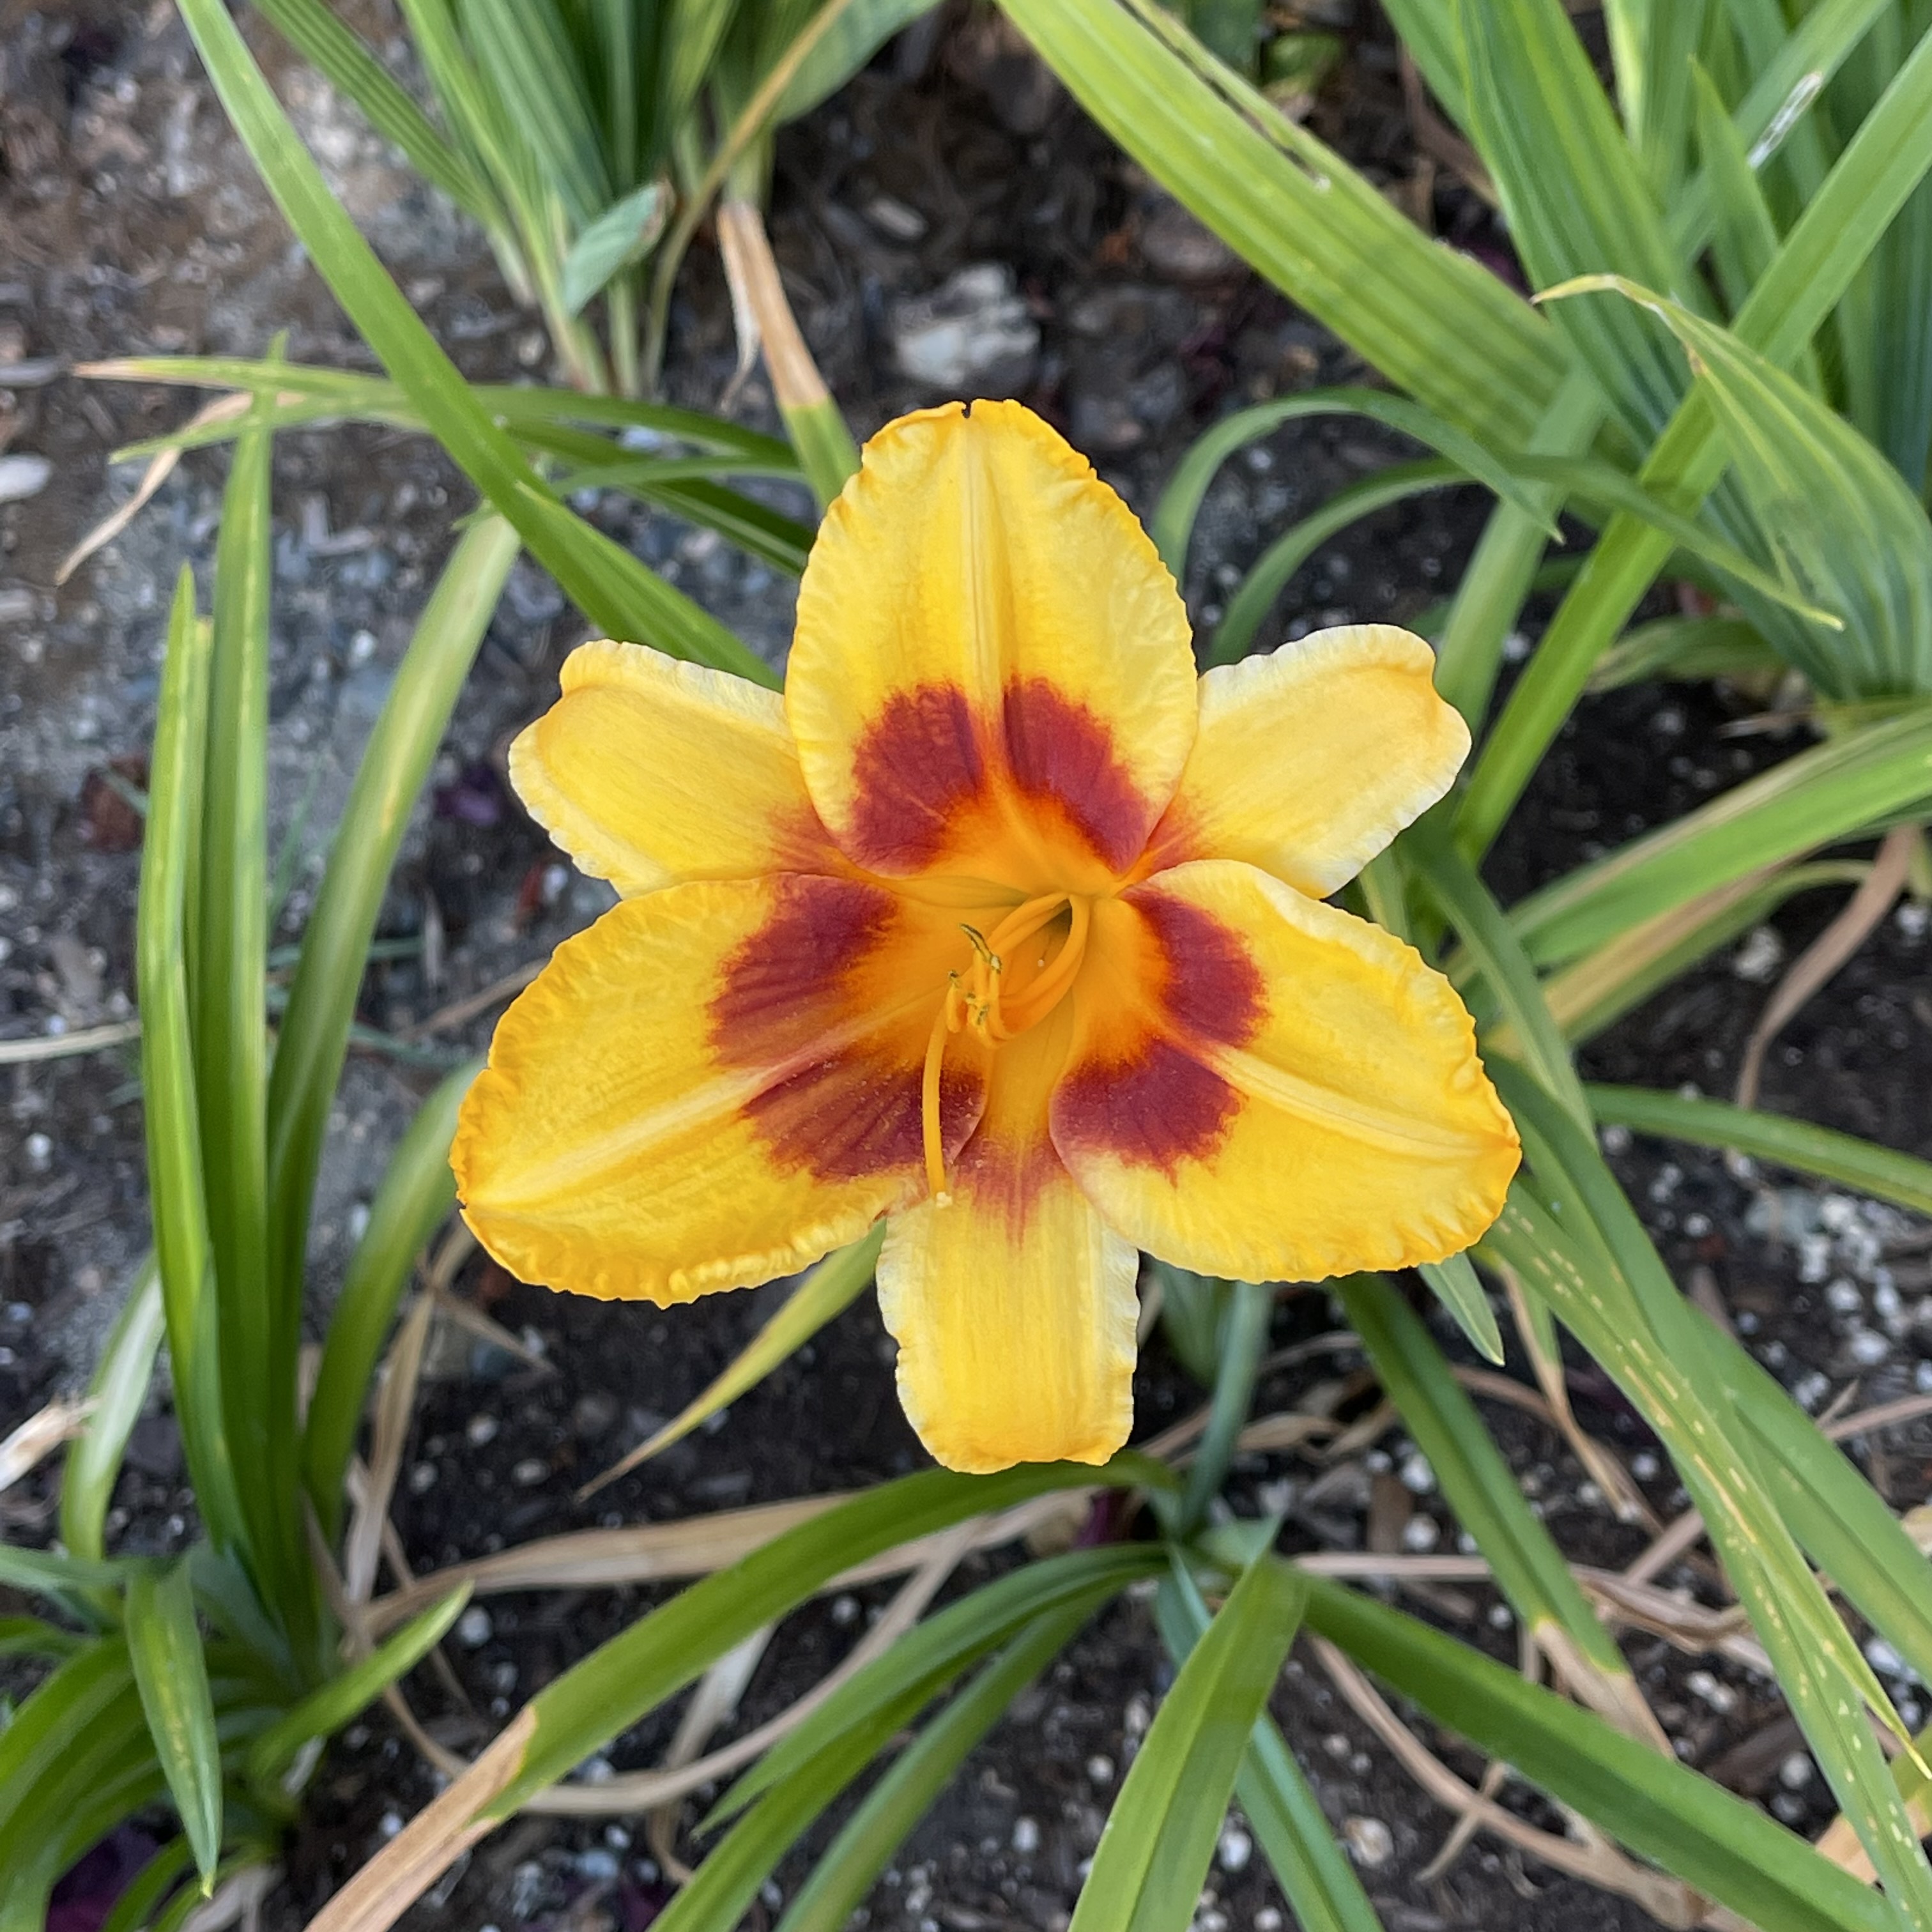 |
Final Appearance click to enlarge 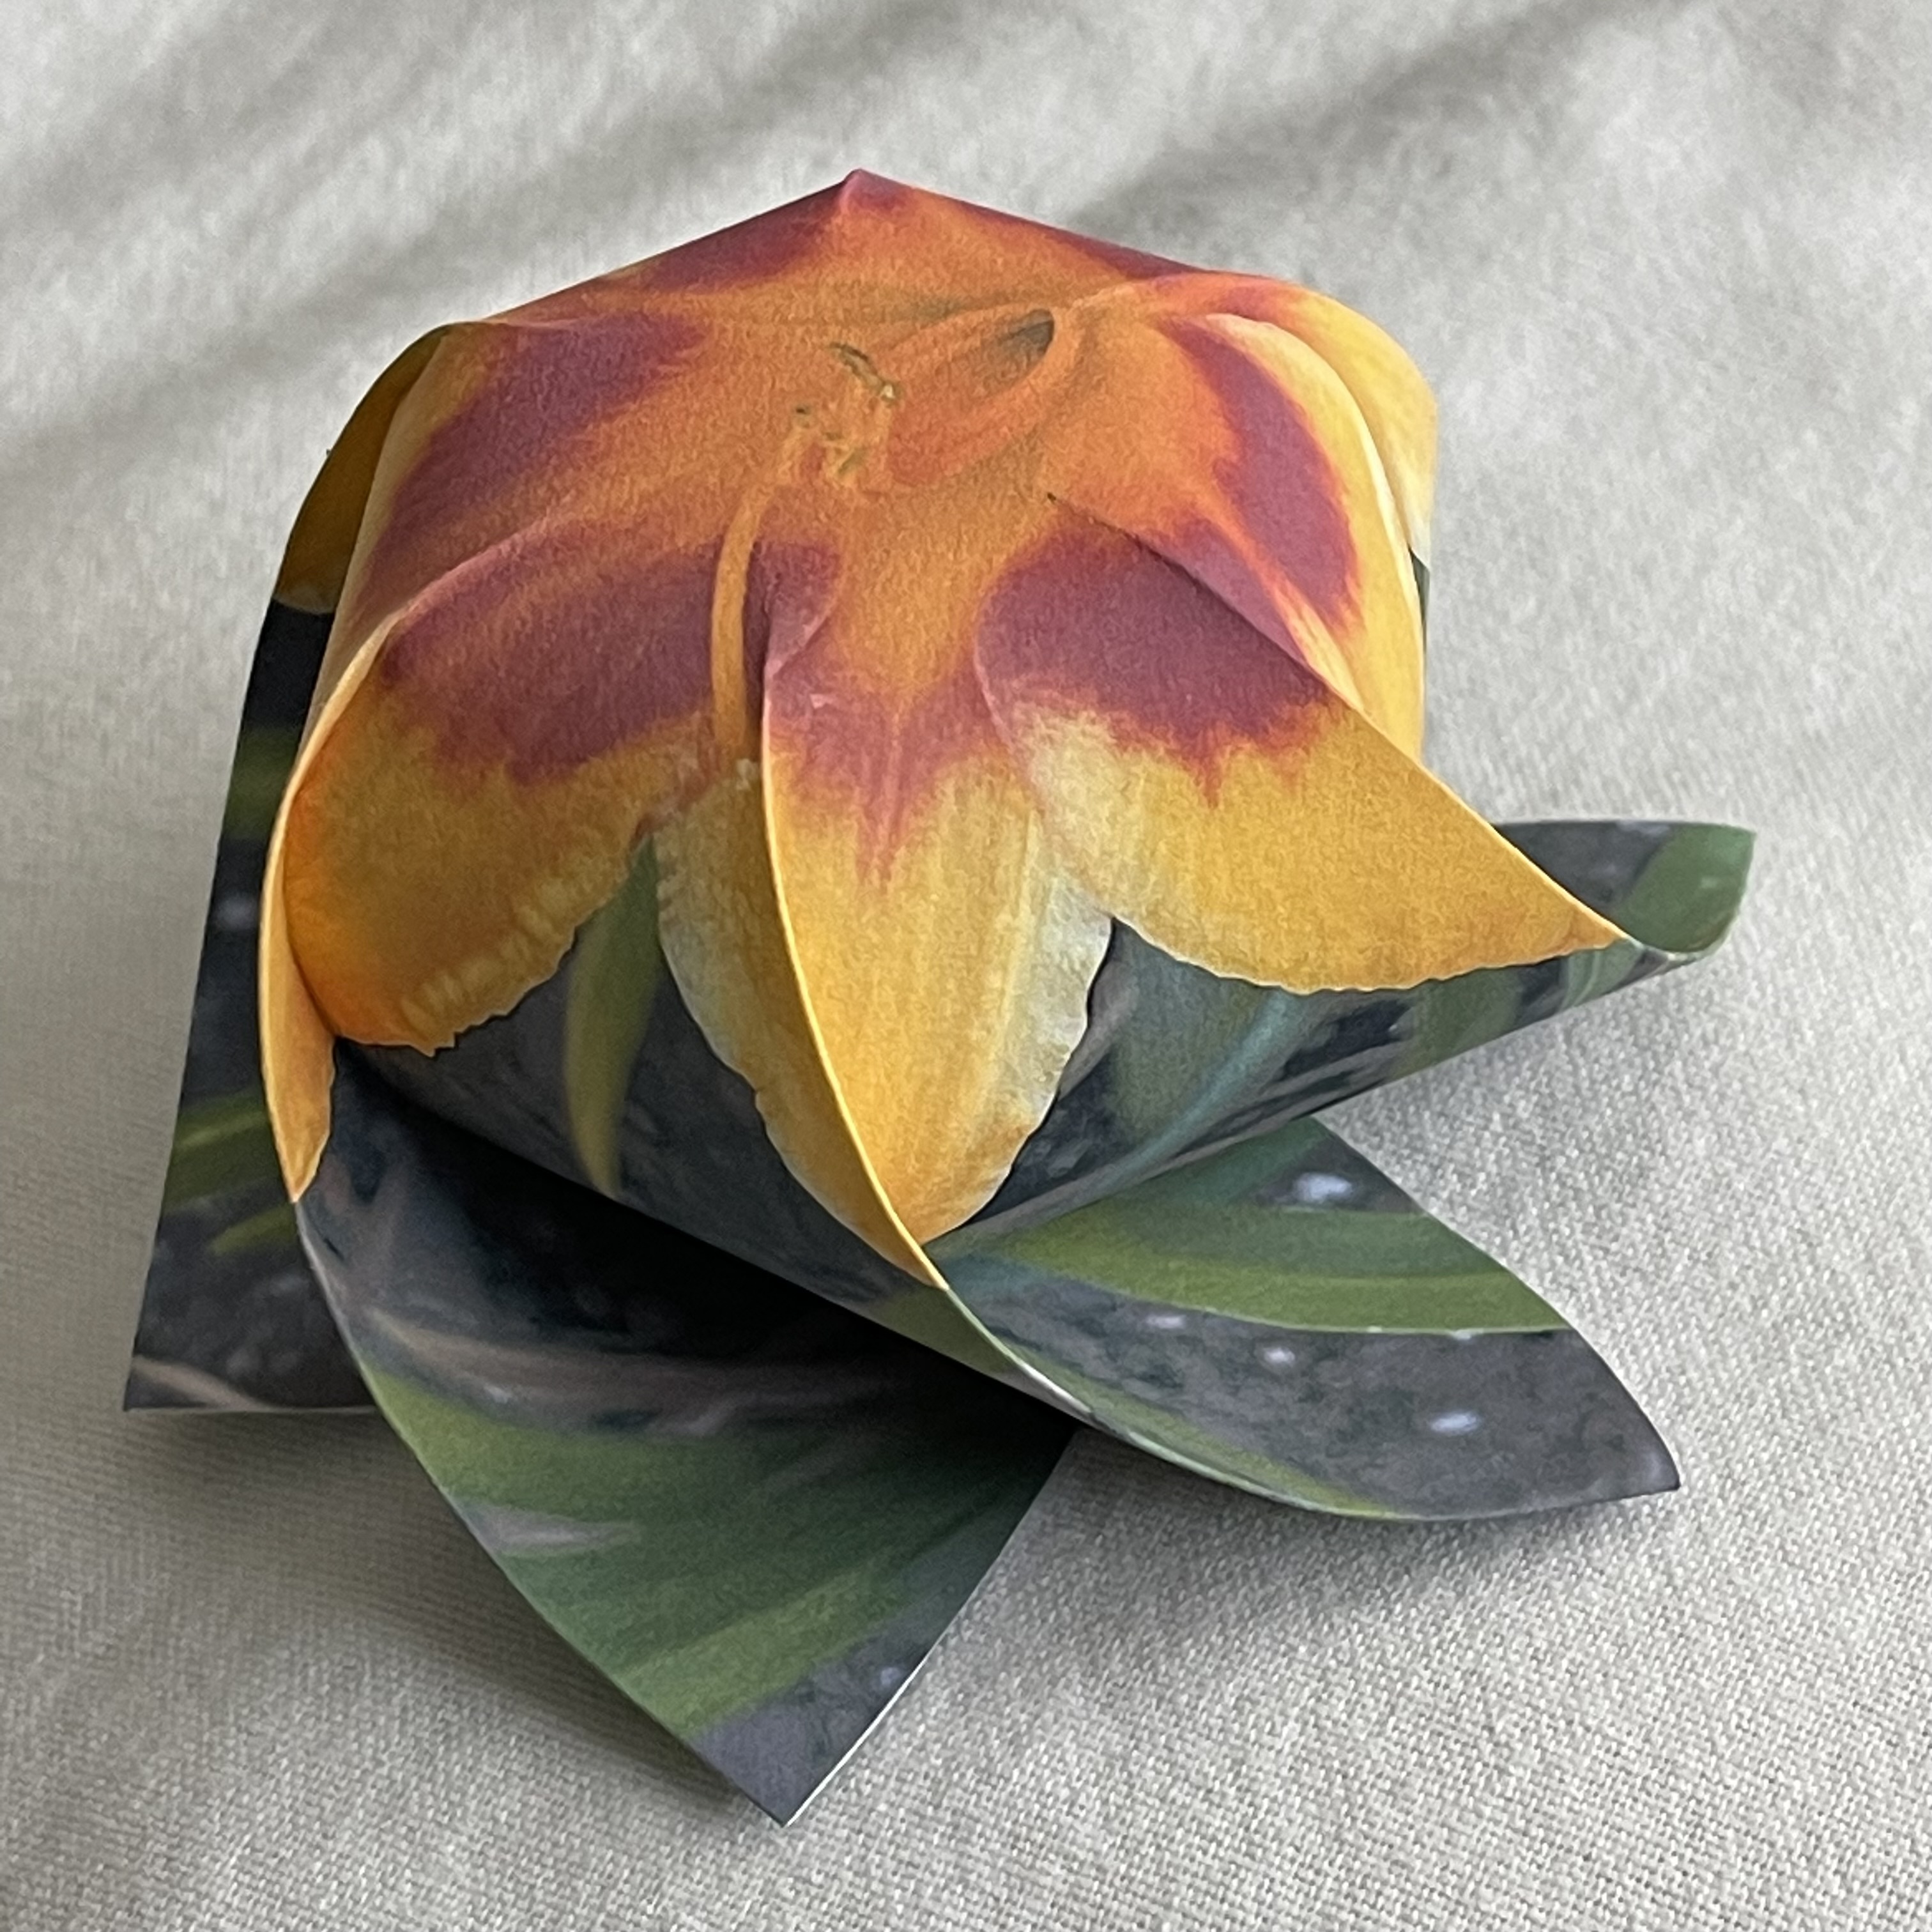 |
| Crease Pattern (7 axes) click to enlarge 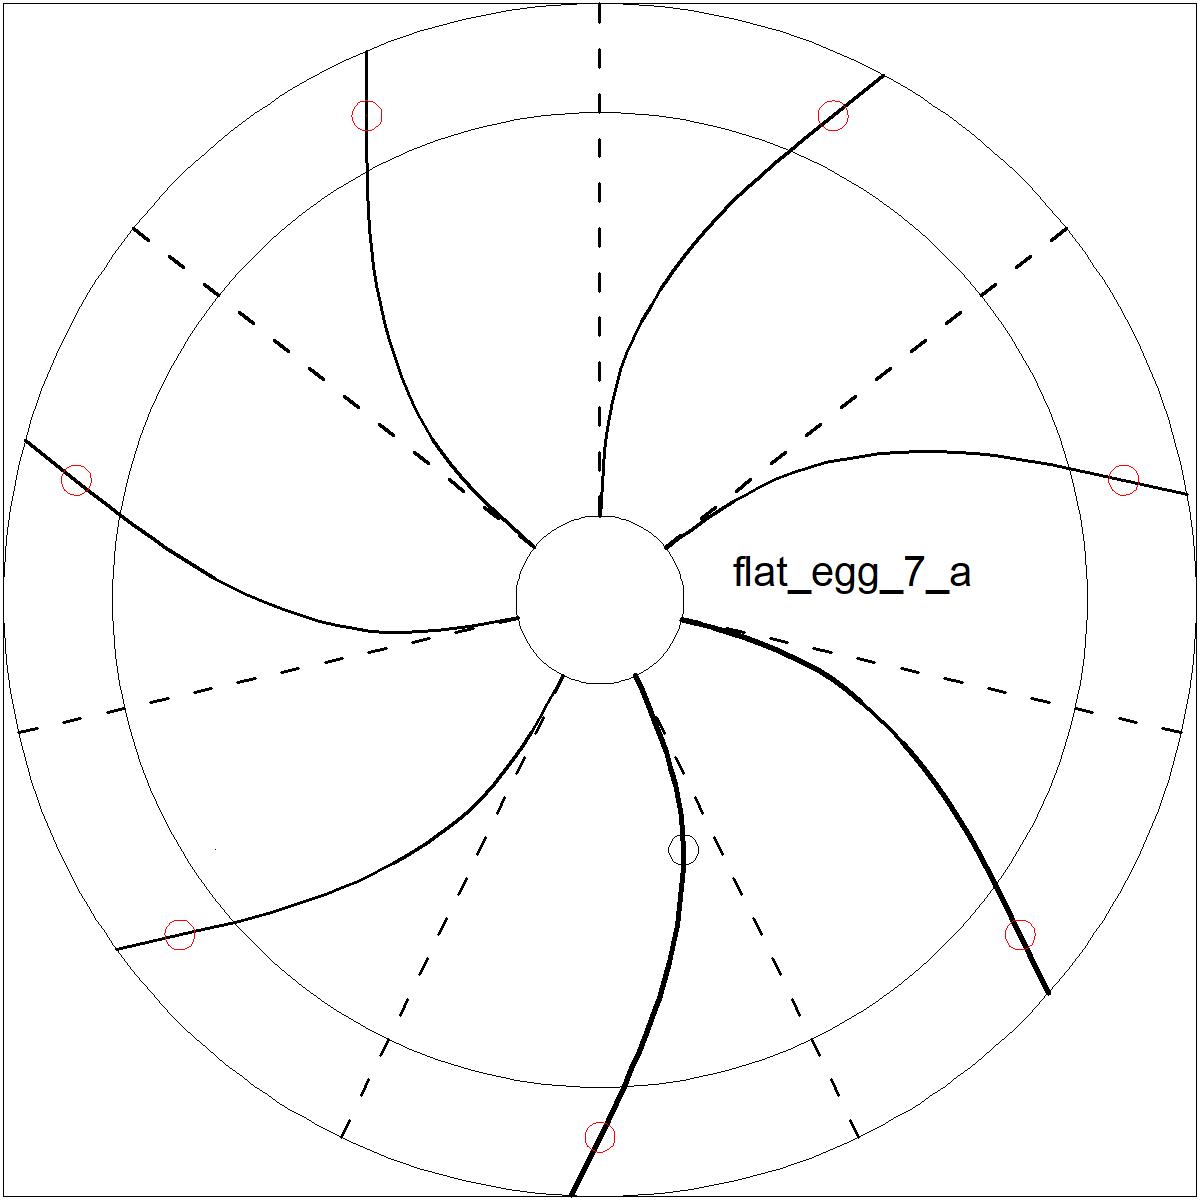 |
Image of Clematis click to enlarge  |
Final Appearance click to enlarge 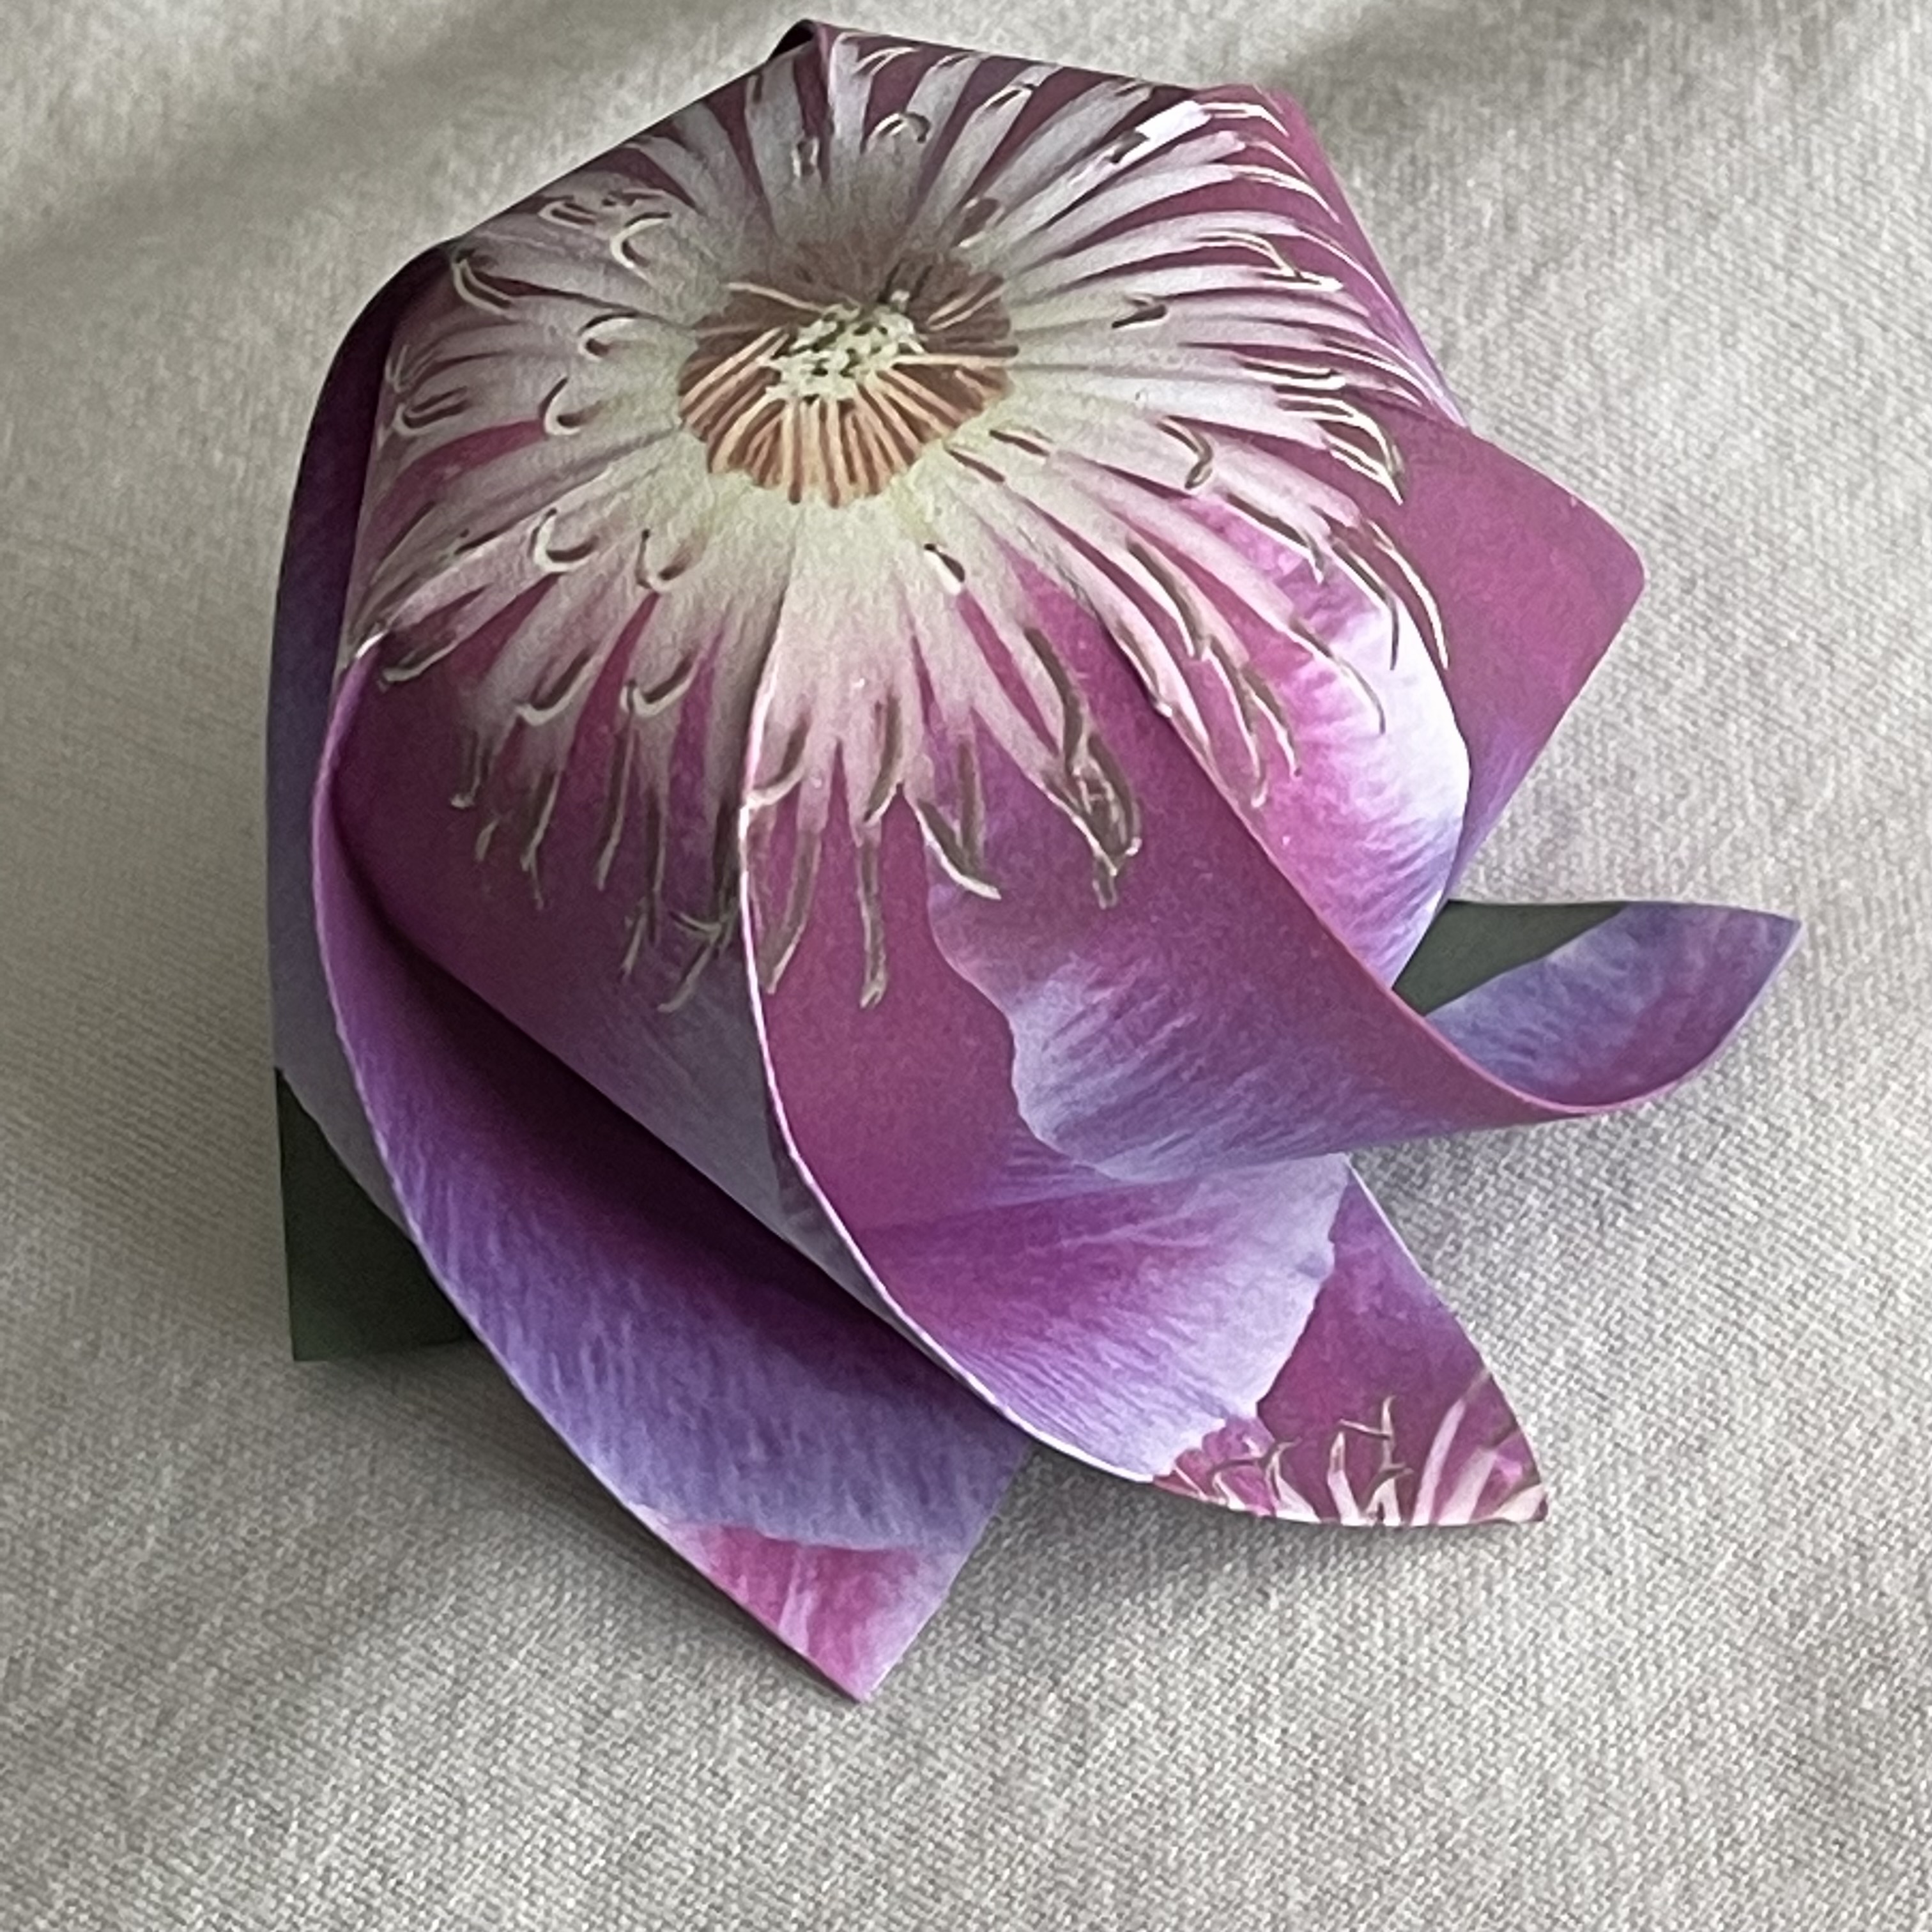 |
Download the following files.
(1) Diagram pattern drawing
    Drawing file (if the environment to handle DWG and/or DXF file is available)
	Down load  flat_egg_6_ref.dwg
	Down load  flat_egg_7_a.dwg
	or
	Down load  flat_egg_6_ref.dxf
	Down load  flat_egg_7_a.dxf
    Diagram pattern image file (JPG)
	Down load  flat_egg_6_ref.jpg
	Down load  flat_egg_7_a.jpg
(2) Flower image files (JPG)
	Down load  22_class_1a_flower.jpg
	Down load  22_class_1b_flower.jpg
|
Adding thick paper(32 lb.) under the diagram paper gives a better scoring result because some softness beneath gives a slight dent to the model paper. That will make the pre-creasing process easier. |
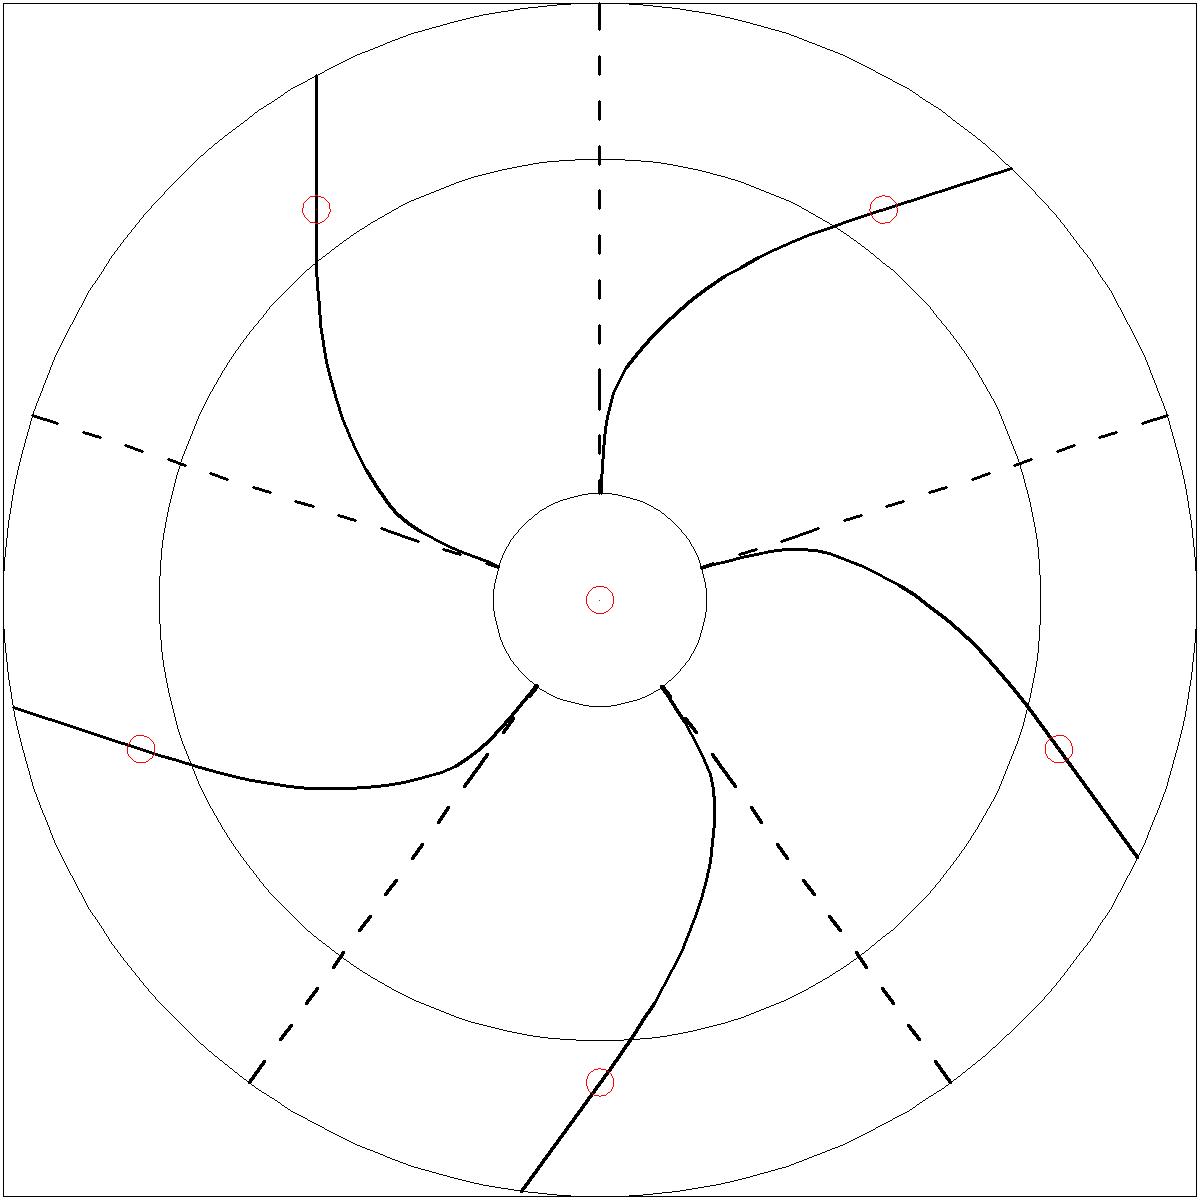
There are linear regions and curved regions as shown in the picture below. Use a ruler for the linear portions (circle 1 and 2-s). The curved portions (circle 2-c) will be scored "FREE HAND", Yes ! The central area is left blank. Score the linear area first, then the curved portion with steady pressure. While scoring curved lines, working toward you will give a better control of the pen and pressure. |
| ------ Scoring lines ------ click to enlarge  |
Begin Prefolding process first with Mountain Fold ,then Valley fold . When working on the mountain fold, the diagrammed side is up, while during valley side folding, the flower image side is up. It is easier working with "mountain fold" facing you. Repeat the process at least 2 times around. Since the paper is very sturdy, folding firmly do not break the working paper. The following pictures show both the diagram side and flower image side. |
- rear view after pre-creasing -
click to enlarge
 |
-front view after pre-creasing -
click to enlarge
 |
-add more twist to the flaps-
click to enlarge
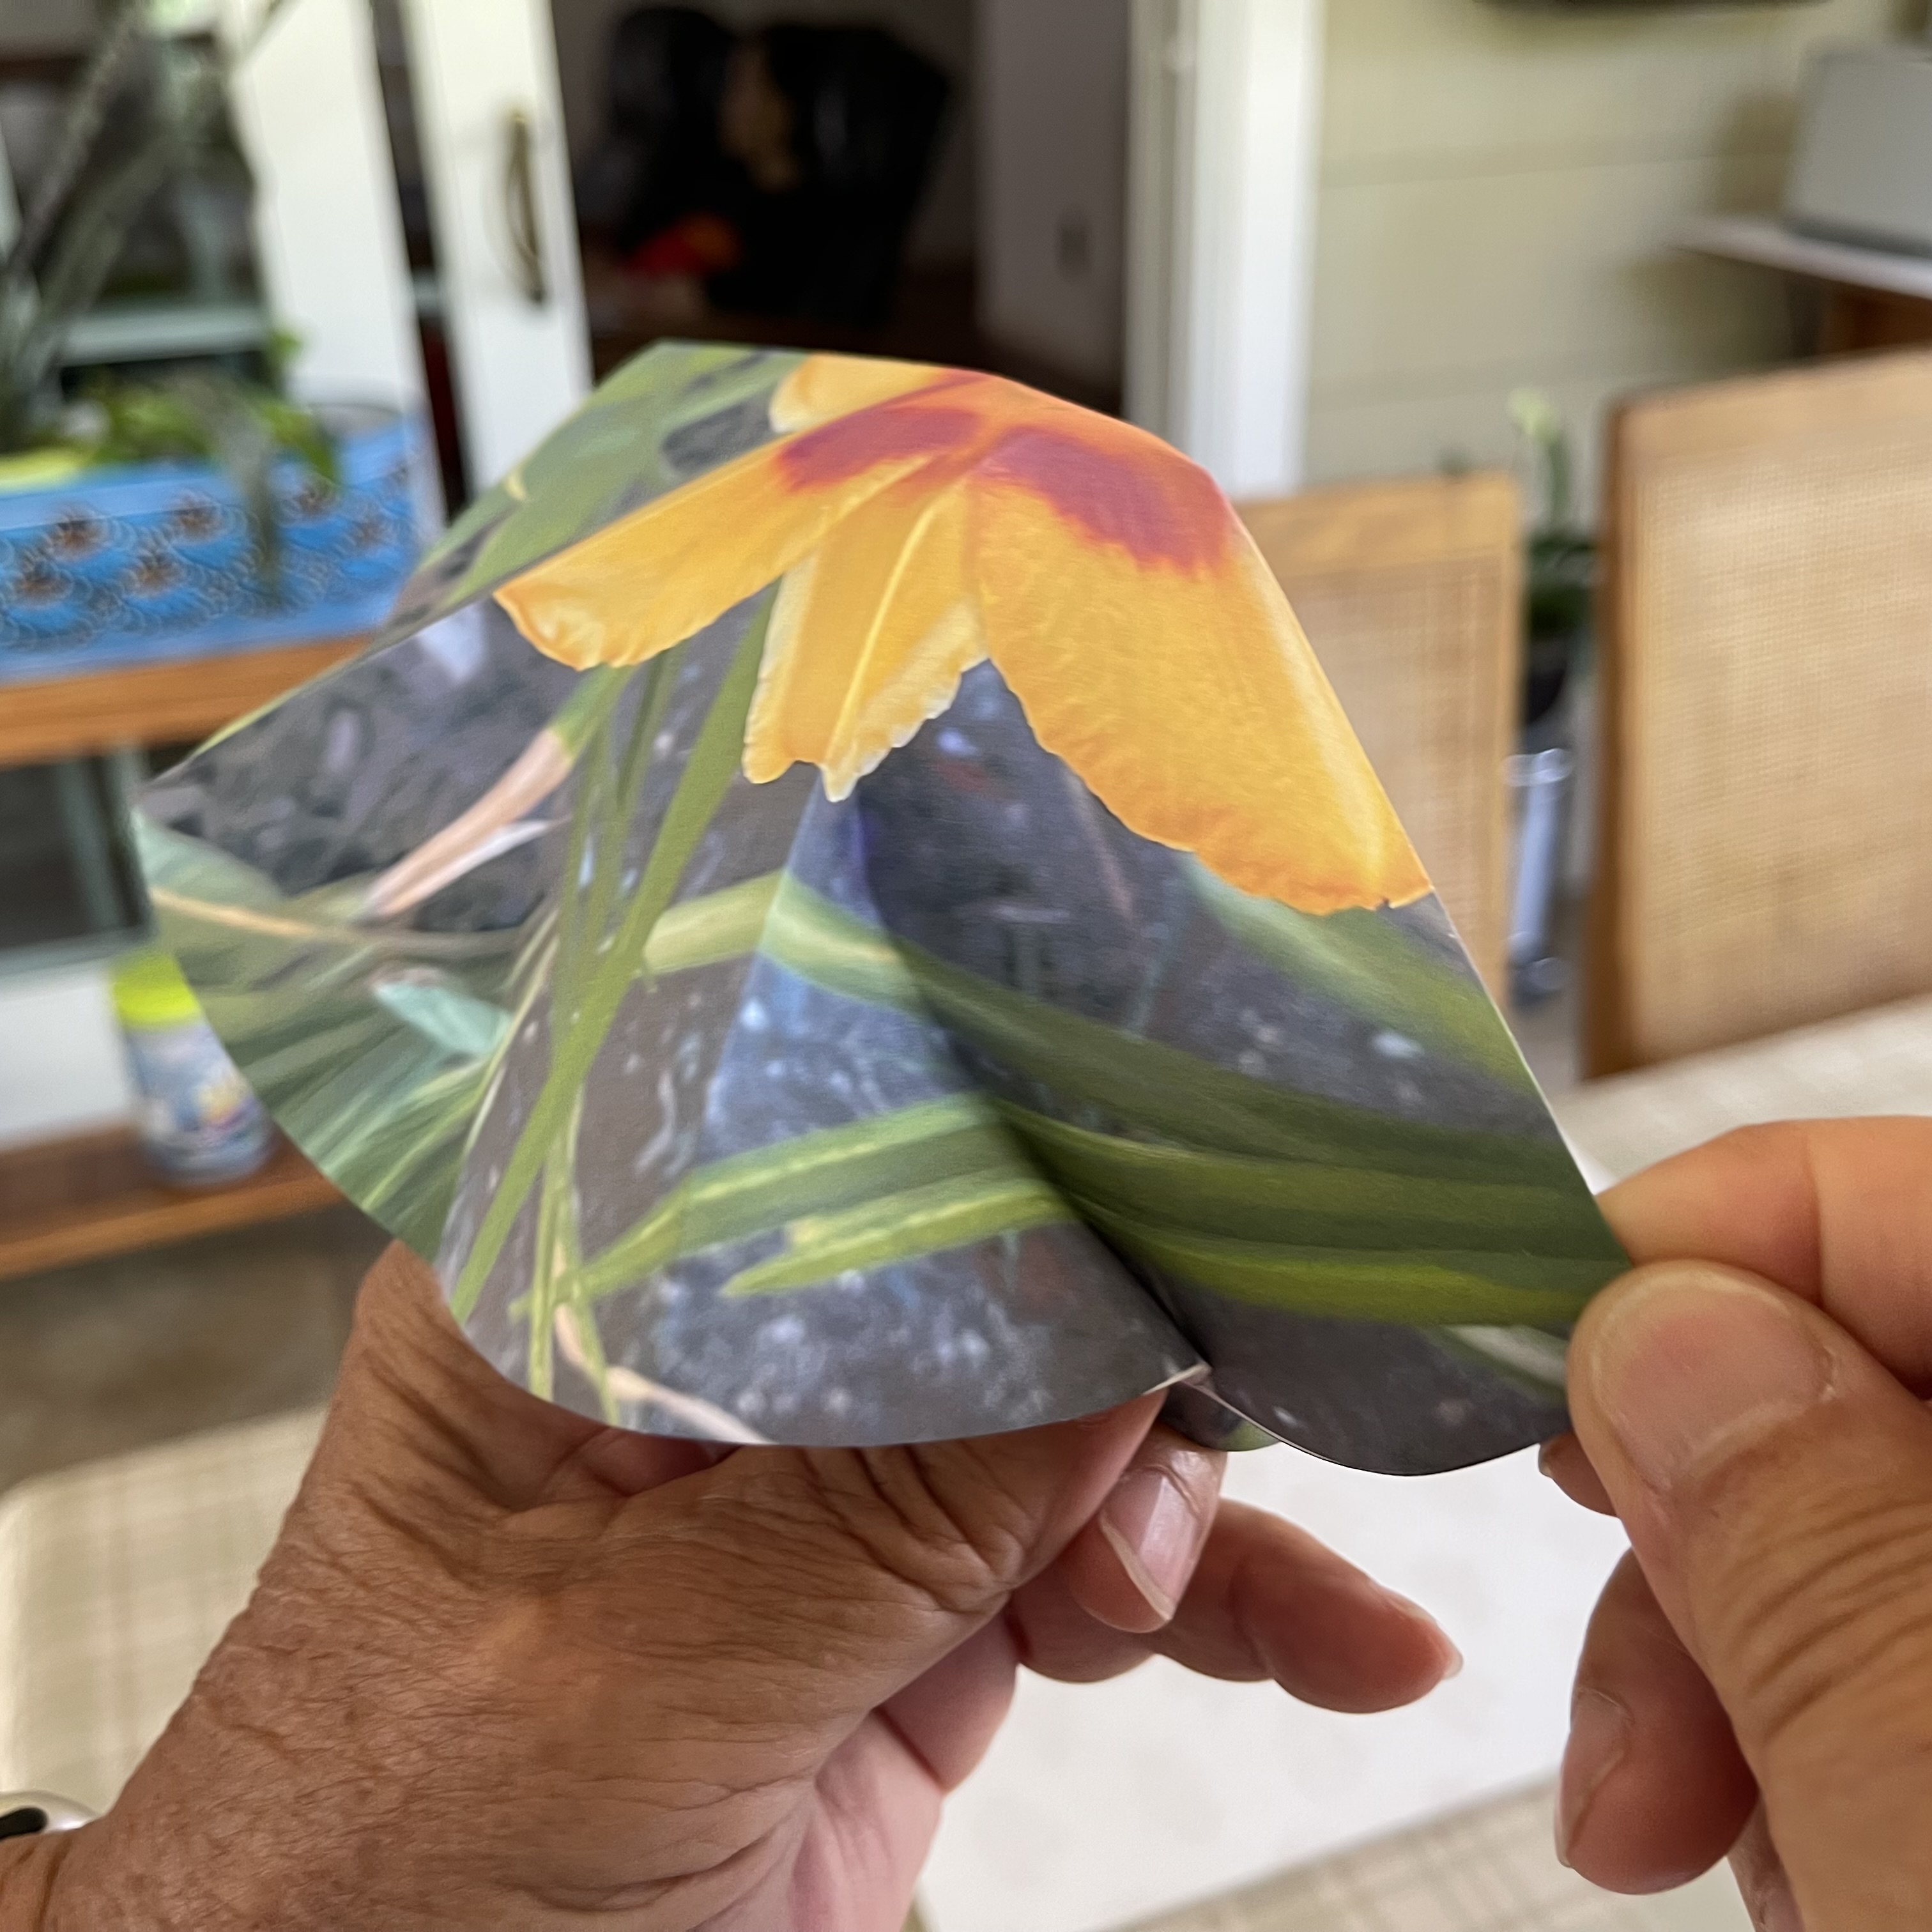 |
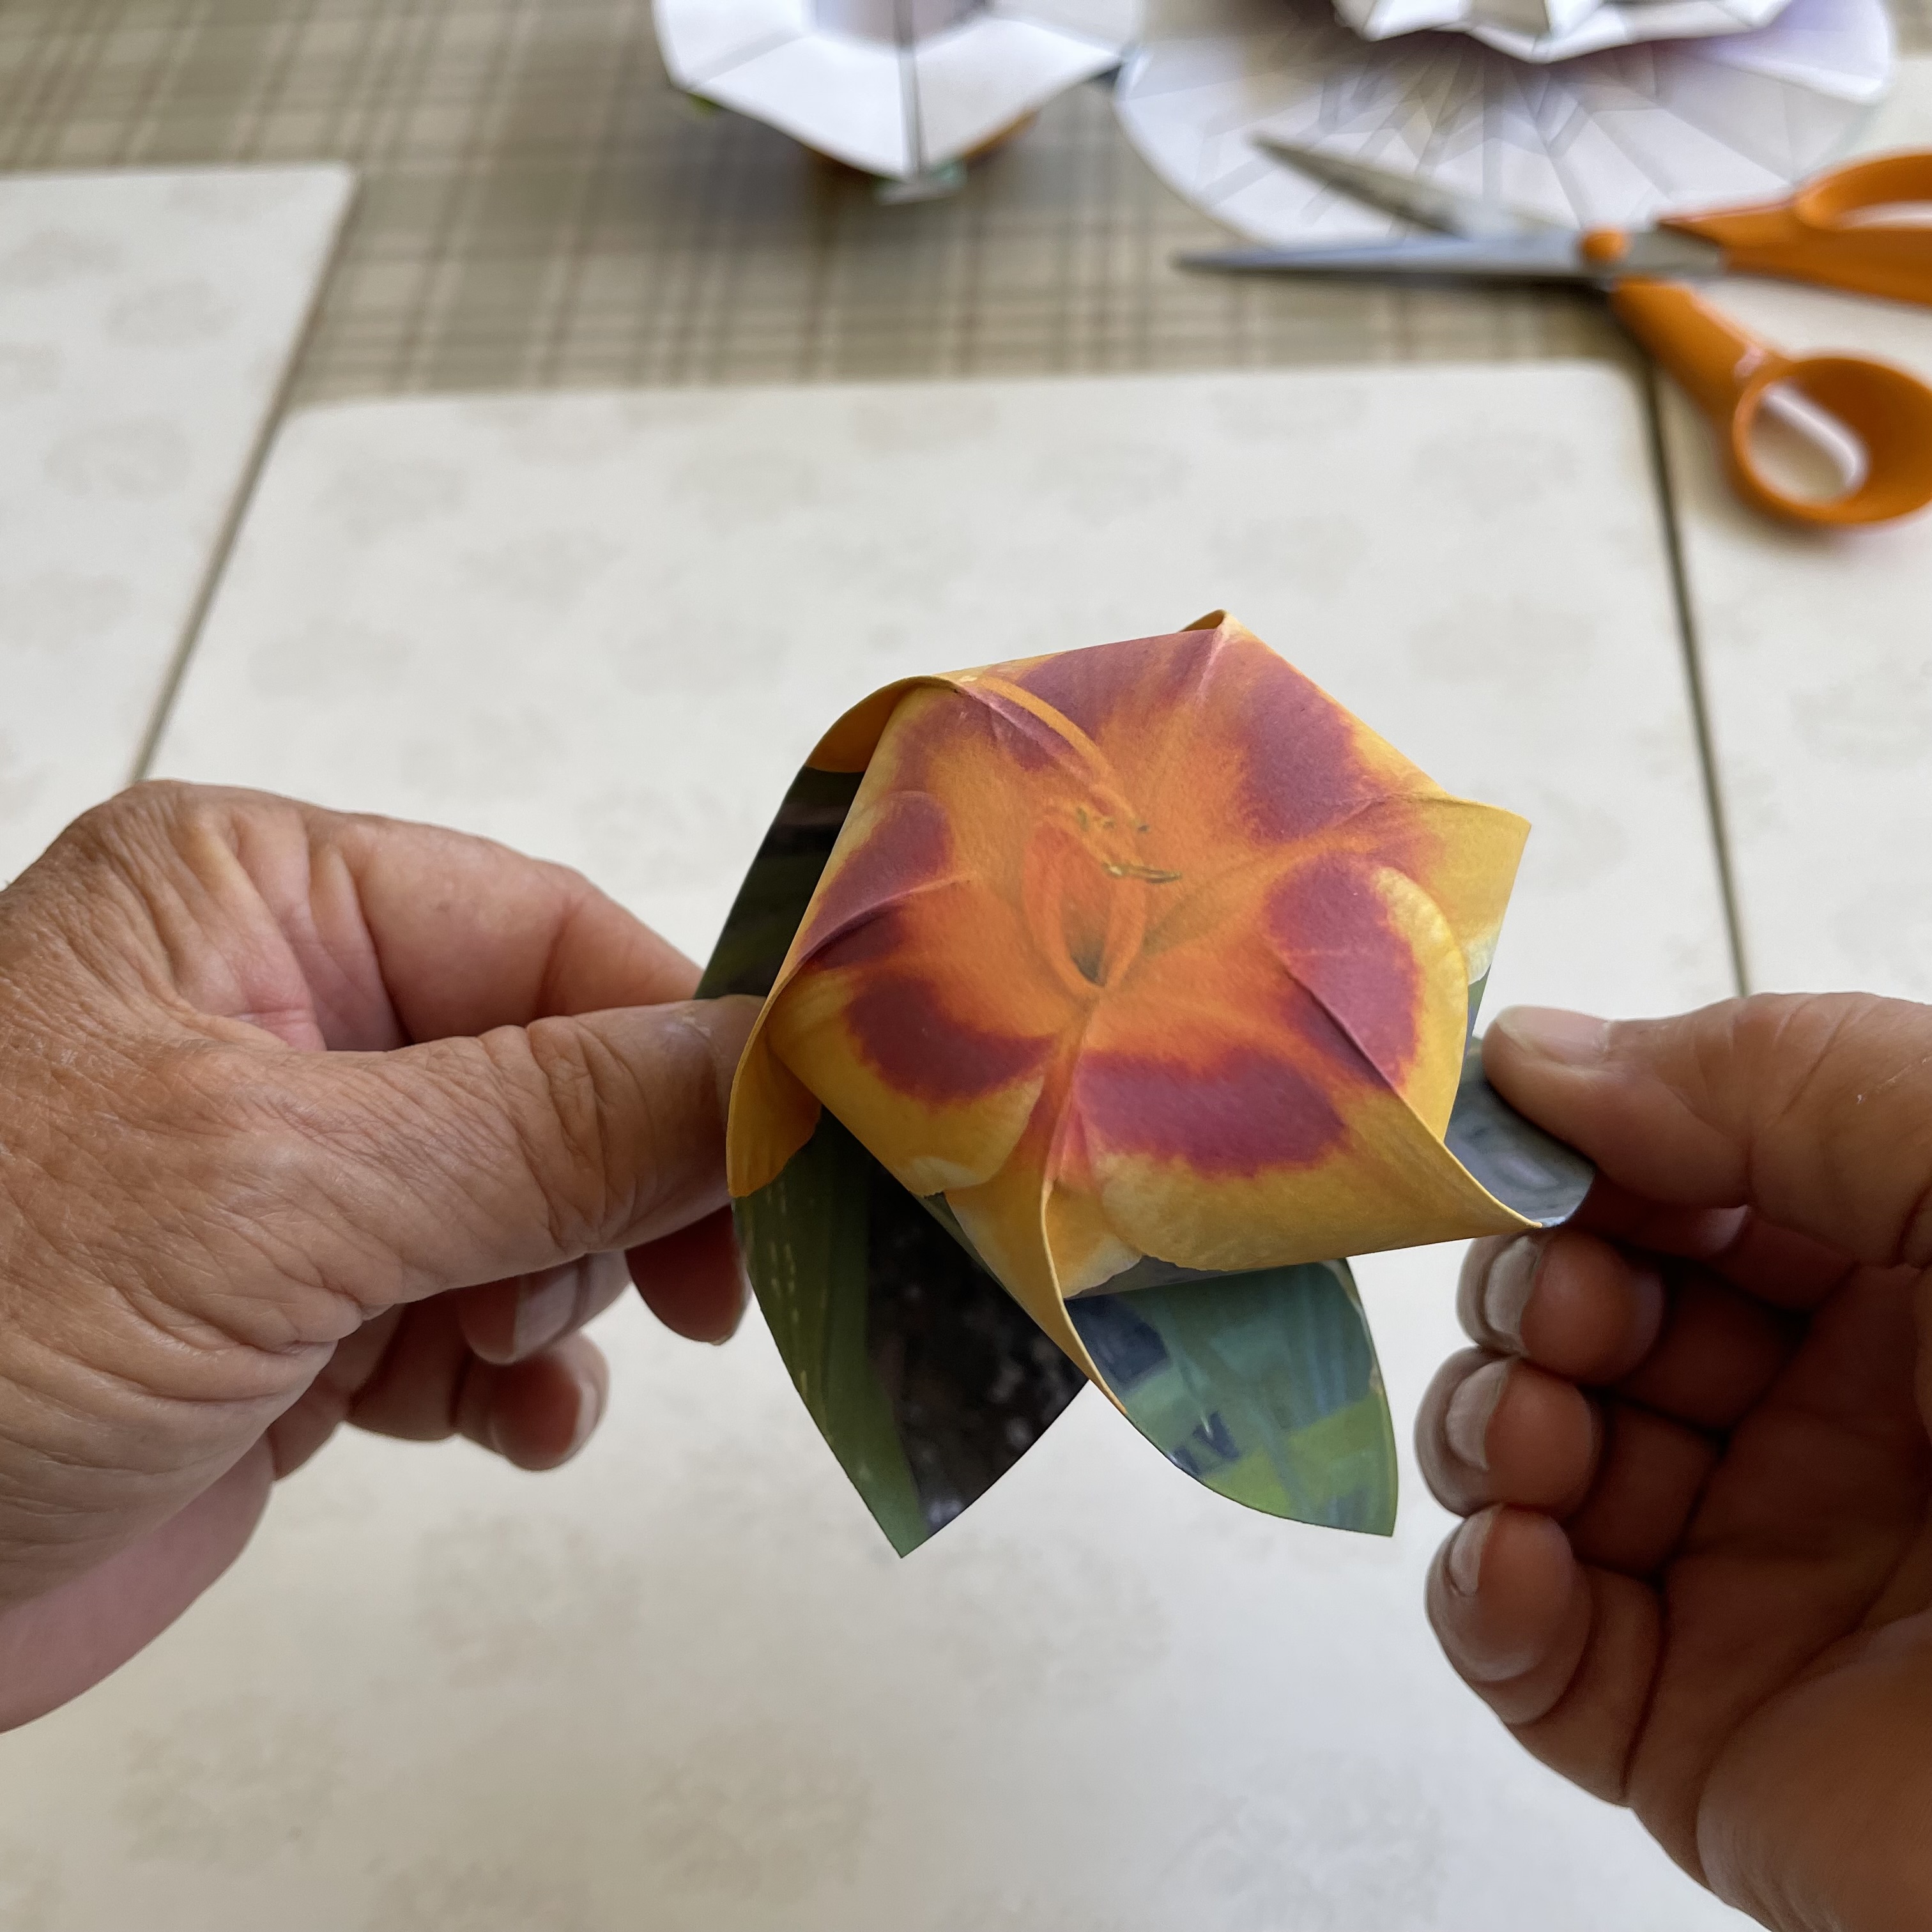
Using both hands, try wrapping around , first top area, then bottom flap area. Refer to the pictures below. The model tends to shrink to form a hexagonal pattern. Watch the bottom flap converge to a center point. When it happens , hold whole model, and begin adding more twist to the bottom flaps holding symmetric edges. It is done !! |
-- squeeze into round form --
click to enlarge
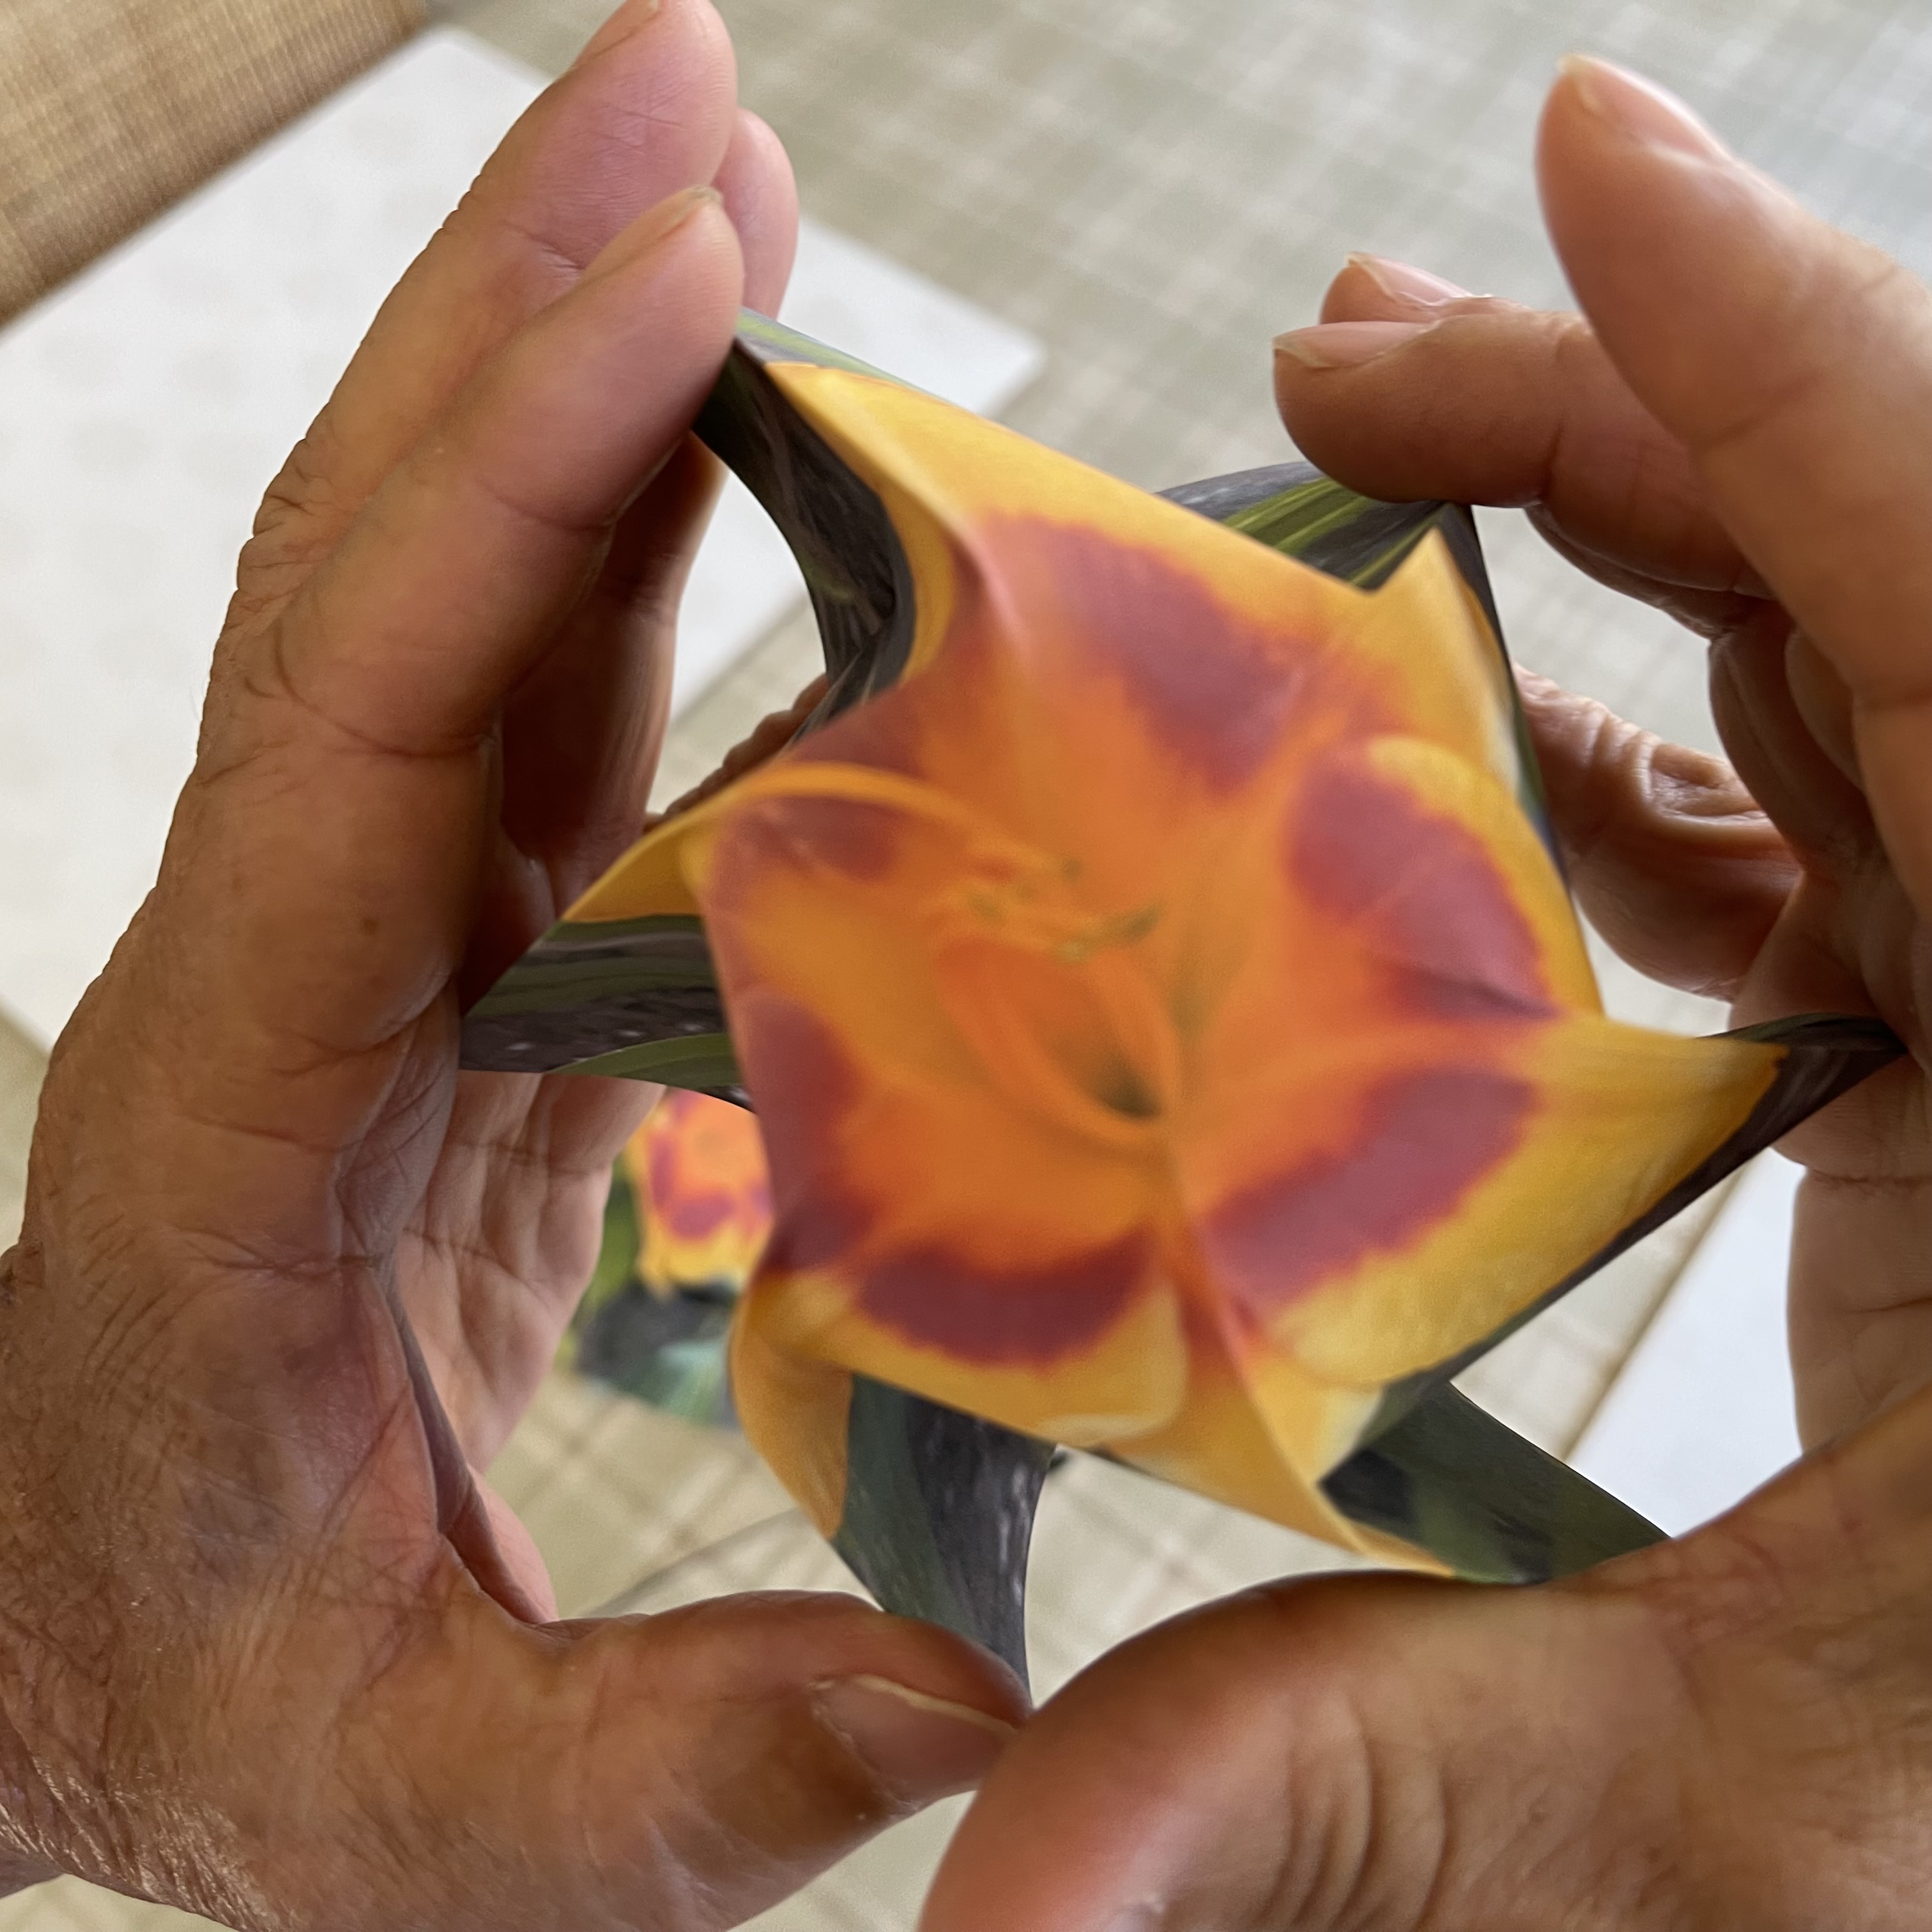 |
--adjust flaps at bottom-1 --
click to enlarge
 |
--adjust flaps at bottom-2 --
click to enlarge
 |
-- hold flaps symmetrically --
click to enlarge
 |
--twist flaps --
click to enlarge 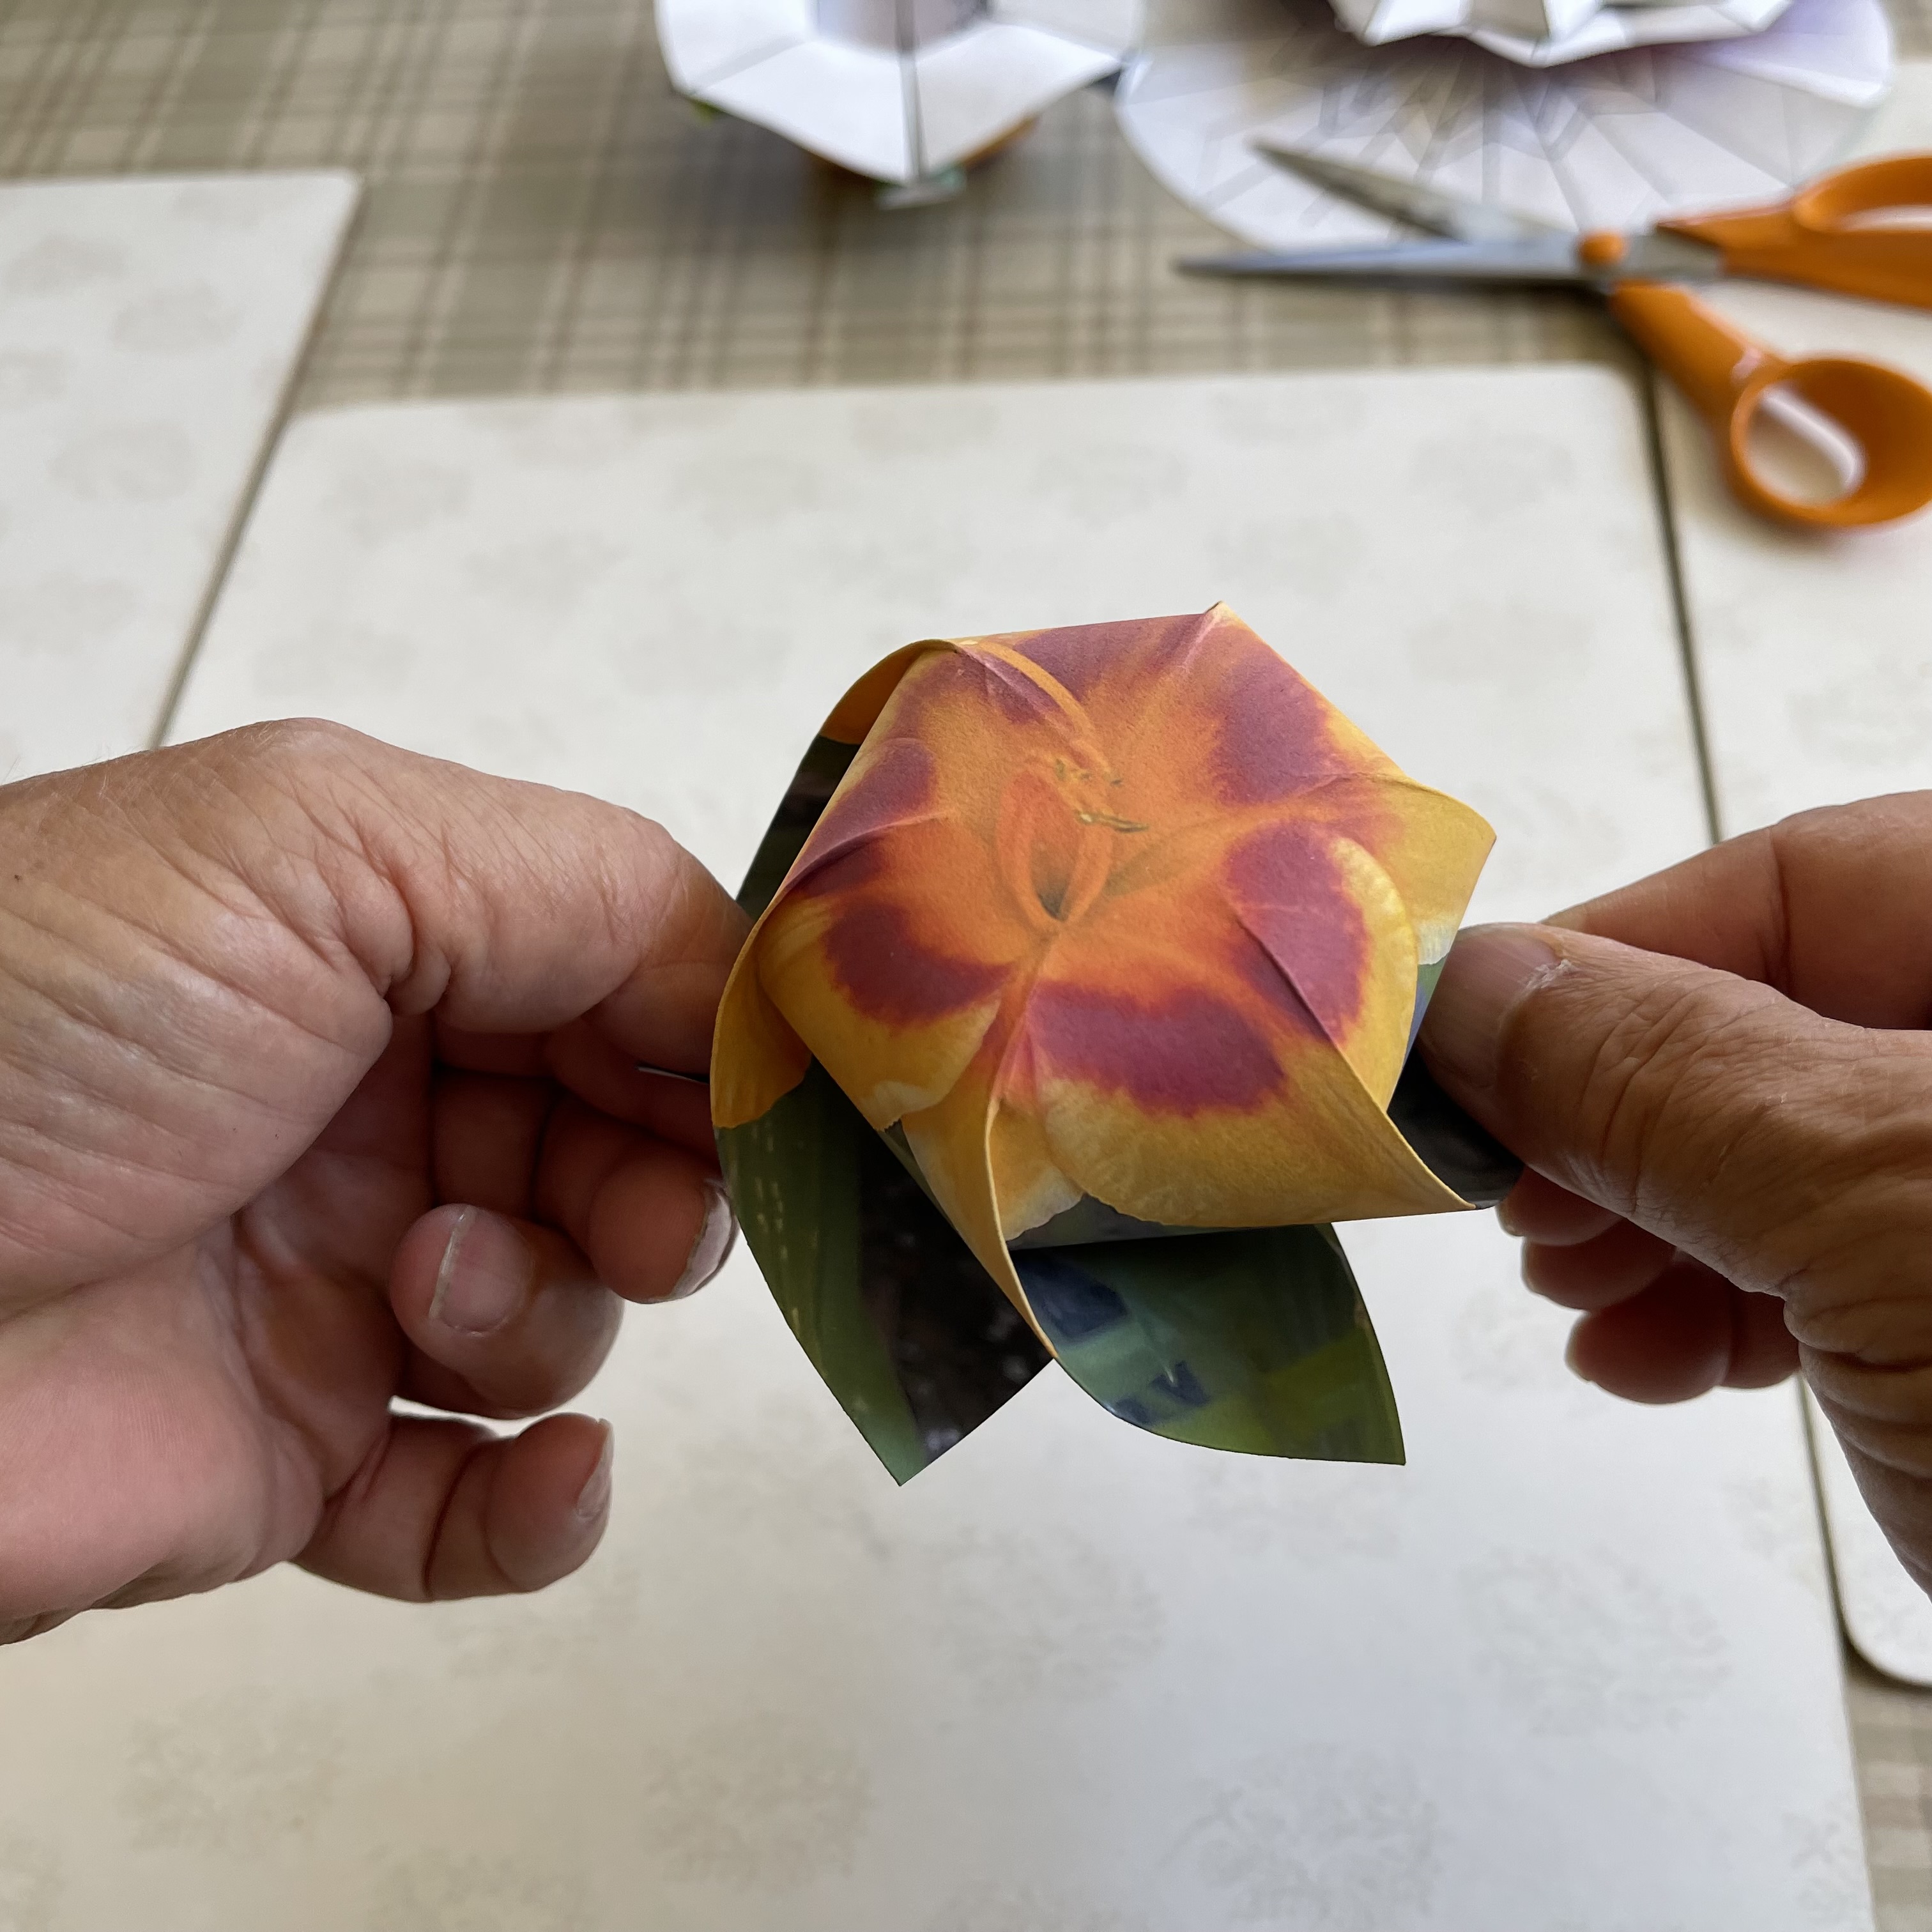 |
Here is the average time estimate of the whole process. diagram scoring and cutting out a circle 10 min pre-crease 6 min final folding and adjustment 4 min Total 20 min |
| ------ Top View ------
click to enlarge 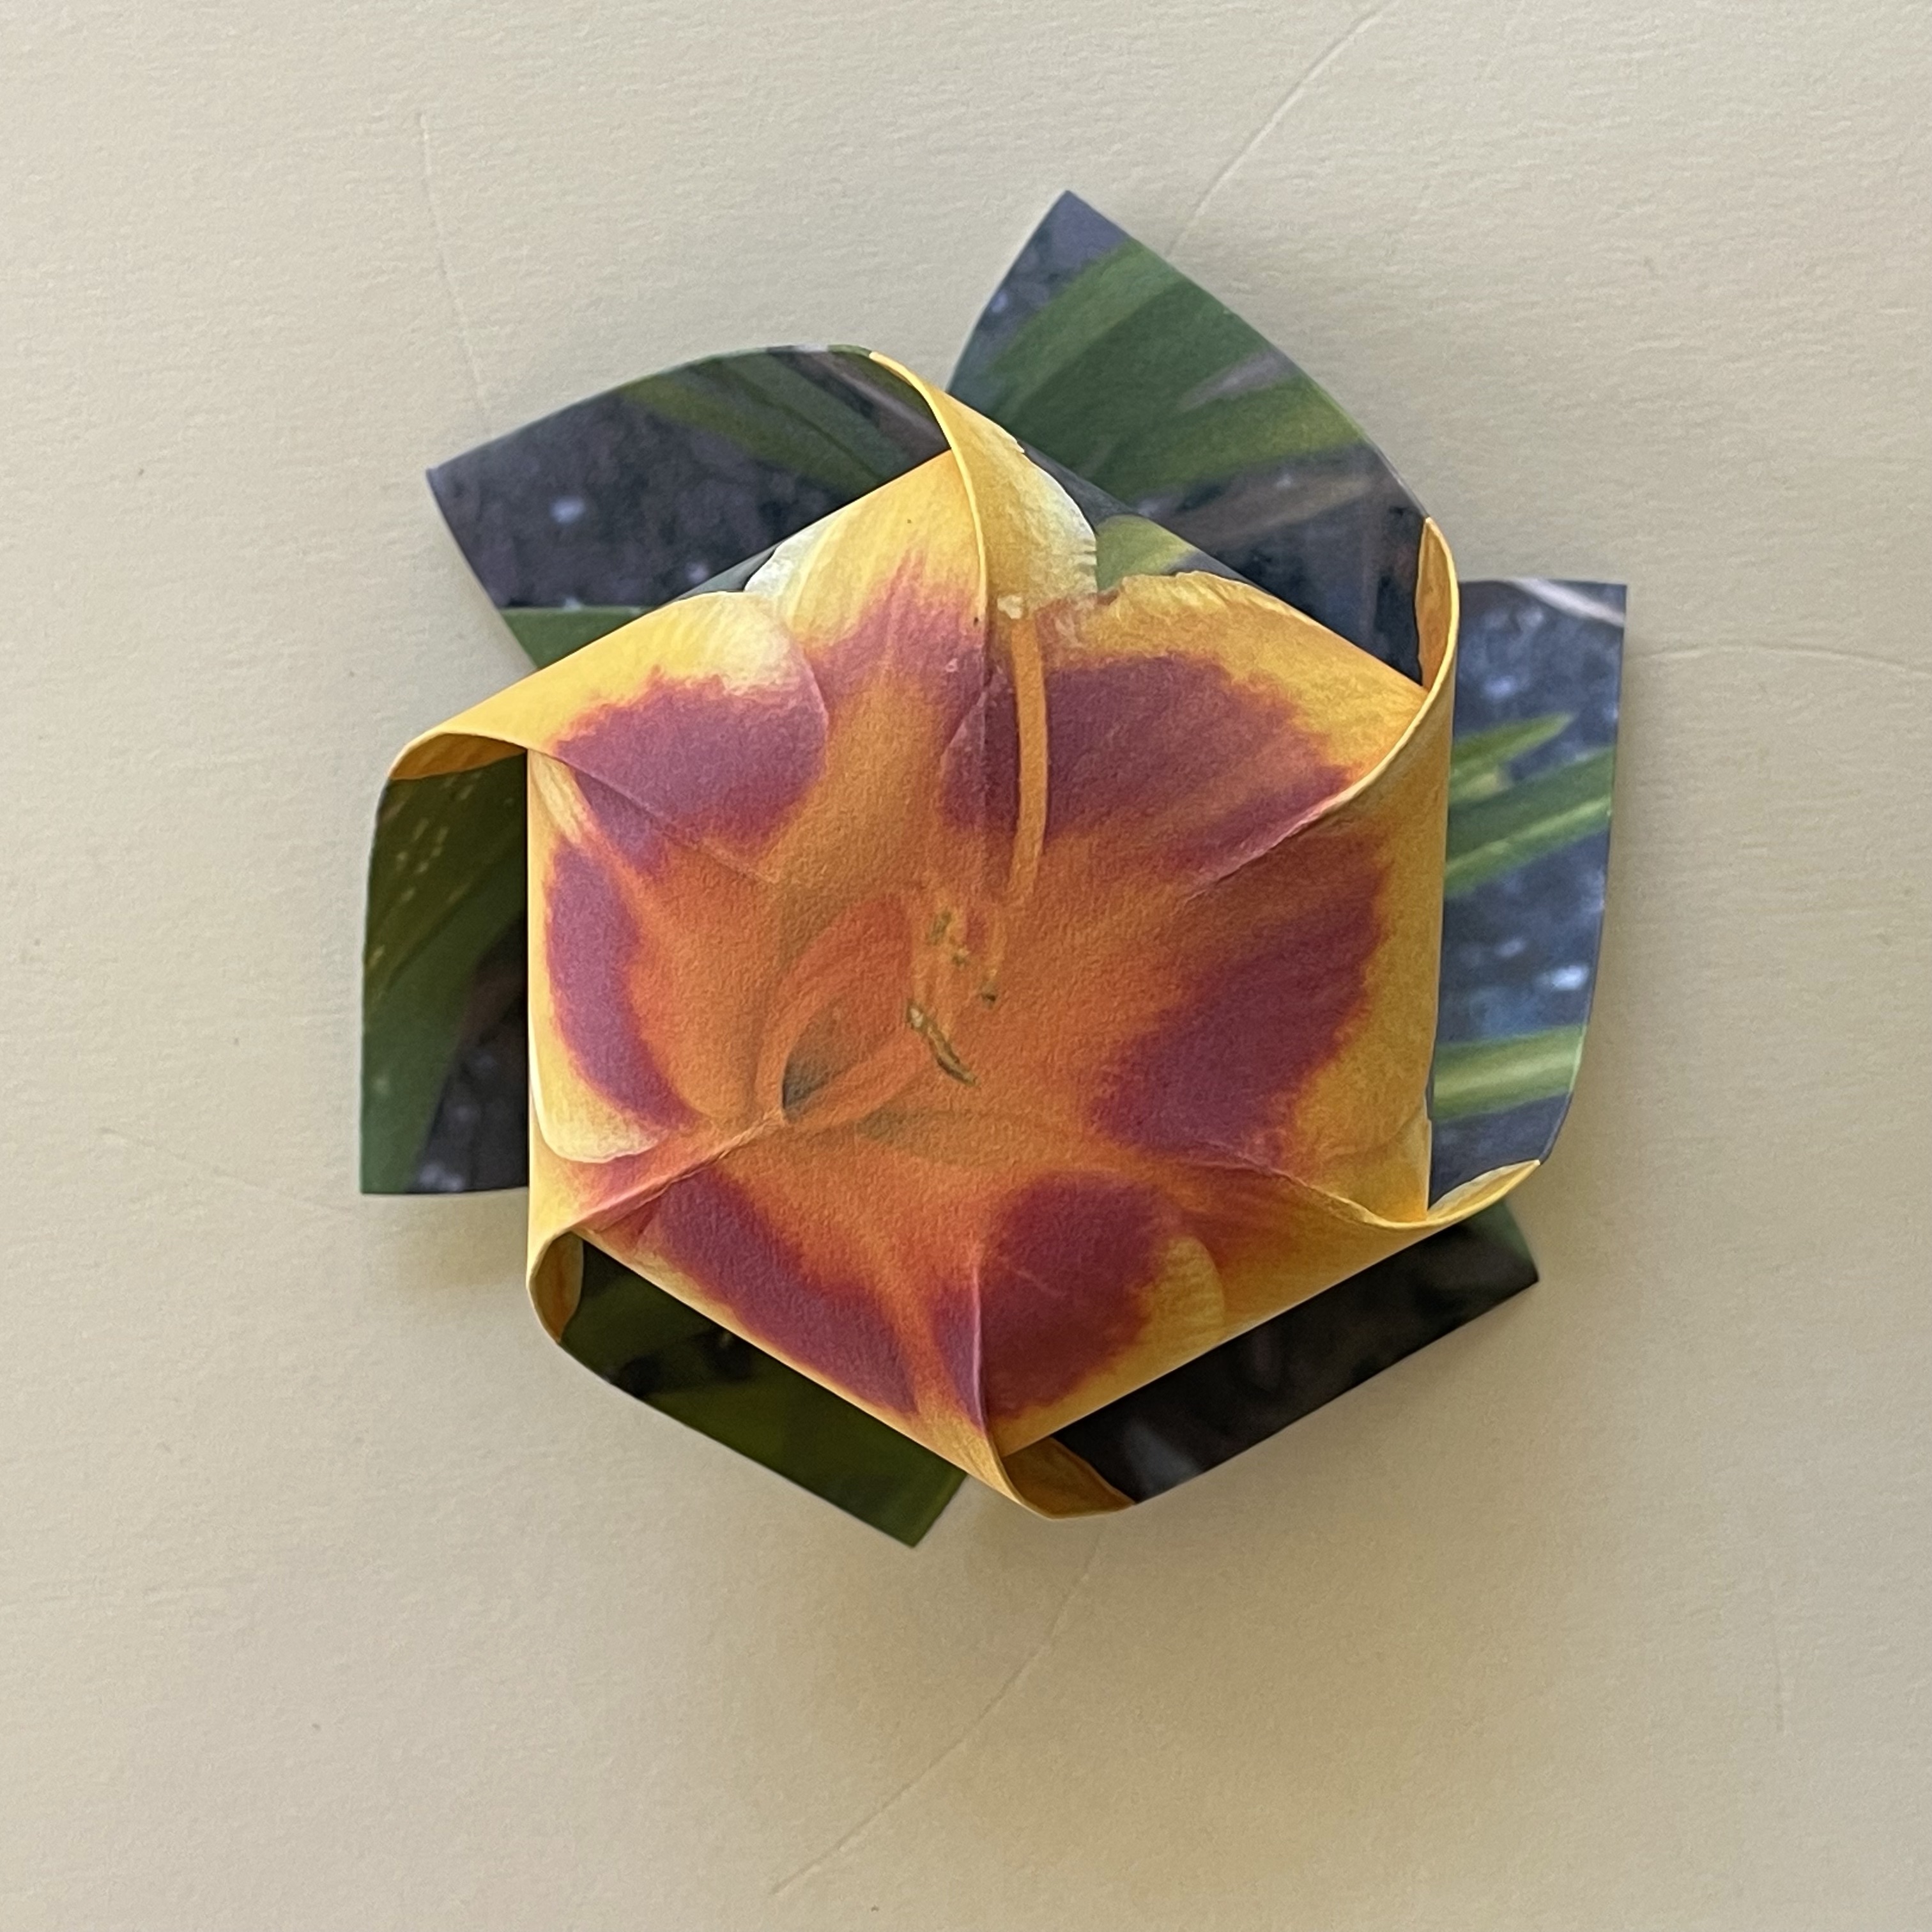 |
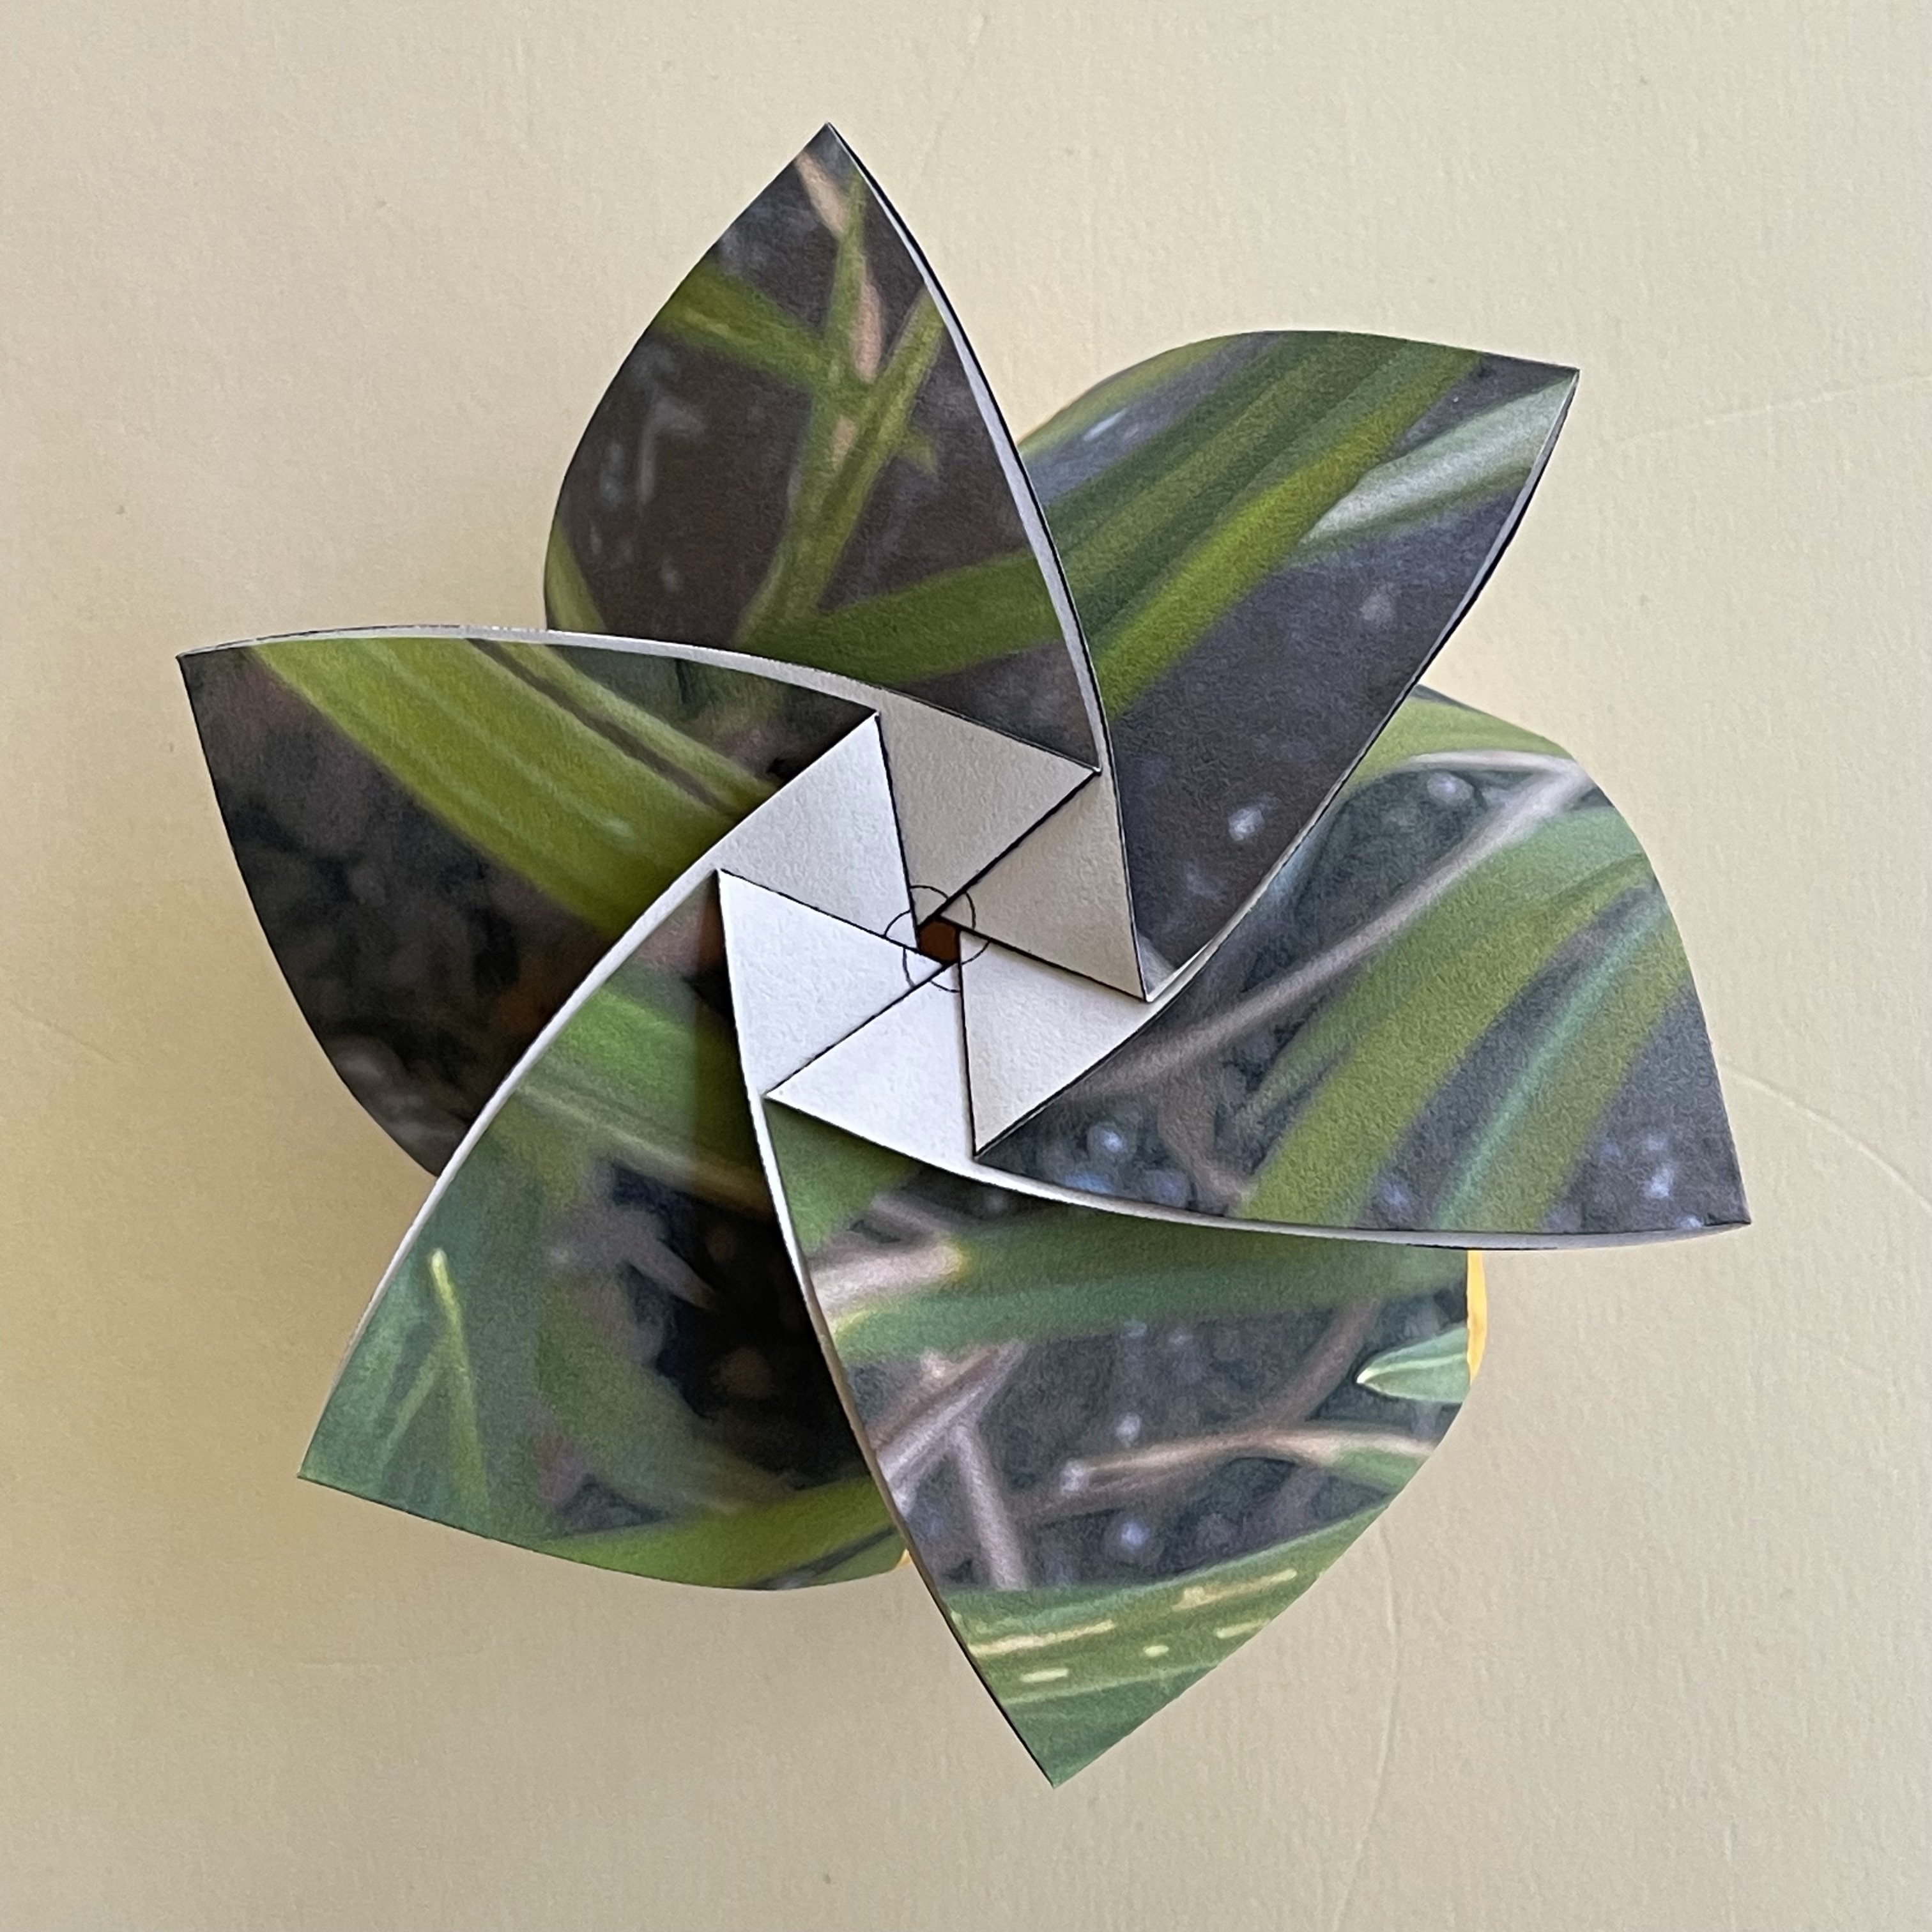
---- Upside-down View ----
click to enlarge
 |
------ Side View------
click to enlarge
 |
| ------ Top View ------
click to enlarge 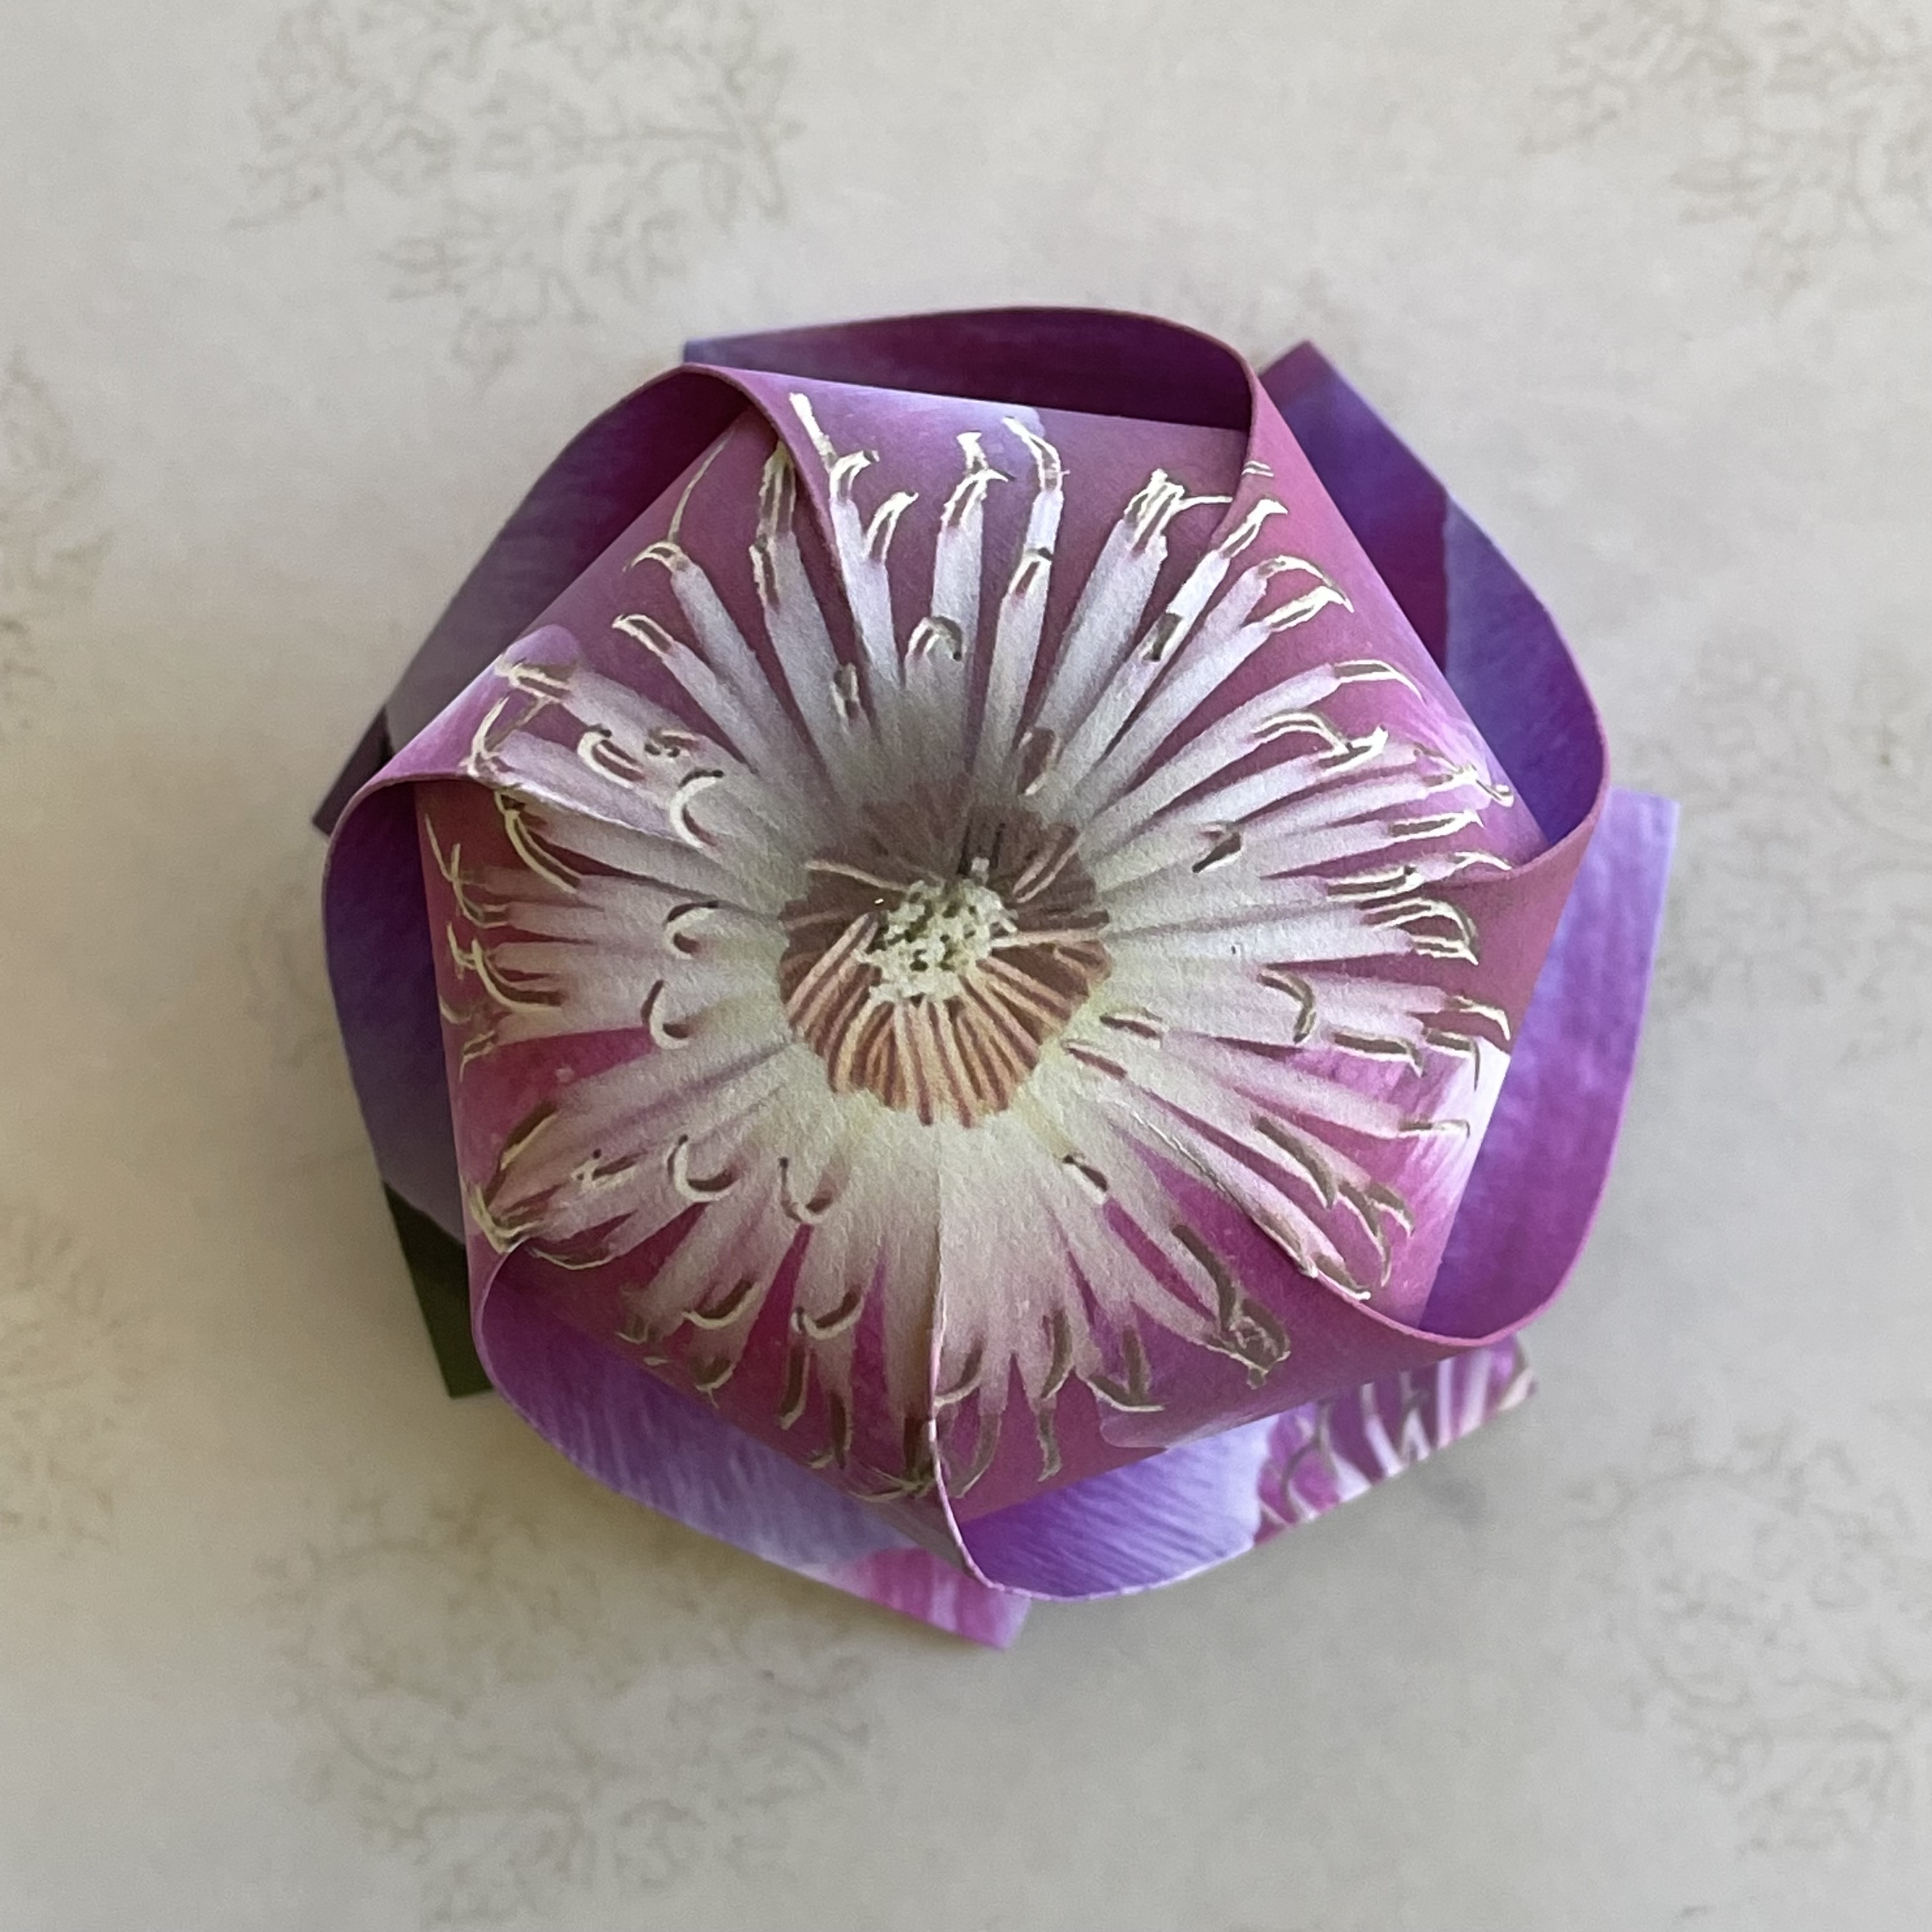 |
---- Upside-down View ----
click to enlarge
 |
------ Side View------
click to enlarge
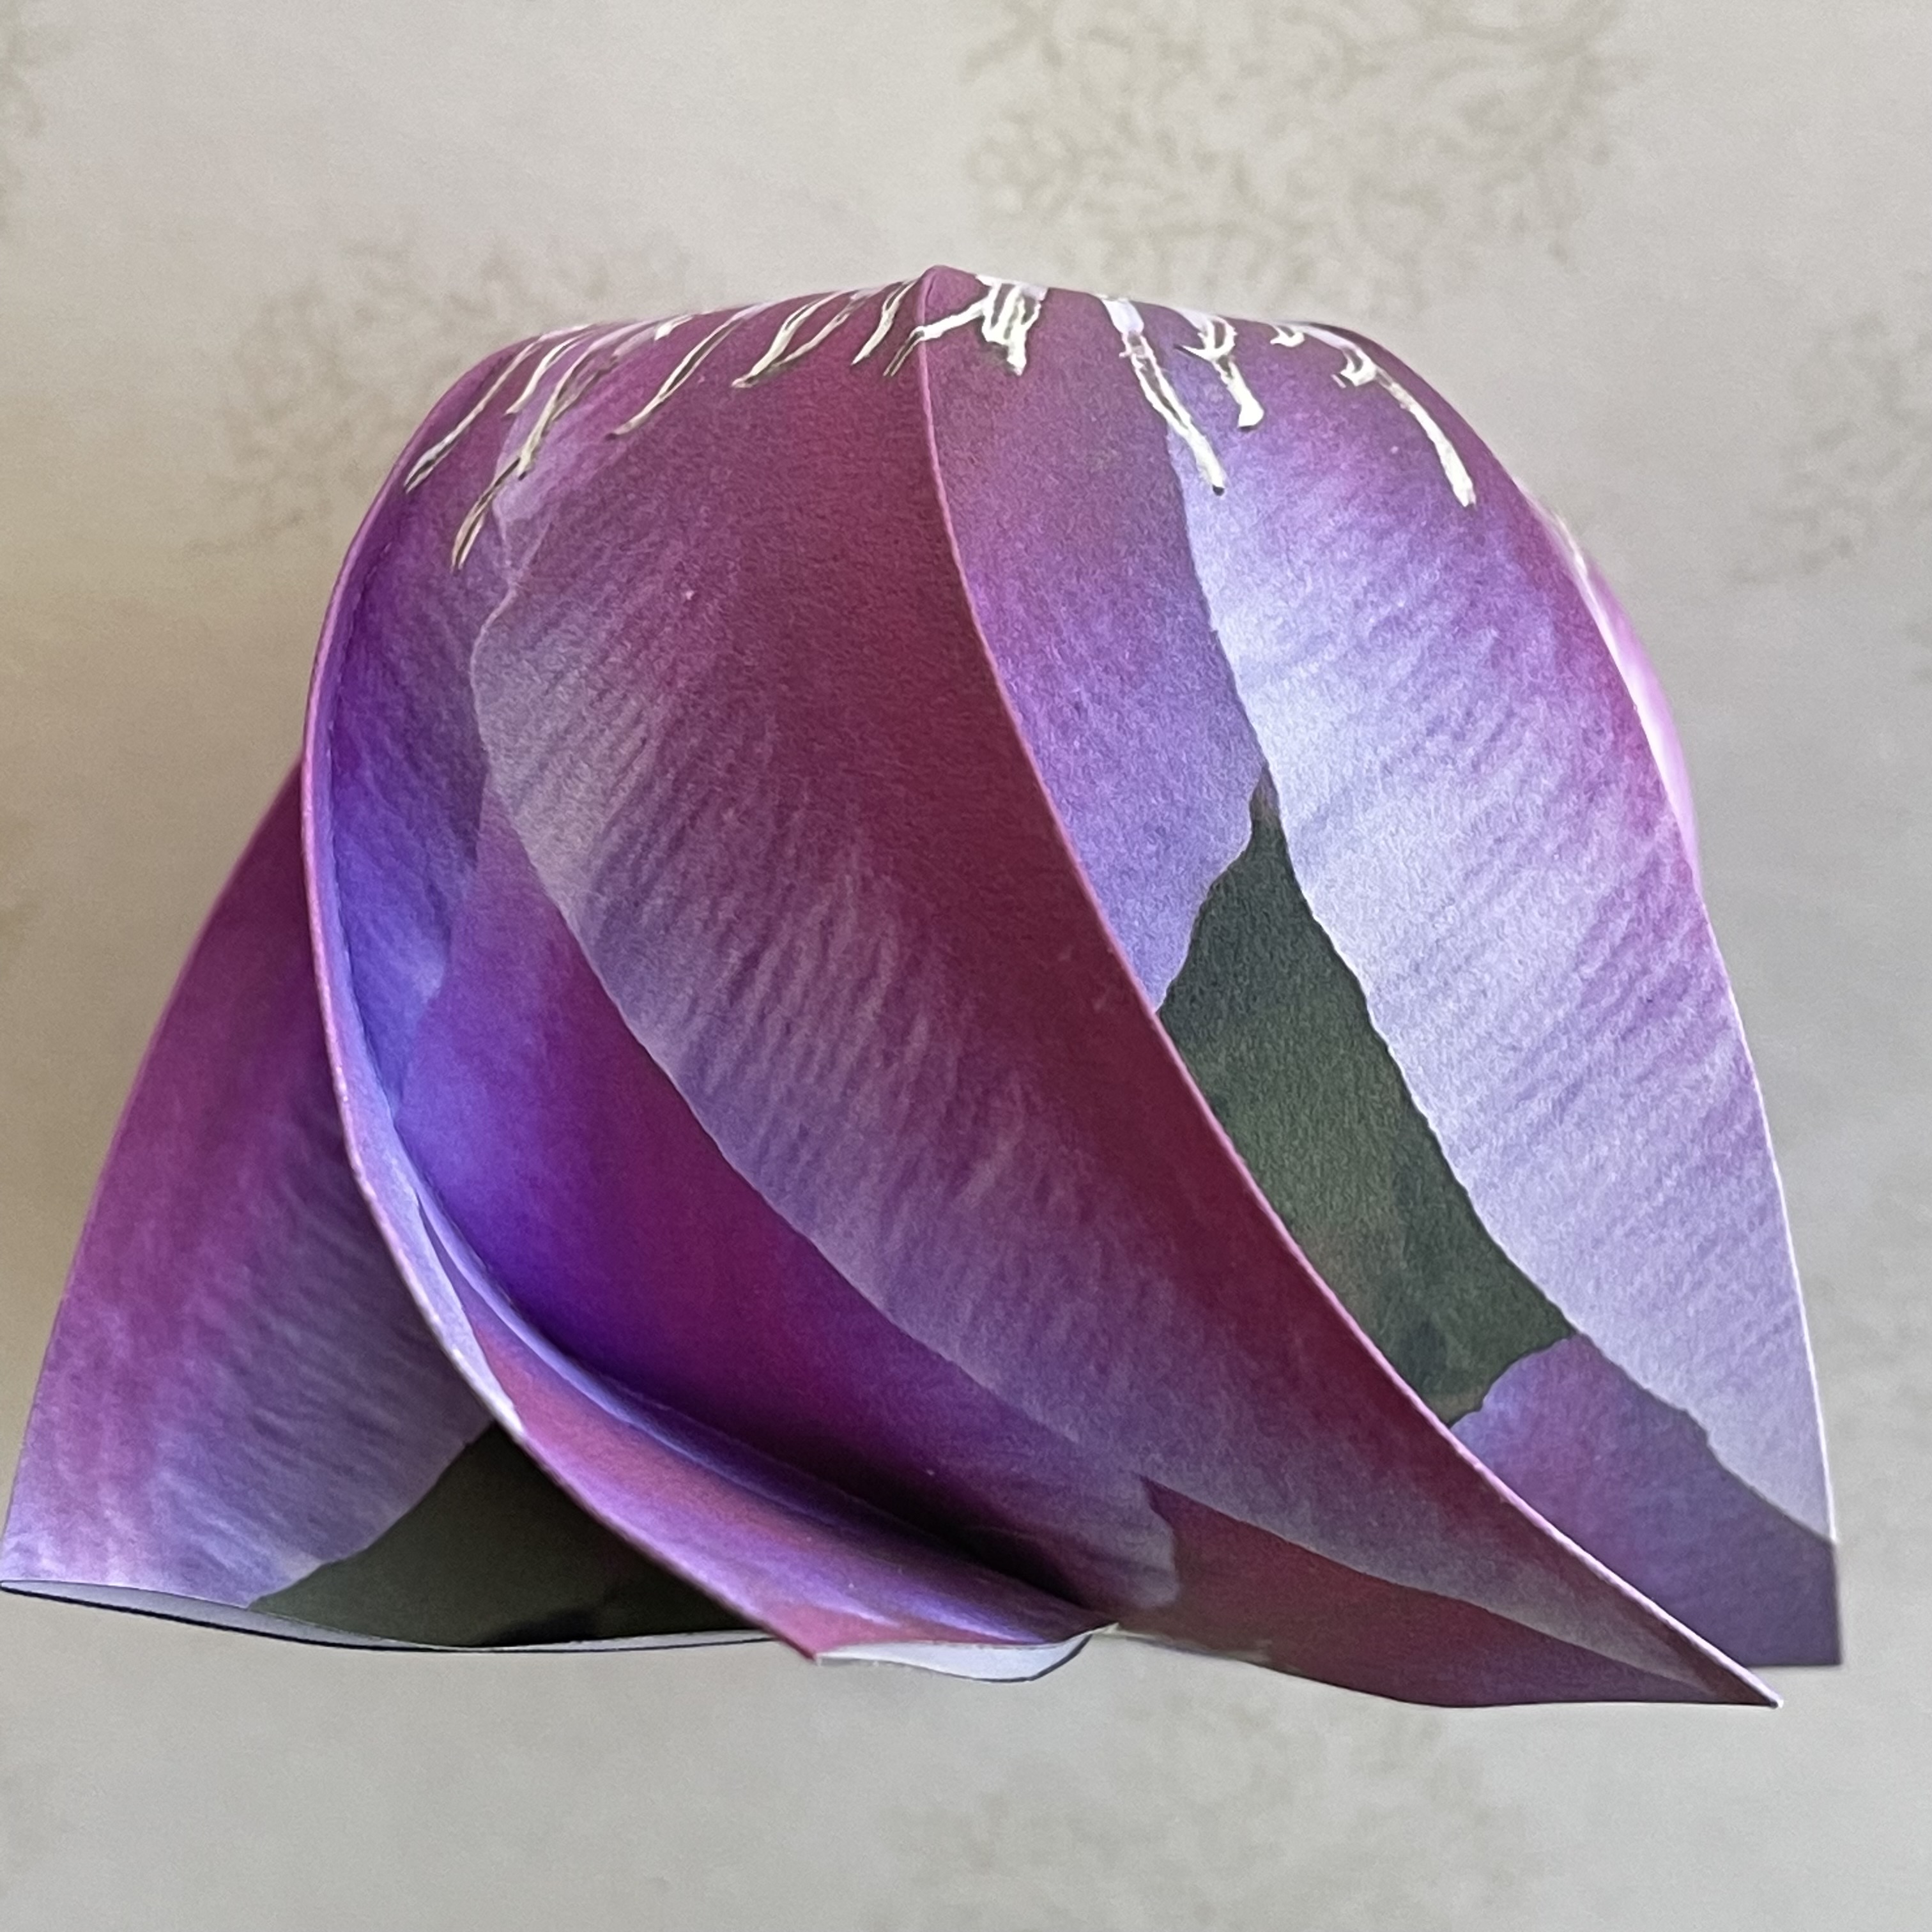 |
In class-1, the petals of flowers are twisted in one way. In this class we make a model whose petals look stretching outward. To help the attendant to make a stable model, a rubber band is used to give the model temporary stability while giving a final adjustment. Keep the rubber band on for a while until the model shape is stabilized. |
| Fig.3-1 Crease Pattern click to enlarge & print  |
Fig.3-2 Image of Flower click to enlarge |
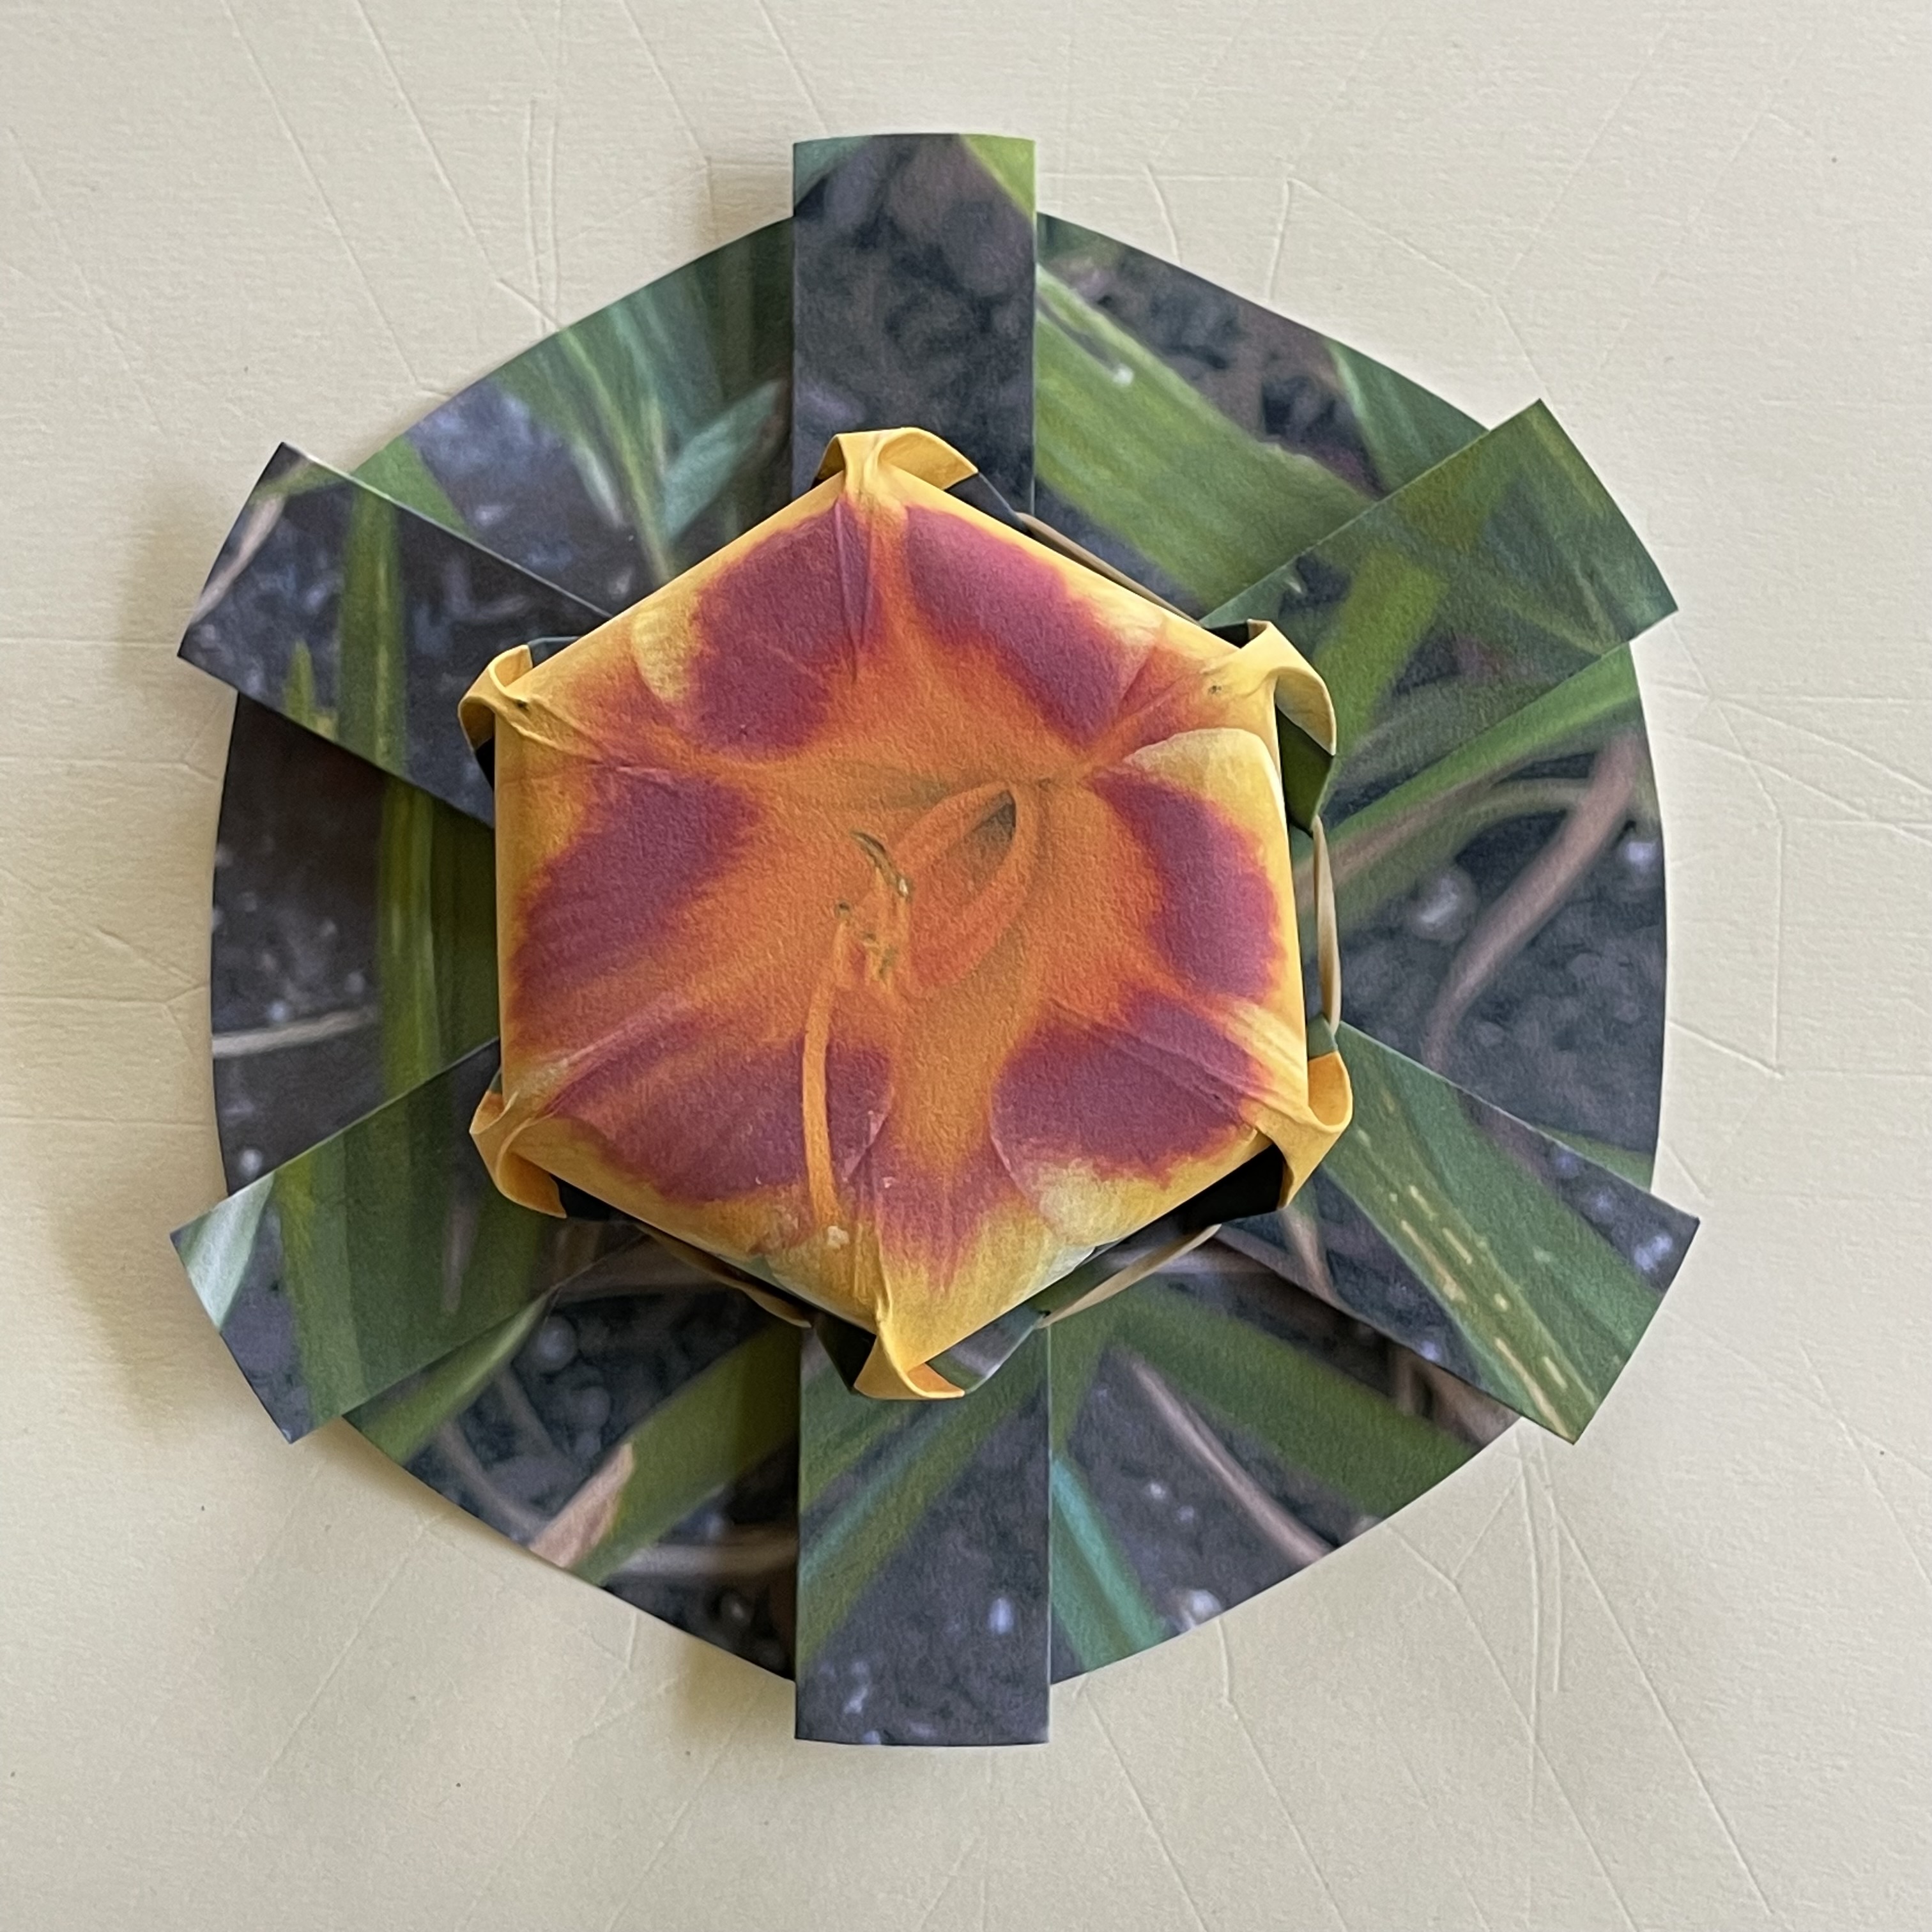
Fig.2-3 Final Appearance click to enlarge 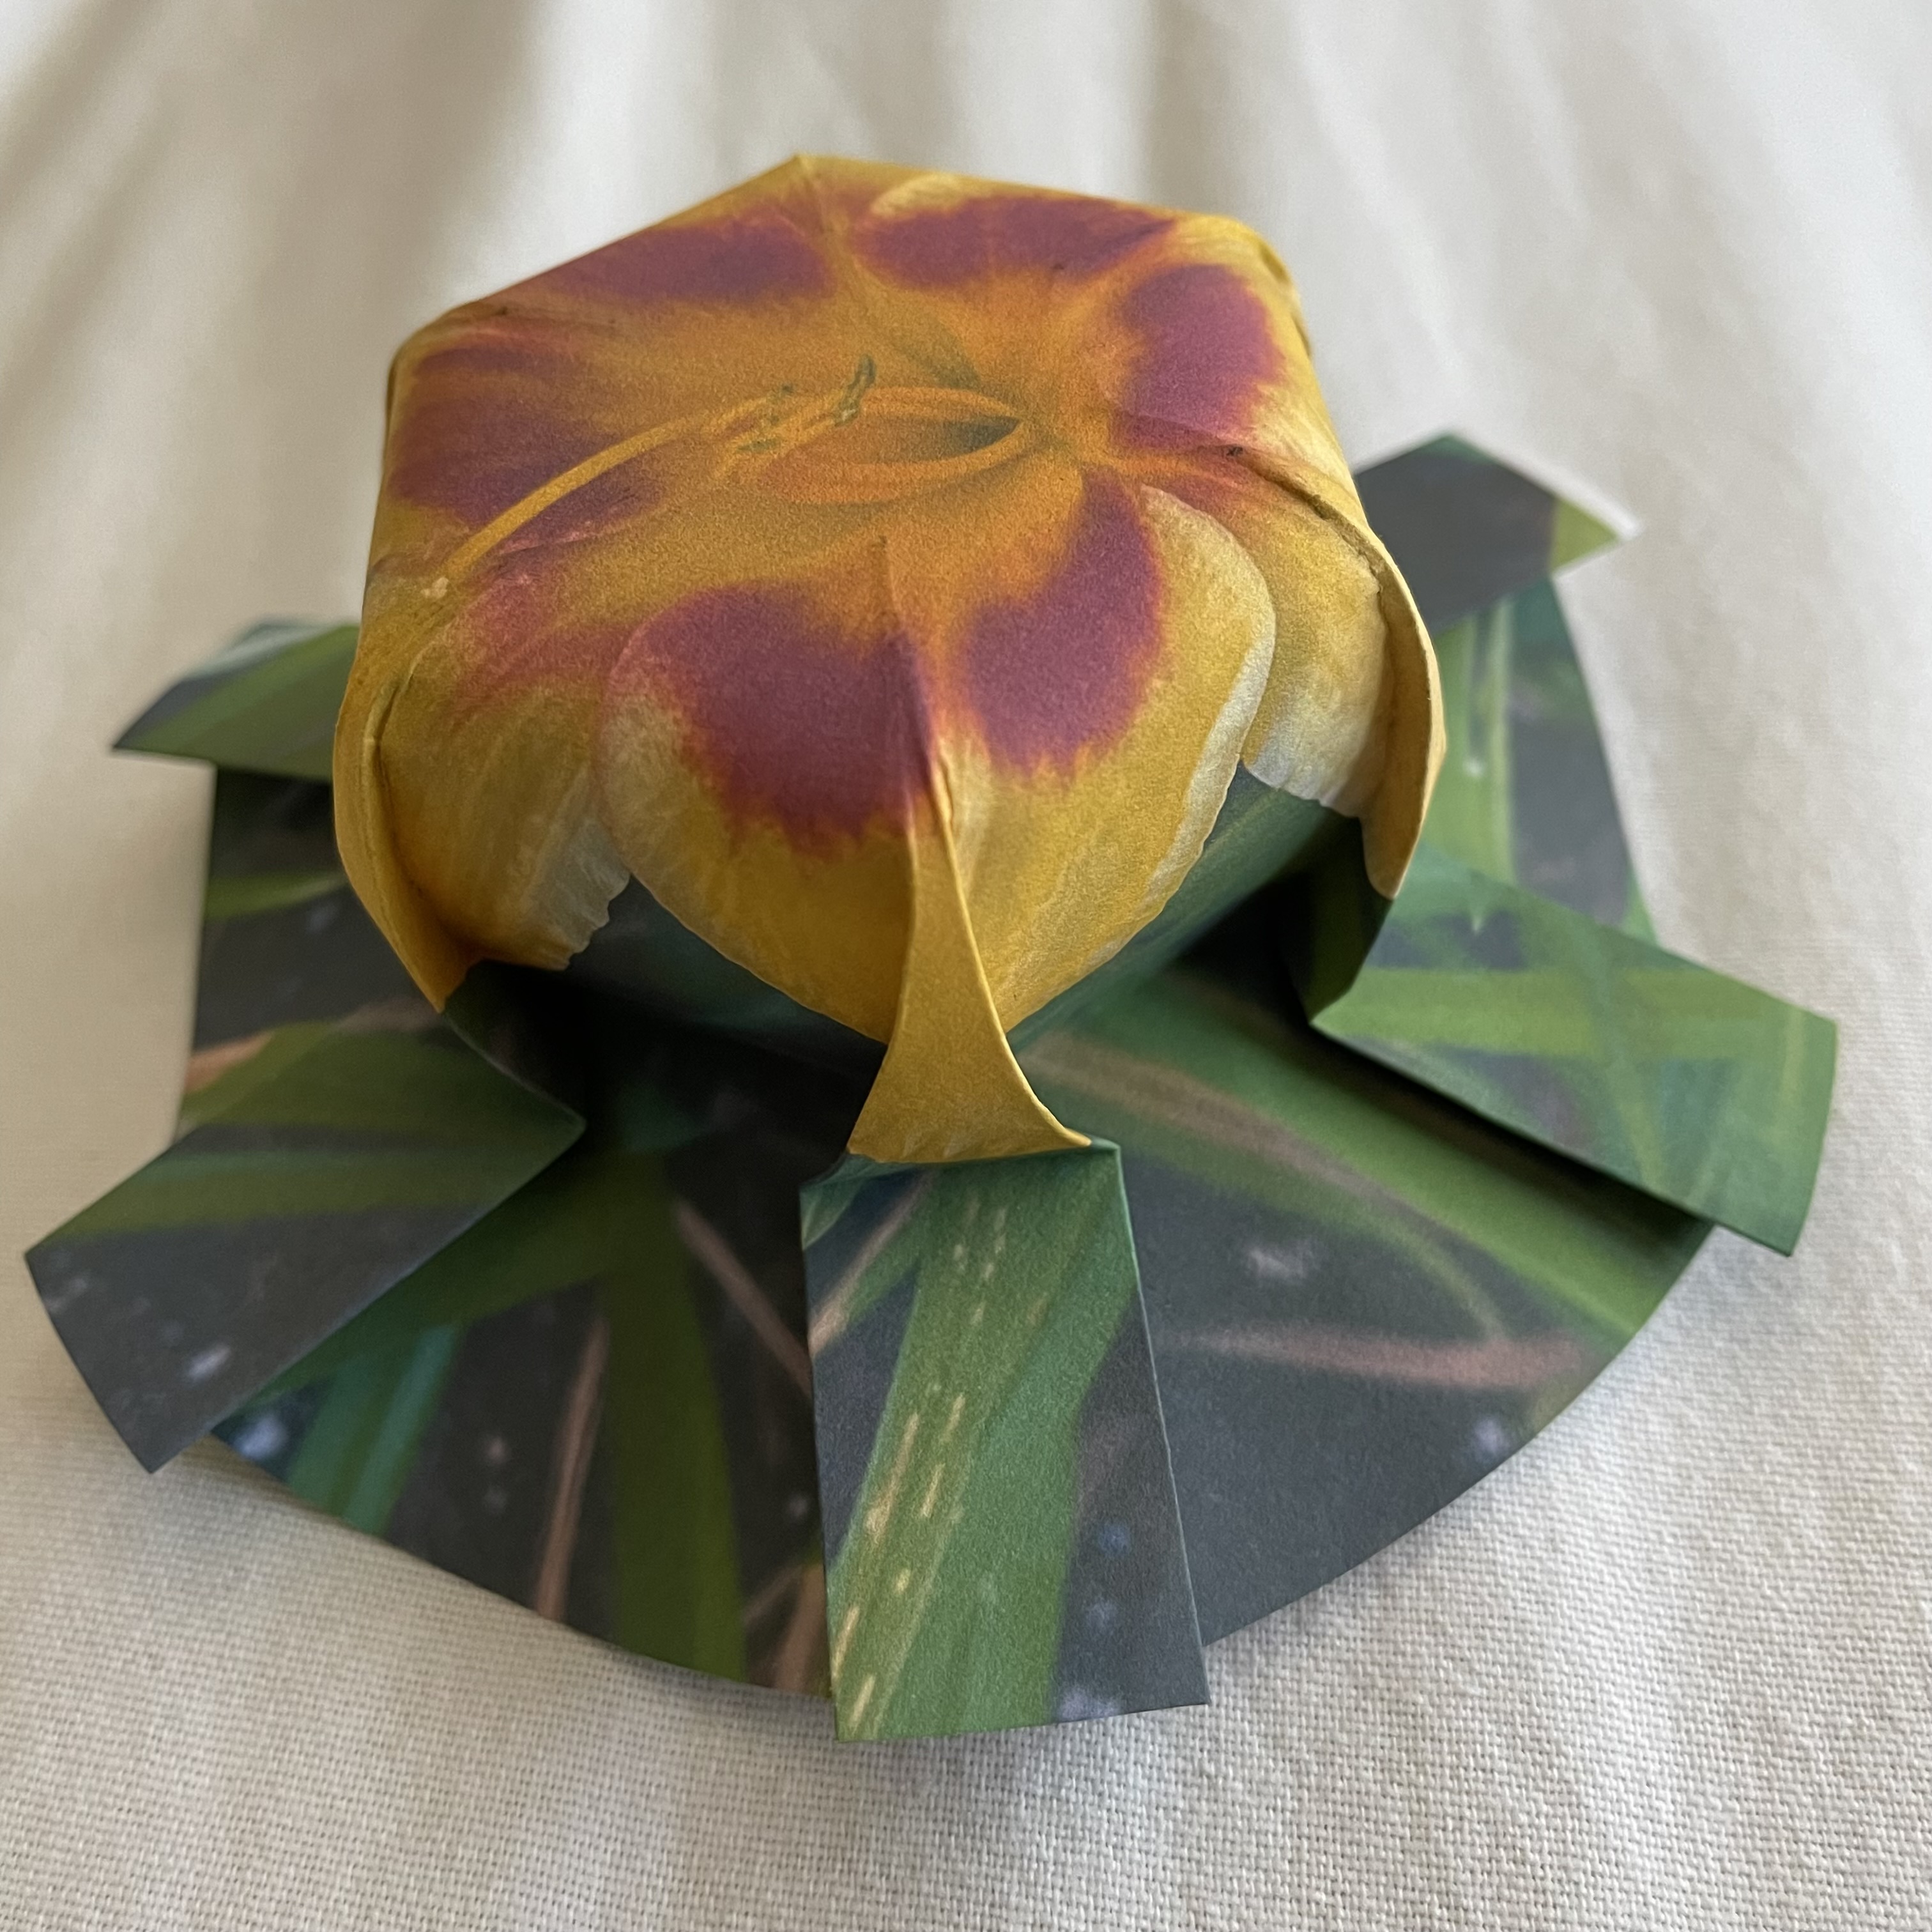
|
Download the following files.
(1) Diagram pattern drawing
    Drawing file (if the environment to handle DWG and/or DXF file is available)
	Down load  flat_egg_6_test.dwg
	or
	Down load  flat_egg_6_test.dxf
    Diagram pattern image file (JPG)
	Down load  flat_egg_6_test.jpg
(2) Flower image files (JPG)
	Down load  22_class_1a_flower.jpg
|
Adding thick paper(32 lb.) under the diagram paper gives a better scoring result because some softness beneath gives a slight dent to the model paper. That will make the pre-creasing process easier. |
There are linear regions and curved regions as shown in the picture below. Use a ruler for the linear portions (marked "S"). The curved portions (marked "C") will be traced "FREE HAND", Yes ! The central area is left blank. Trace the linear area first, then the curved portions with steady pressure. While tracing curves lines, working toward you will give a better control of the pen . |
| ------ Scoring lines ------ click to enlarge 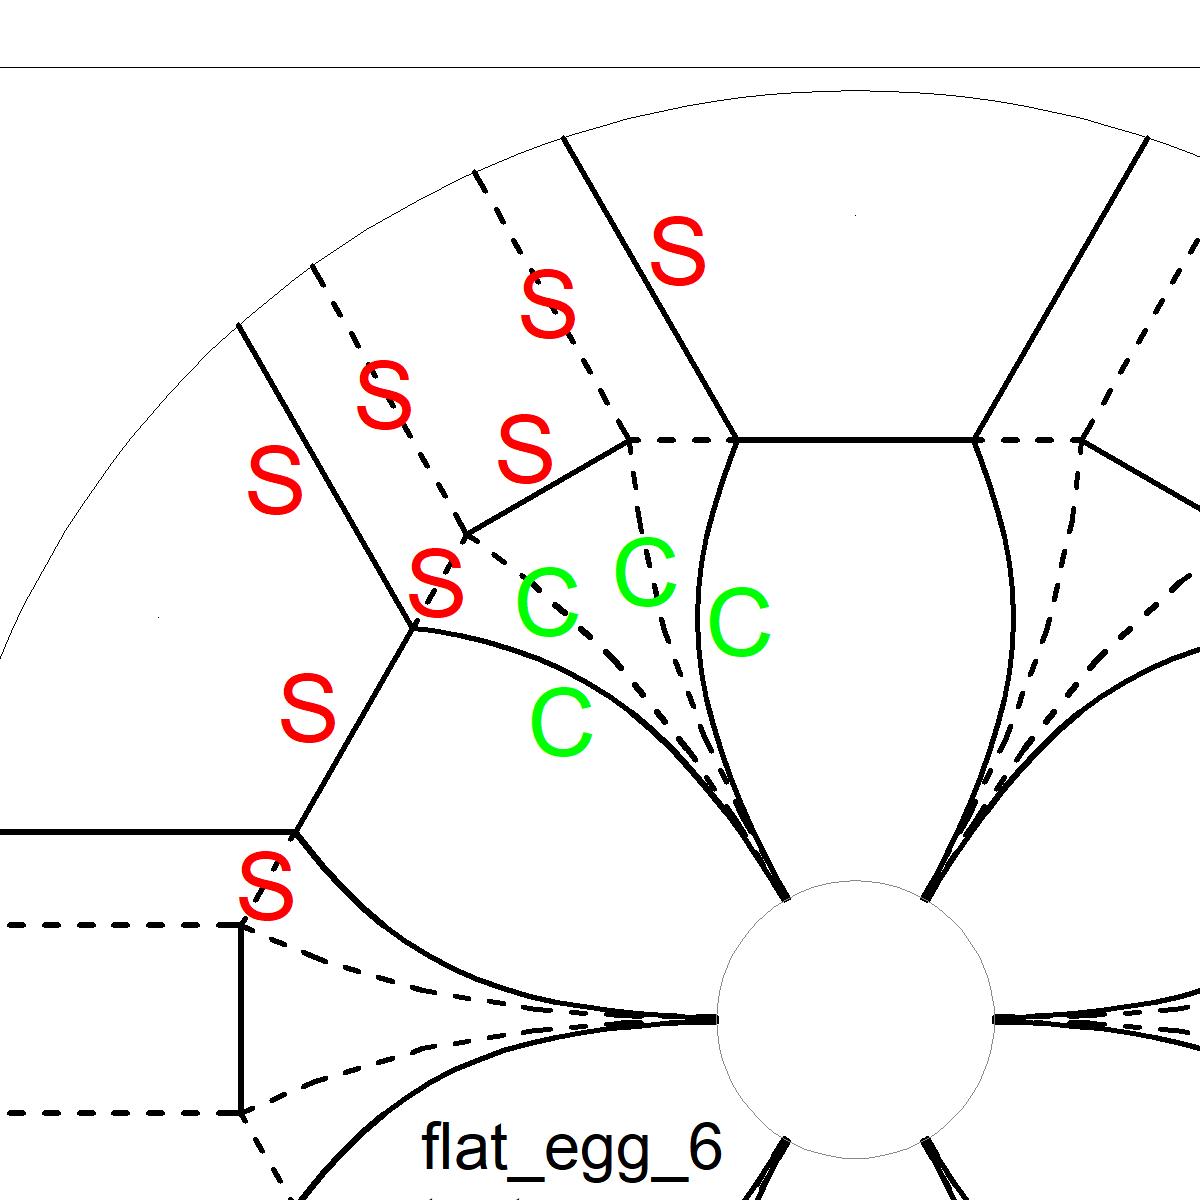 |
------ Scoring lines ------ click to enlarge 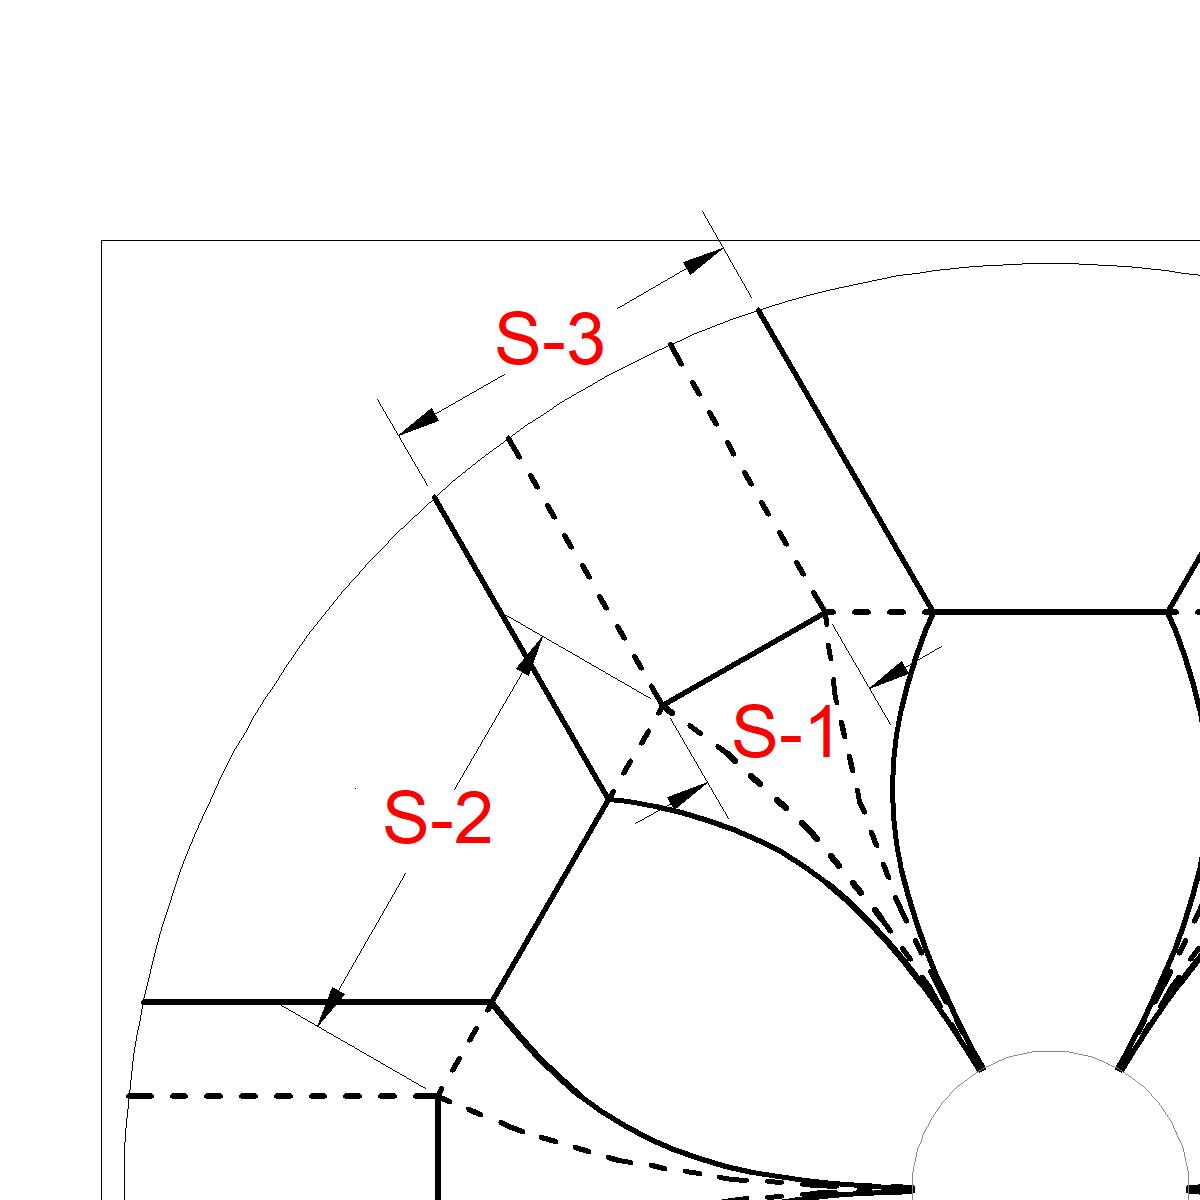 |
Begin Prefolding process first with Mountain Fold ,then Valley fold . When working on the mountain fold, the diagrammed side is up, while during valley side folding, the flower image side is up. It is easier to do so. Since the paper is very sturdy, folding firmly do not break the working paper. The following pictures show both the diagram side and flower image side. |
| -After Pre-crease- Rear View - click to enlarge 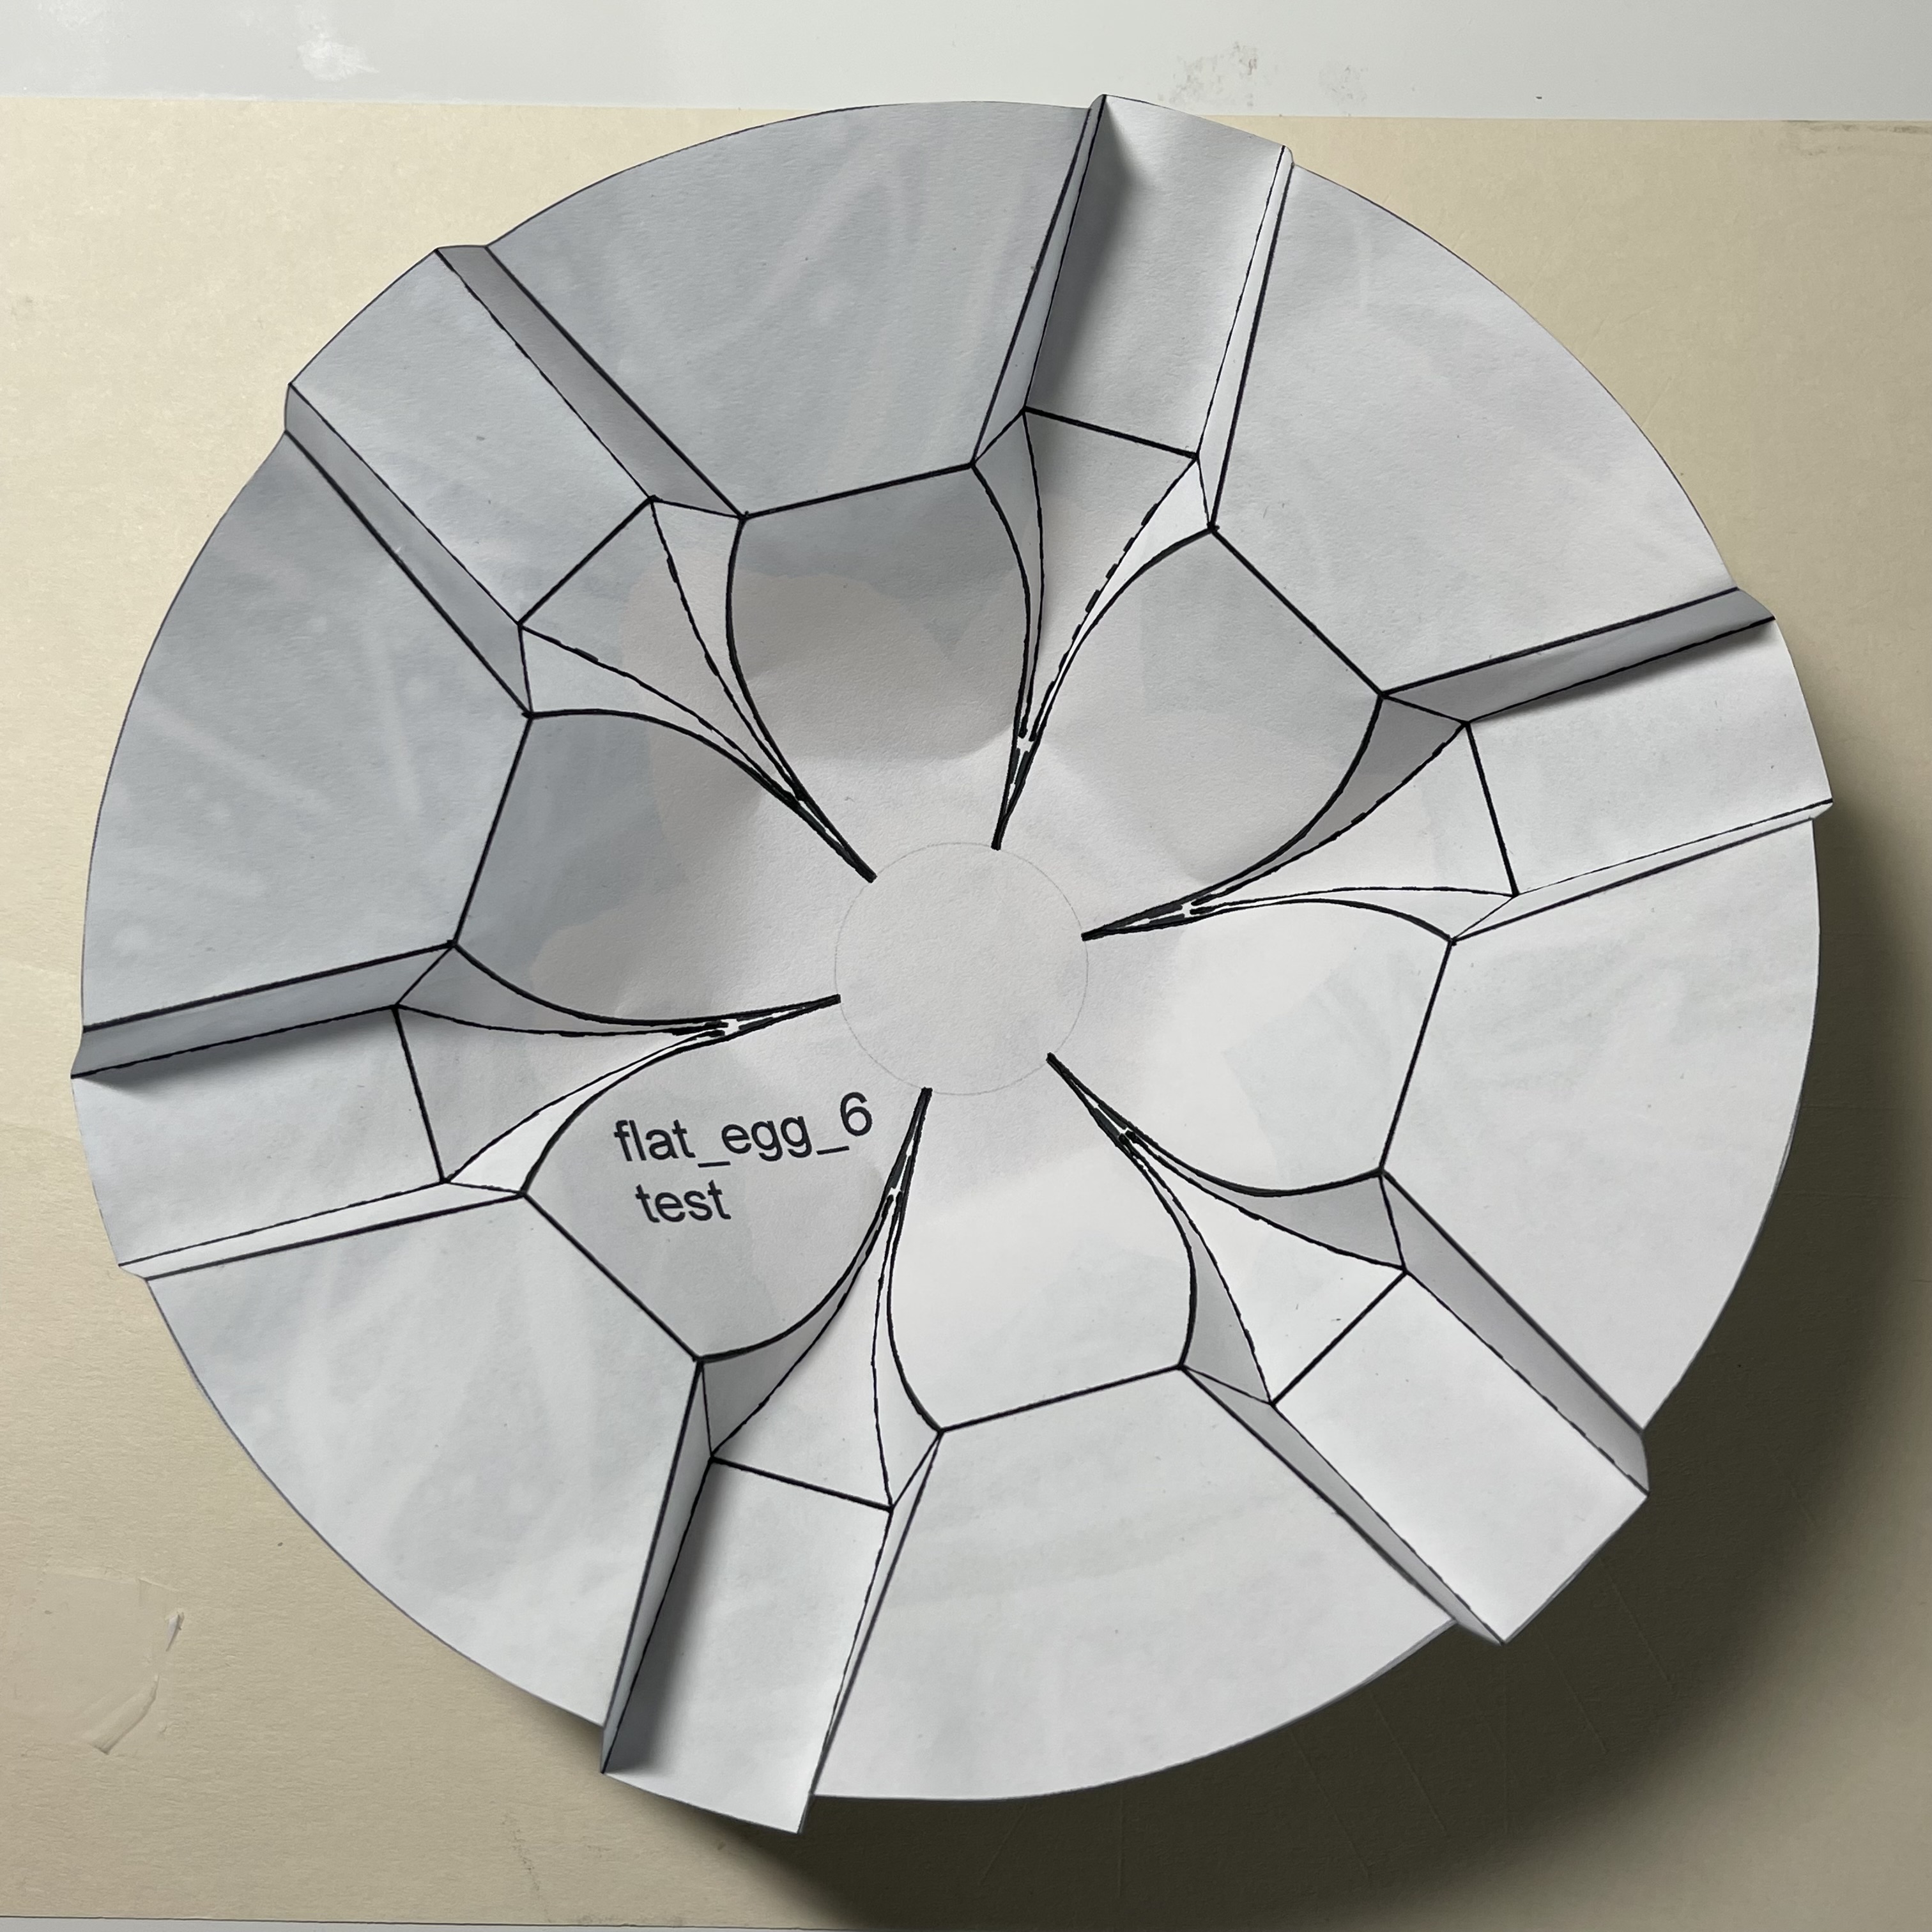 |
-After Pre-crease- Front View - click to enlarge 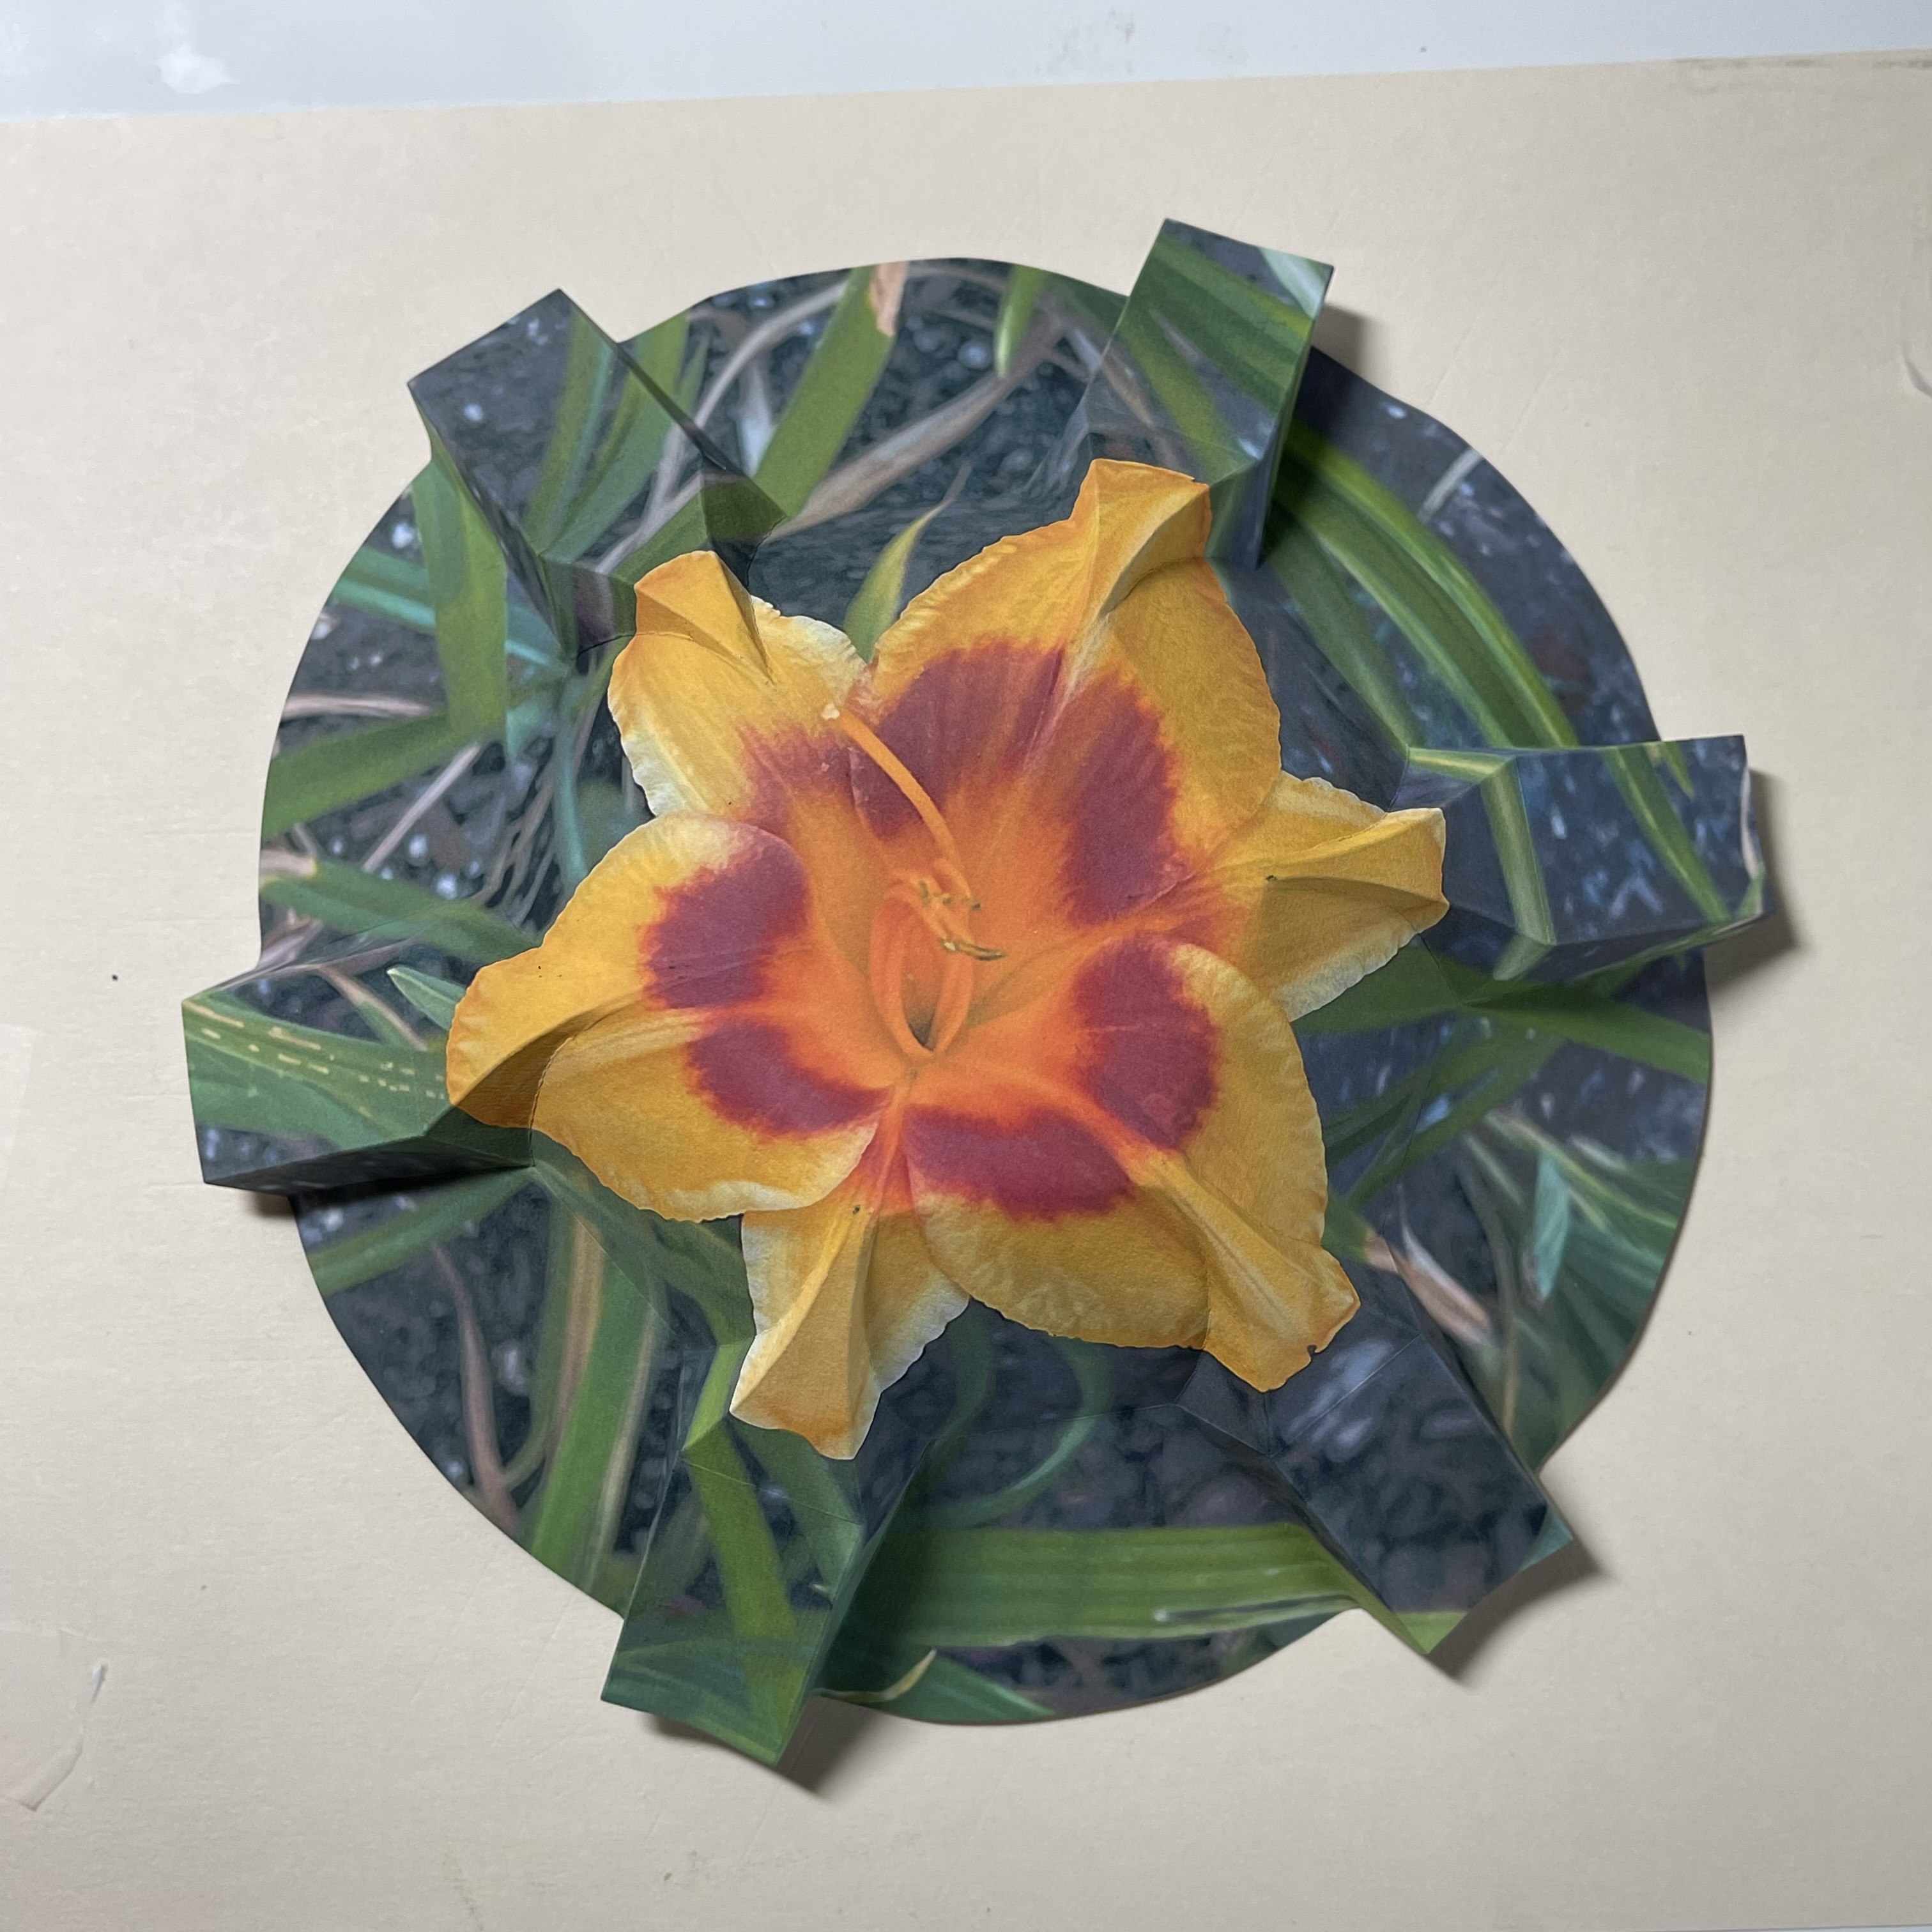 |
| - Align lines on flaps- click to enlarge 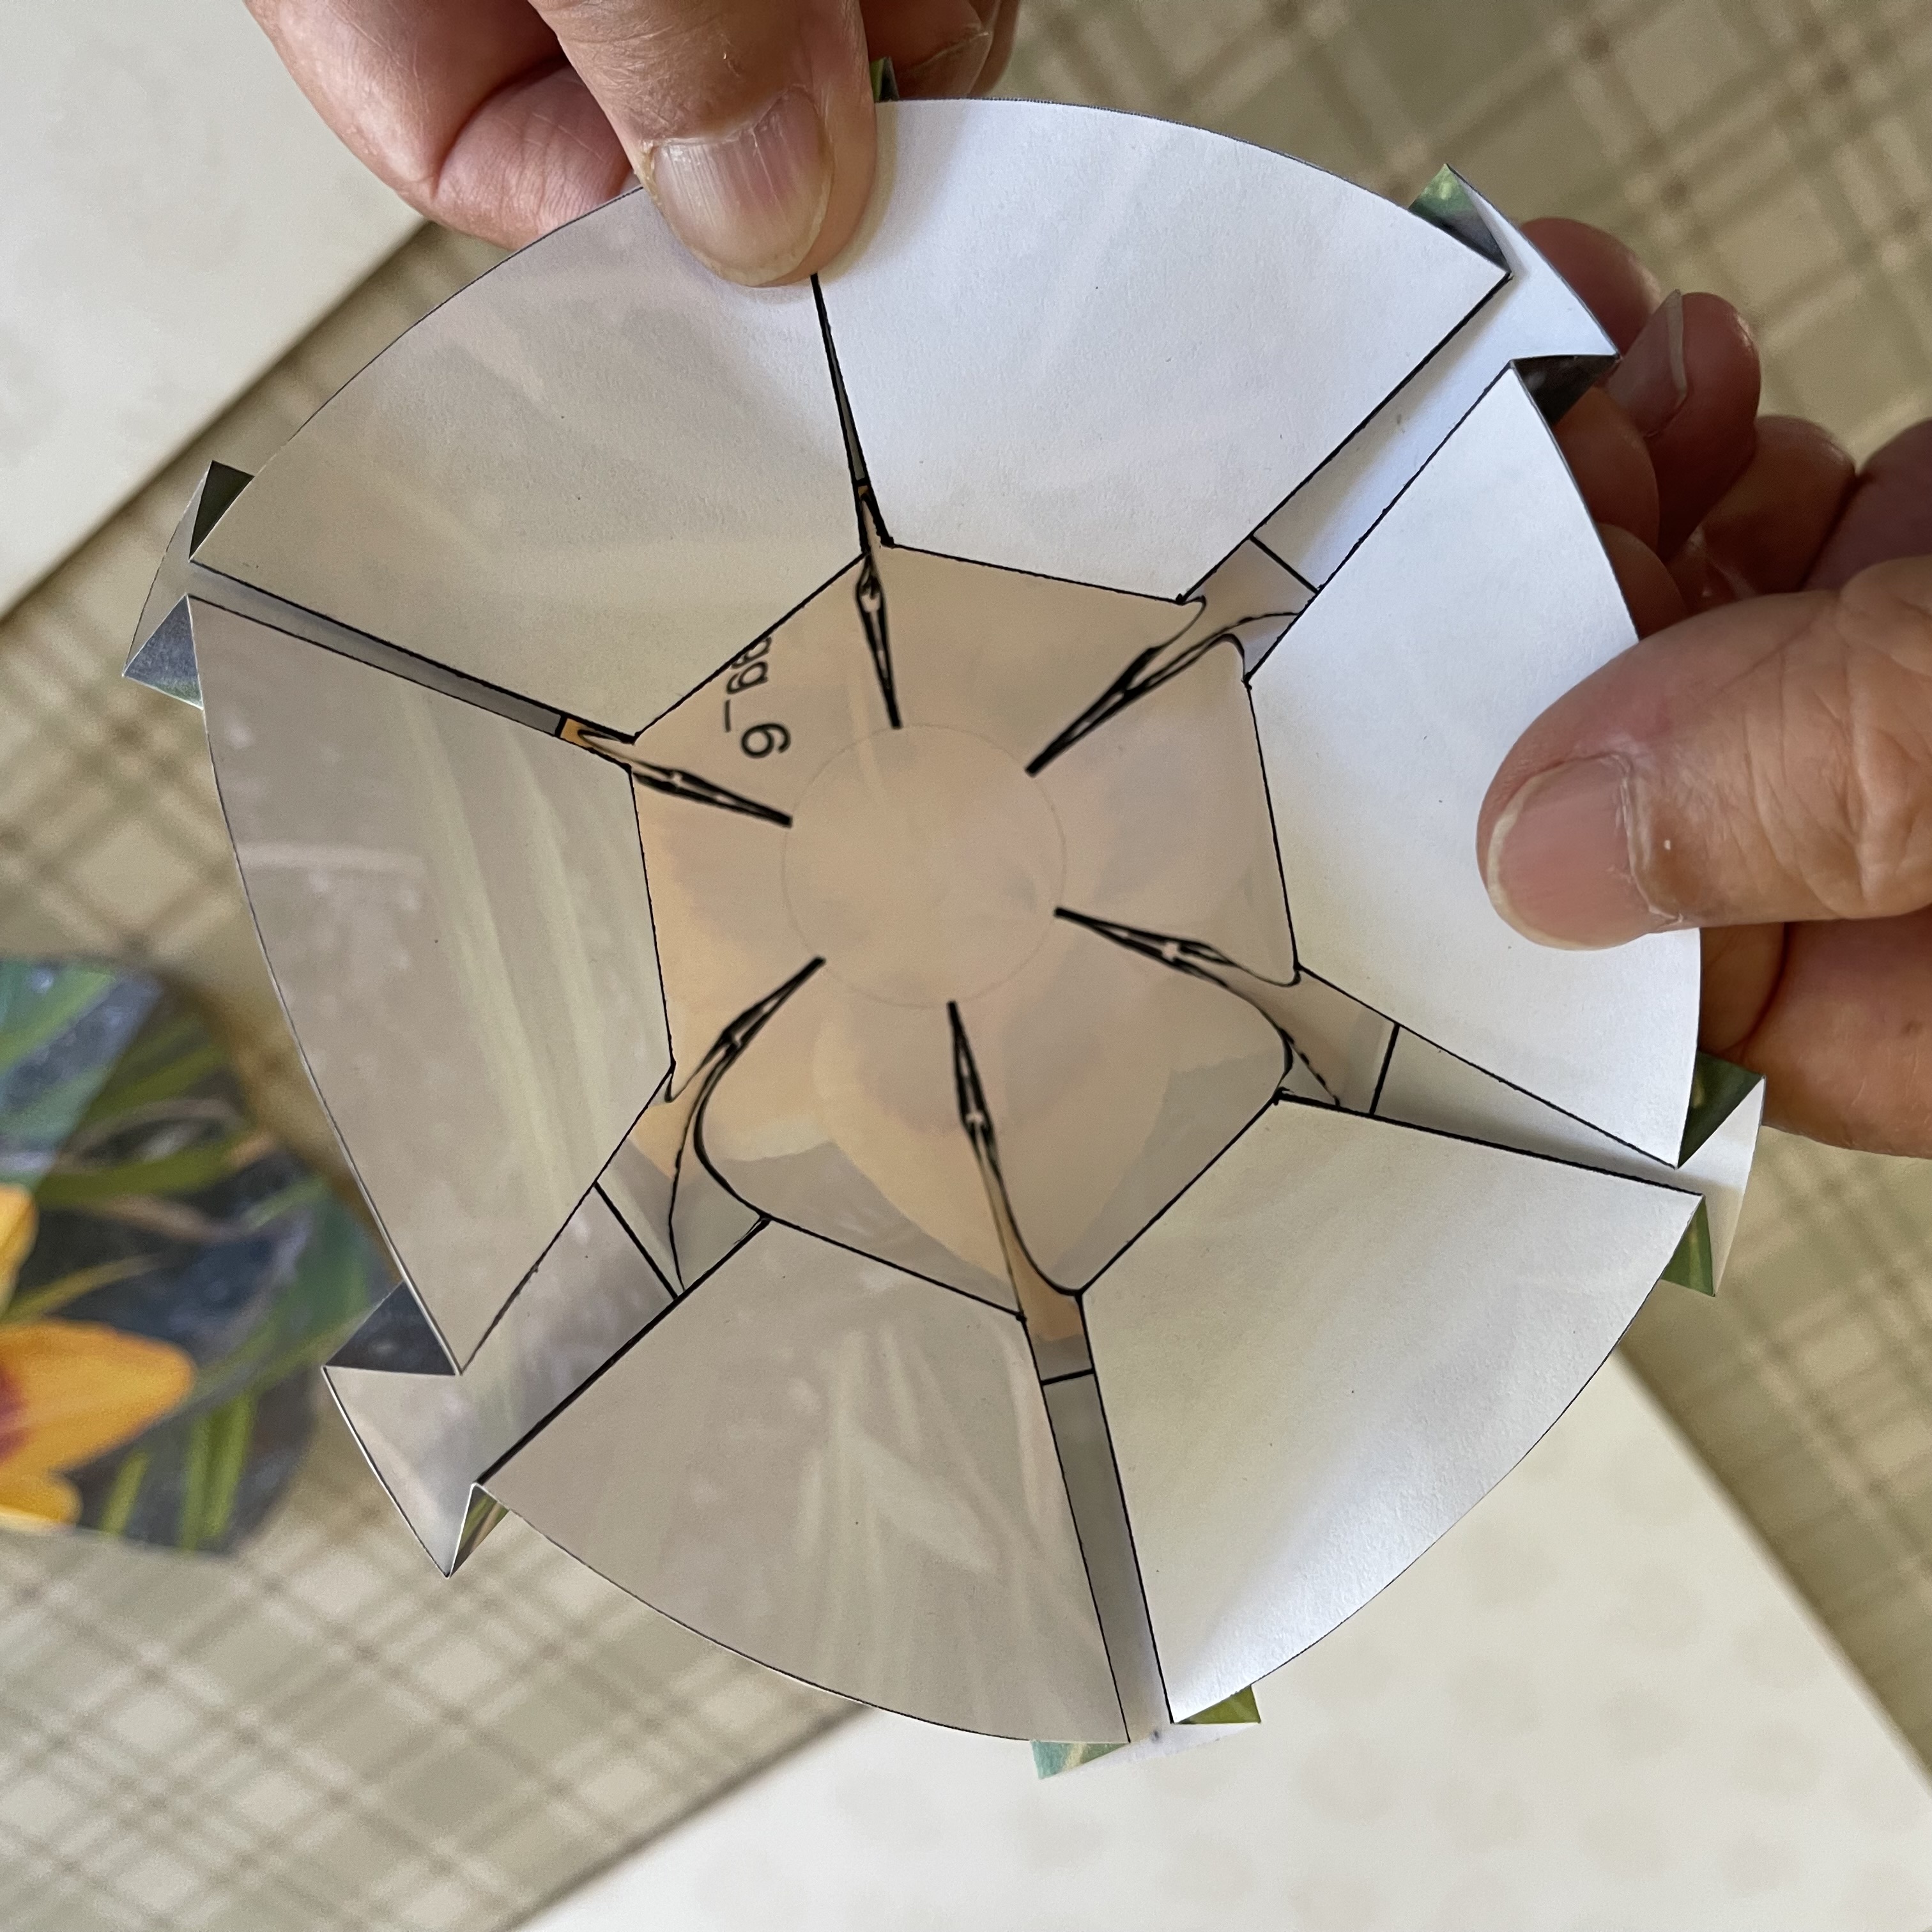 |
-Temp stability by rubber band - click to enlarge 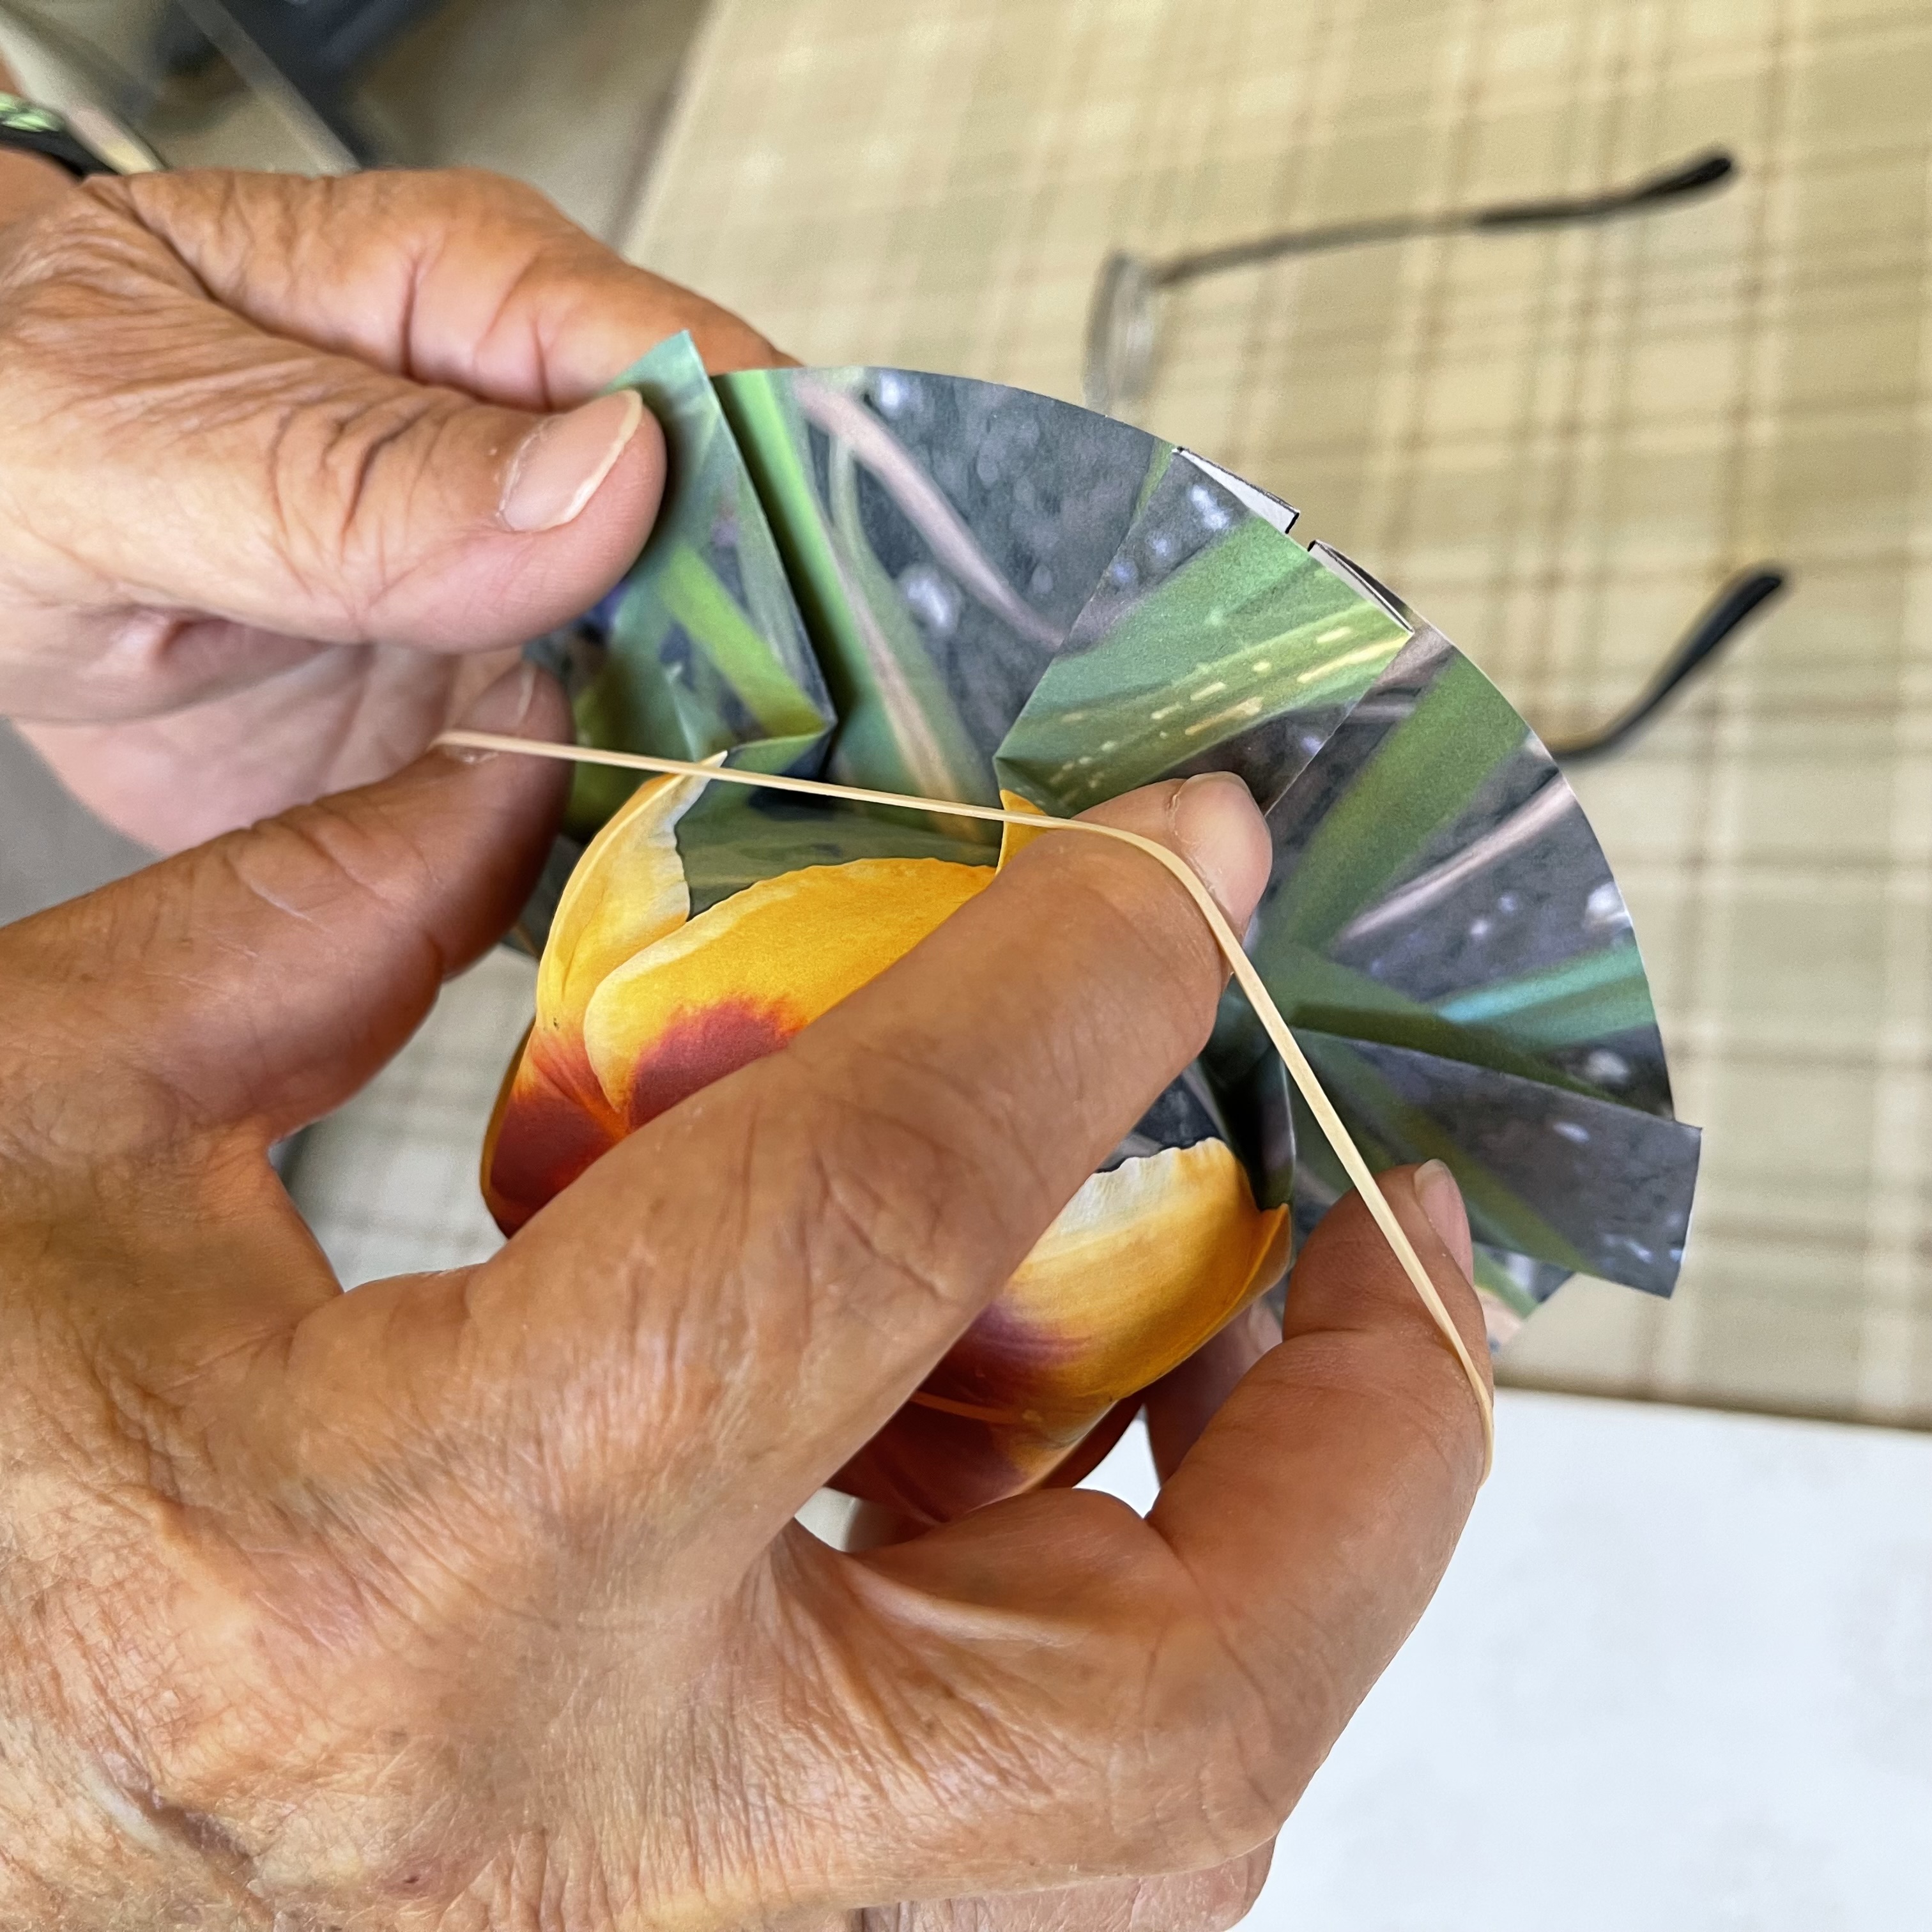 |
Begin Prefolding process first with Mountain Fold ,then Valley fold . When working on the mountain fold, the diagrammed side is up, while during valley side folding, the flower image side is up. It is easier to do so. Since the paper is very sturdy, folding firmly do not break the working paper. The following pictures show both the diagram side and flower image side. |
| ------ Hold Bottom Flaps ------ click to enlarge 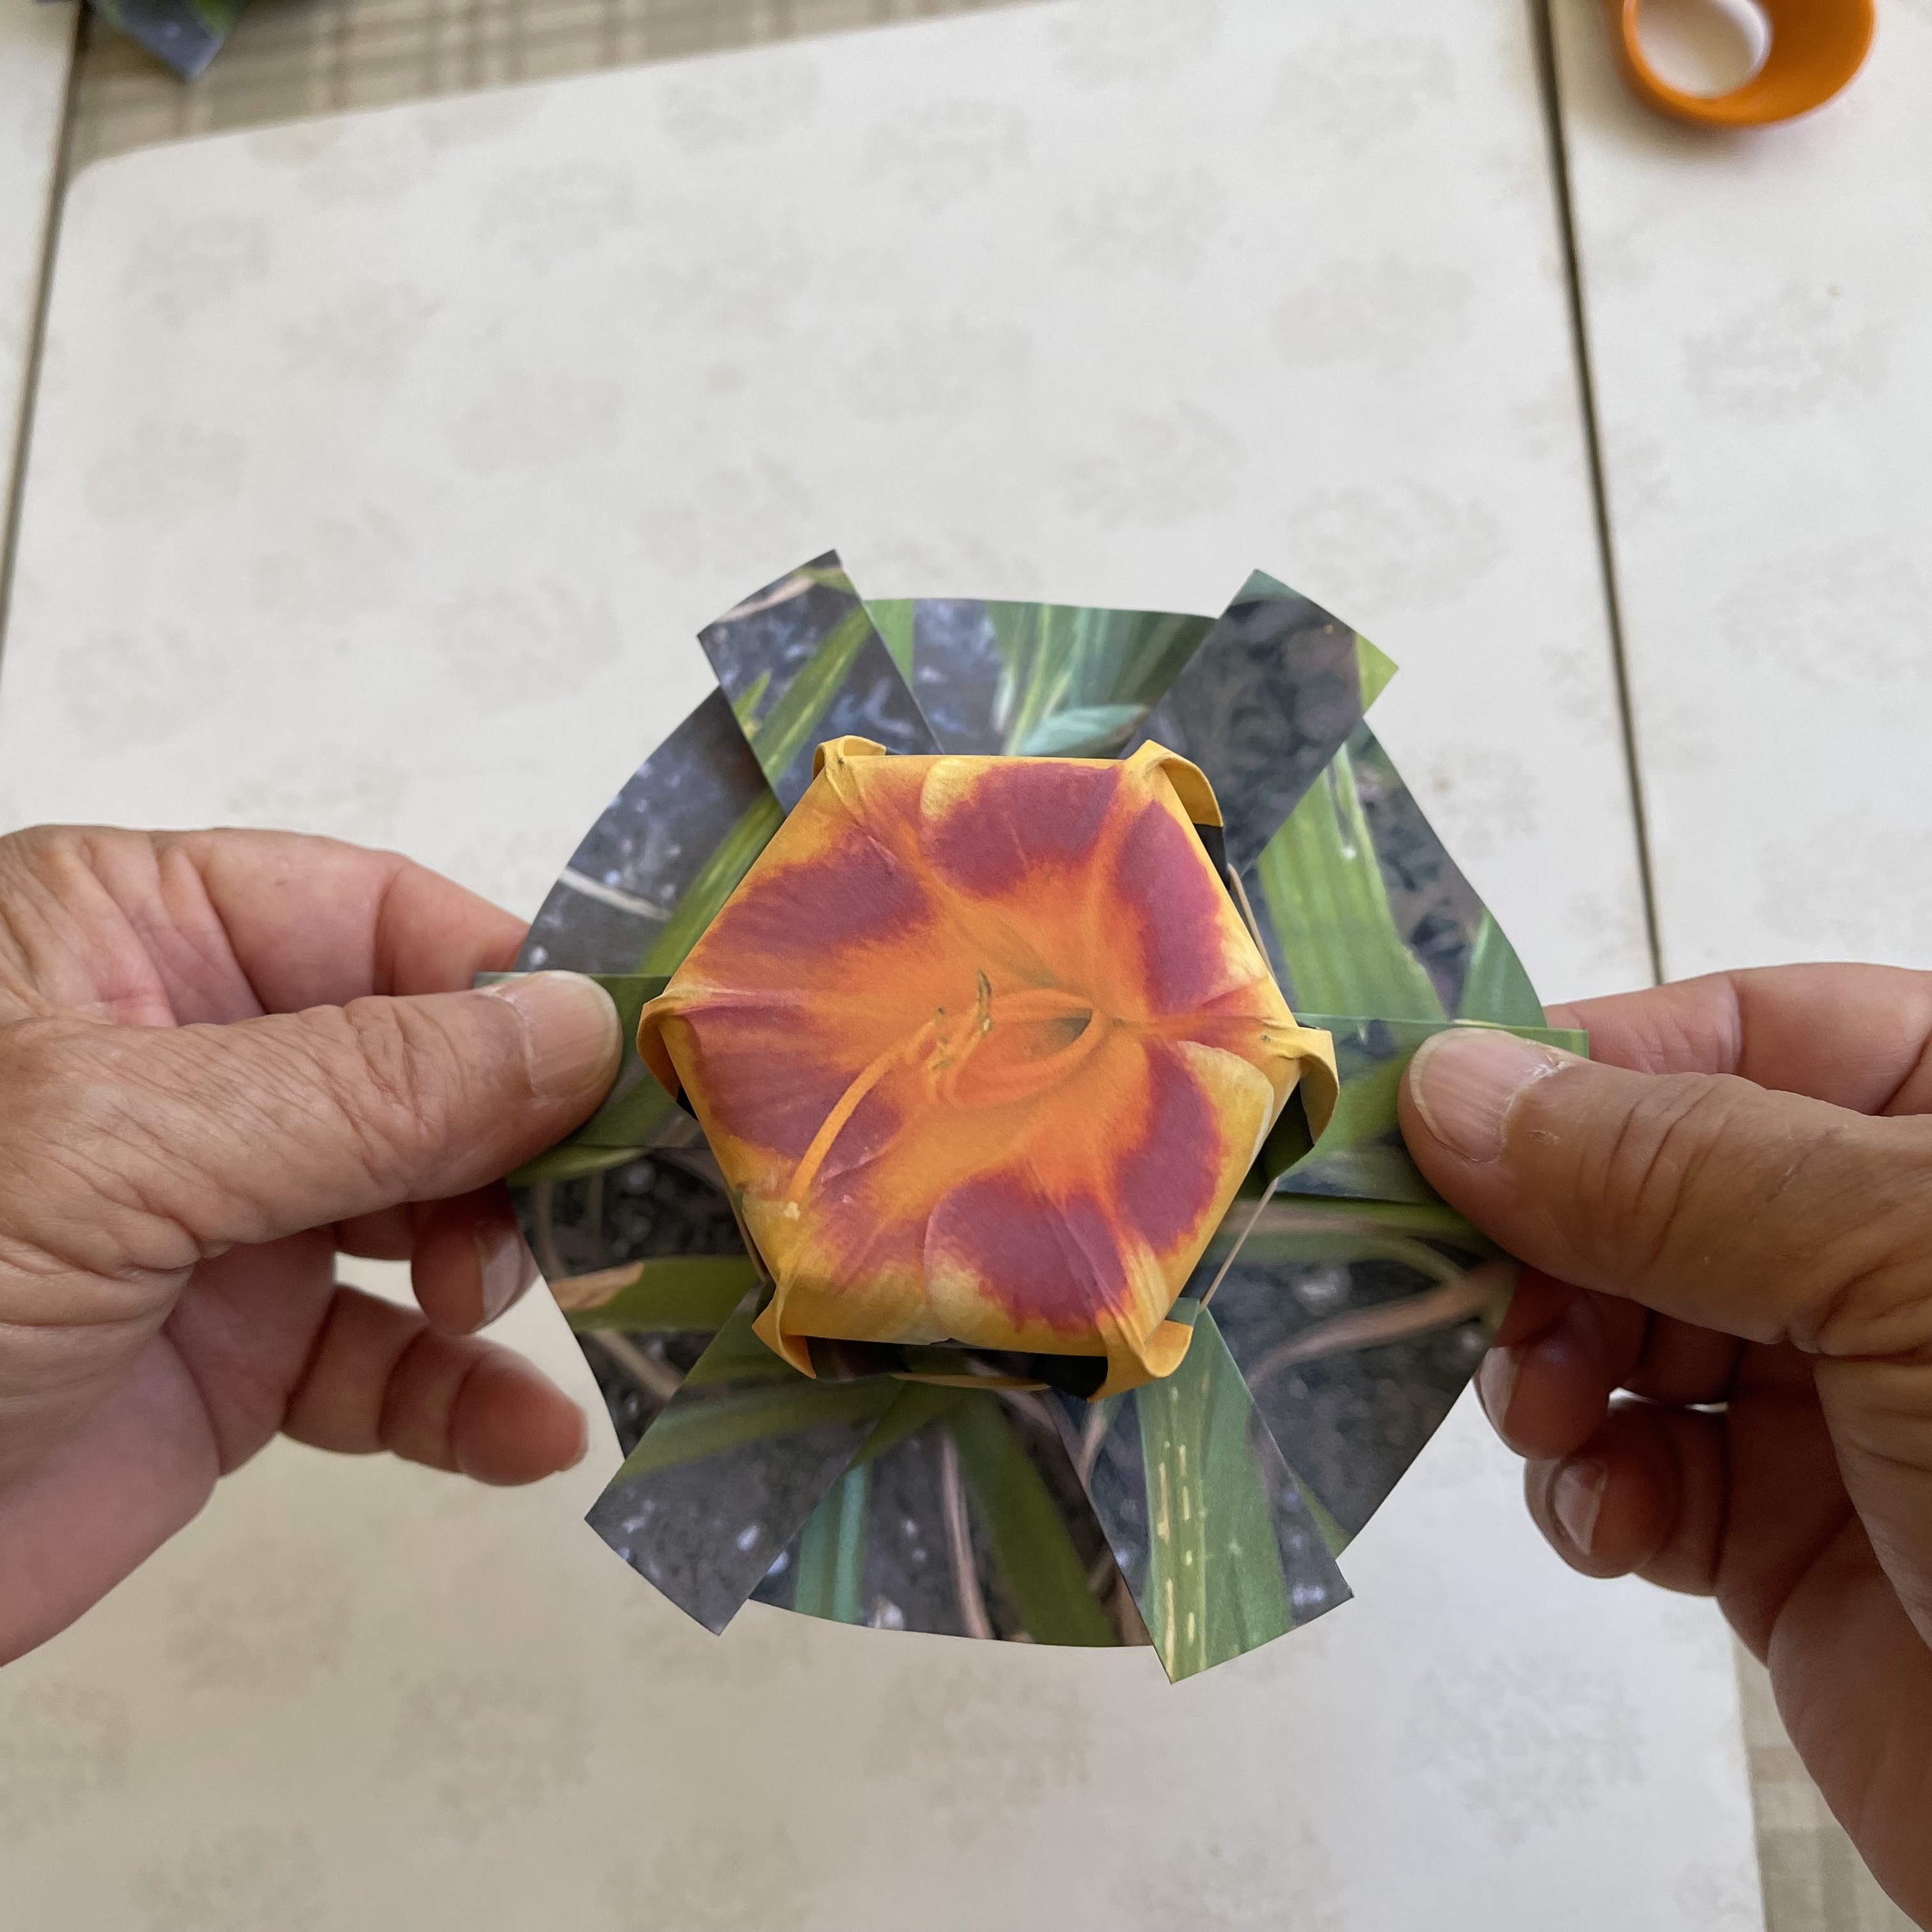 |
------ Pushing In Flaps ------ click to enlarge 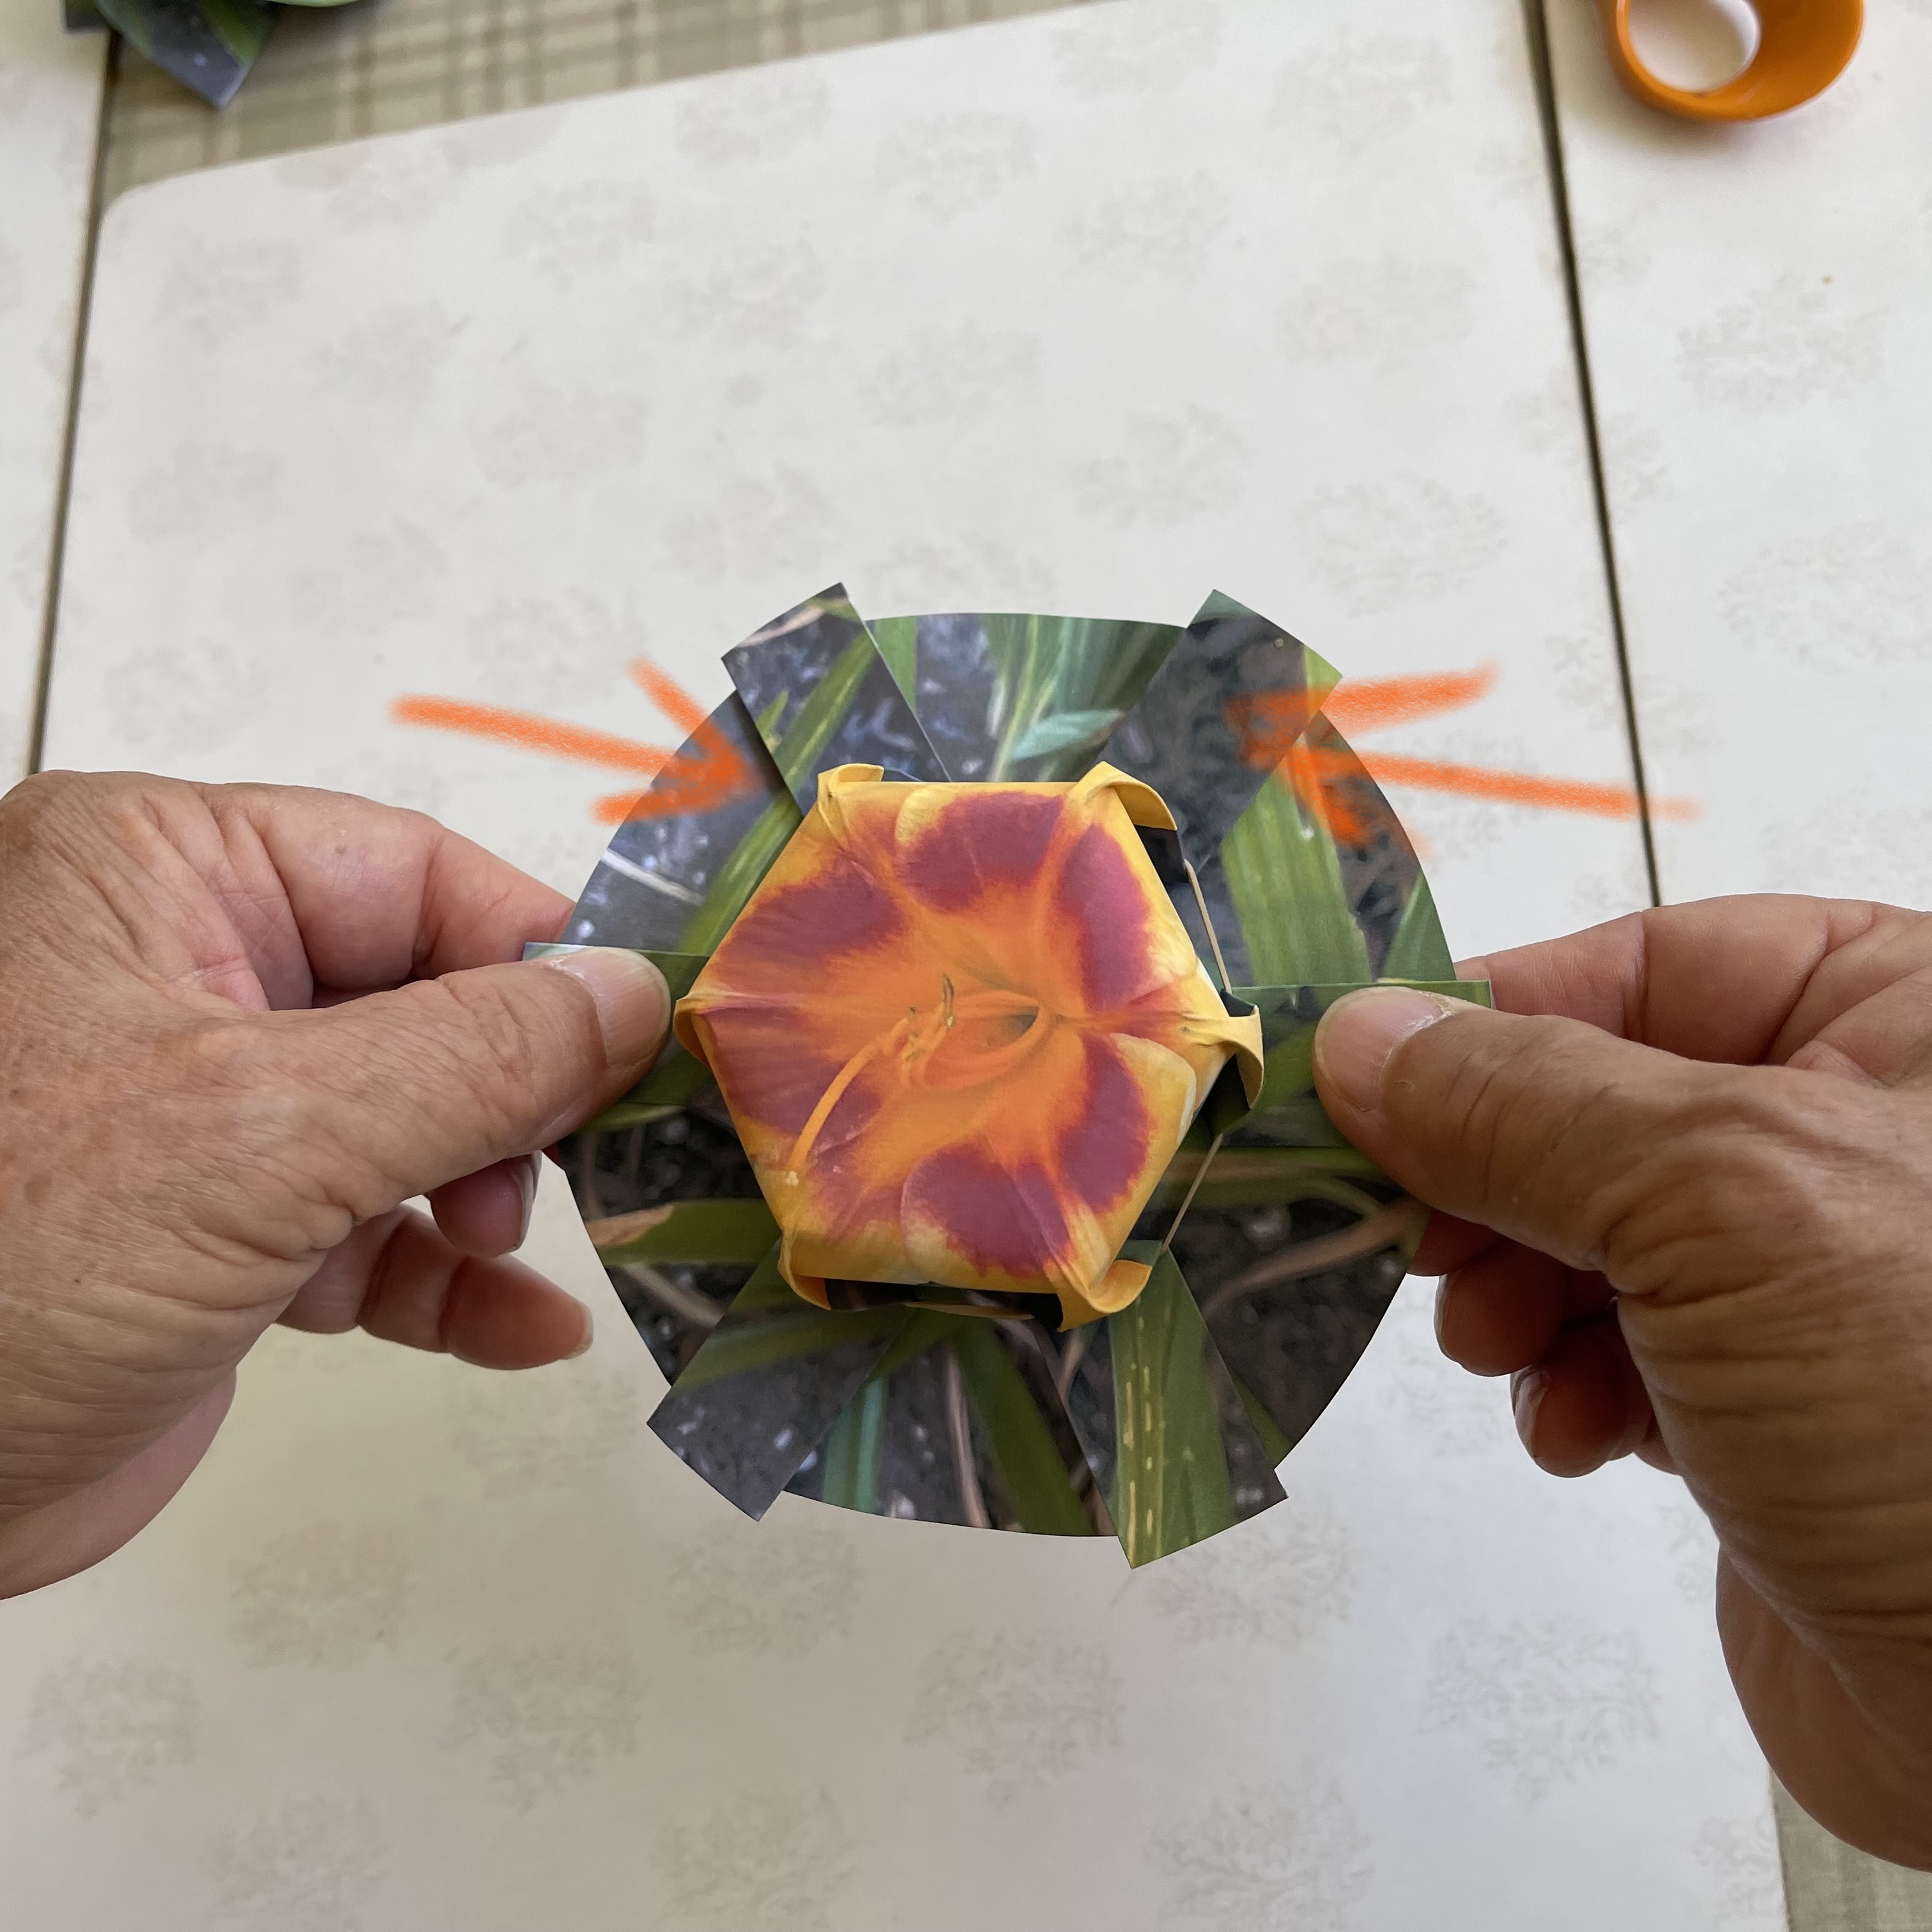 |
Here is the average time estimate of the whole process. diagram scoring and cutting out a circle 15 min pre-crease 11 min final folding and adjustment 4 min Total 30 min |
---- Final - Top View ----
click to enlarge
 |
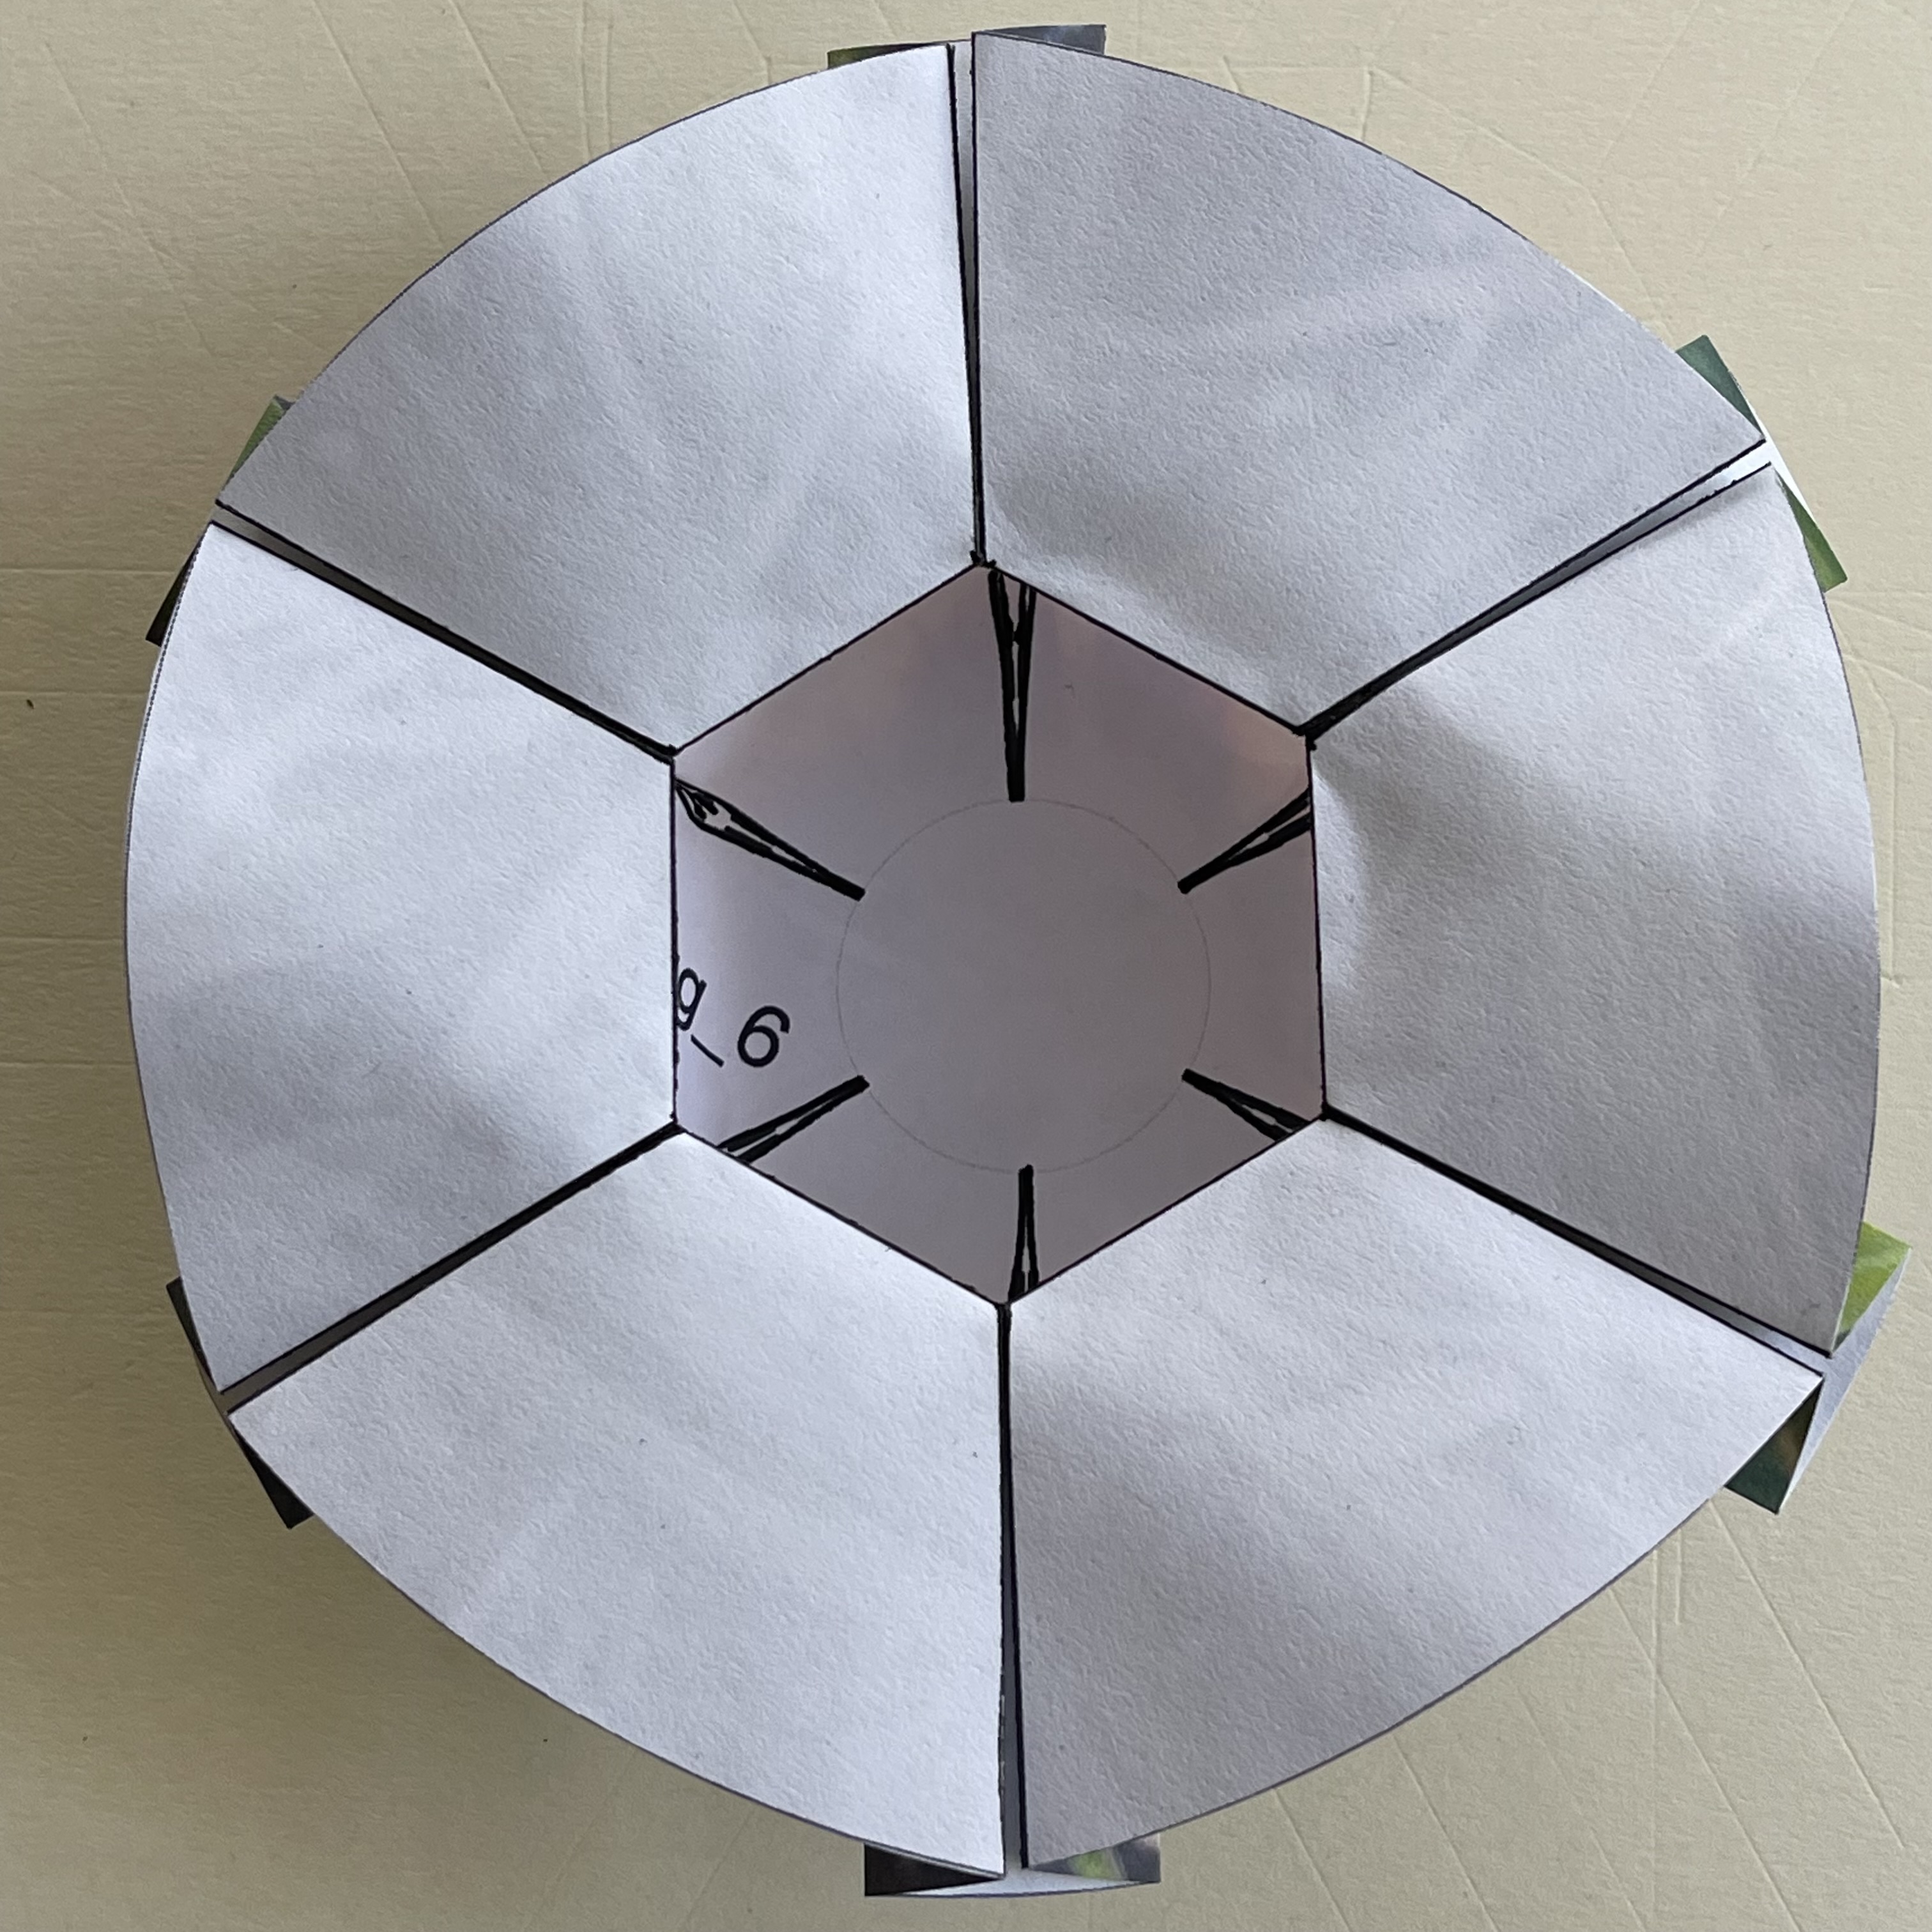
-- Final - Bottom View --
click to enlarge
 |
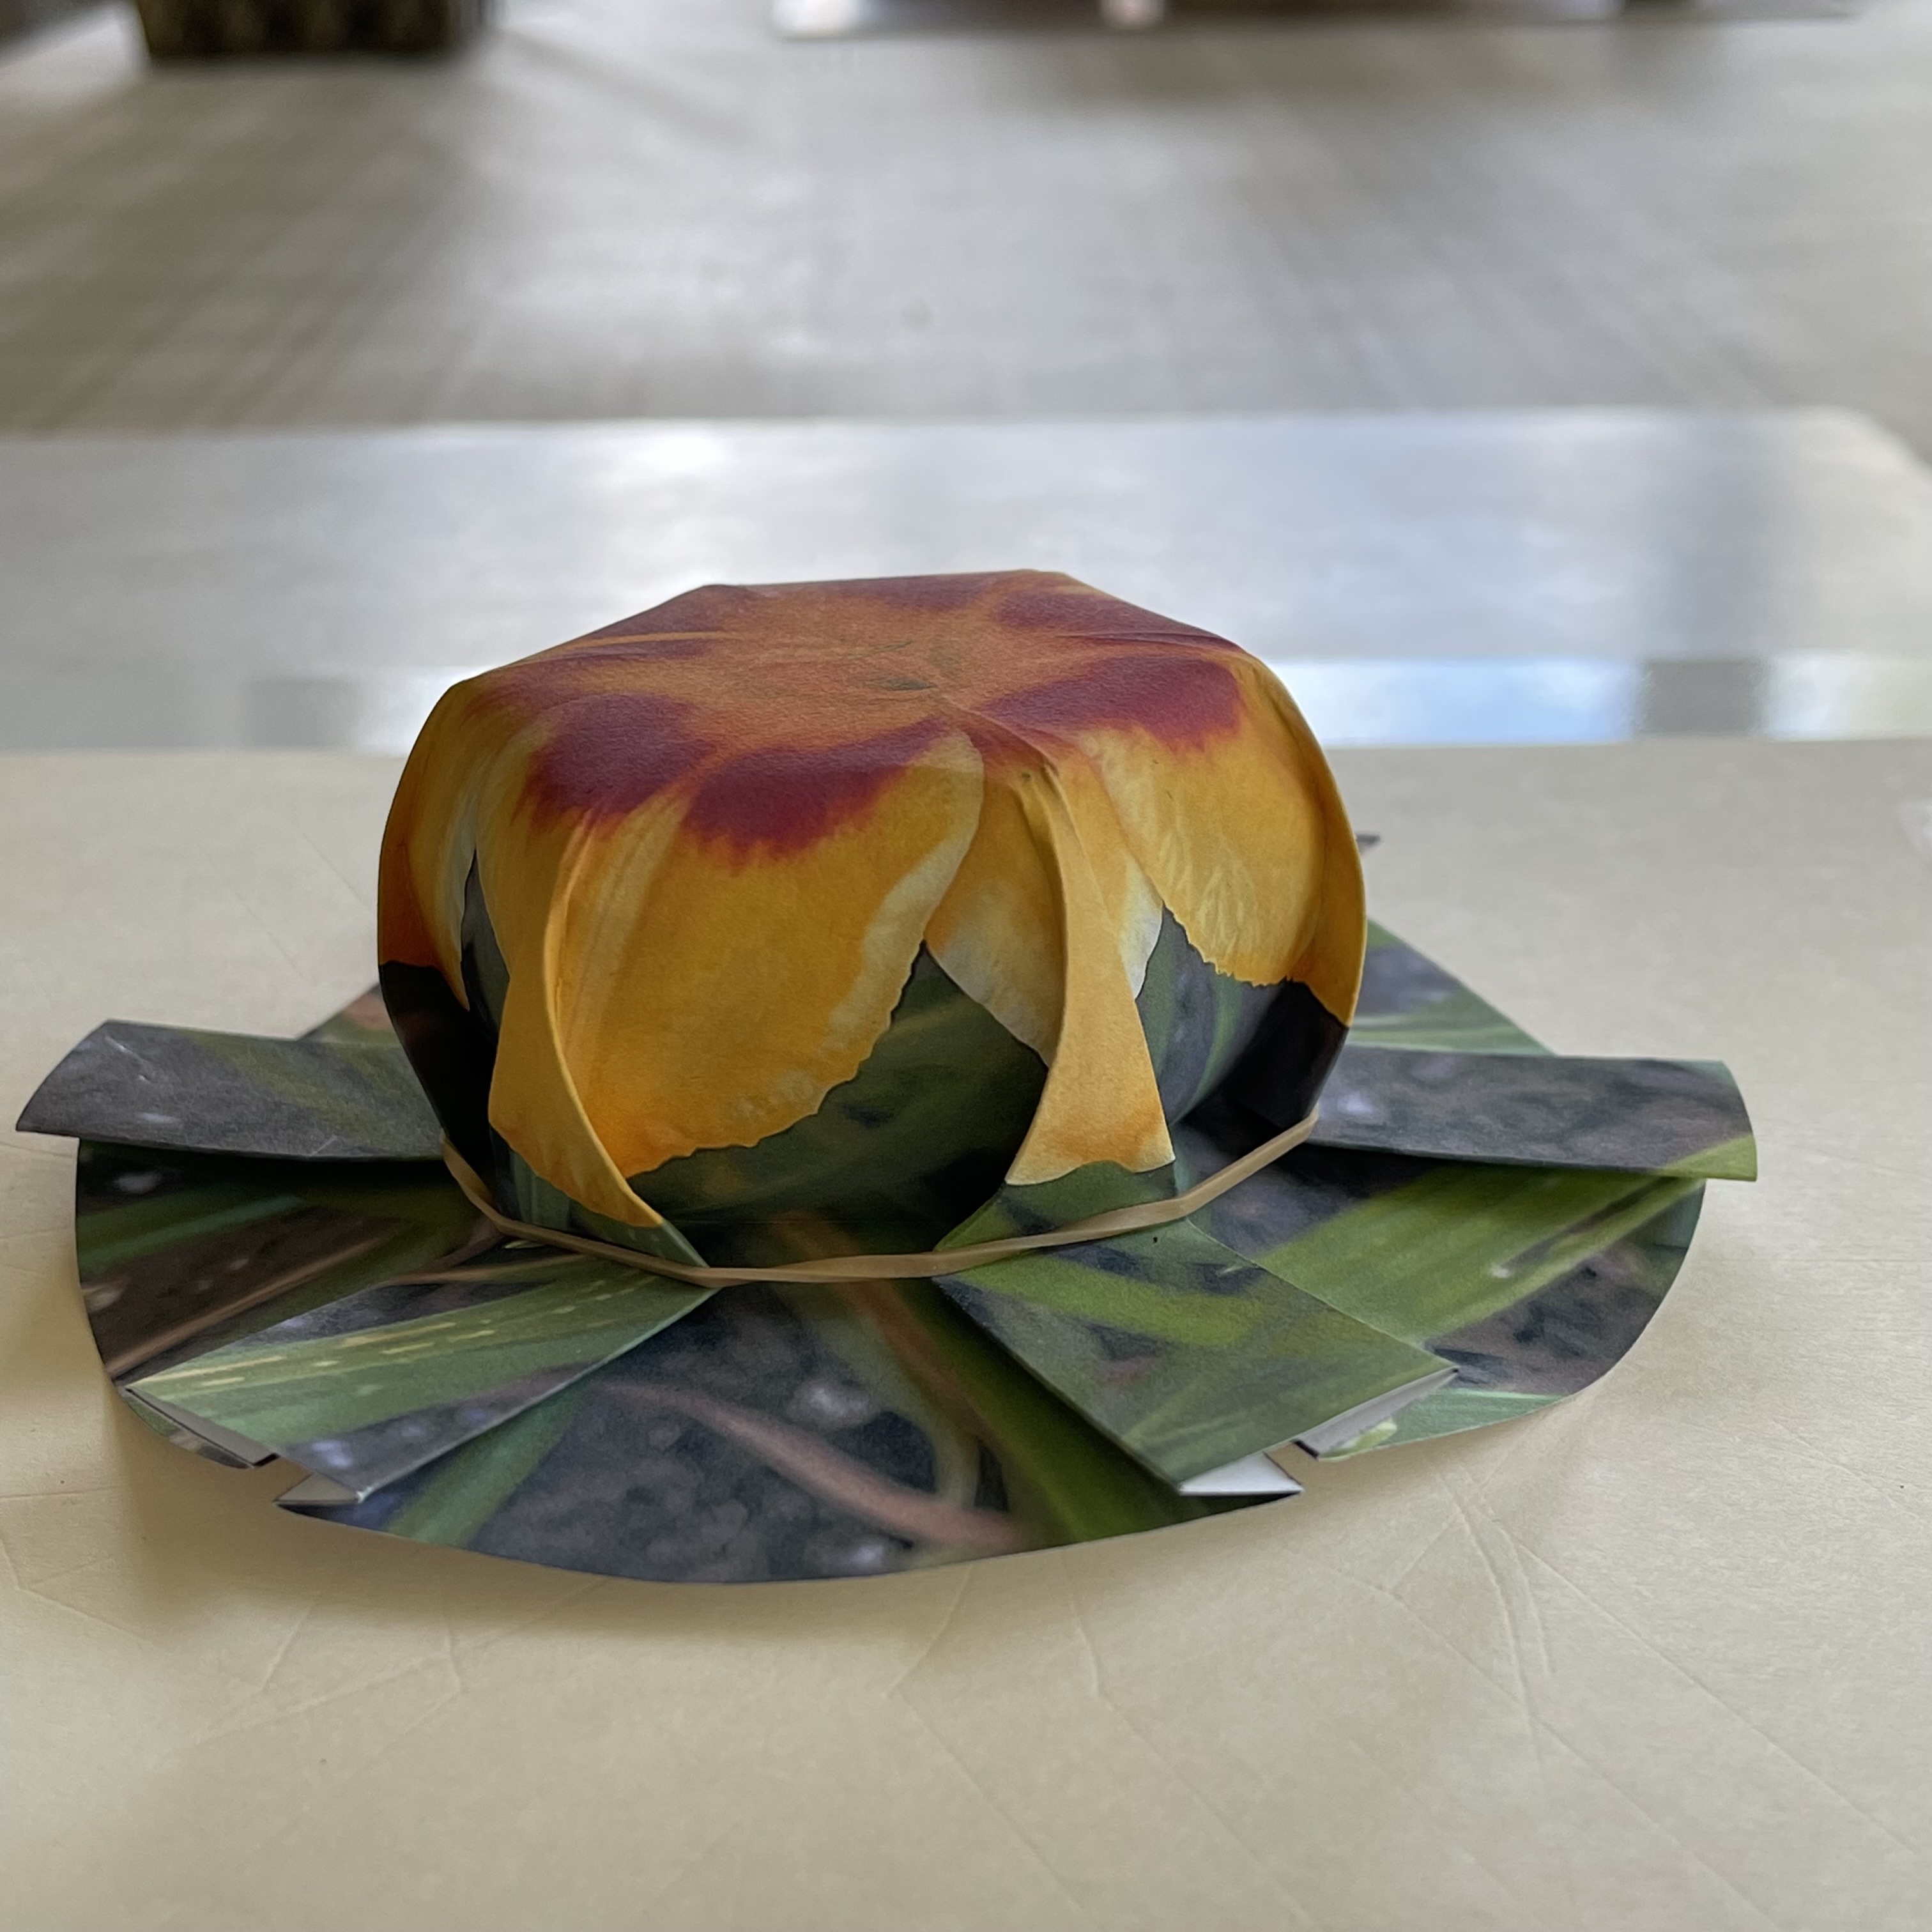
---- Final - Side View ----
click to enlarge
 |
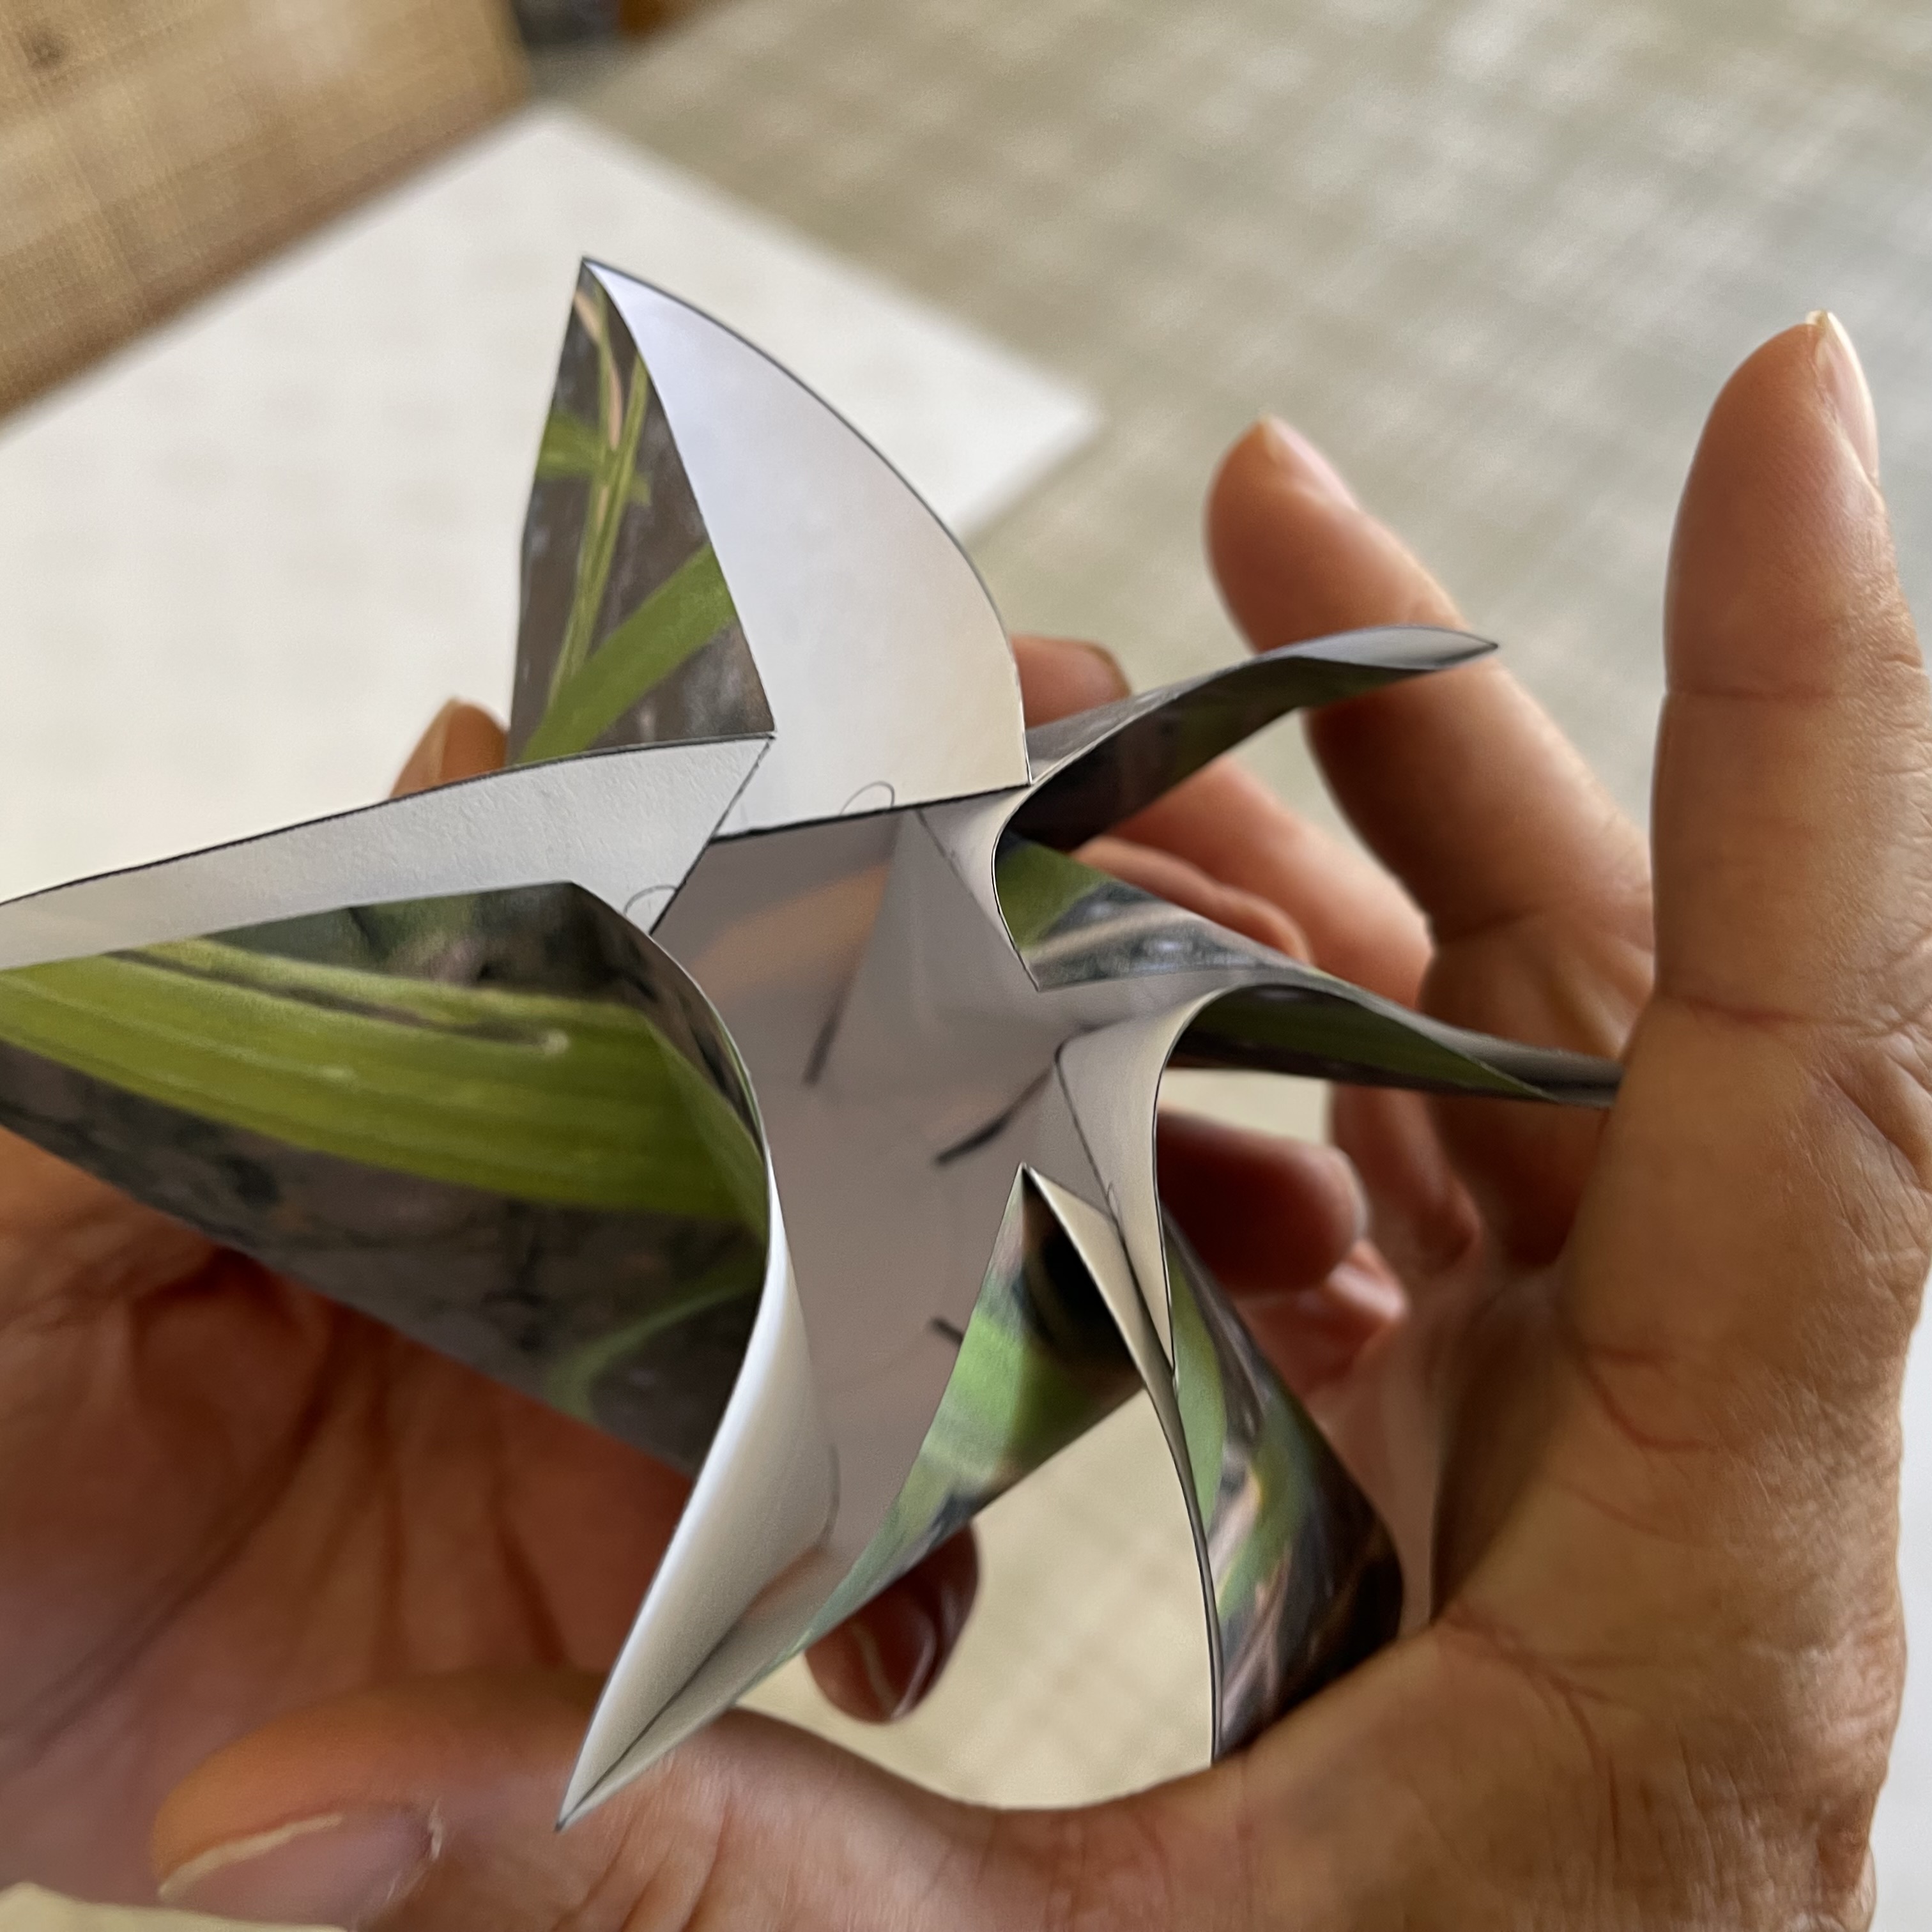
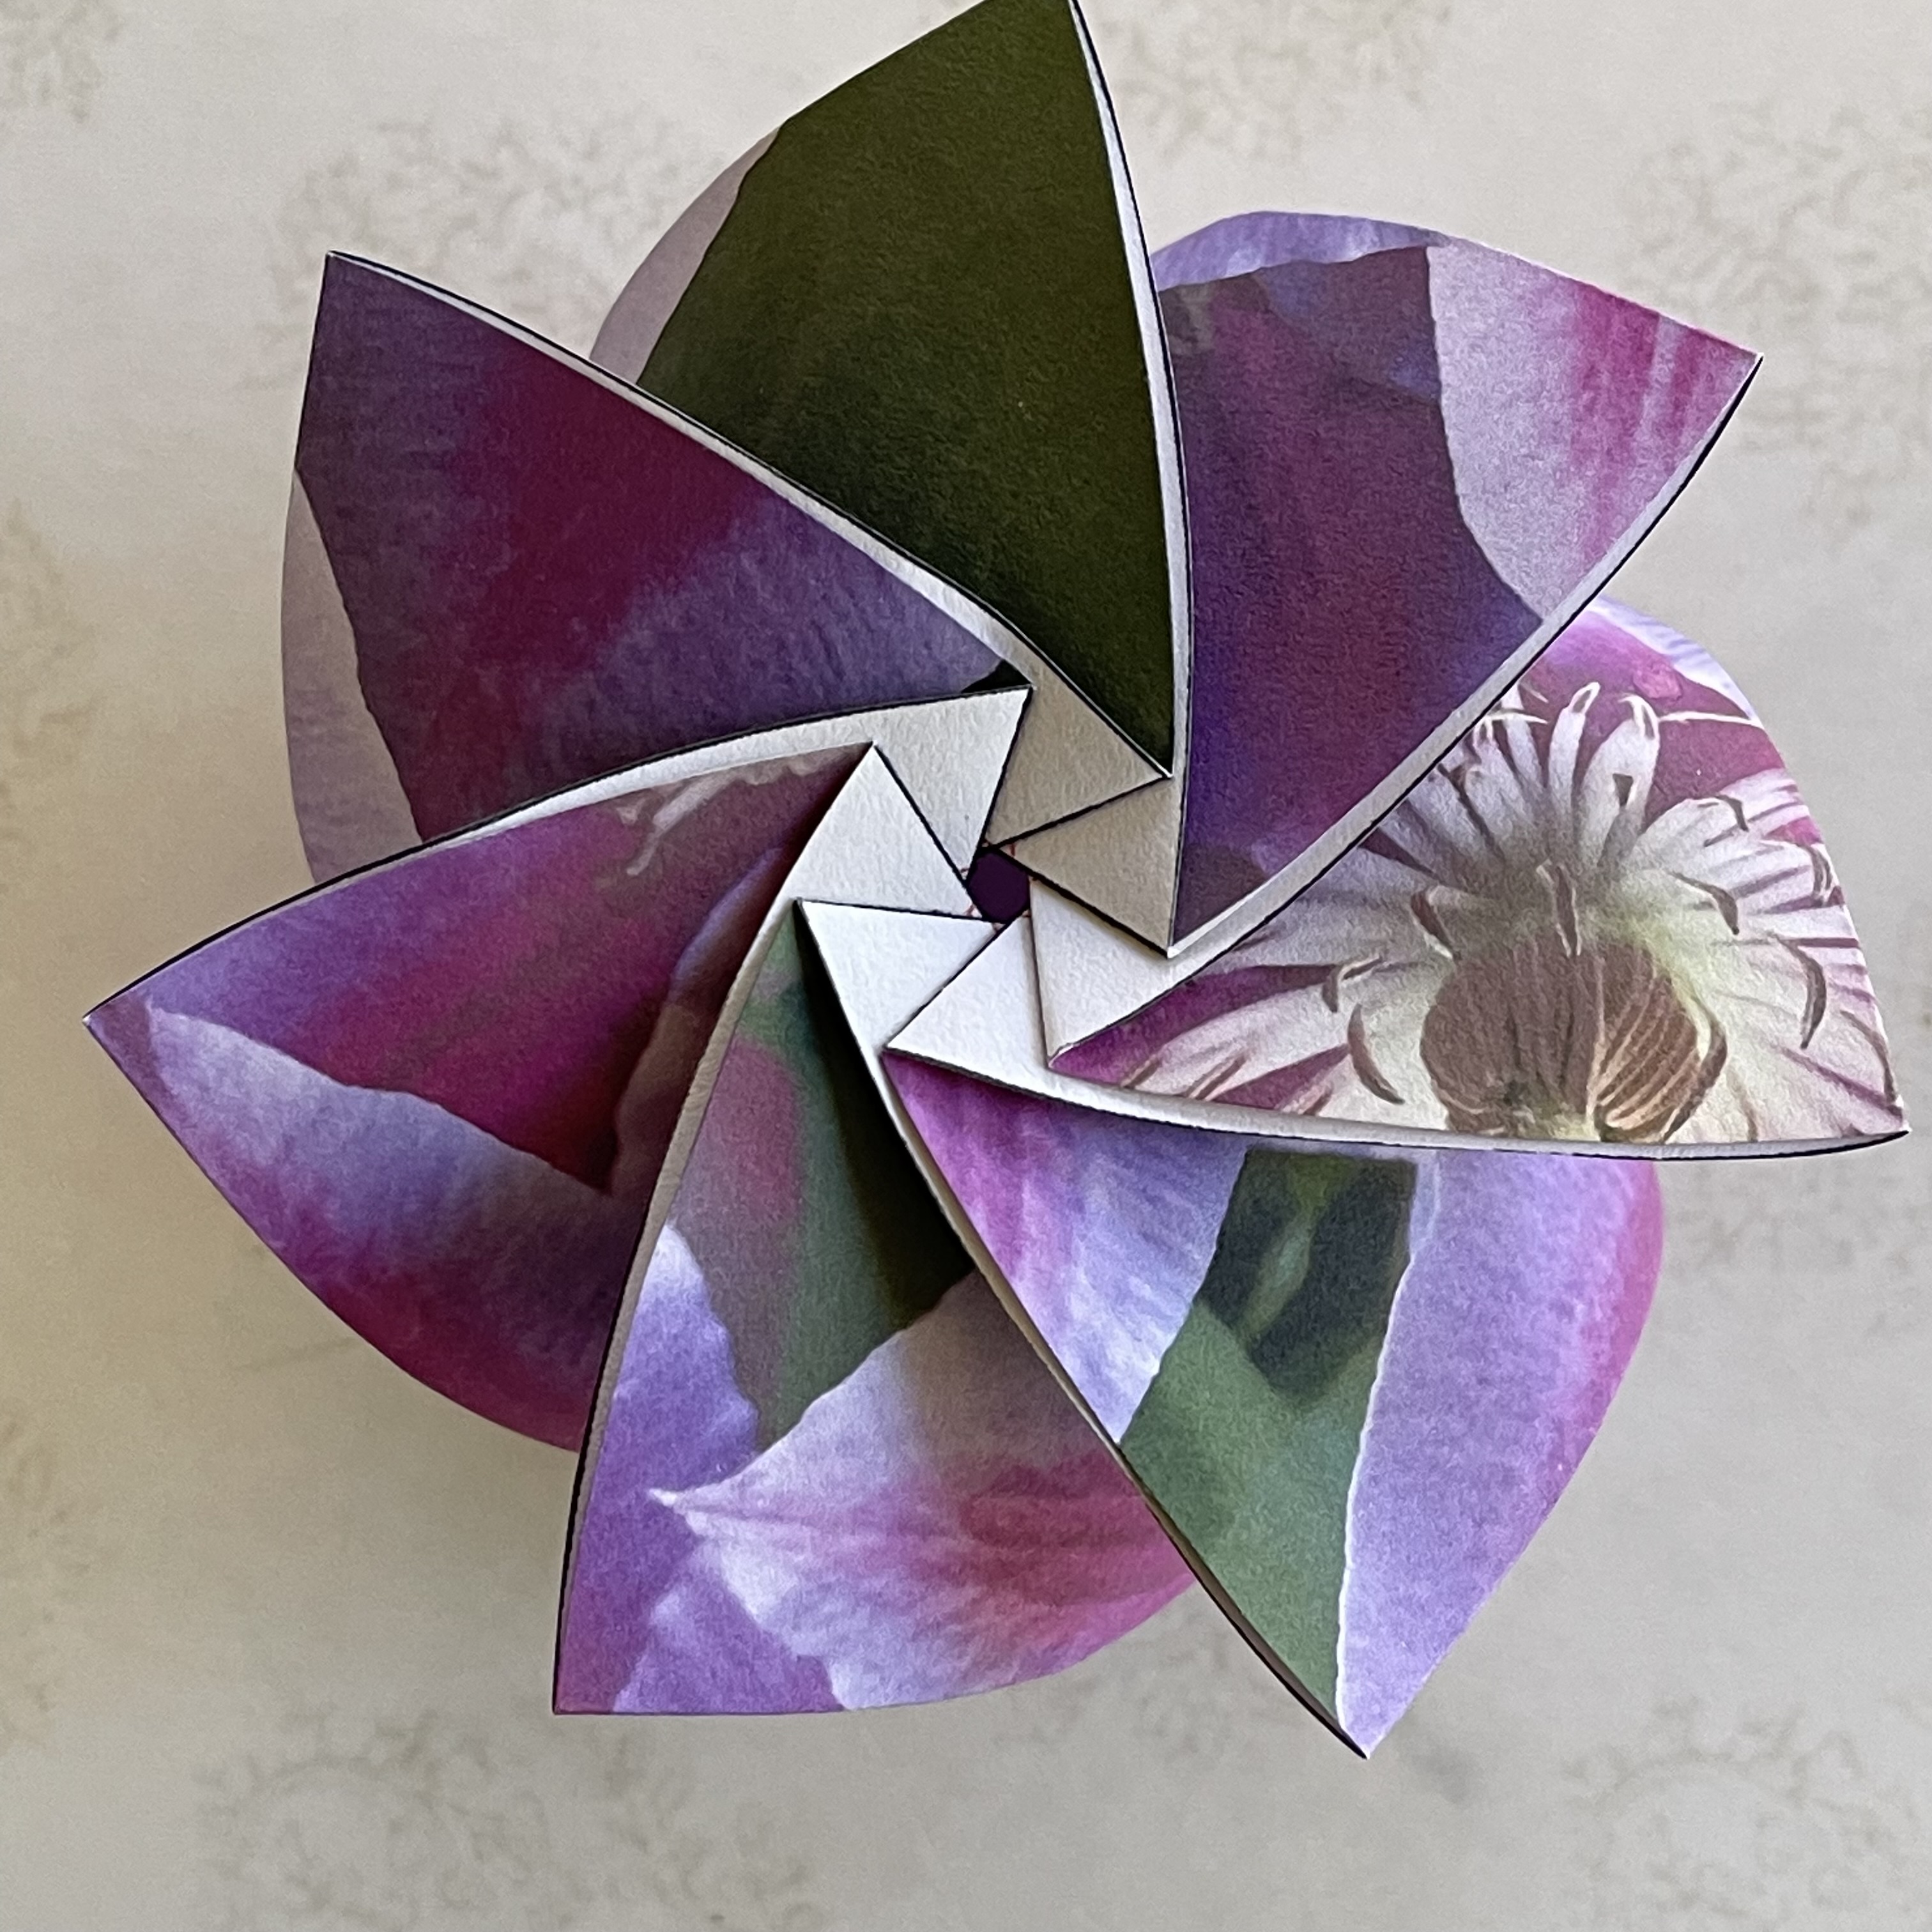
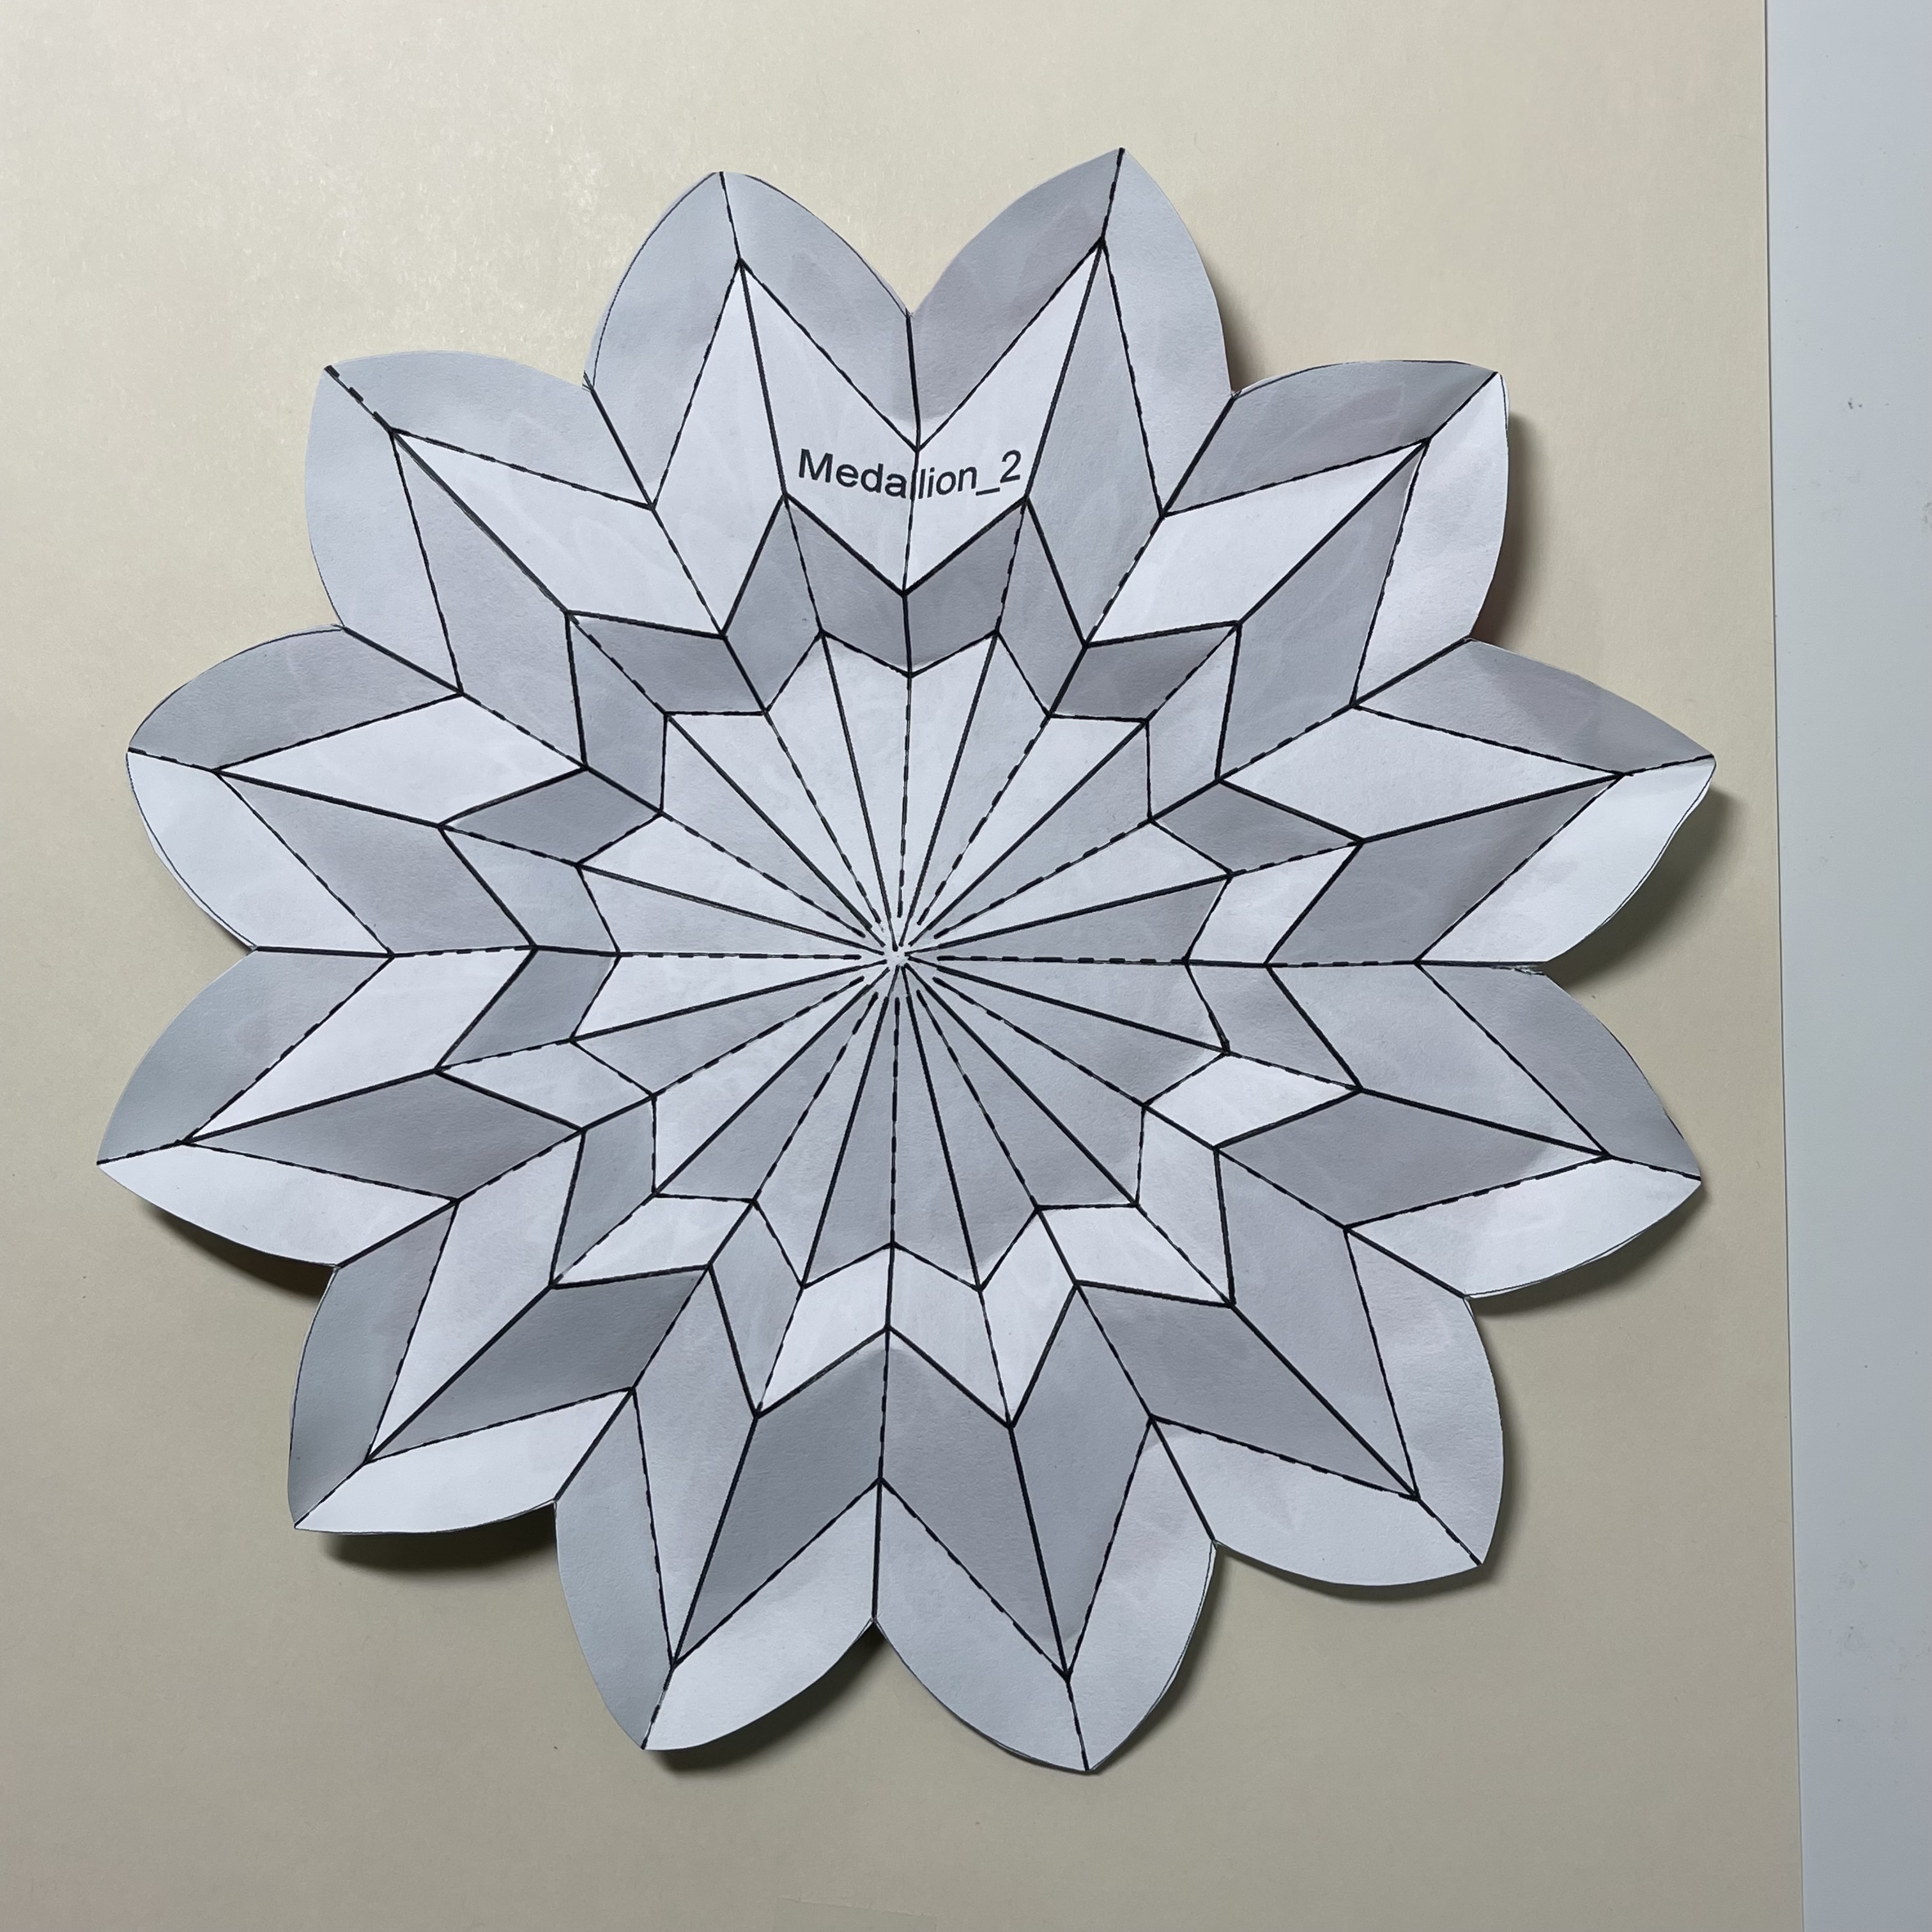
Class-3 is a simple exercise of radial tesselation , and a piece like "Stellar Medallion" in Jun Mitani's Ref[1] is created. All the crease lines are made up of short lines and there is no curved lines. In the class the attendants will work on #1 model, which is easier and more likely to be finished within given time limit. Model #2 is presented here as an advanced exercise for those who finished working on #1 model. |
| Crease Pattern click to enlarge 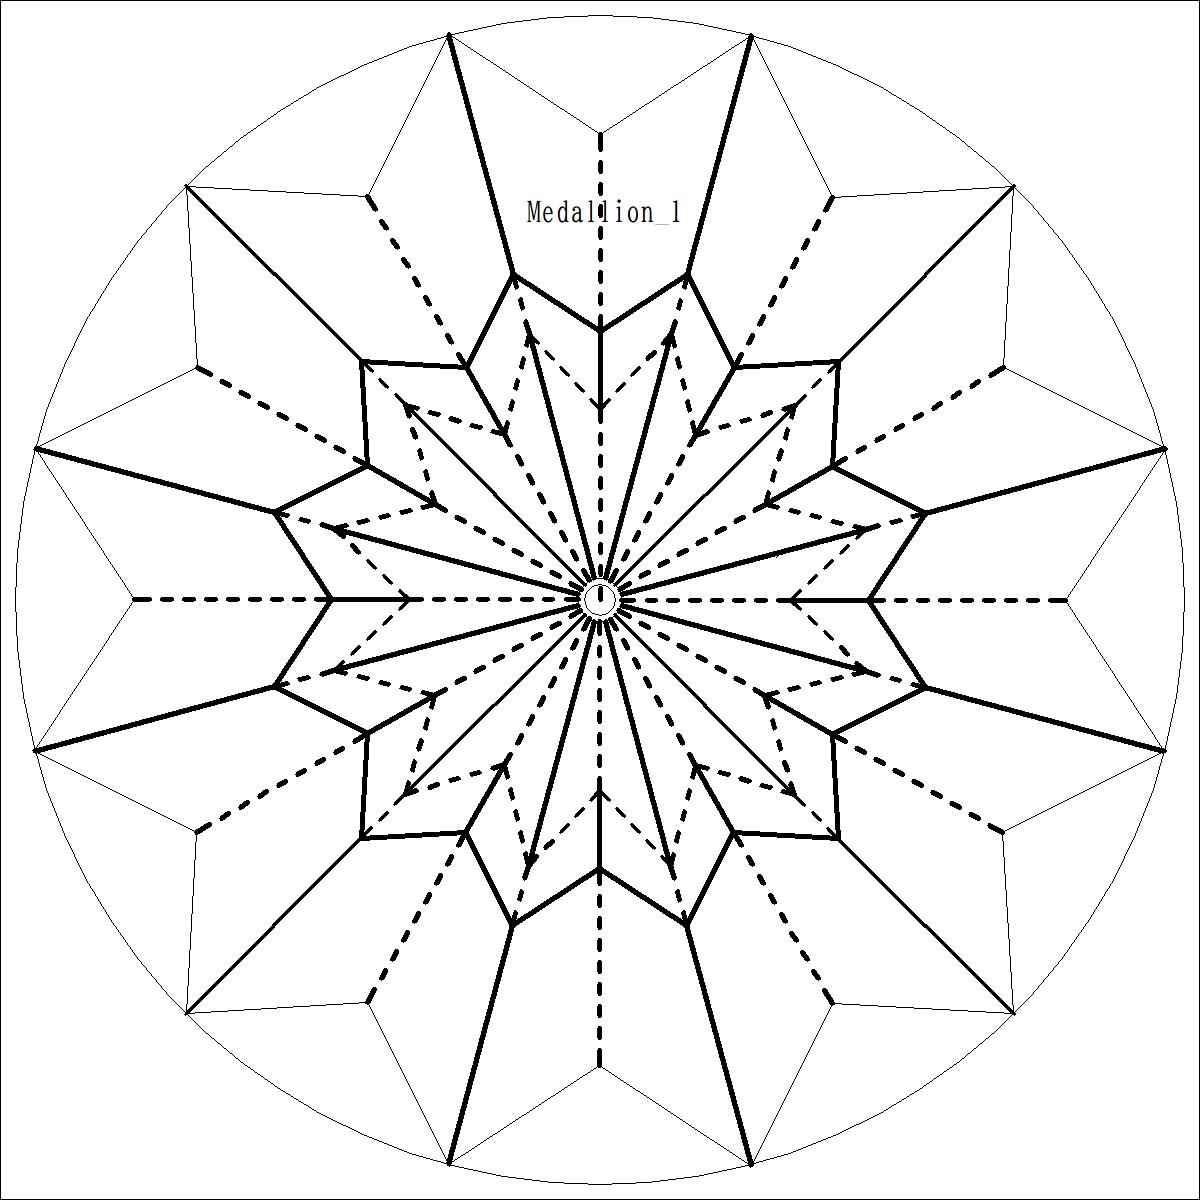 |
Image of Fower click to enlarge 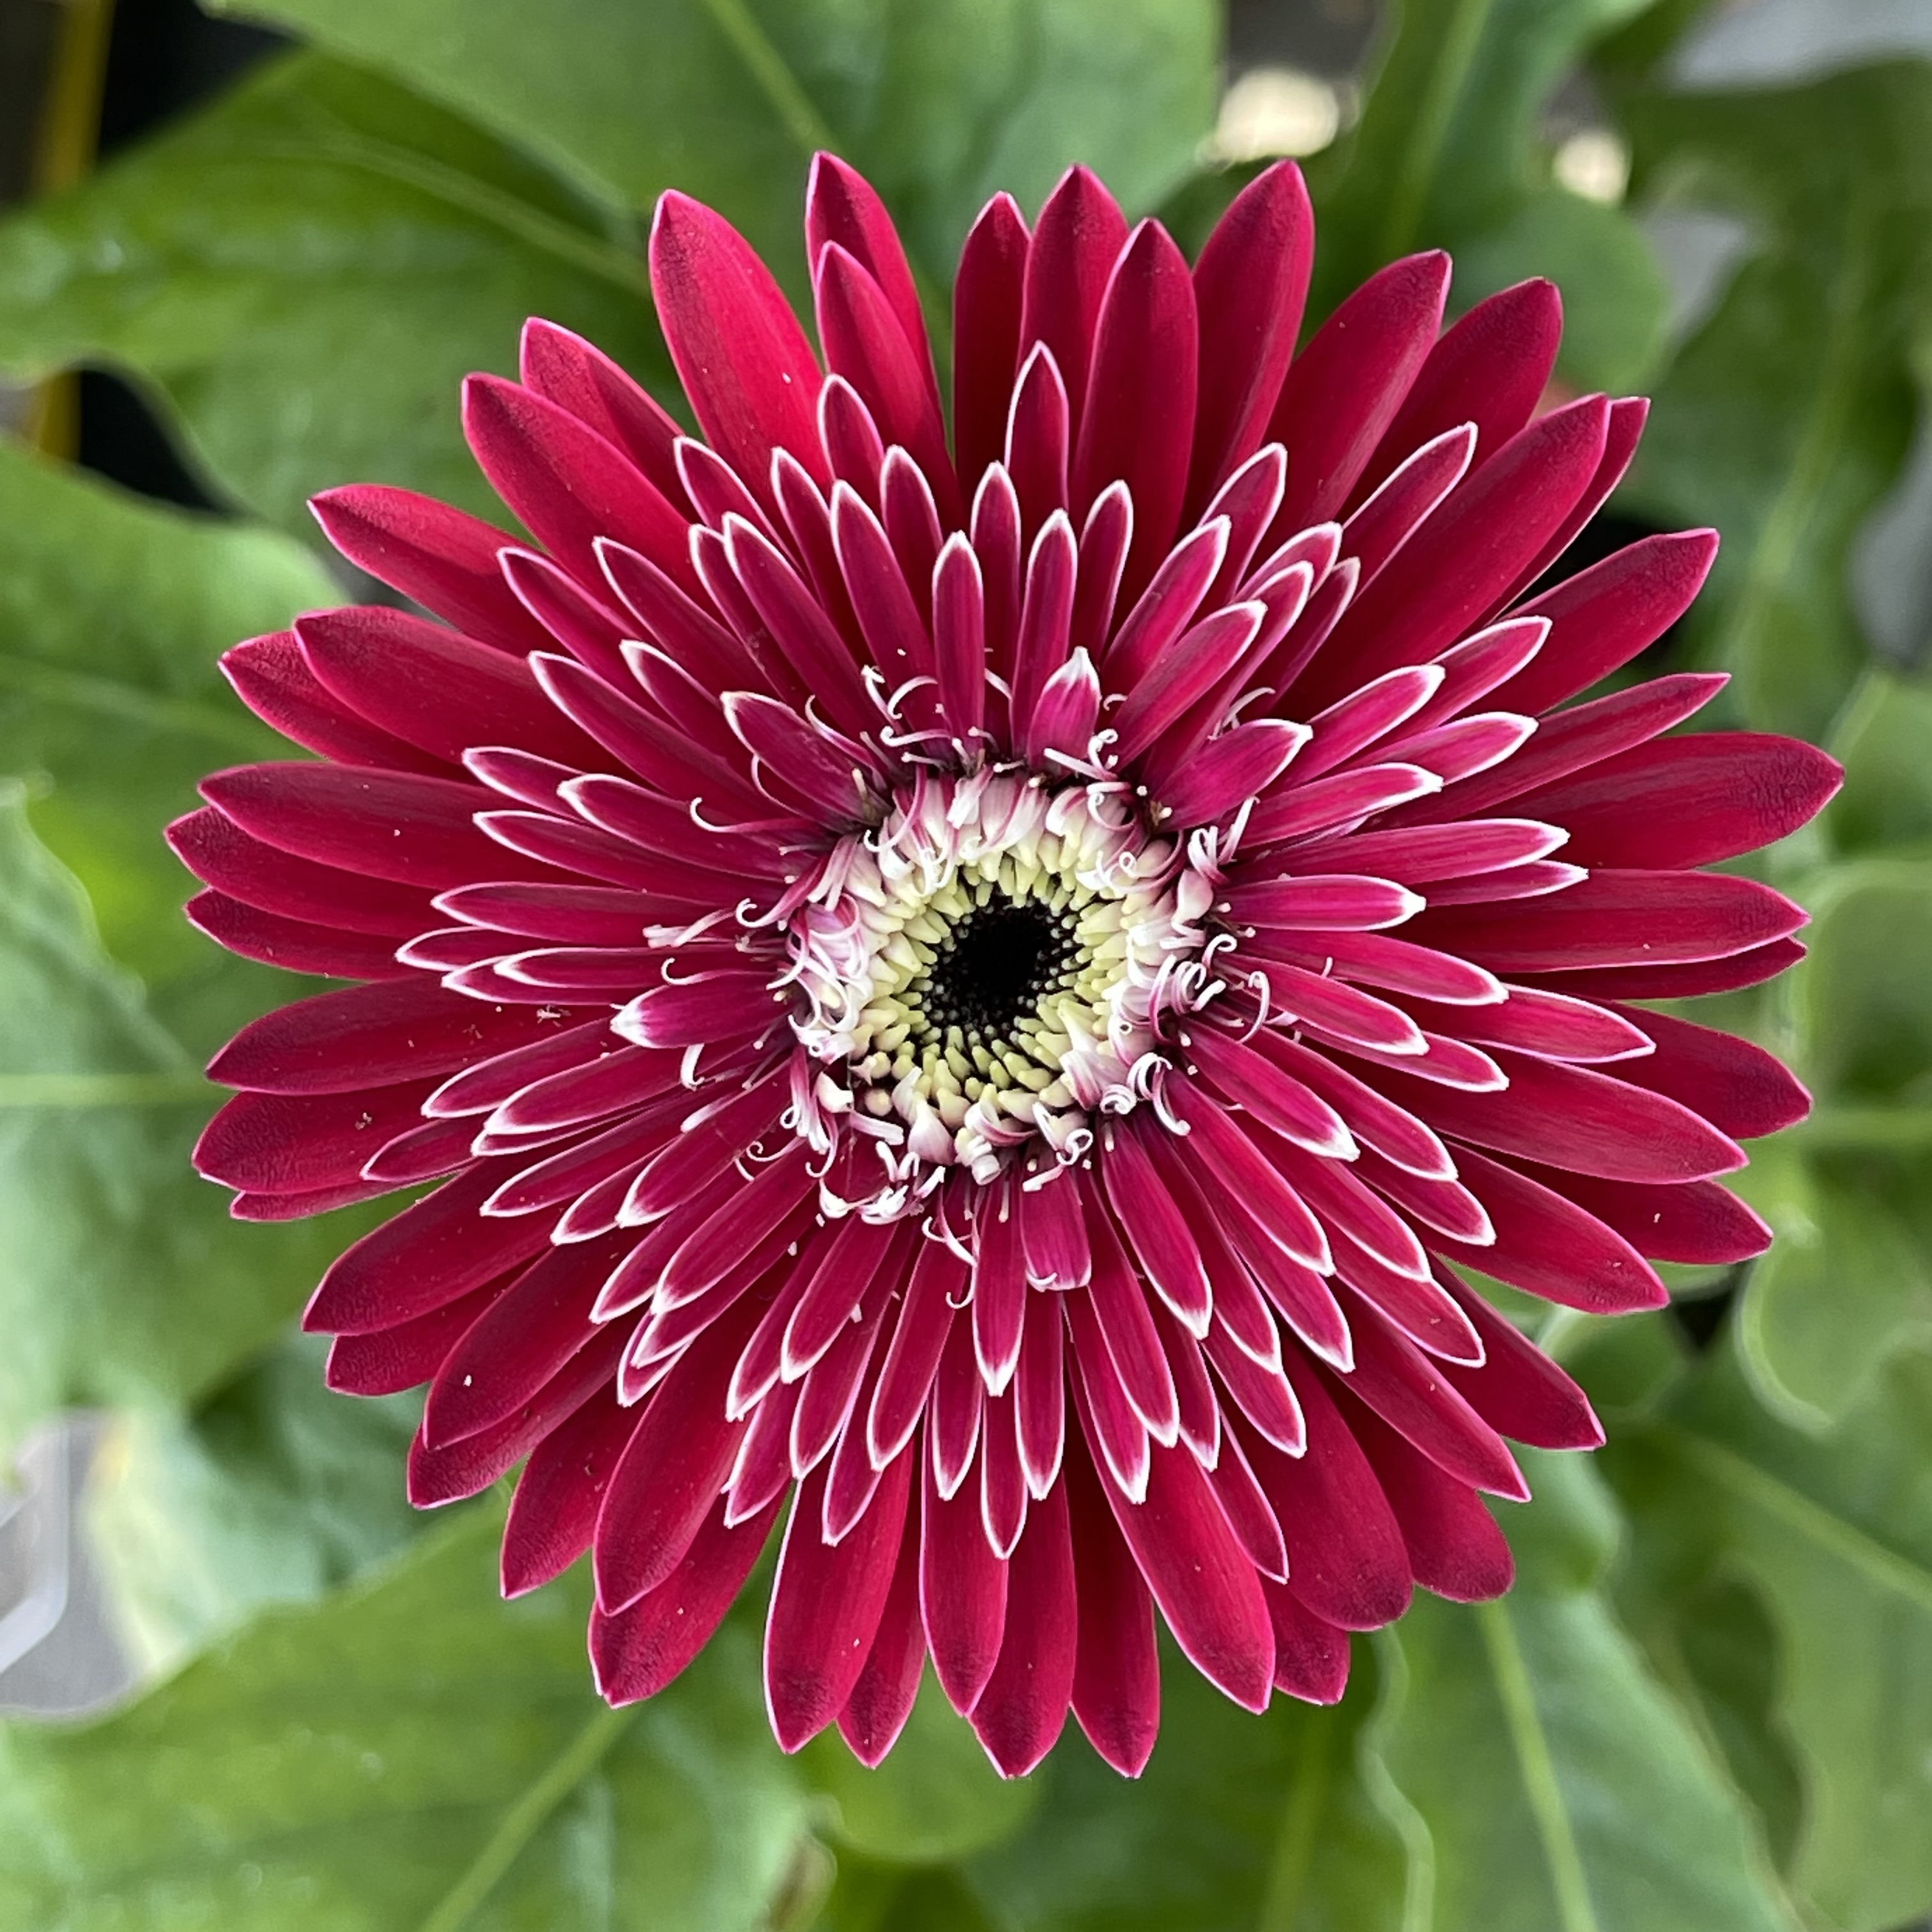 |
Final Appearance click to enlarge 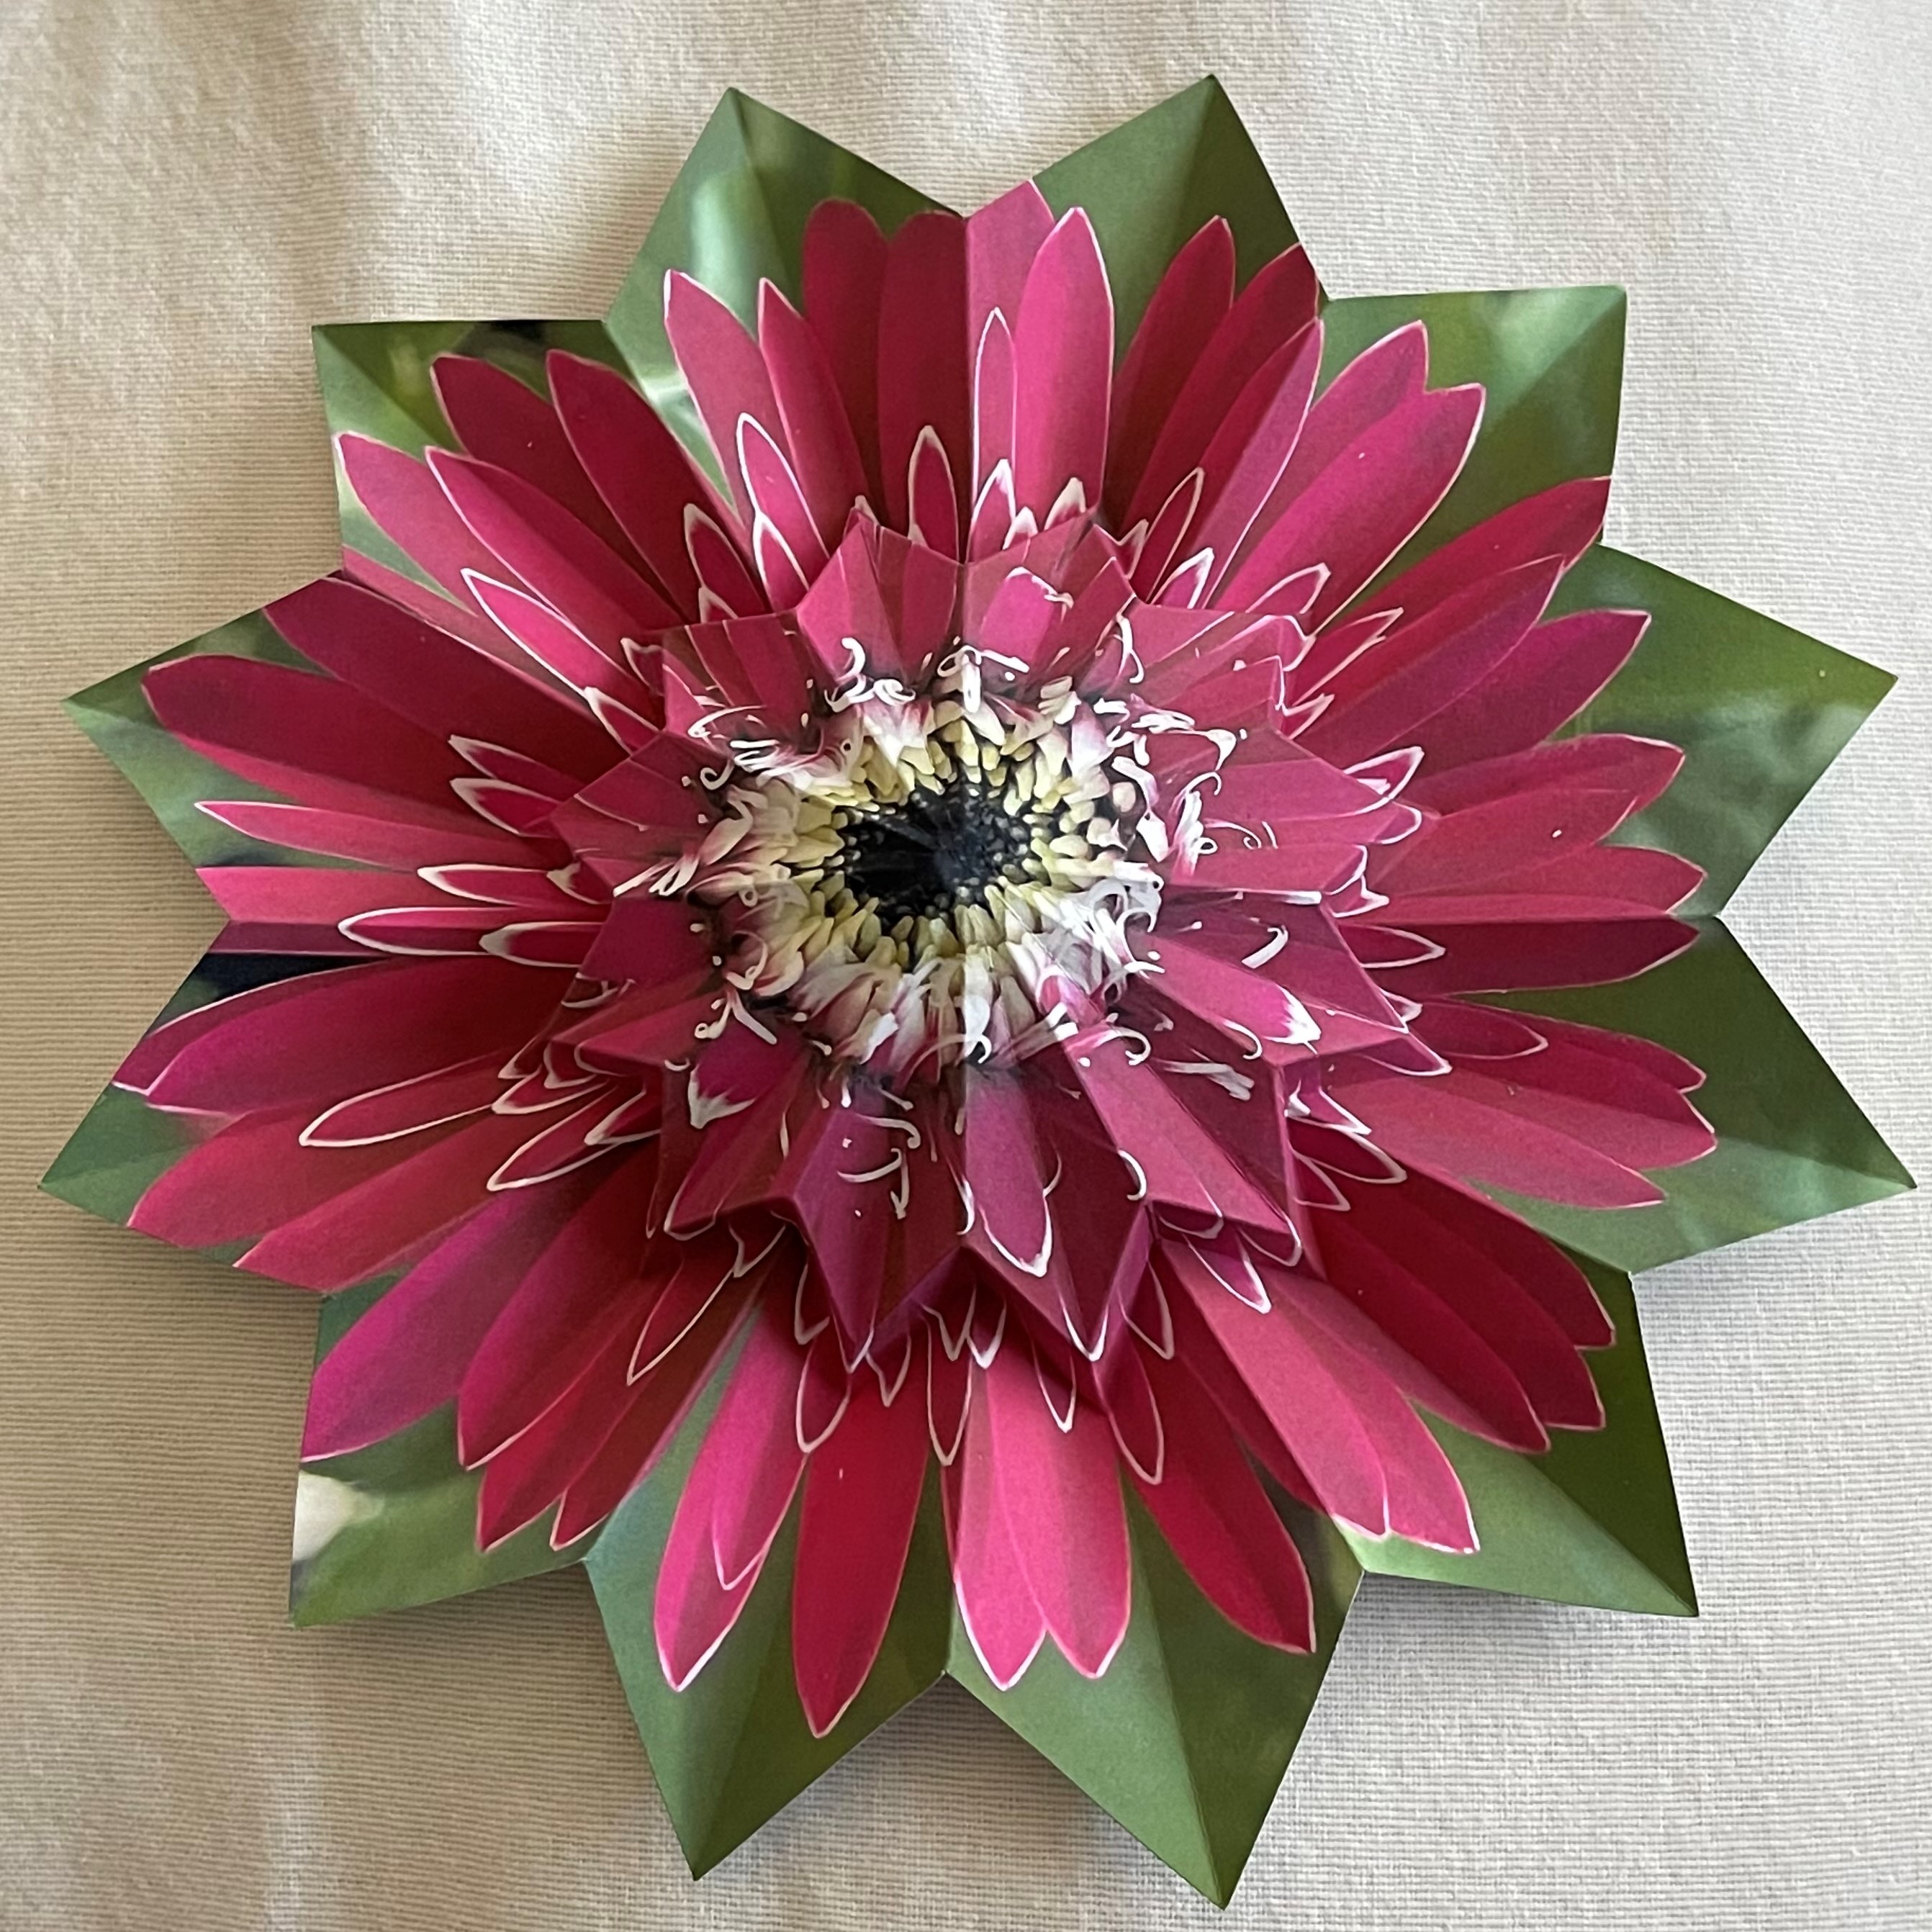 |
| Crease Pattern click to enlarge 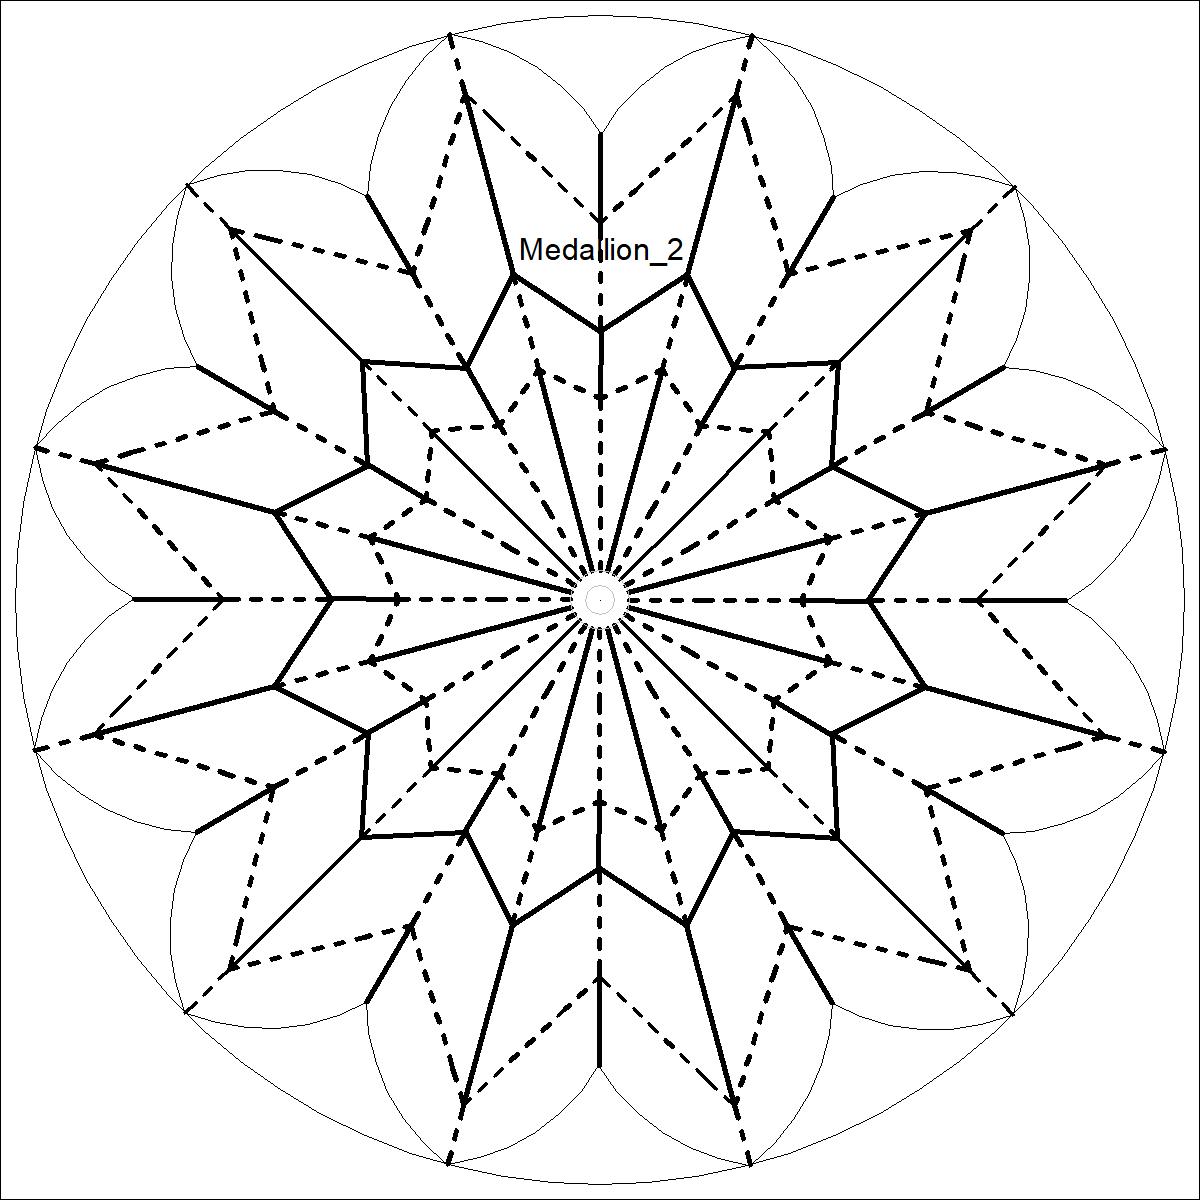 |
Image of Fower click to enlarge |
Final Appearance click to enlarge 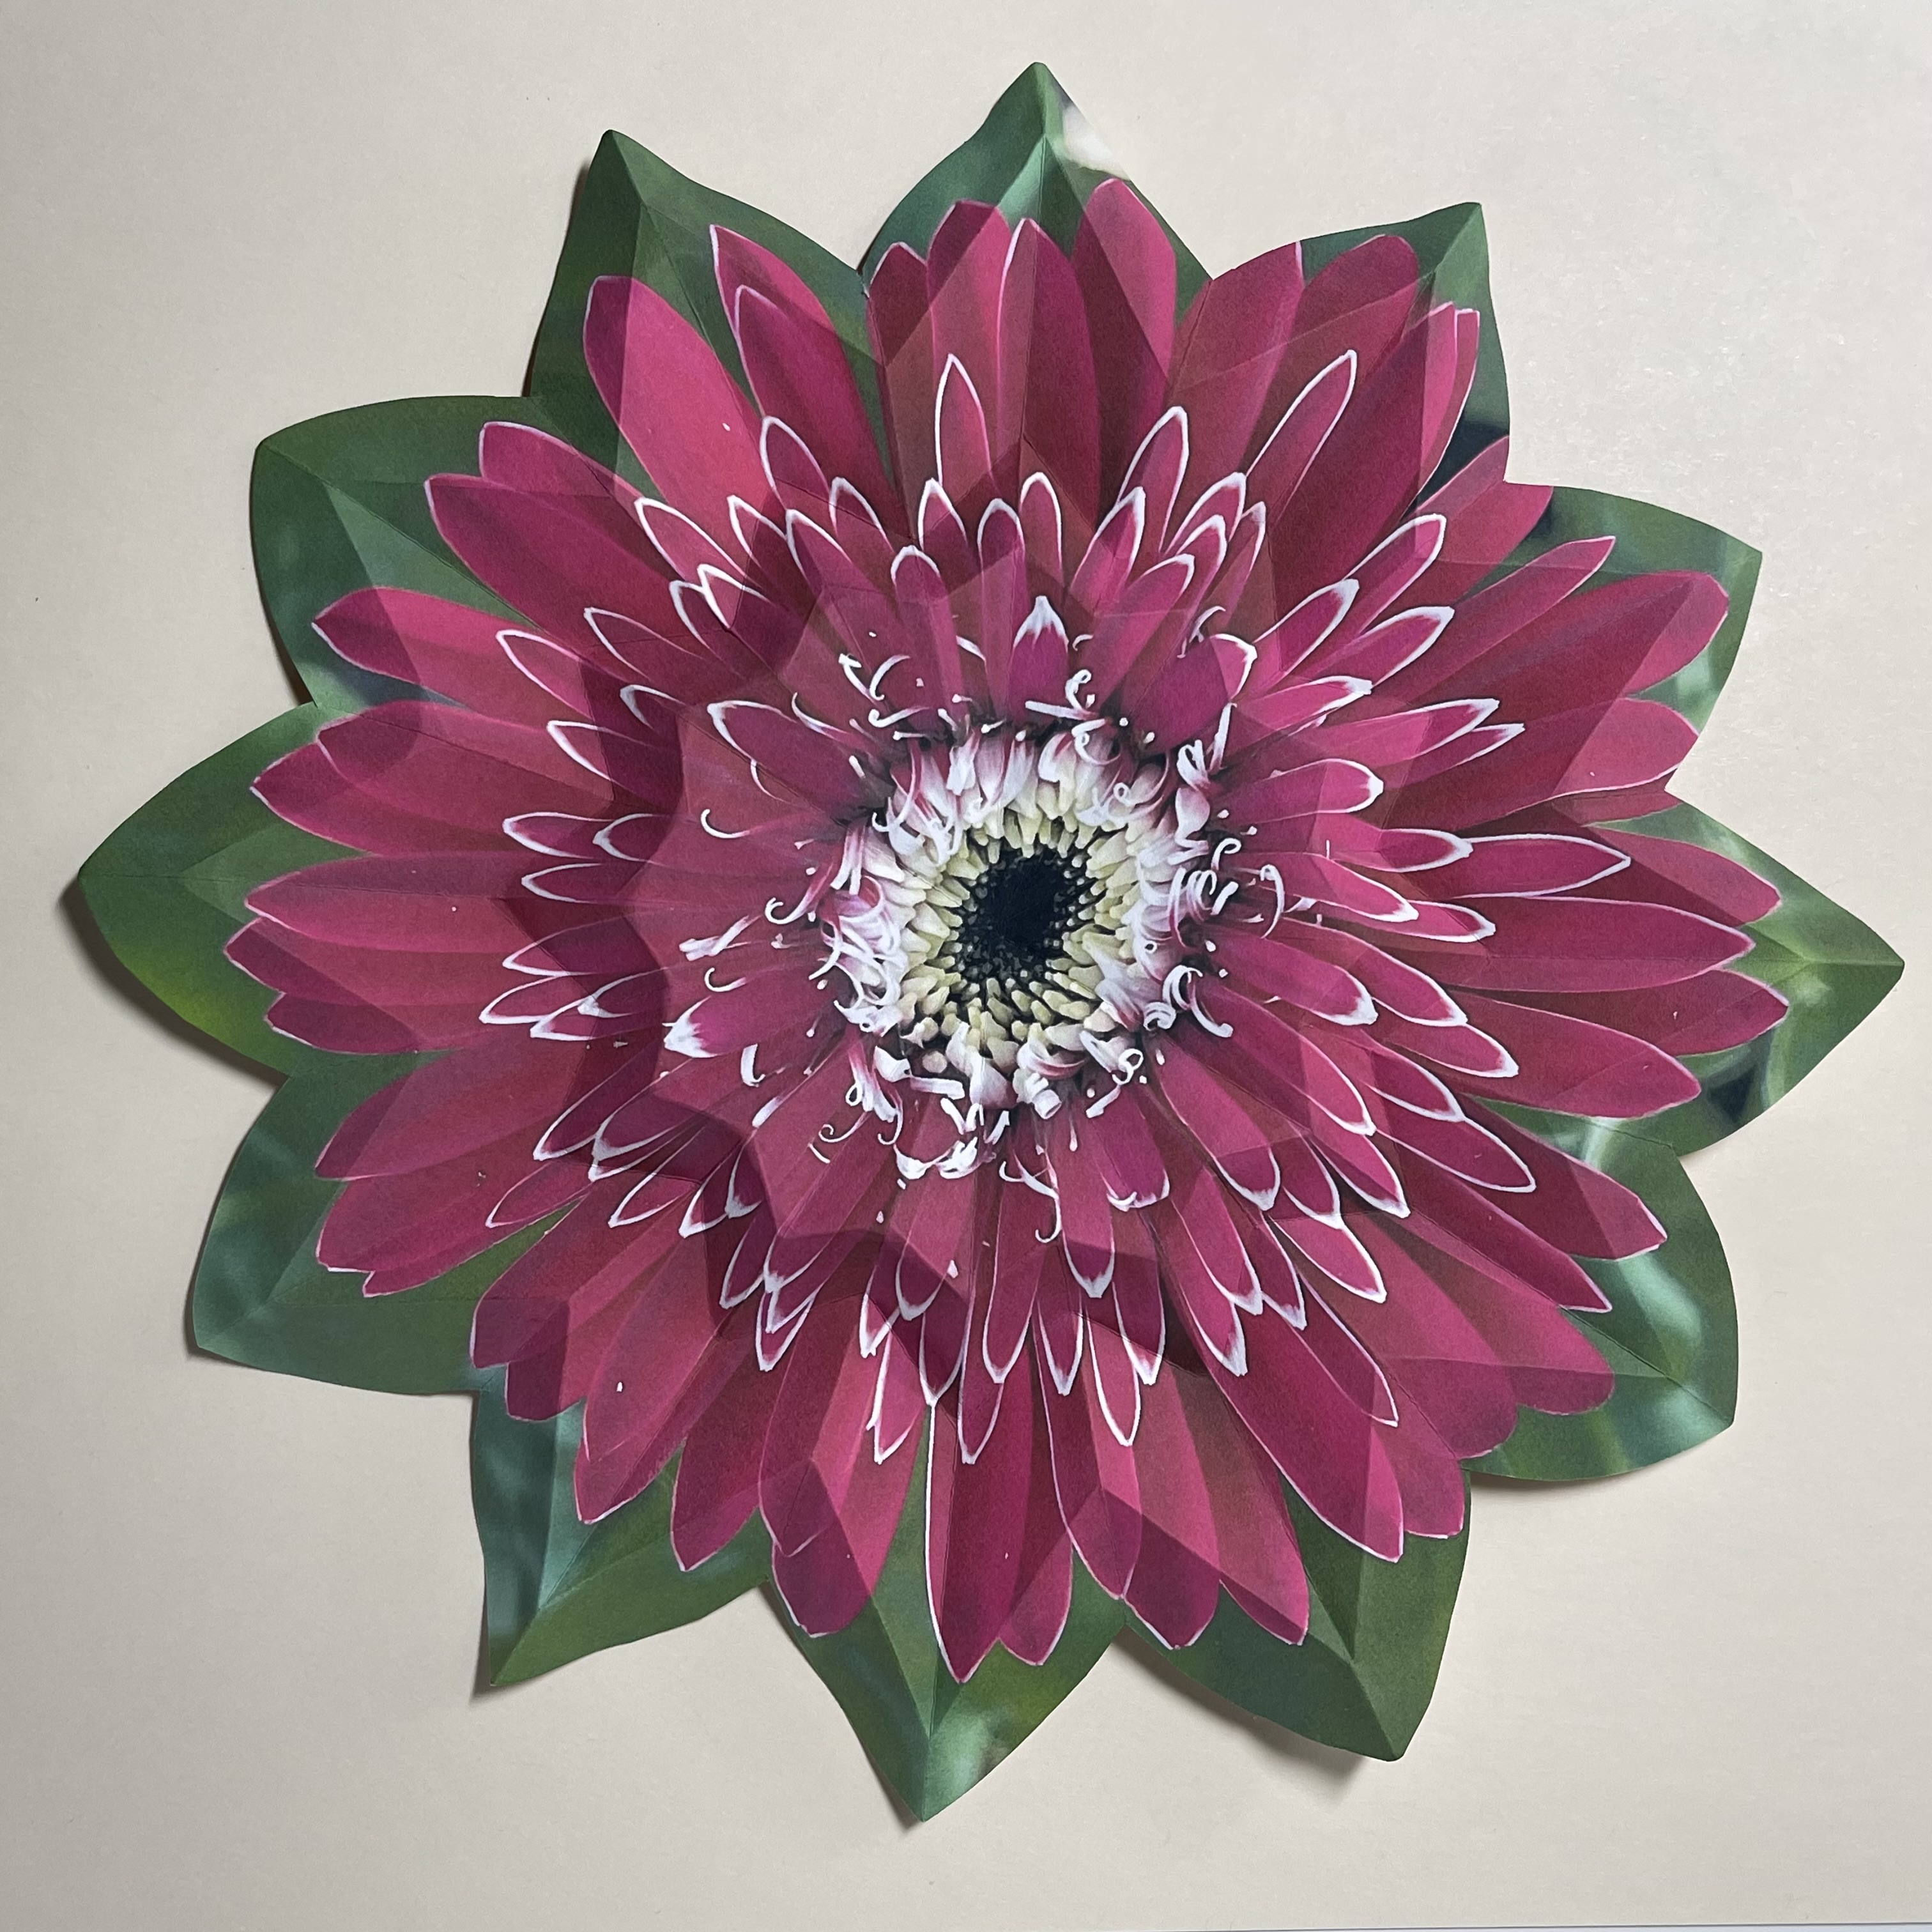 |
Download the following files.
(1) Diagram pattern drawing
    Drawing file (if the environment to handle DWG and/or DXF file is available)
	Down load  Medallion_1.dwg
	Down load  Medallion_2.dwg
	or
	Down load  Medallion_1.dxf
	Down load  Medallion_2.dxf
    Diagram pattern image file (JPG)
	Down load  Medallion_1.jpg
	Down load  Medallion_2.jpg
(2) Flower image files (JPG)
	Down load  22_class_3_flower.jpg
|
Adding thick paper(32 lb.) under the diagram paper gives a better scoring result because some softness beneath gives a slight dent to the model paper. That will make the pre-creasing process easier. |
There are many lines to score. So it is better to use a simple rule on how to proceed to avoid leaving some lines left unscored. For example, first, score lines which go radially outside (marked "Radial"), then treat lines which go around cumferentially (marked "Circumferential'). This way works better than doing randomly. Just a suggestion. |
| ------ Scoring lines ------ click to enlarge 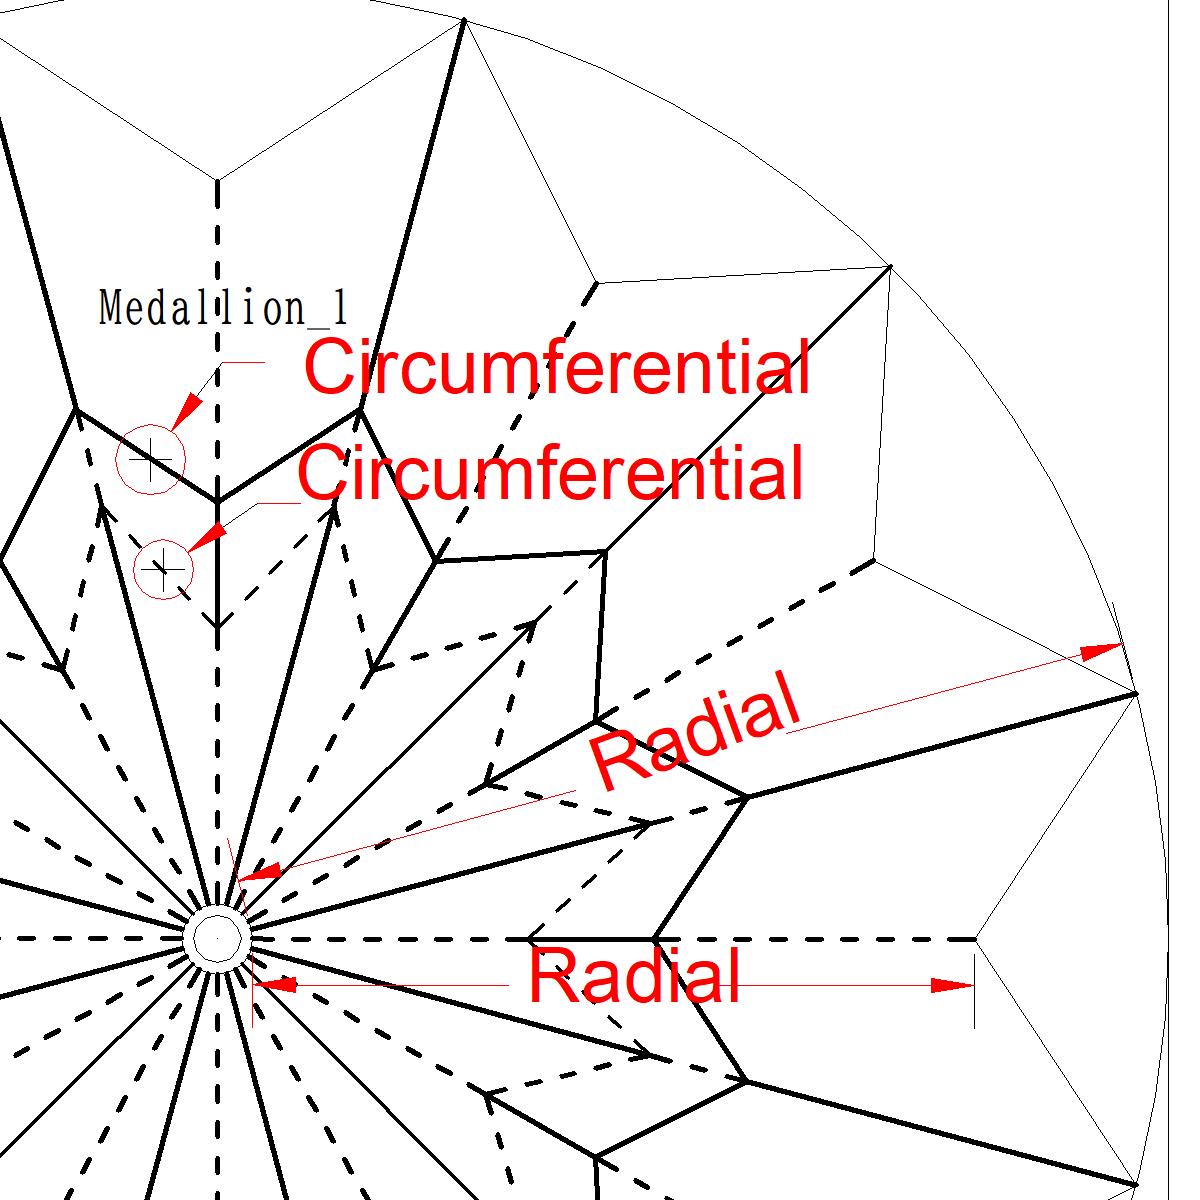 |
Begin Prefolding circumferential lines from the center toward outside . Then work on the radial lines. In this case all precrease is done with diagram-printed side up. After the radial precrease is done , fold the paper along one radial line and cut the peripheral edge. Refer to the picture "Cutting Edges". Since the paper is very sturdy, folding firmly do not break the working paper. The following pictures show all these processes |
| -- Circumferetial Crease --
click to enlarge 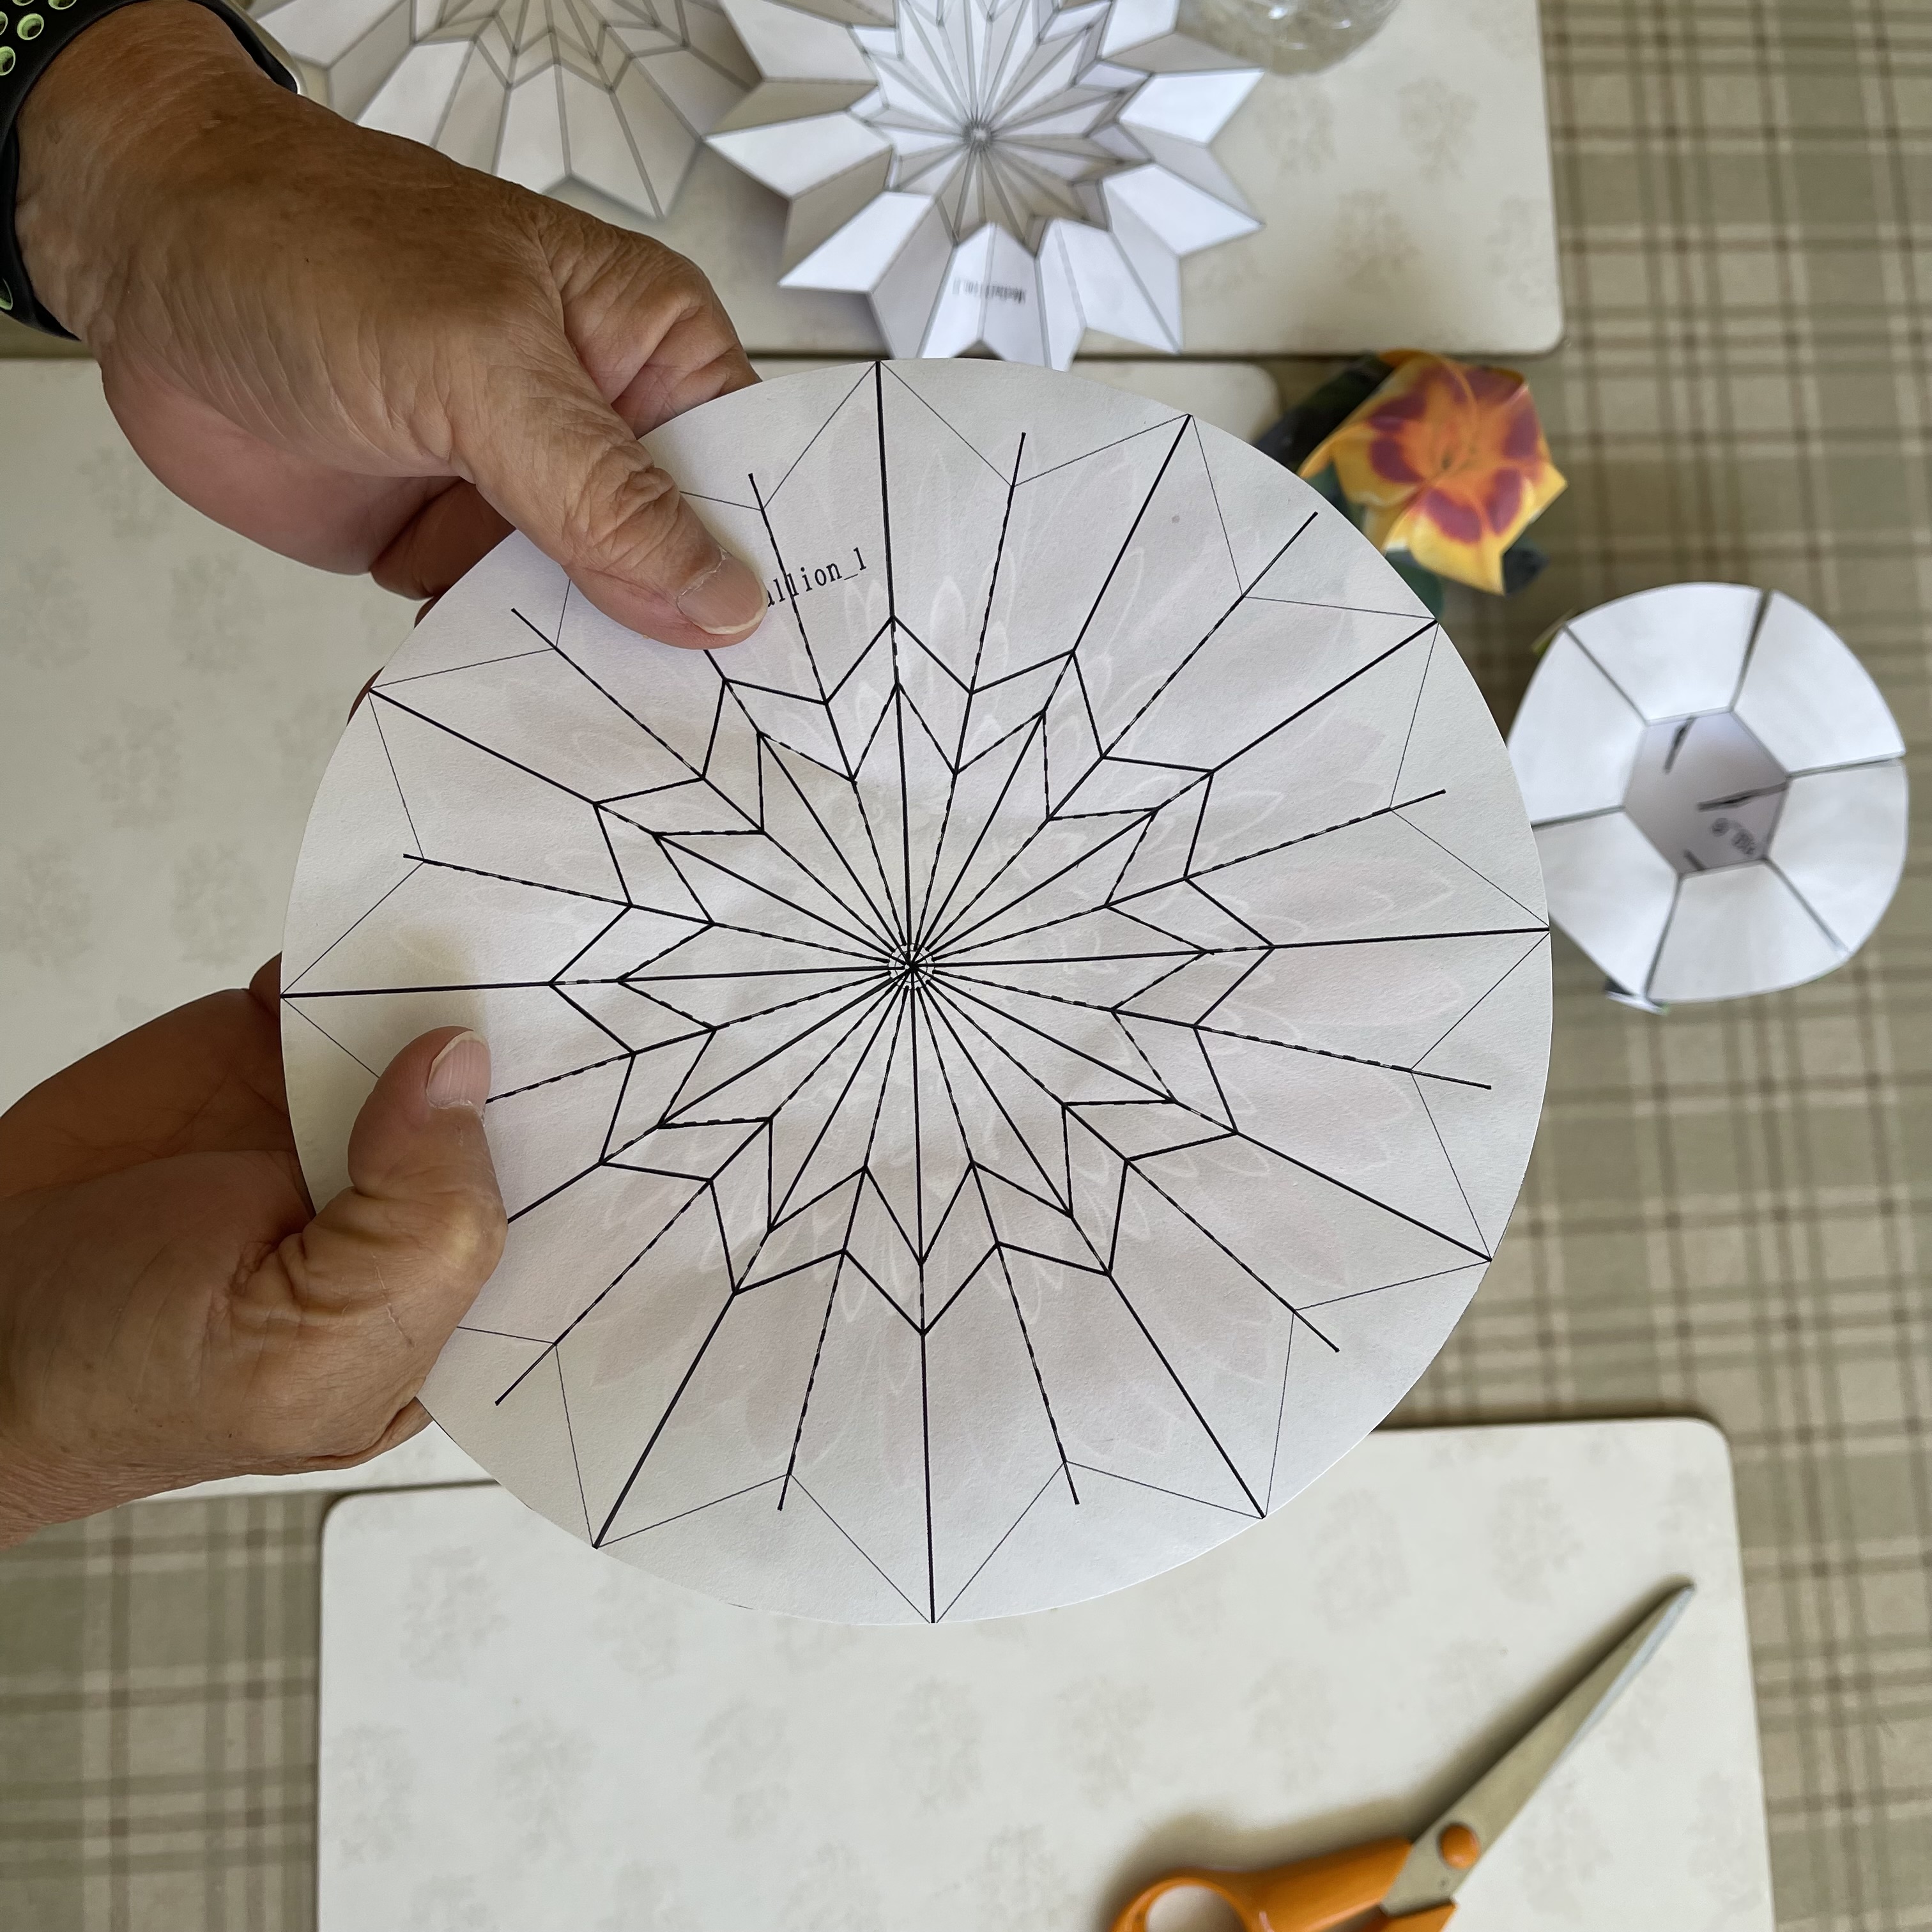 |
-- Circumferetial Crease --
click to enlarge 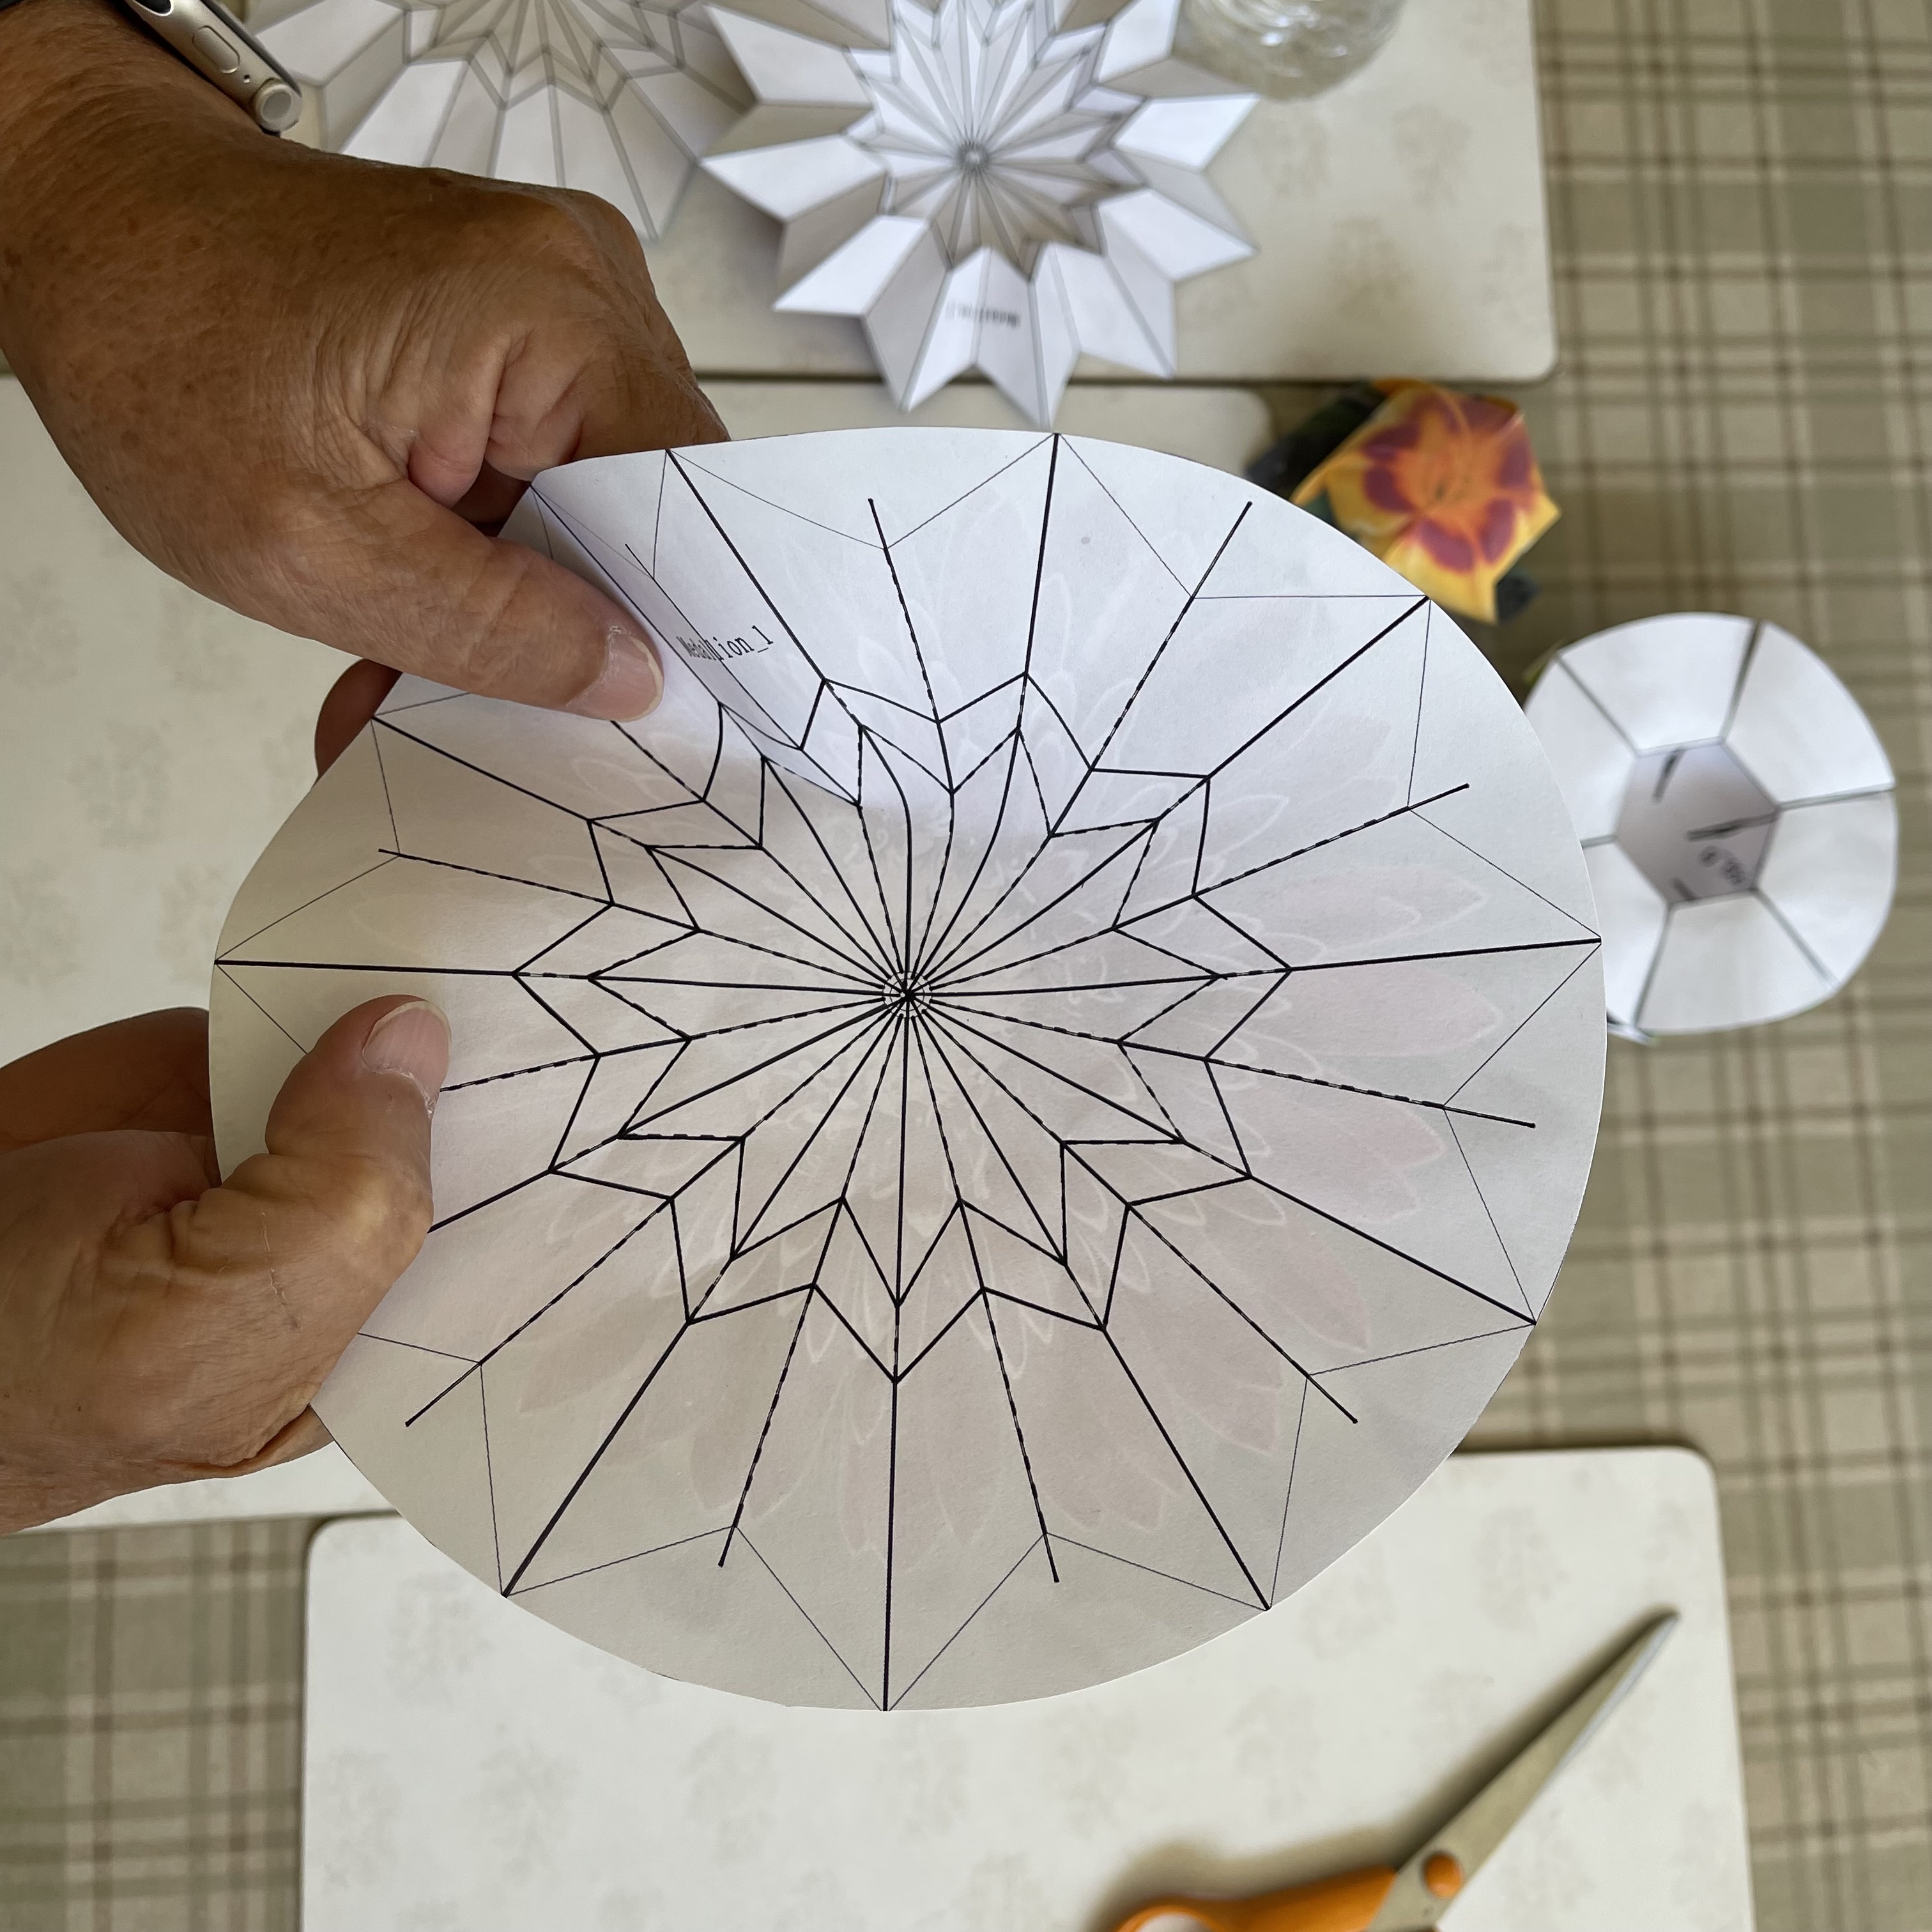 |
-- Cutting Edges --
click to enlarge 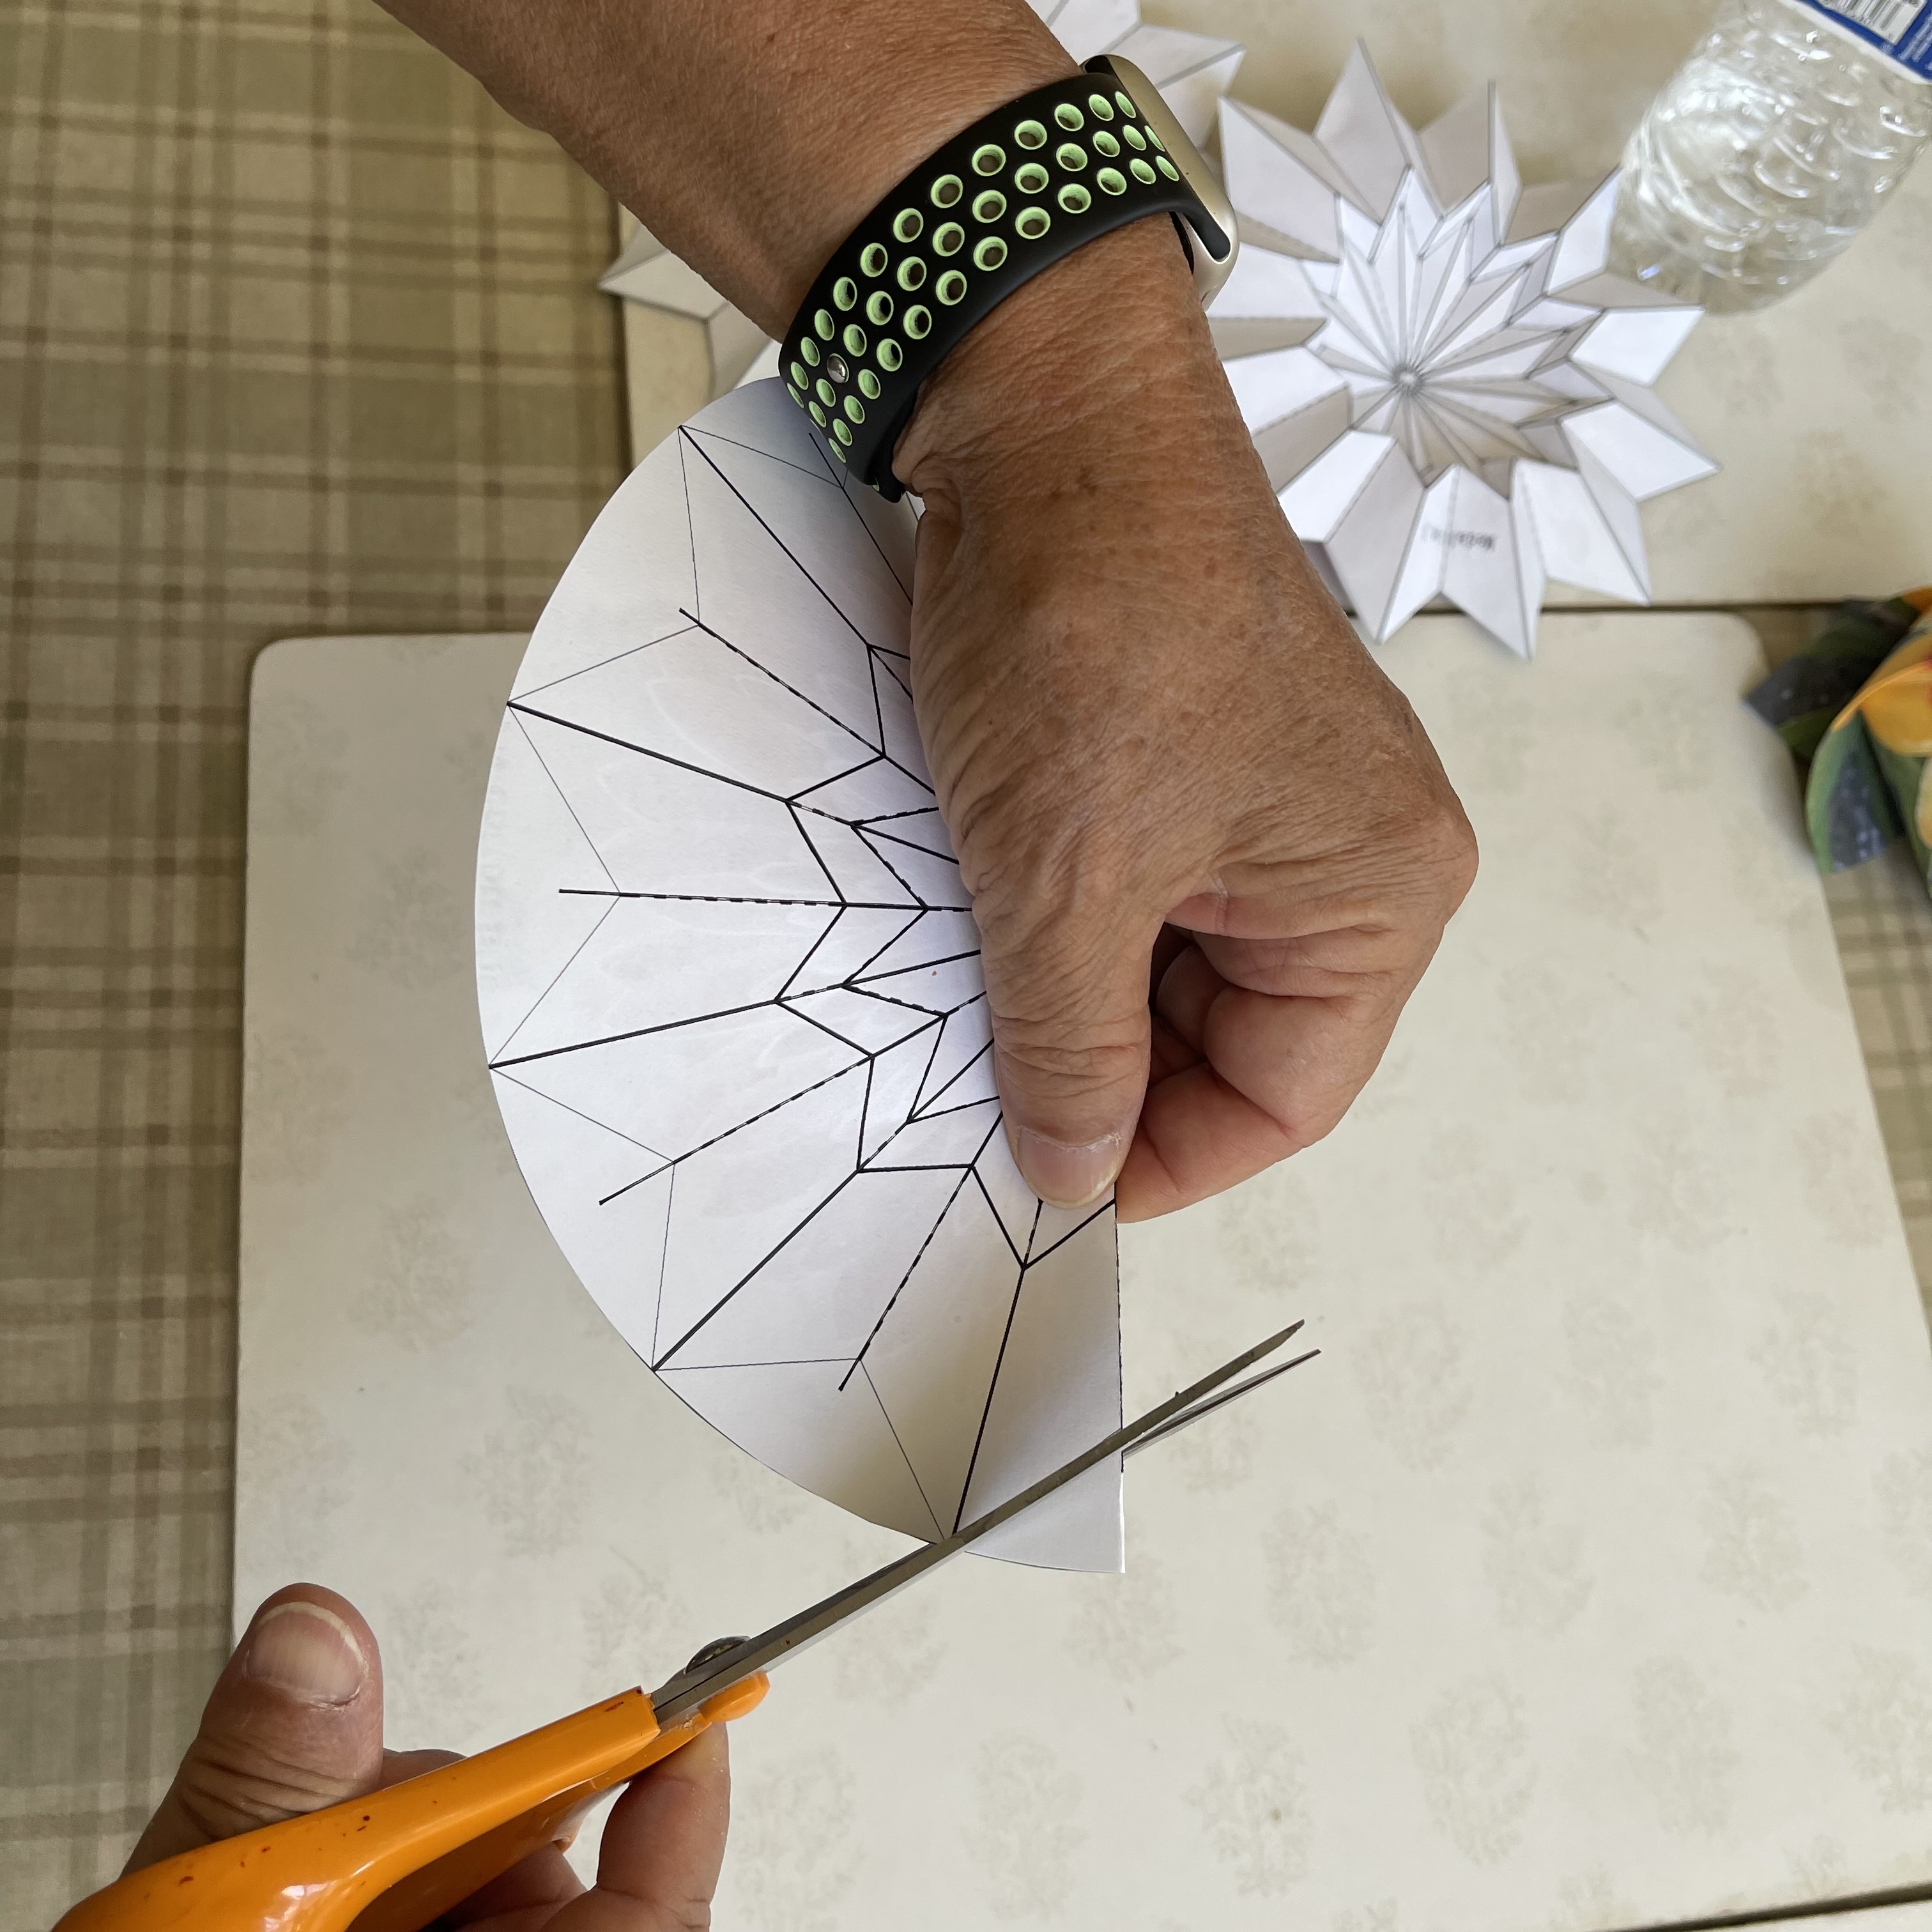 |
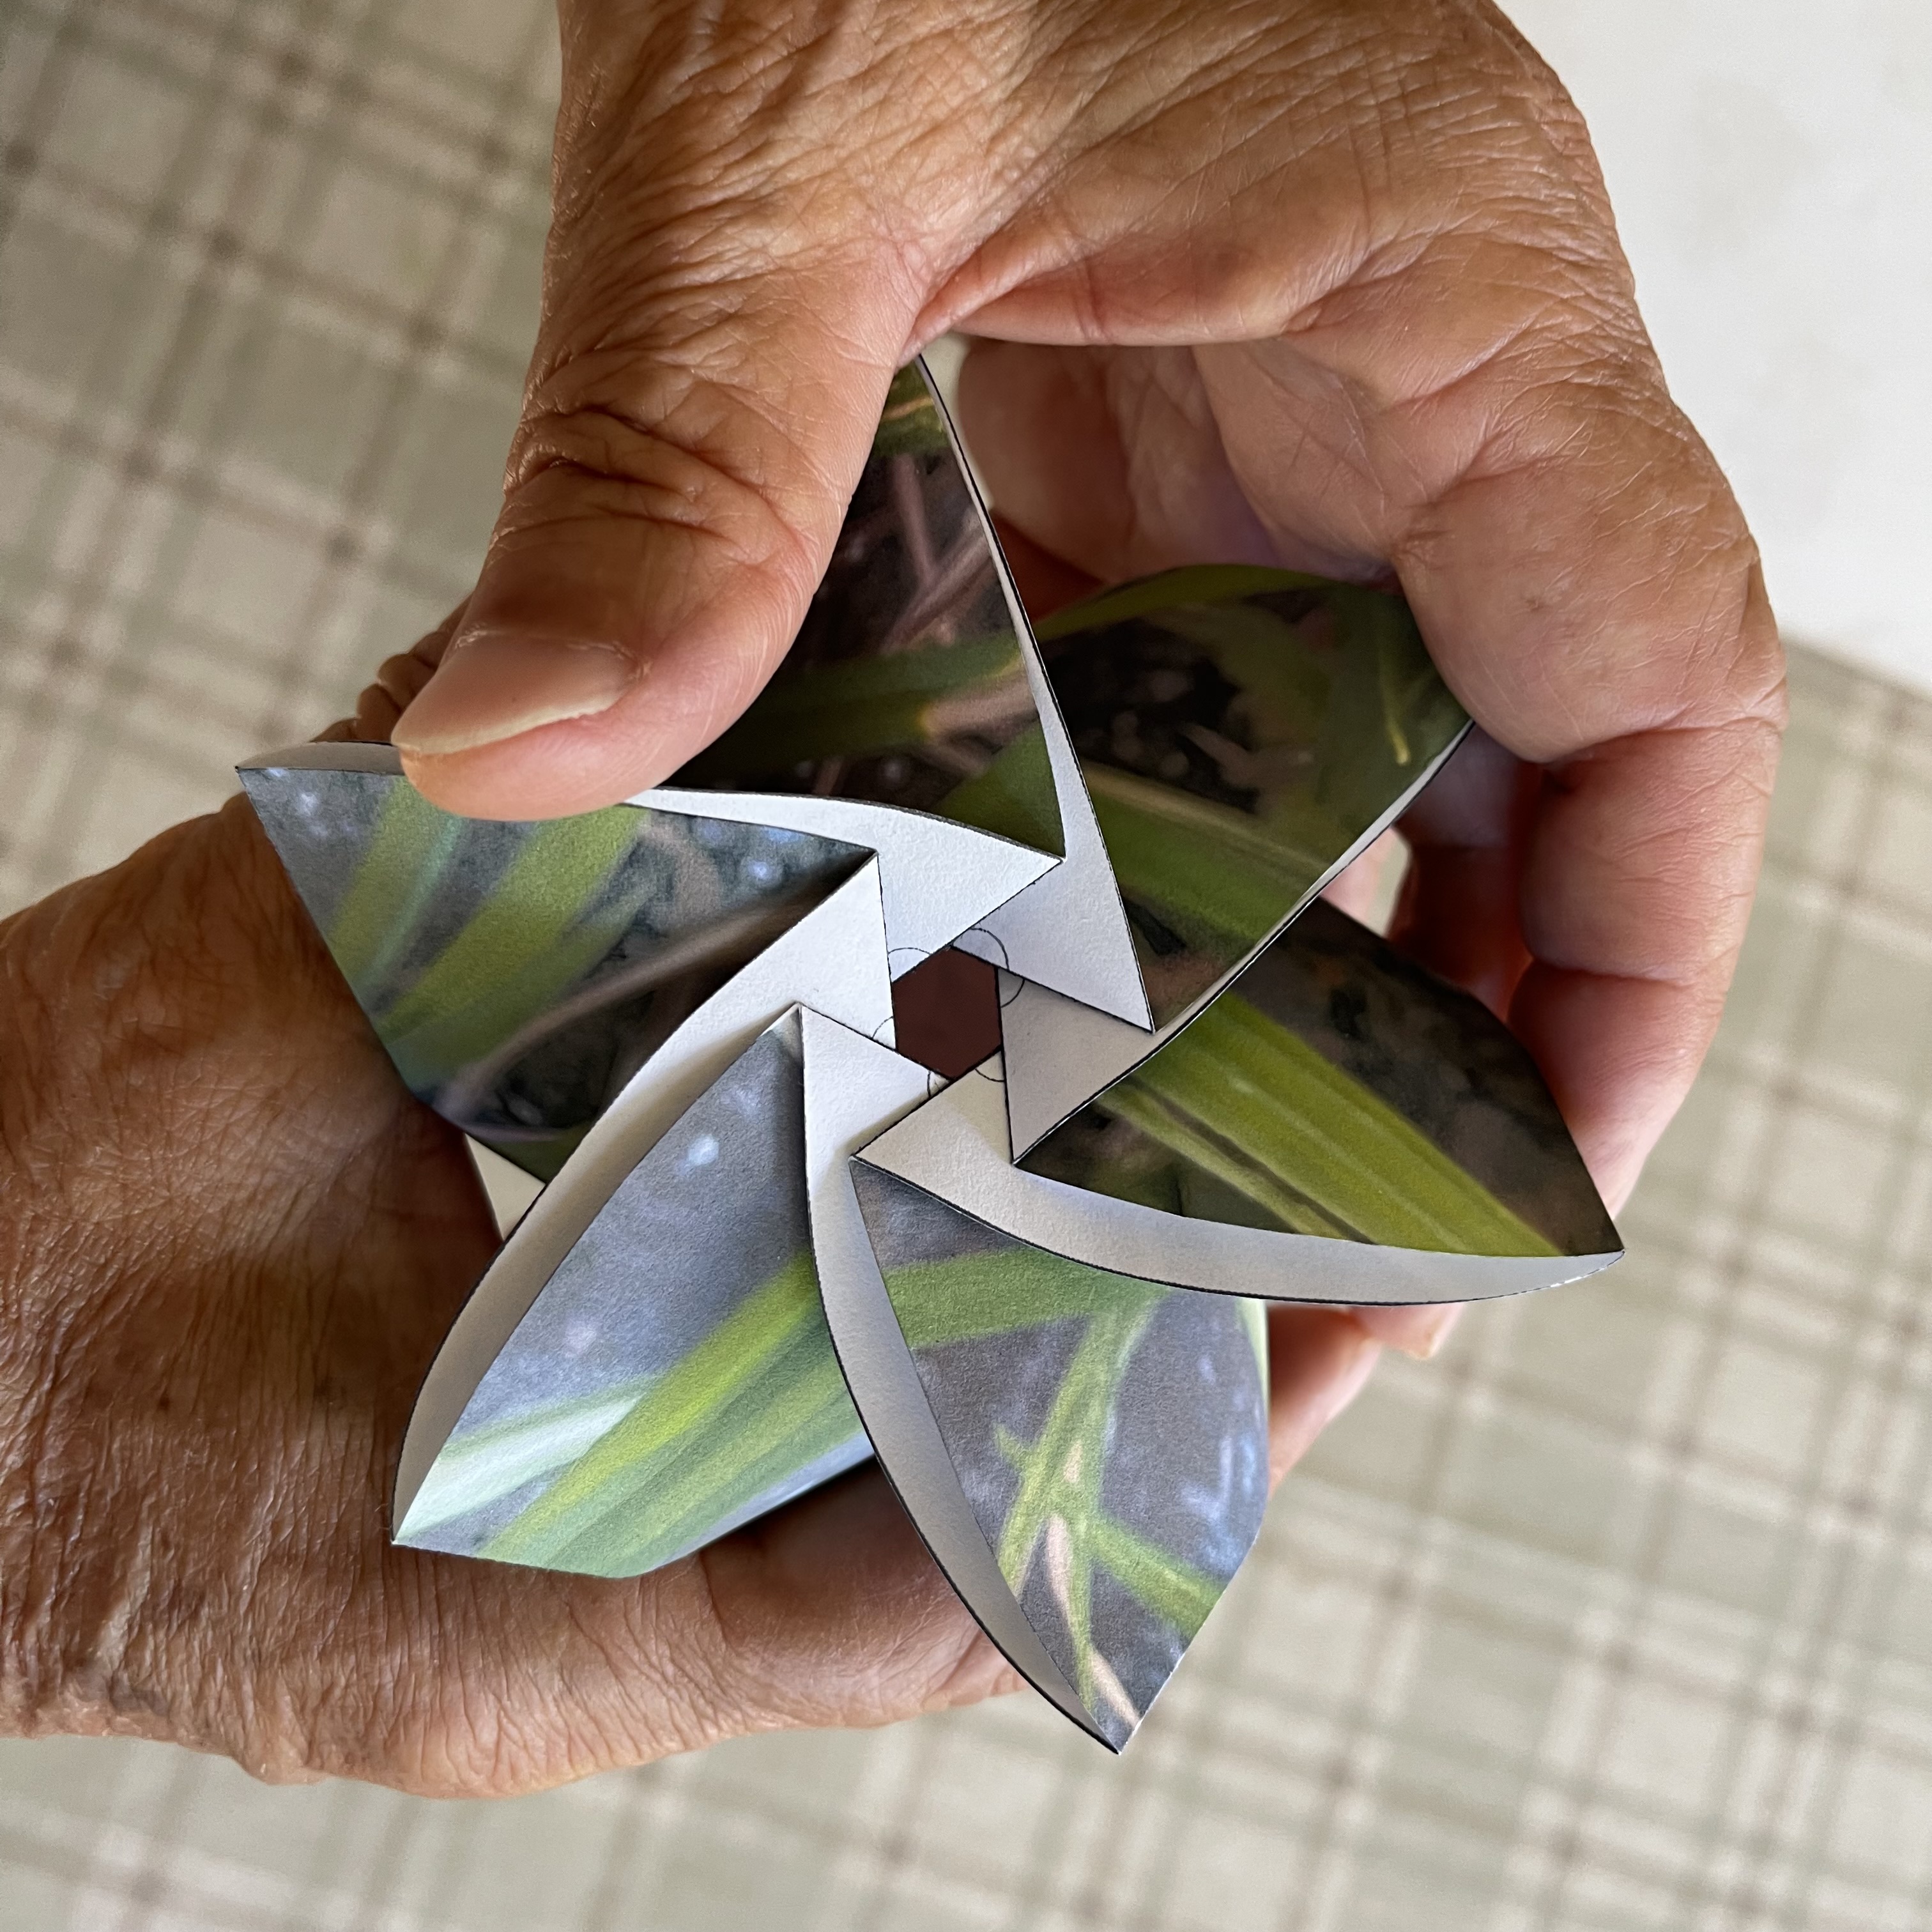
AFter the precrease in the radial direction is done, fold each section by thumb and index finger on the left hand while pushing the model inward by right hand. This makes the circumferential scored lines react according to the intended mountain and valley fold directions. Keep this process patiently and go around the circle at least two times. Then the final shape will begin showing up. Refer to the pictures below. |
| -- Circumferetial Crease --
click to enlarge 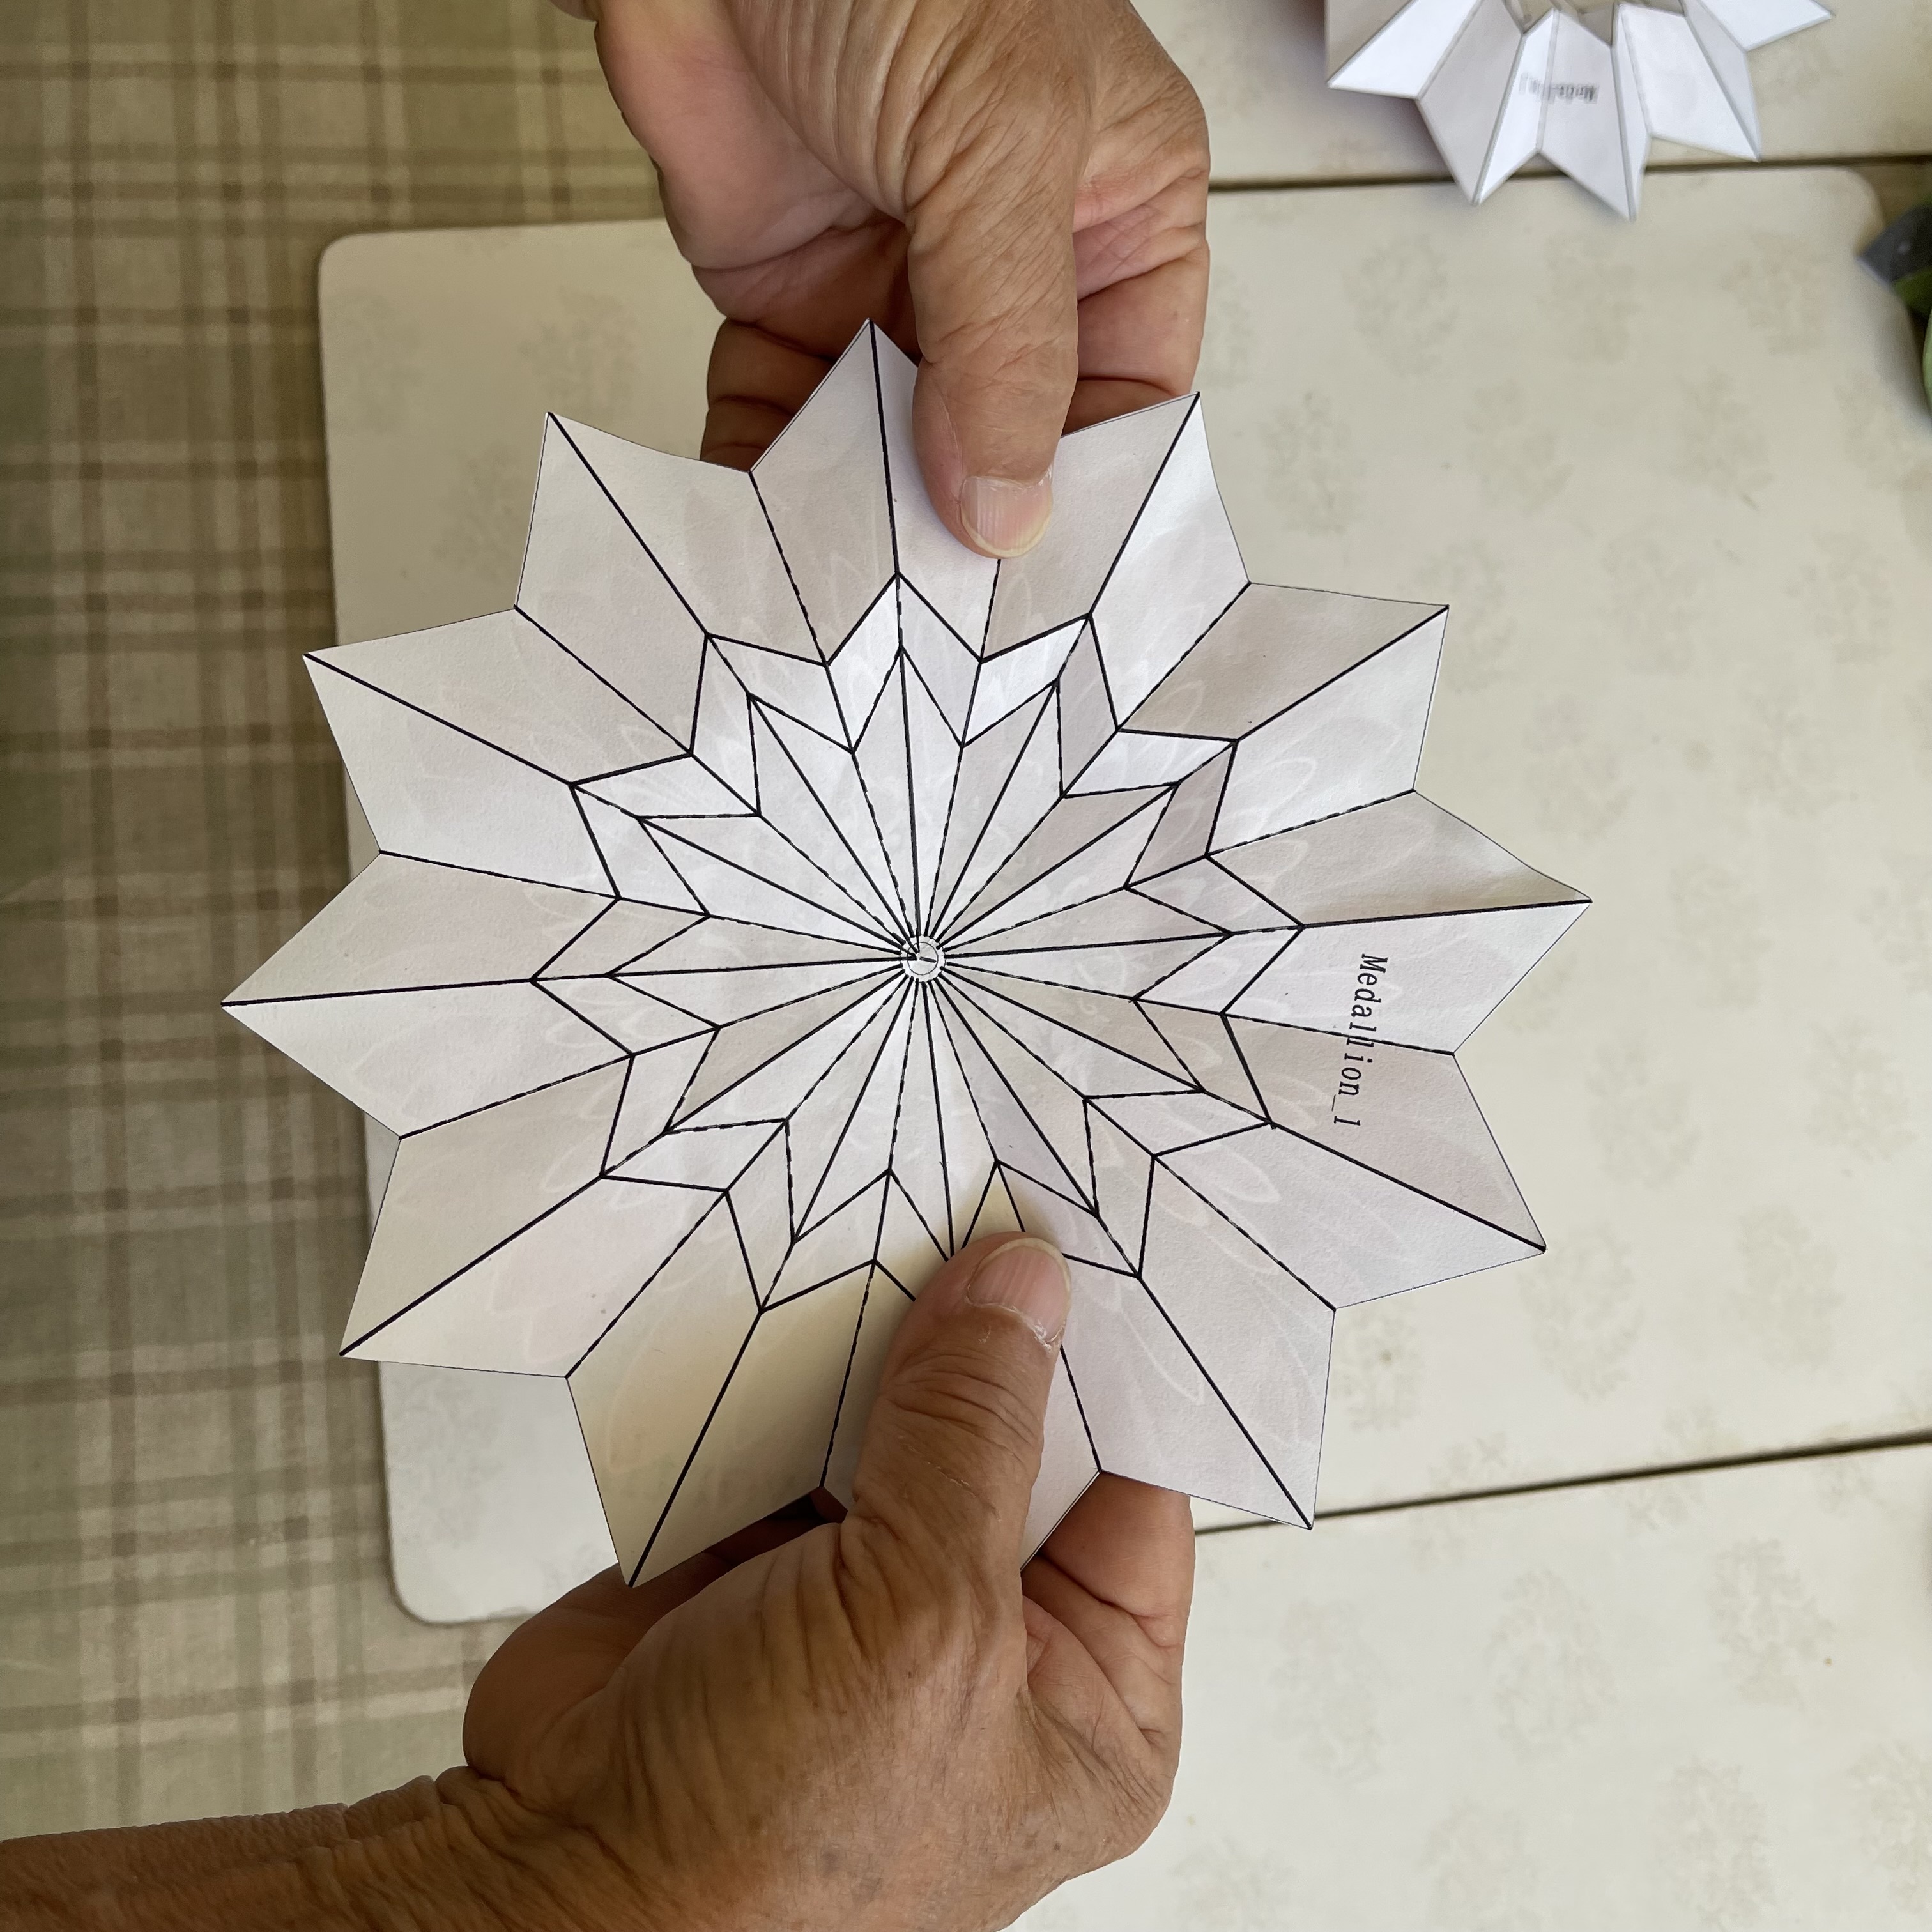 |
-- Circumferetial Crease --
click to enlarge 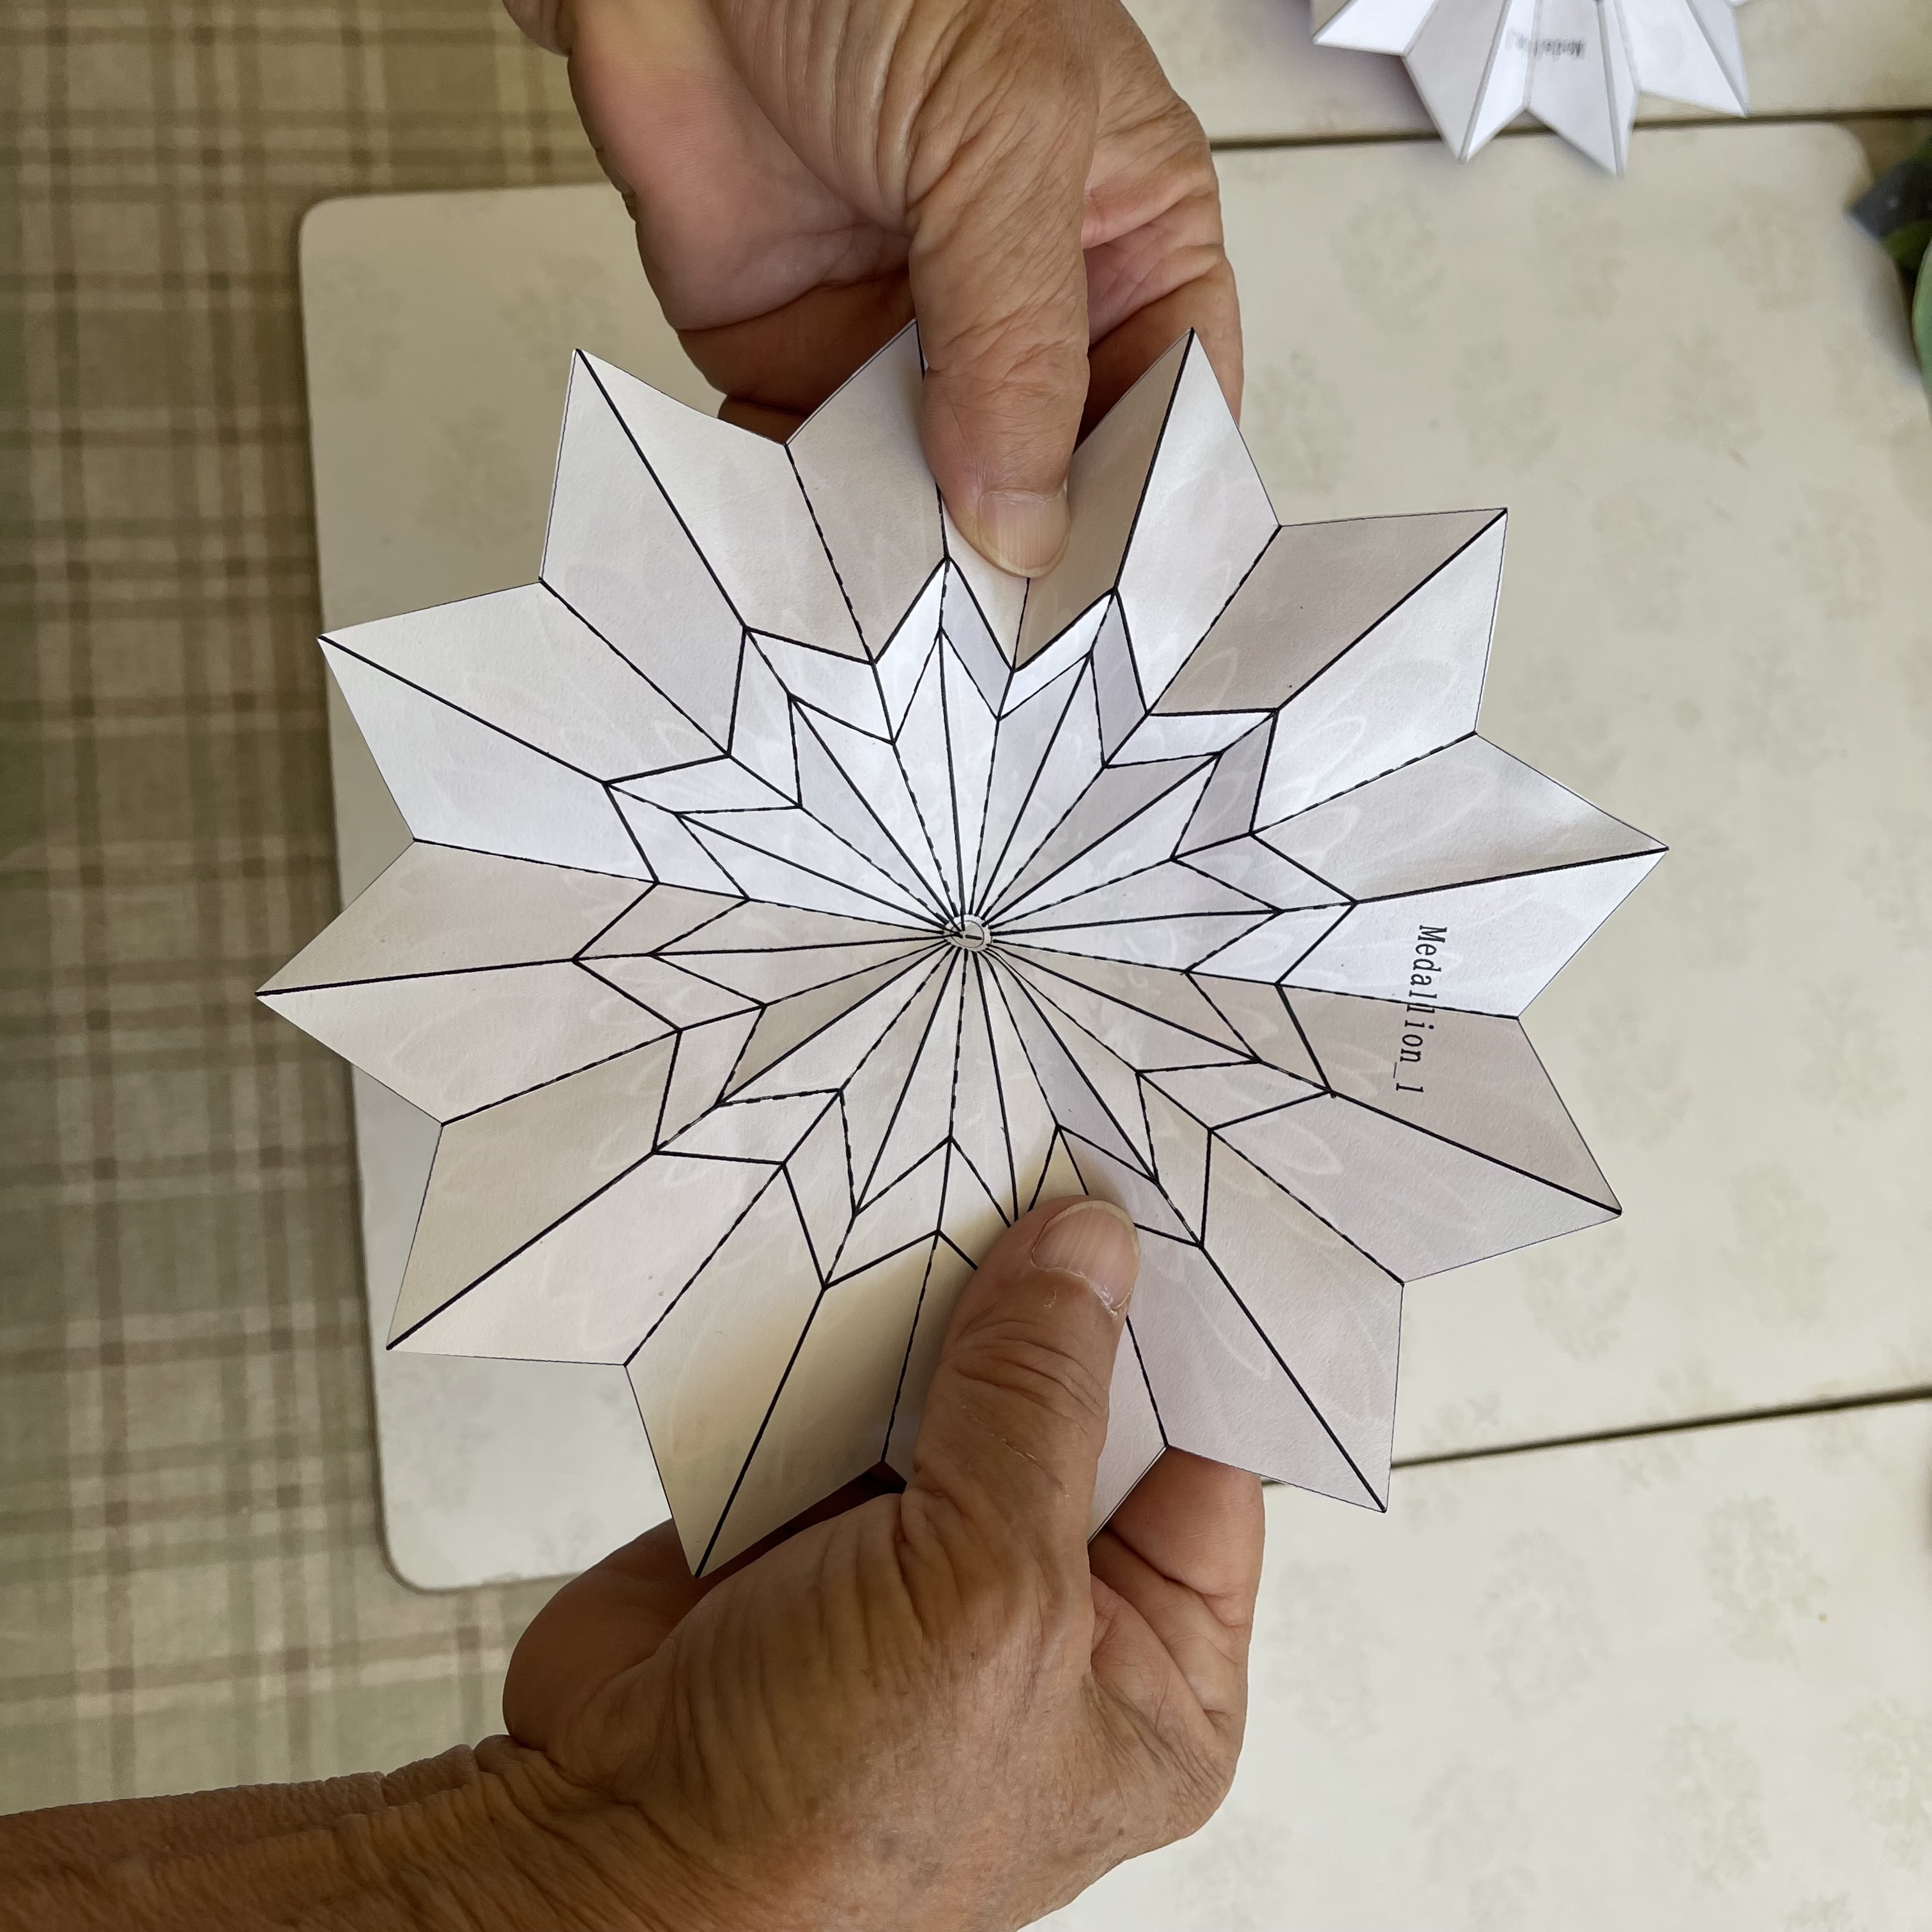 |
-- Push toward center --
click to enlarge  |
Here is the average time estimate of the whole process. diagram scoring and cutting out a circle 15 min pre-crease 15 min final folding and adjustment 5 min Total 35 min |
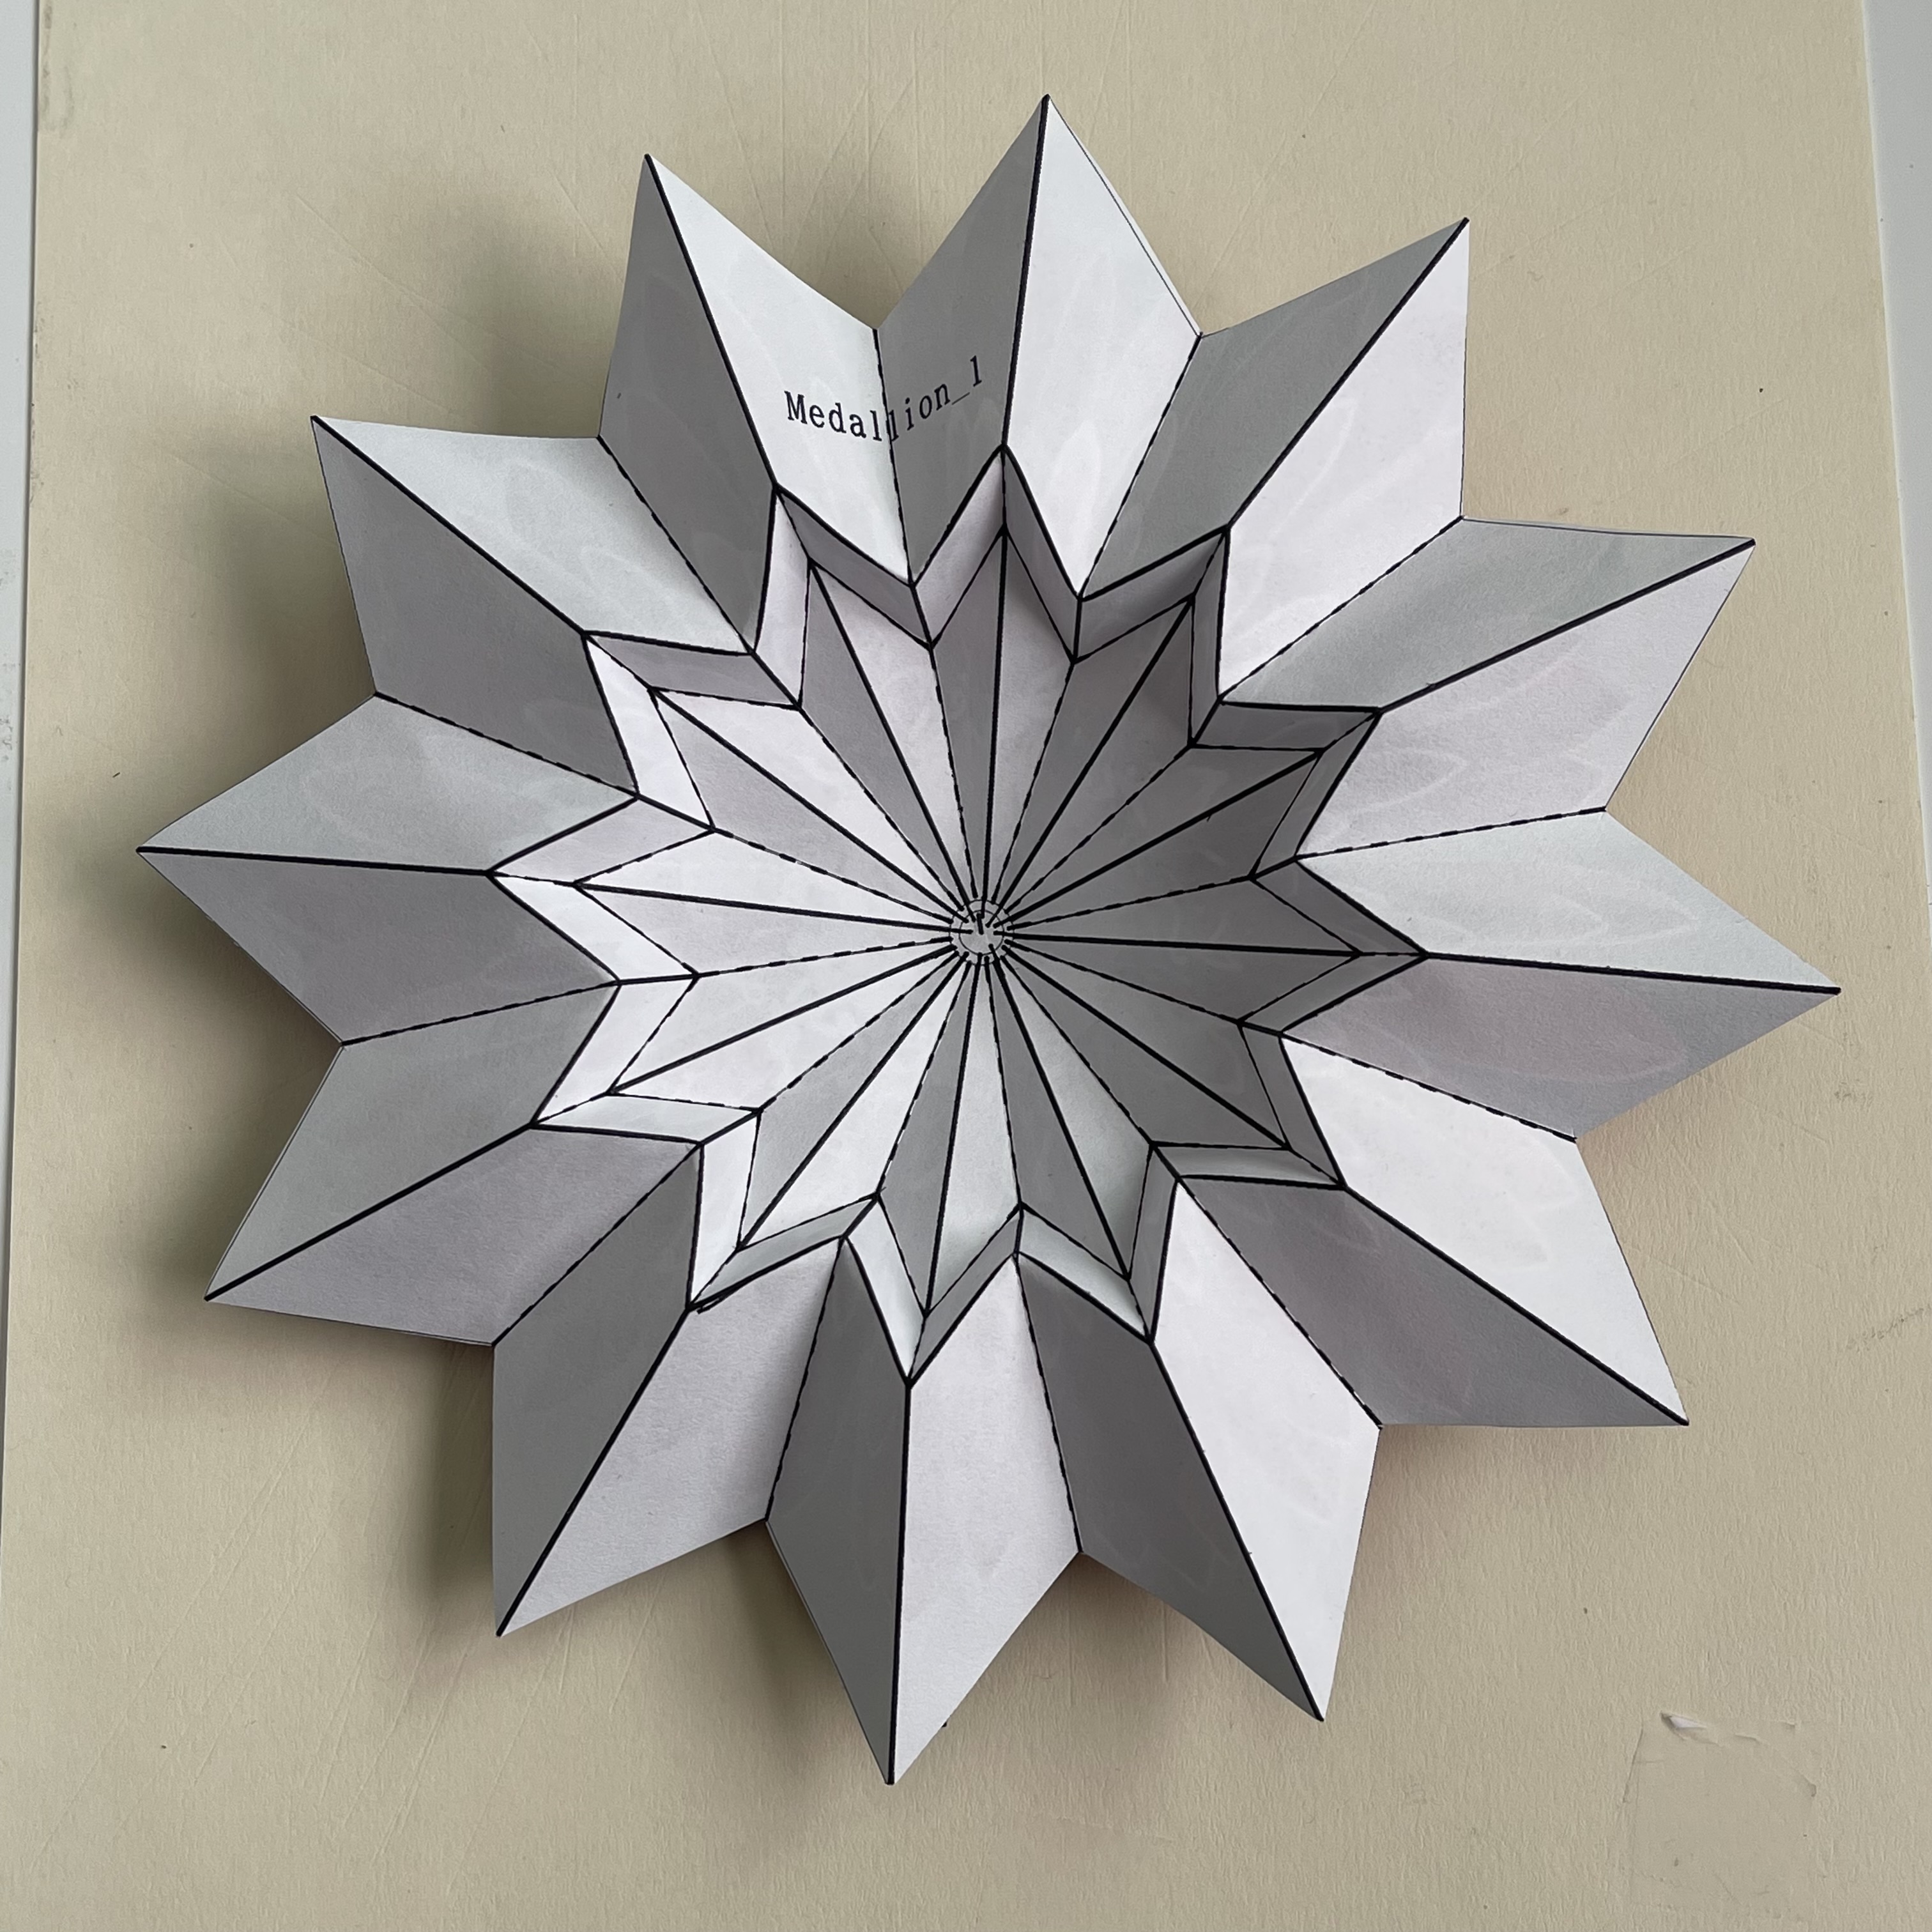
| - Model_1 Final - Top View -
click to enlarge
|
- Model_1 Final - Rear View -
click to enlarge
 |
| - Model_2 Final - Top View -
click to enlarge
|
- Model_2 Final - Rear View -
click to enlarge
 |
During the class only five models are presented. But there are many more variations. Many more models will be added in th future, but right now 3 groups are shown . 1. sphere based (To be added inn he future) 2. flat egg base 3. flat cone based |
| flat egg base click to enlarge 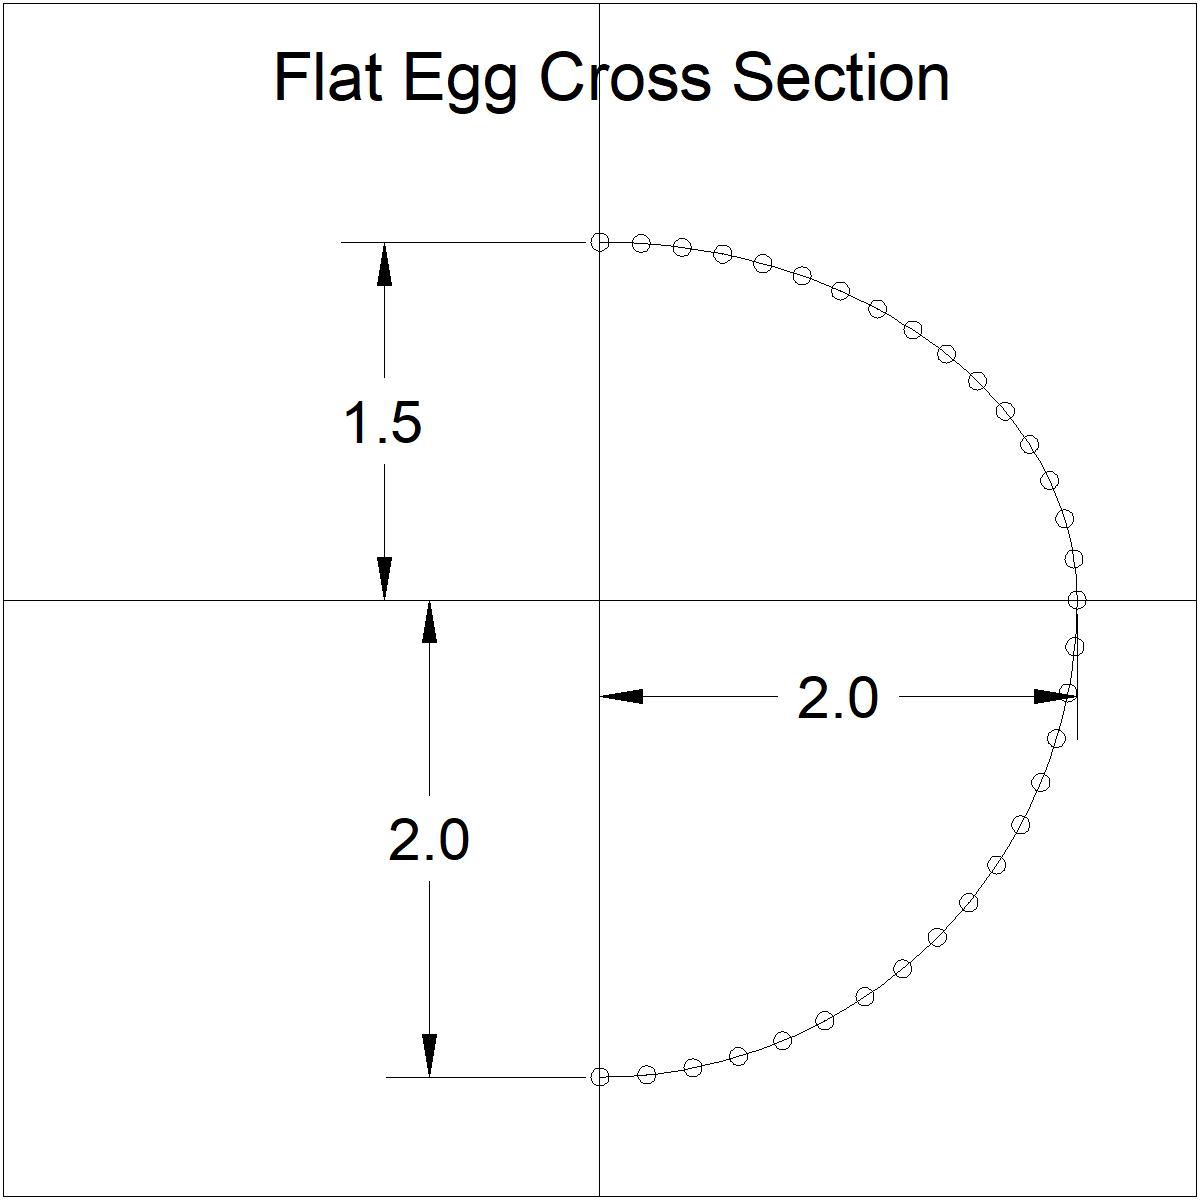 |
flat egg shaded click to enlarge 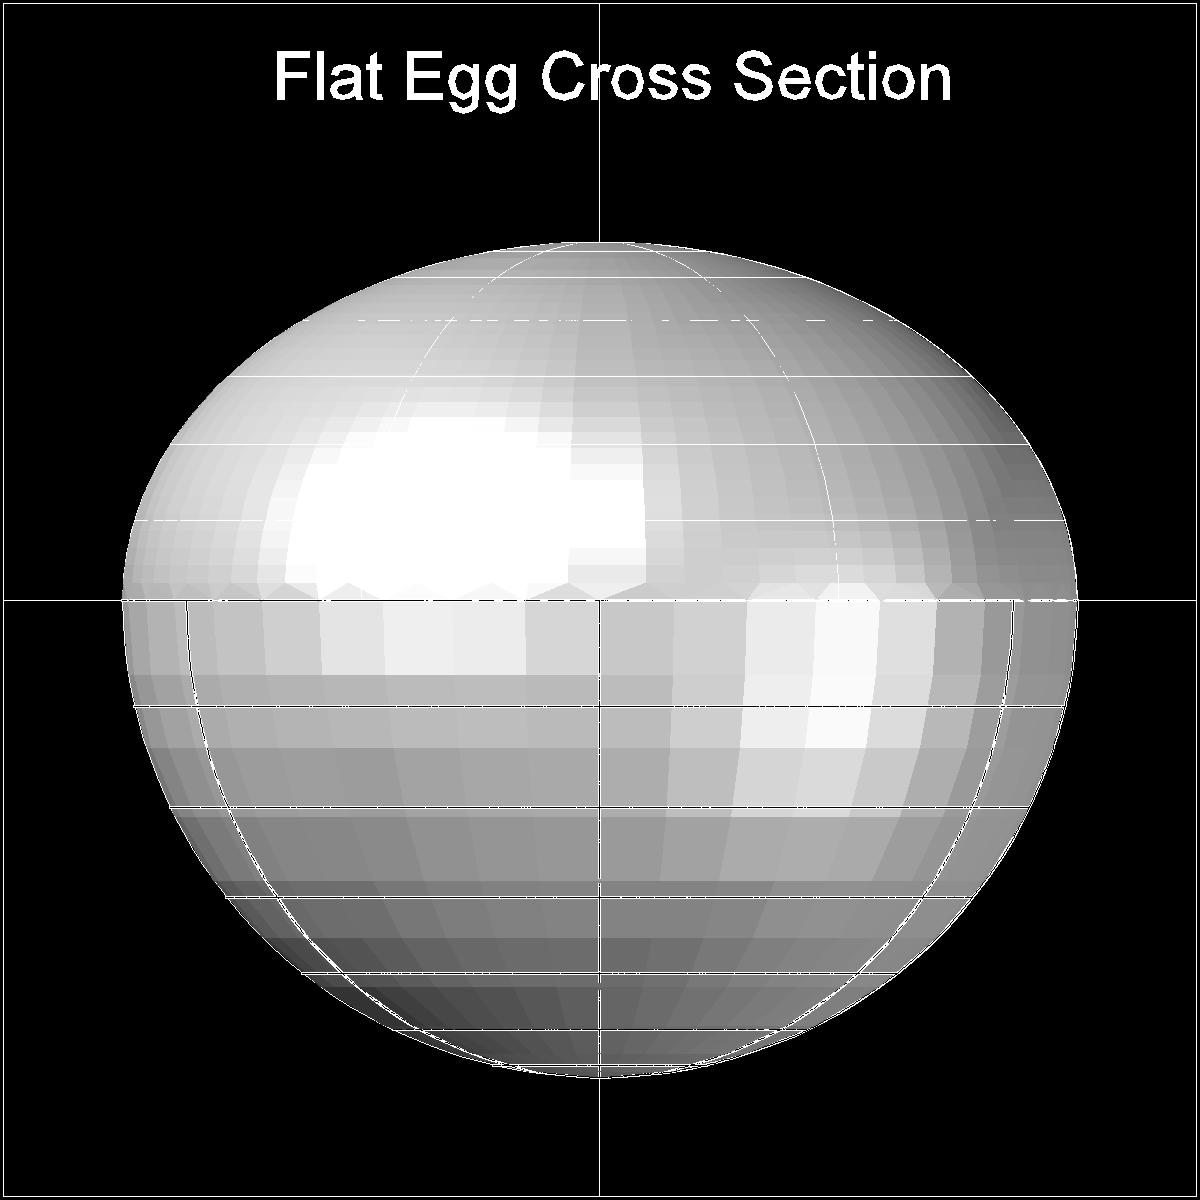 |
flat cone base click to enlarge 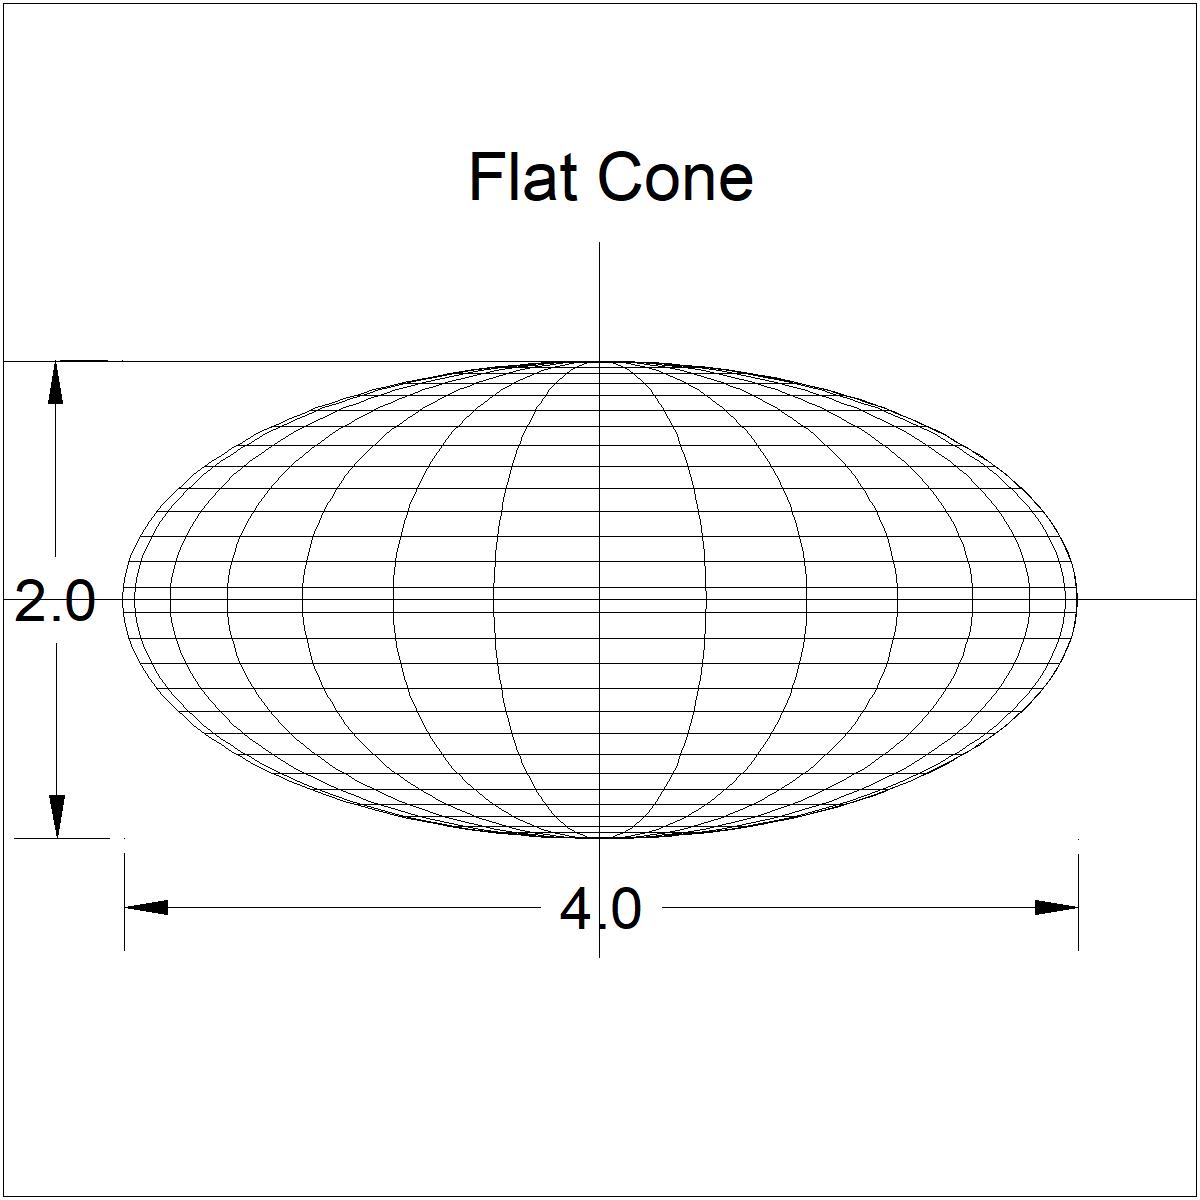 |
flat cone shaded click to enlarge 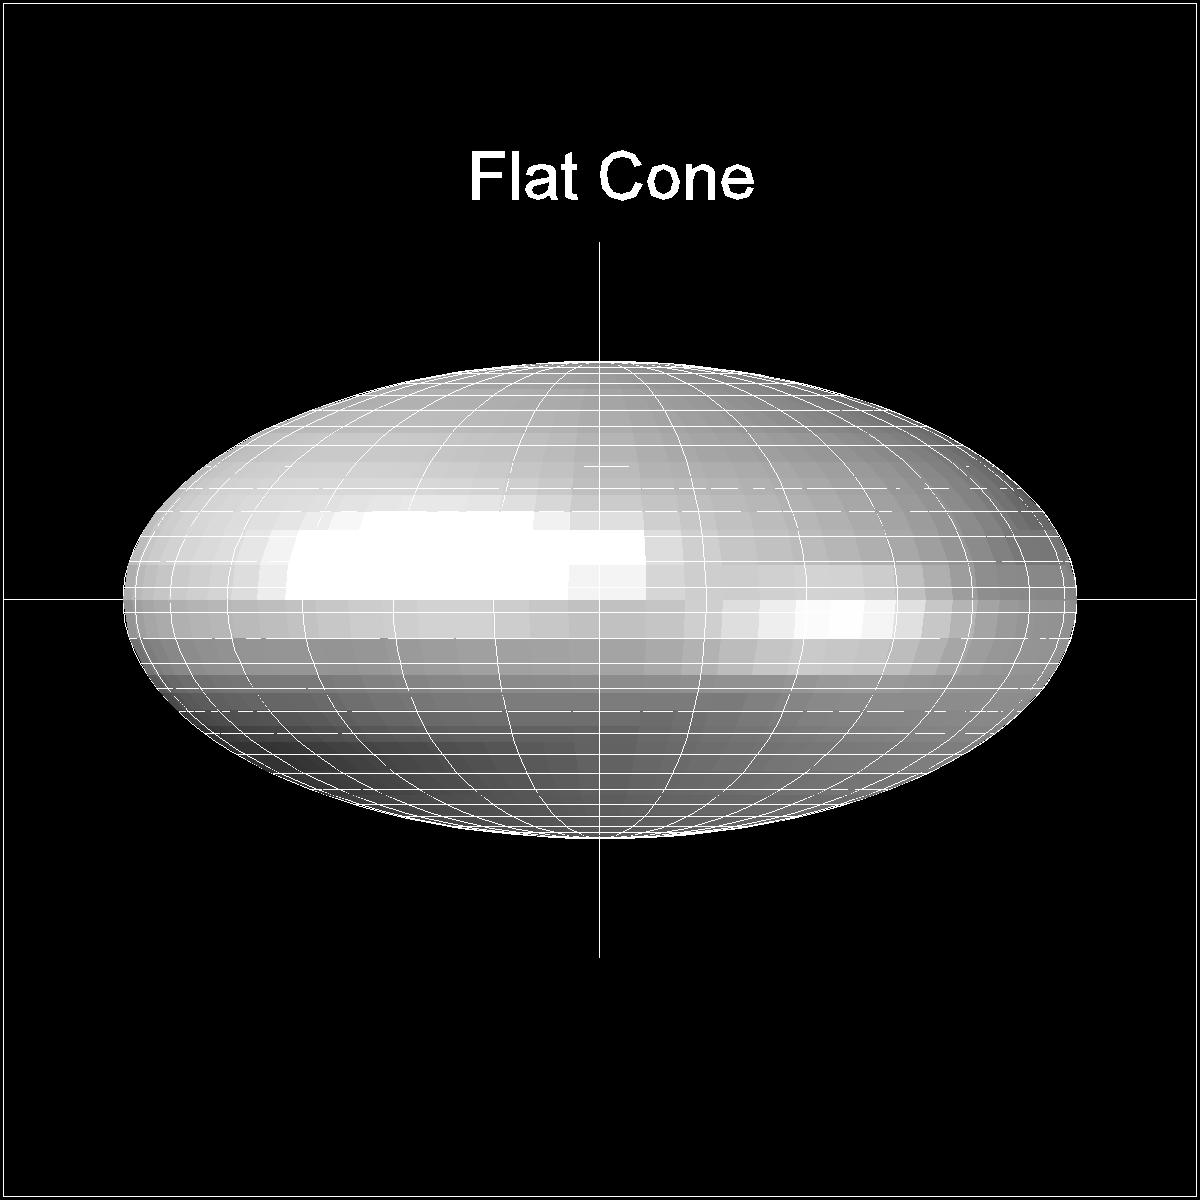 |
| flat egg 5 axis click to enlarge 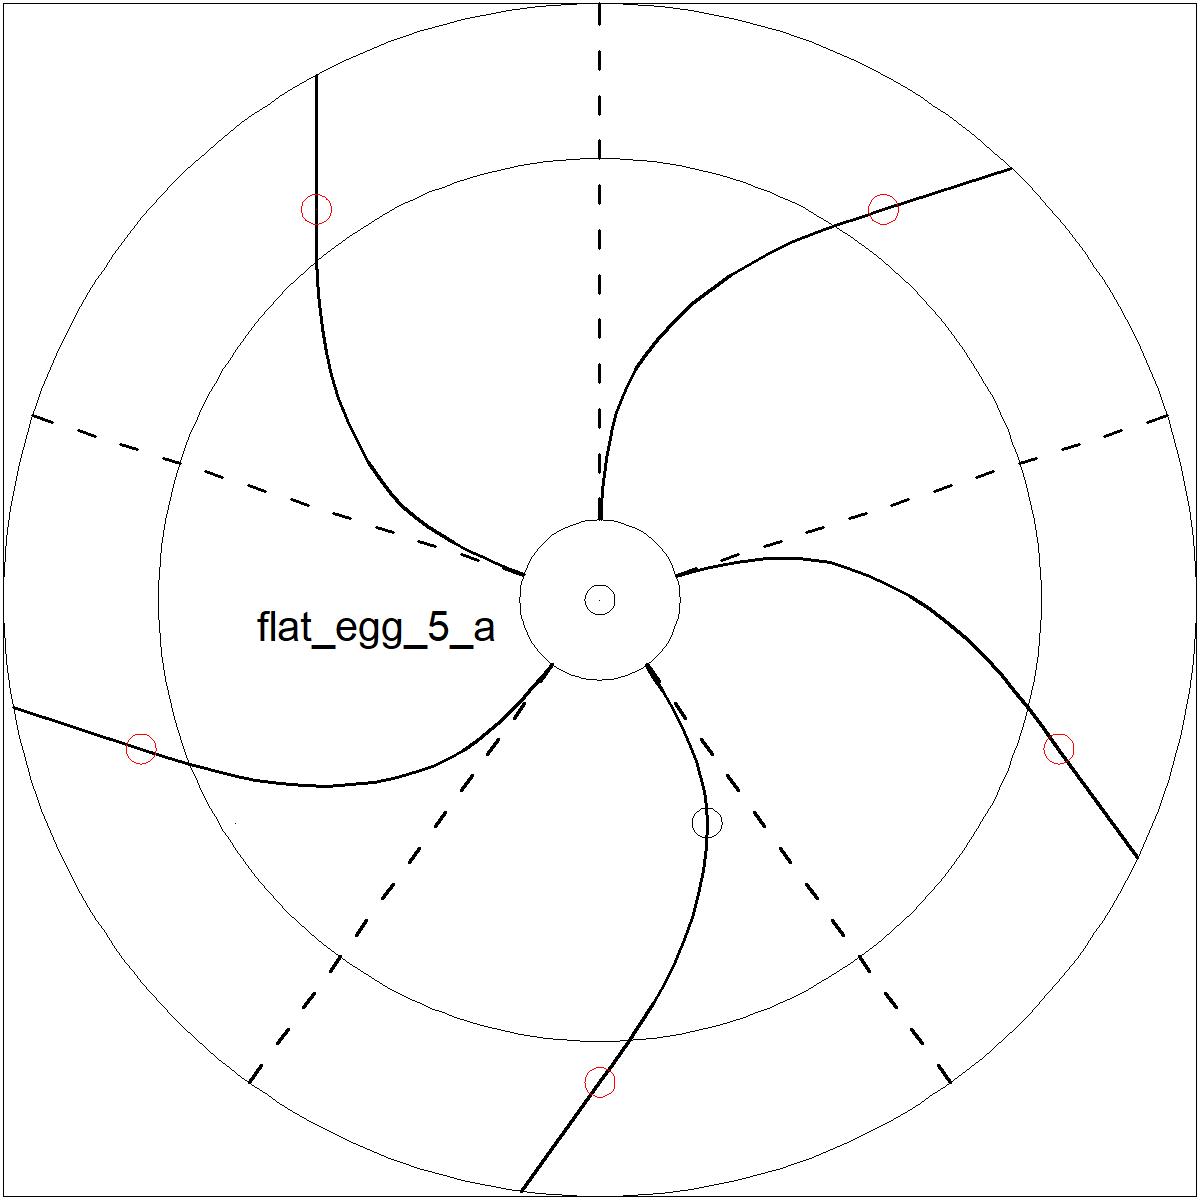 |
flat egg 6 axis click to enlarge 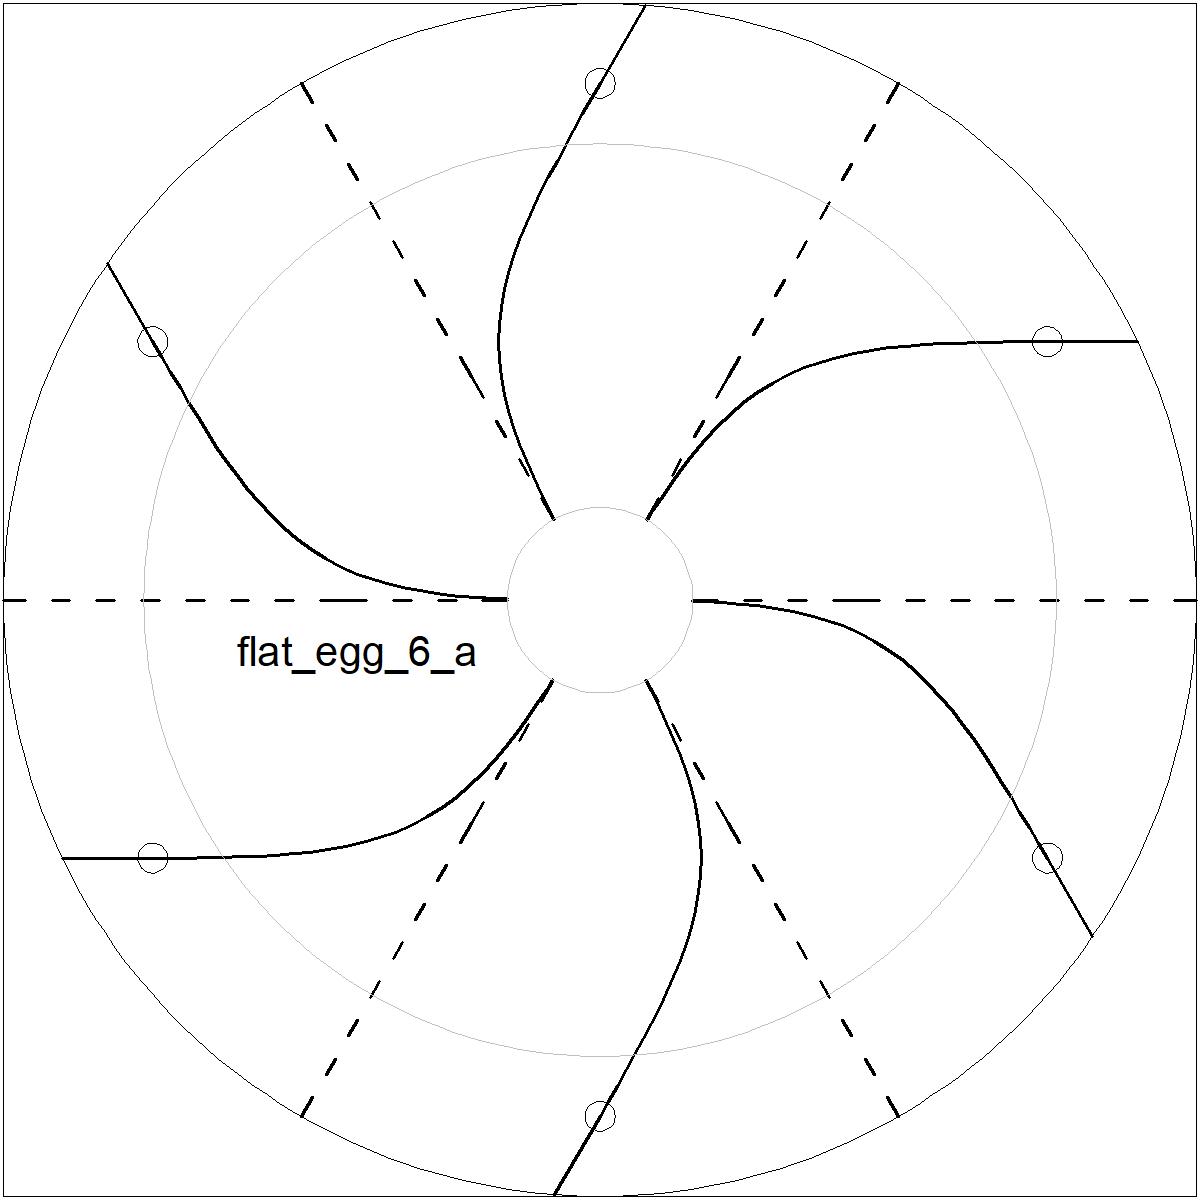 |
flat egg 7 axis click to enlarge |
flat egg 8 axis click to enlarge 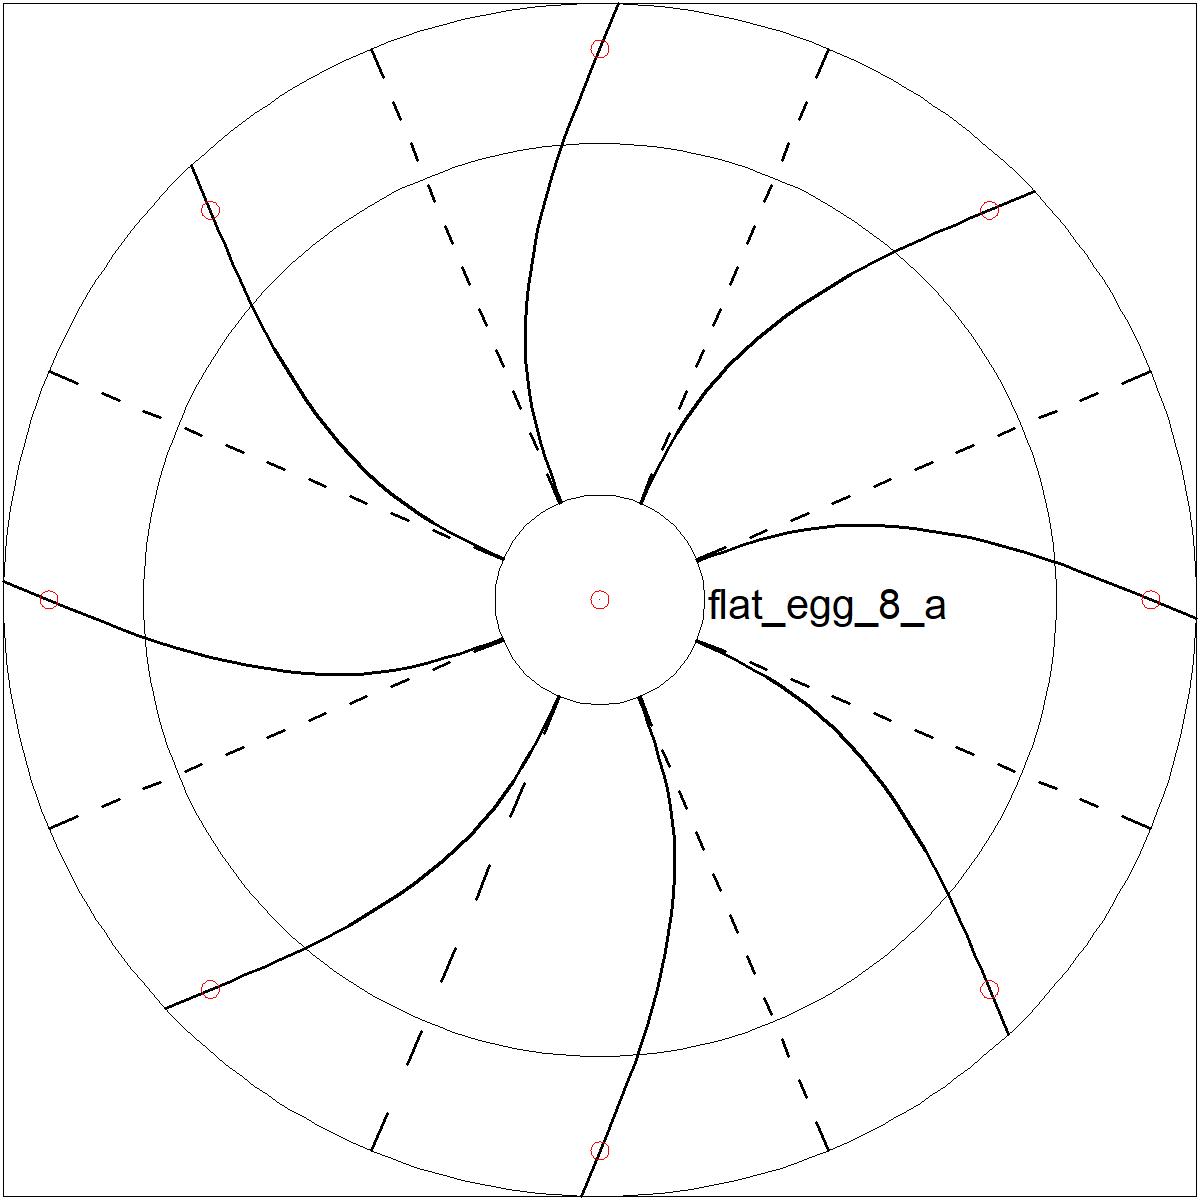 |
| flat egg 9 axis click to enlarge  |
flat egg 10 axis click to enlarge  |
flat egg 12 axis click to enlarge  |
    Drawing file (if the environment to handle DWG and/or DXF file is available)
	  flat_egg_5_a.dwg   flat_egg_6_a.dwg	 flat_egg_7_a.dwg   flat_egg_8_a.dwg
	  flat_egg_9_a.dwg   flat_egg_10_a.dwg   flat_egg_12_a.dwg
	or
	  flat_egg_5_a.dxf   flat_egg_6_a.dxf	 flat_egg_7_a.dwg   flat_egg_8_a.dxf
	  flat_egg_9_a.dxf   flat_egg_10_a.dxf   flat_egg_12_a.dxf

    Diagram JPG files
	  flat_egg_5_a.jpg   flat_egg_6_a.jpg	 flat_egg_7_a.dwg   flat_egg_8_a.jpg
	  flat_egg_9_a.jpg   flat_egg_10_a.jpg   flat_egg_12_a.jpg
|
| flat cone 5 axis click to enlarge  |
flat cone 6 axis click to enlarge 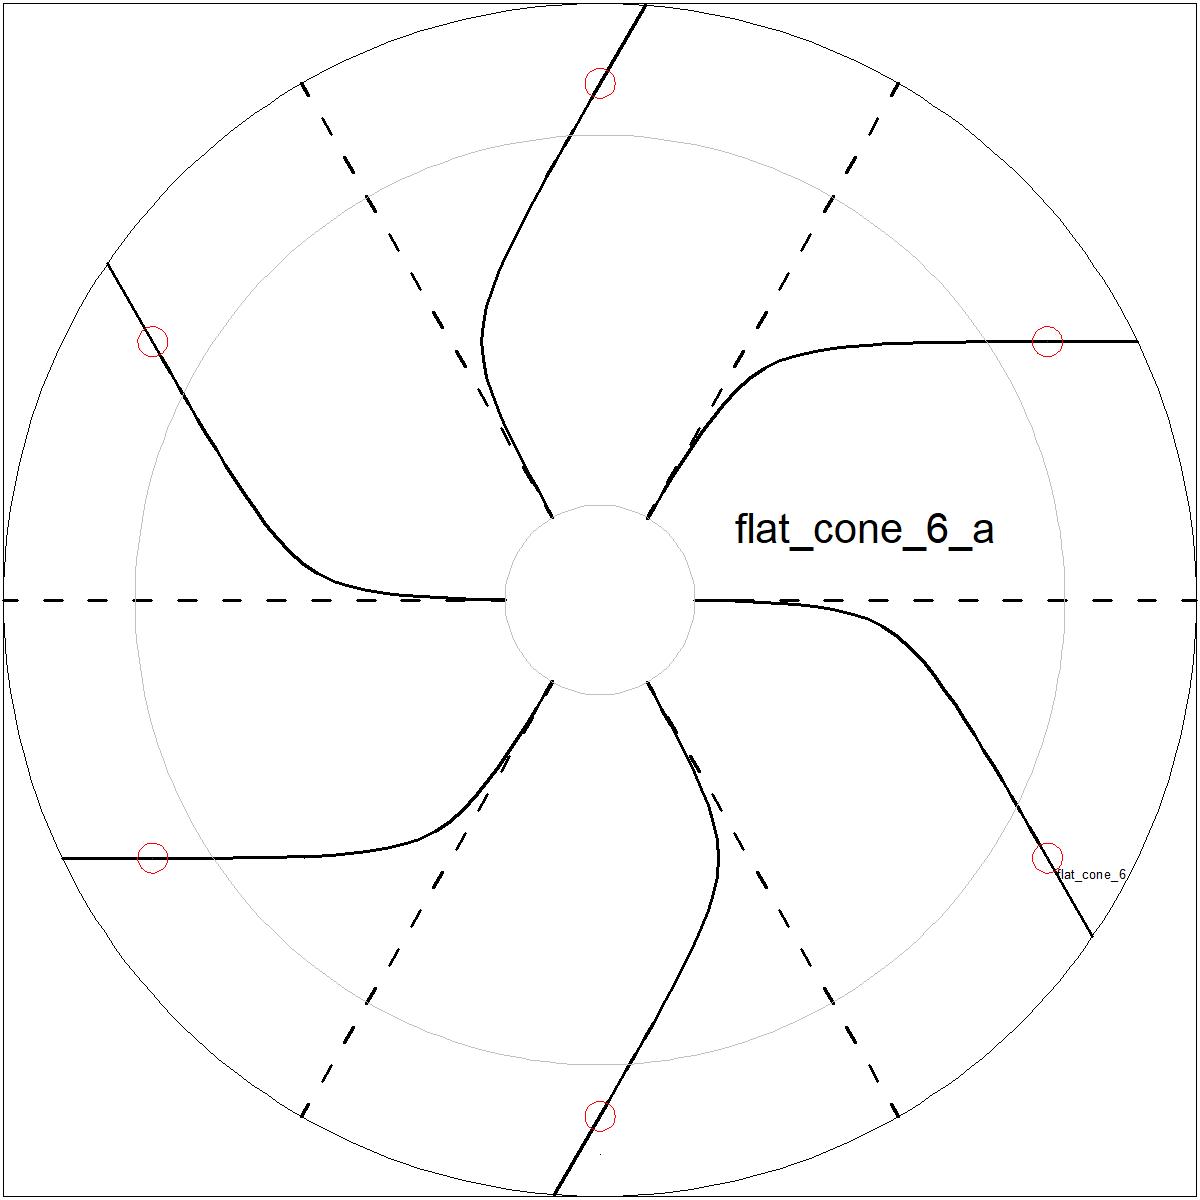 |
flat cone 7 axis click to enlarge  |
flat cone 8 axis click to enlarge 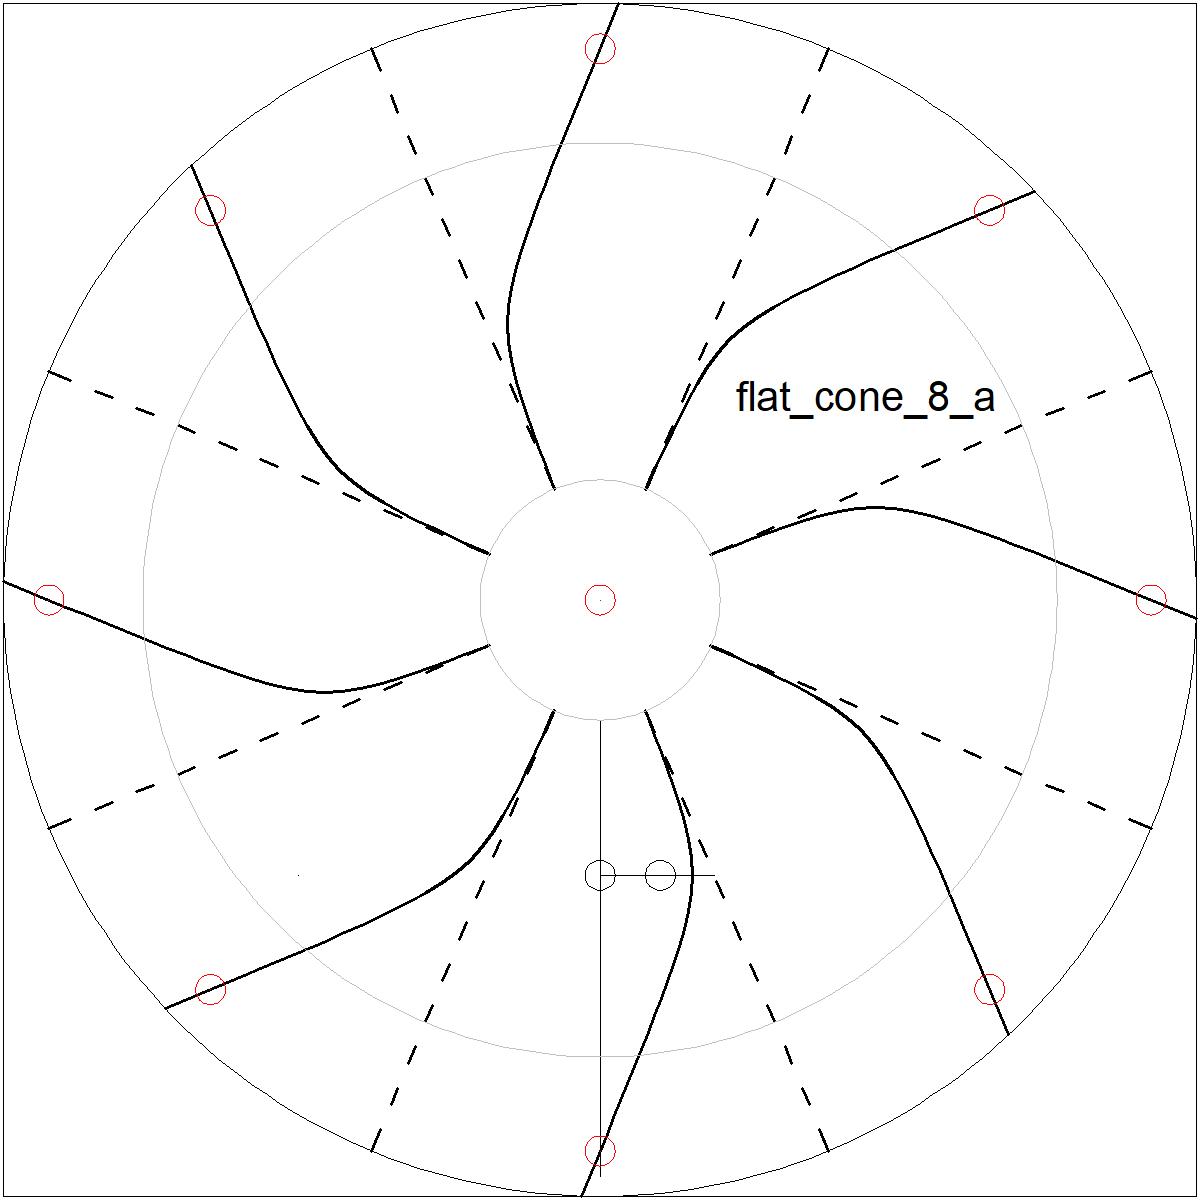 |
| flat cone 9 axis click to enlarge  |
flat cone 10 axis click to enlarge 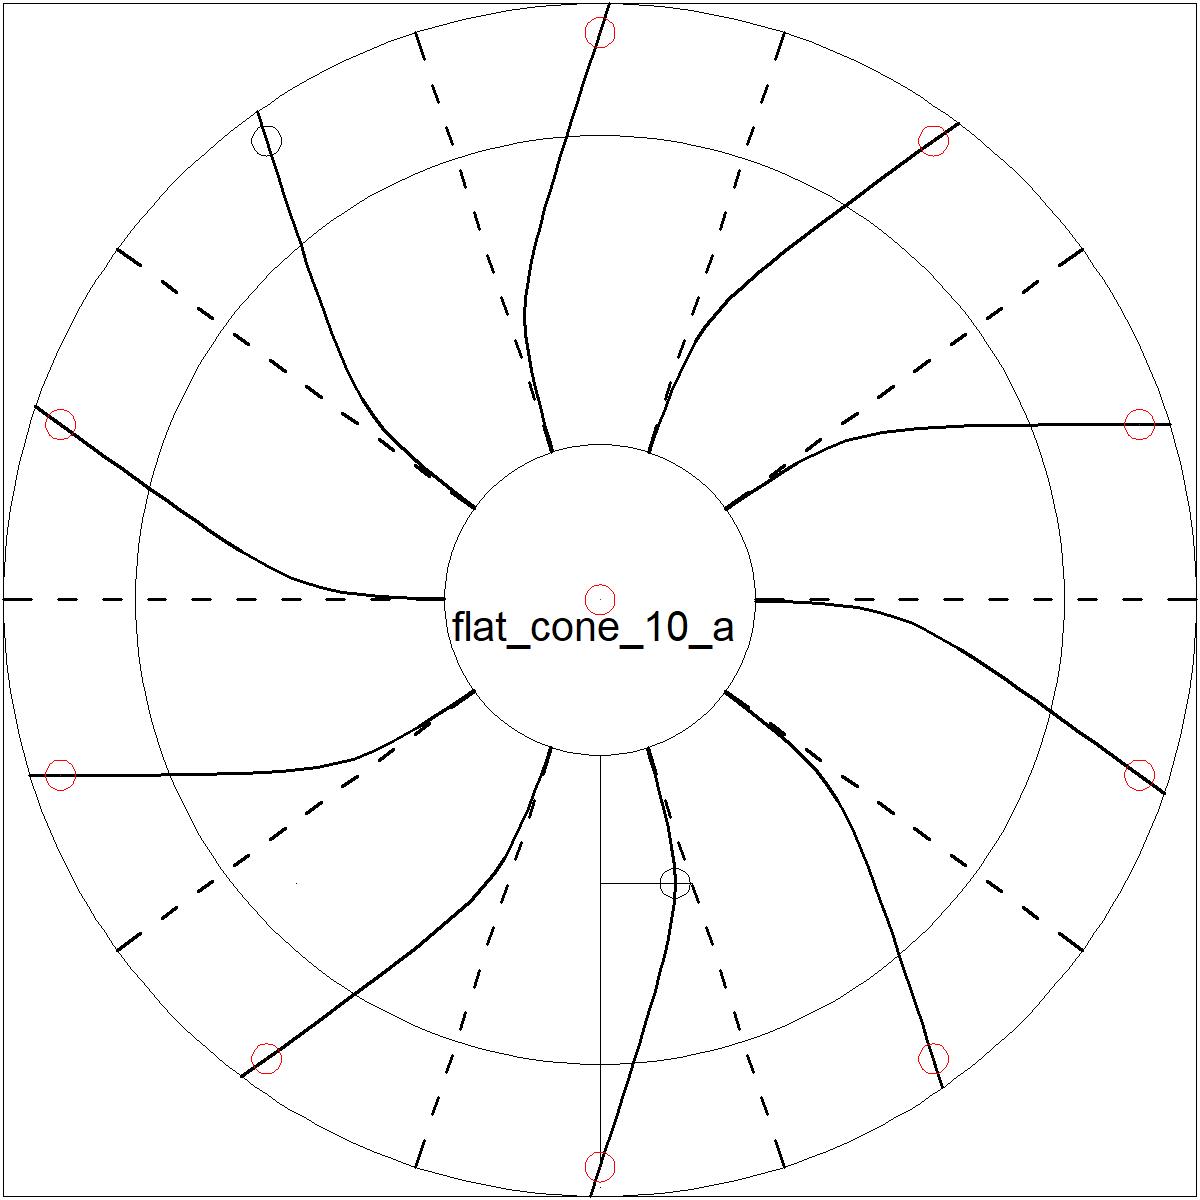 |
flat cone 12 axis click to enlarge 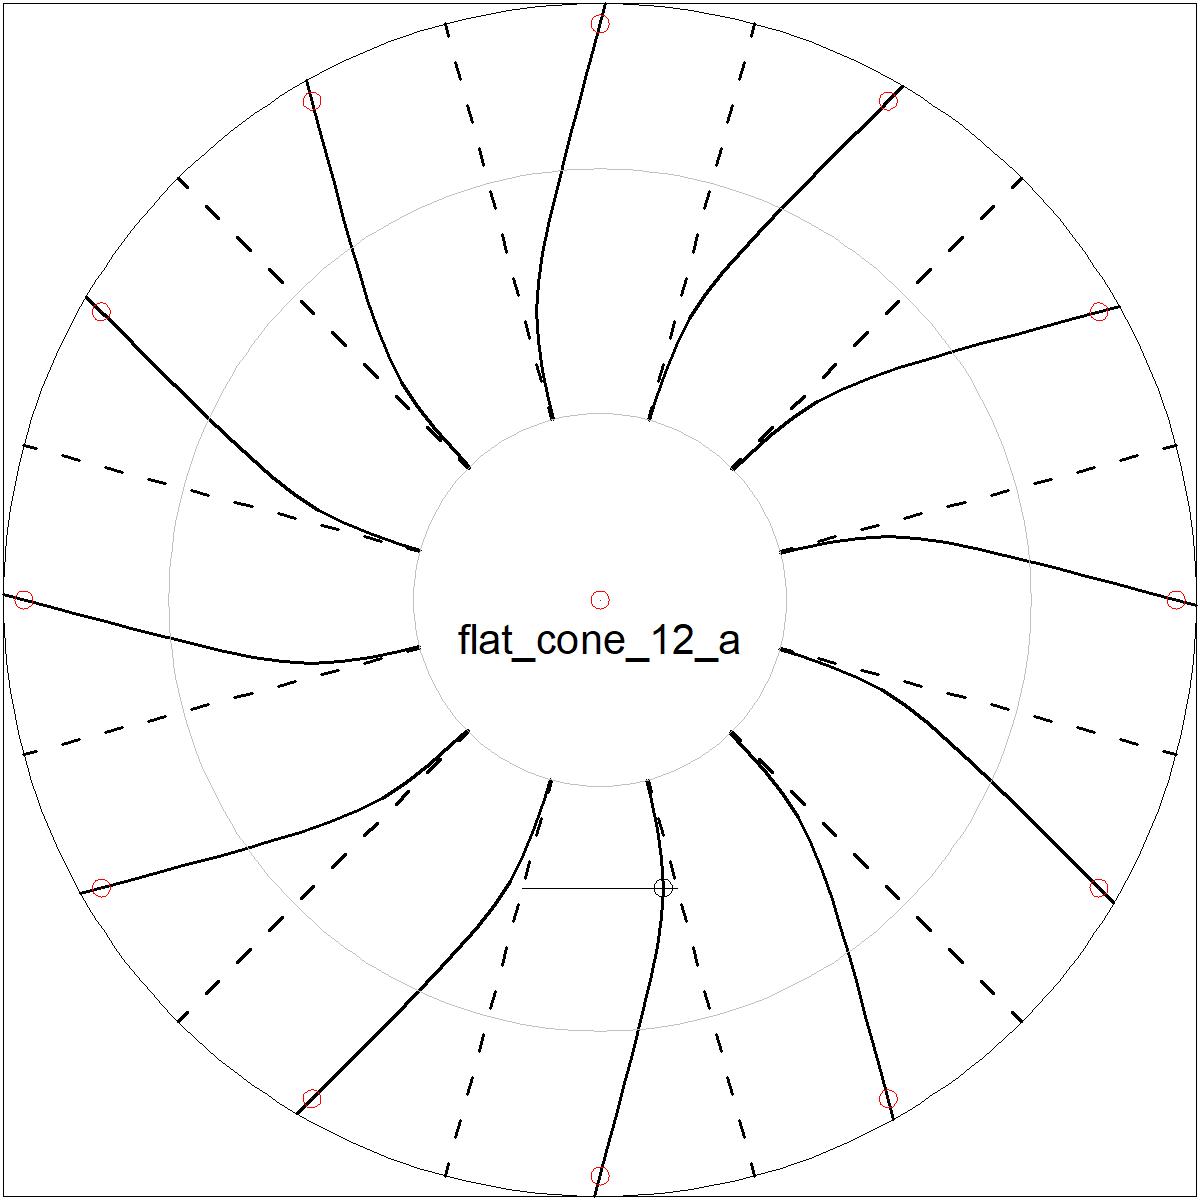 |
    Drawing file (if the environment to handle DWG and/or DXF file is available)
	  flat_cone_5_a.dwg   flat_cone_6_a.dwg	 flat_cone_7_a.dwg   flat_egg_8_a.dwg
	  flat_cone_9_a.dwg   flat_cone_10_a.dwg   flat_cone_12_a.dwg
	or
	  flat_cone_5_a.dxf   flat_cone_6_a.dxf	 flat_cone_7_a.dwg   flat_egg_8_a.dxf
	  flat_cone_9_a.dxf   flat_cone_10_a.dxf   flat_cone_12_a.dxf

    Diagram JPG files
	  flat_cone_5_a.jpg   flat_cone_6_a.jpg	 flat_cone_7_a.dwg   flat_egg_8_a.jpg
	  flat_cone_9_a.jpg   flat_cone_10_a.jpg   flat_cone_12_a.jpg
|
Many more of flower images are shown here for further trials. All these pictures are square. More flower images are to be added in the future. Use them combined with the diagram shown above. |
Satsuki 1
click
to enlarge  |
Satsuki 2
click
to enlarge  |
Satsuki 3
click
to enlarge  |
Kouzu Cherry
click
to enlarge 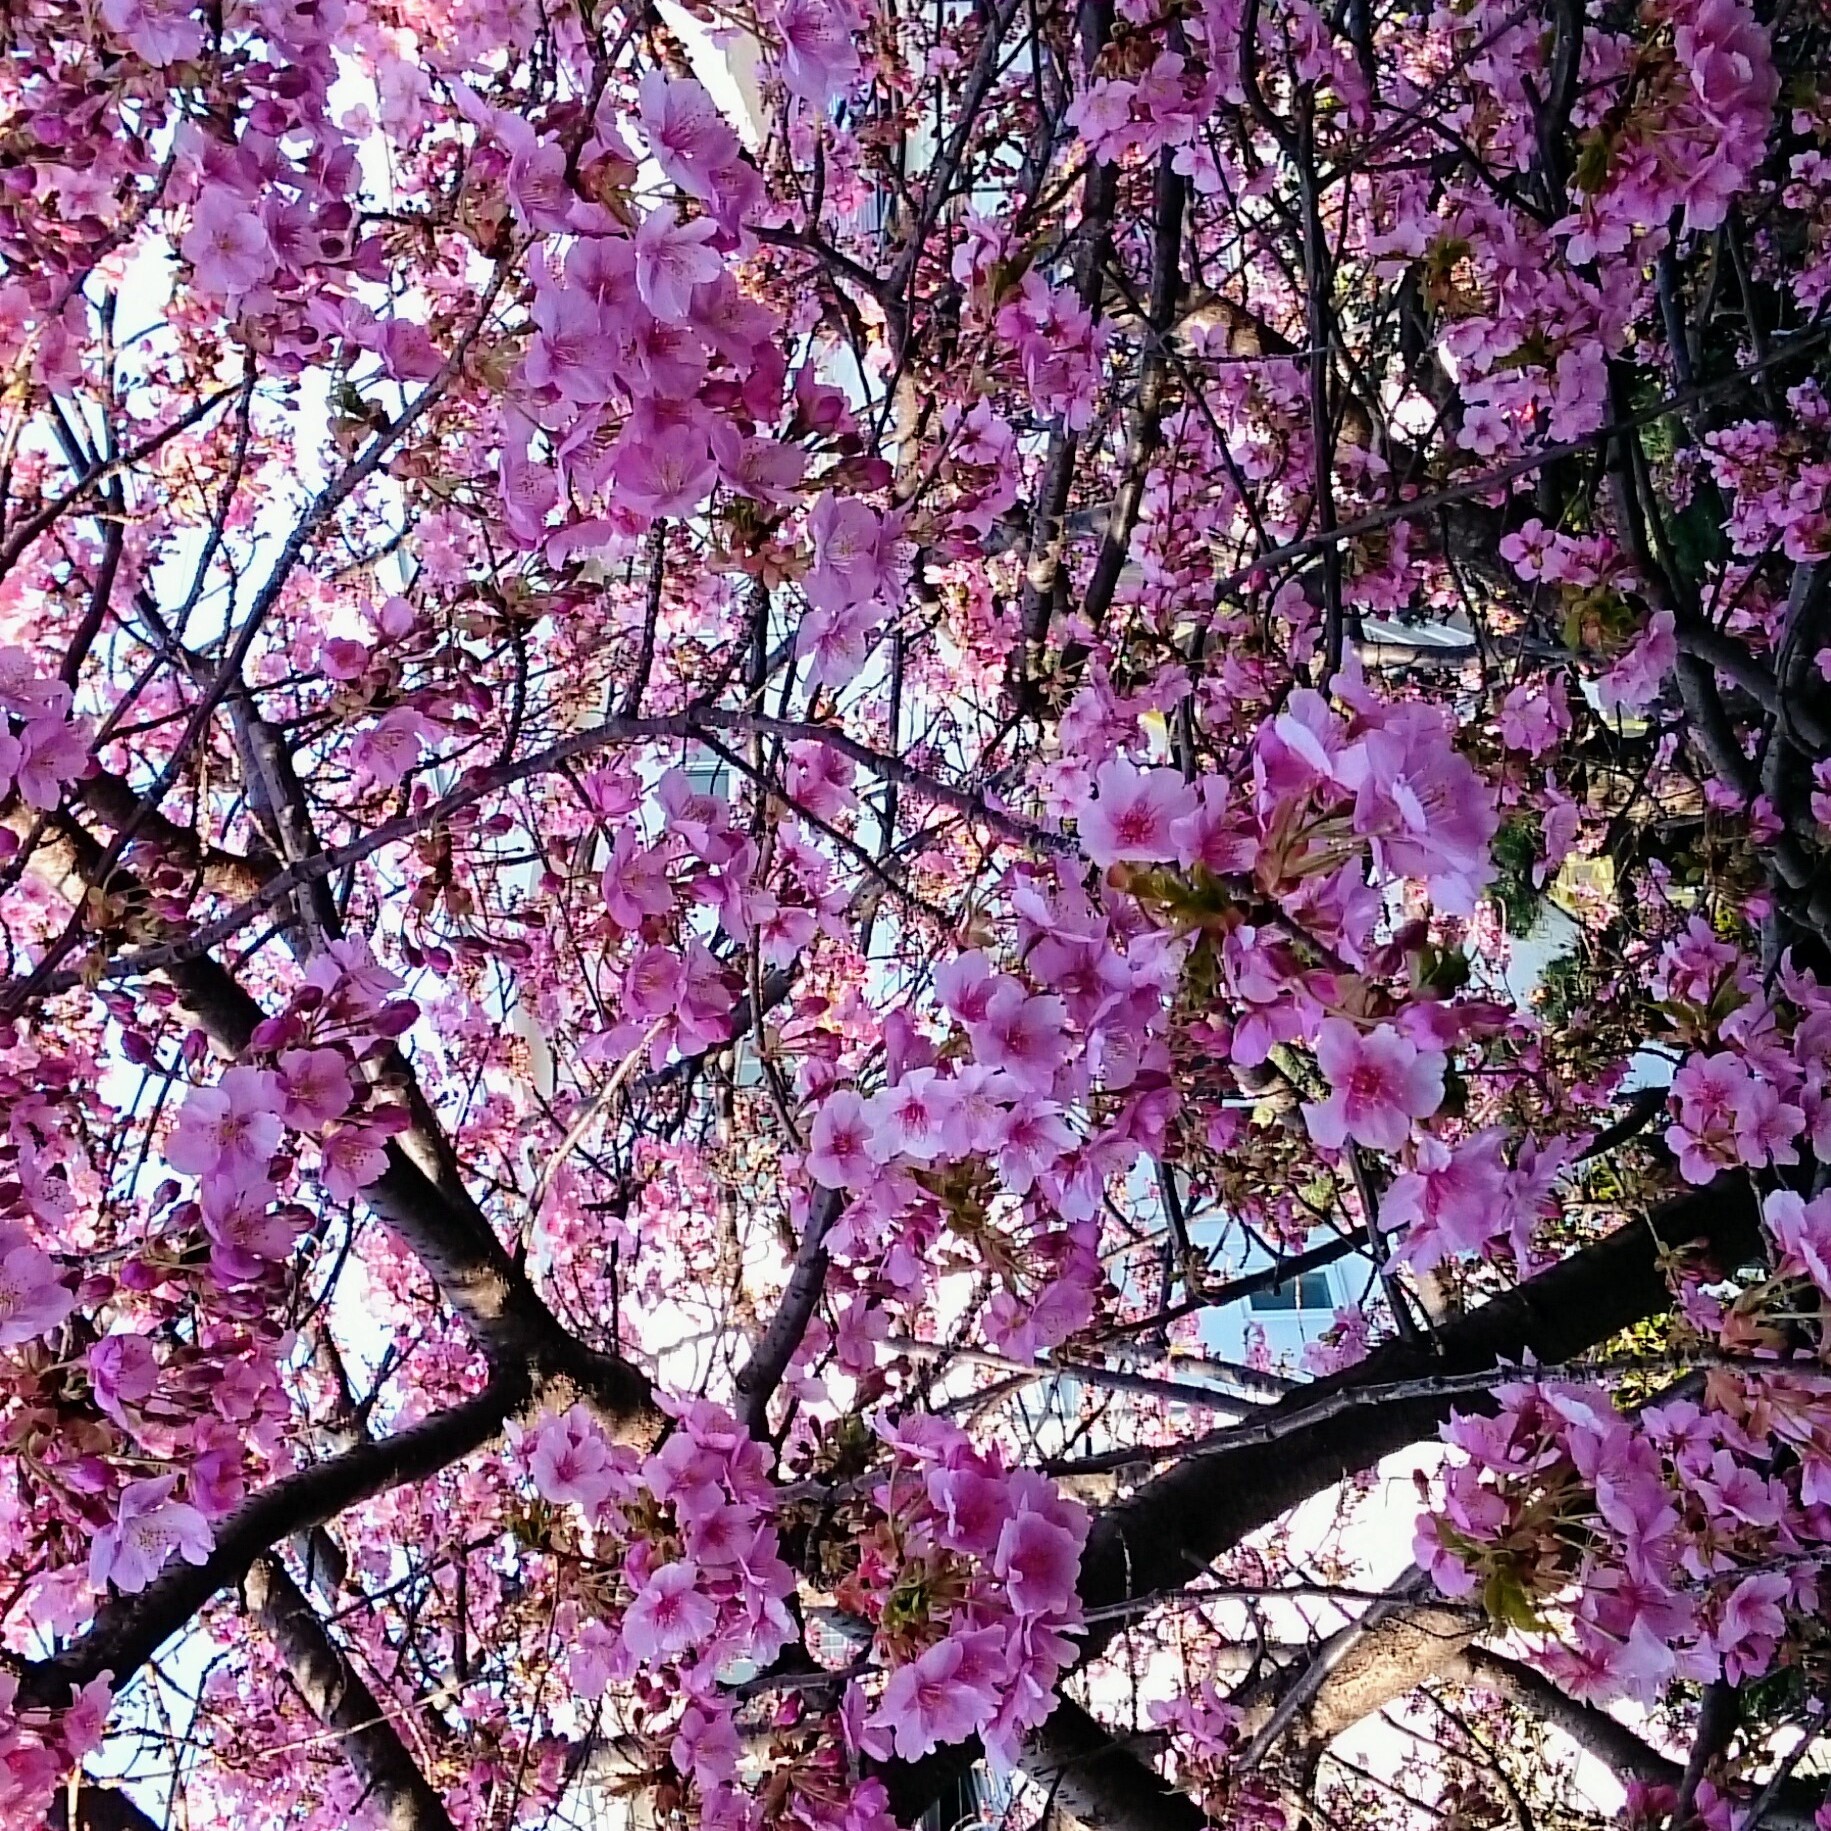 |
Columbine 1
click
to enlarge 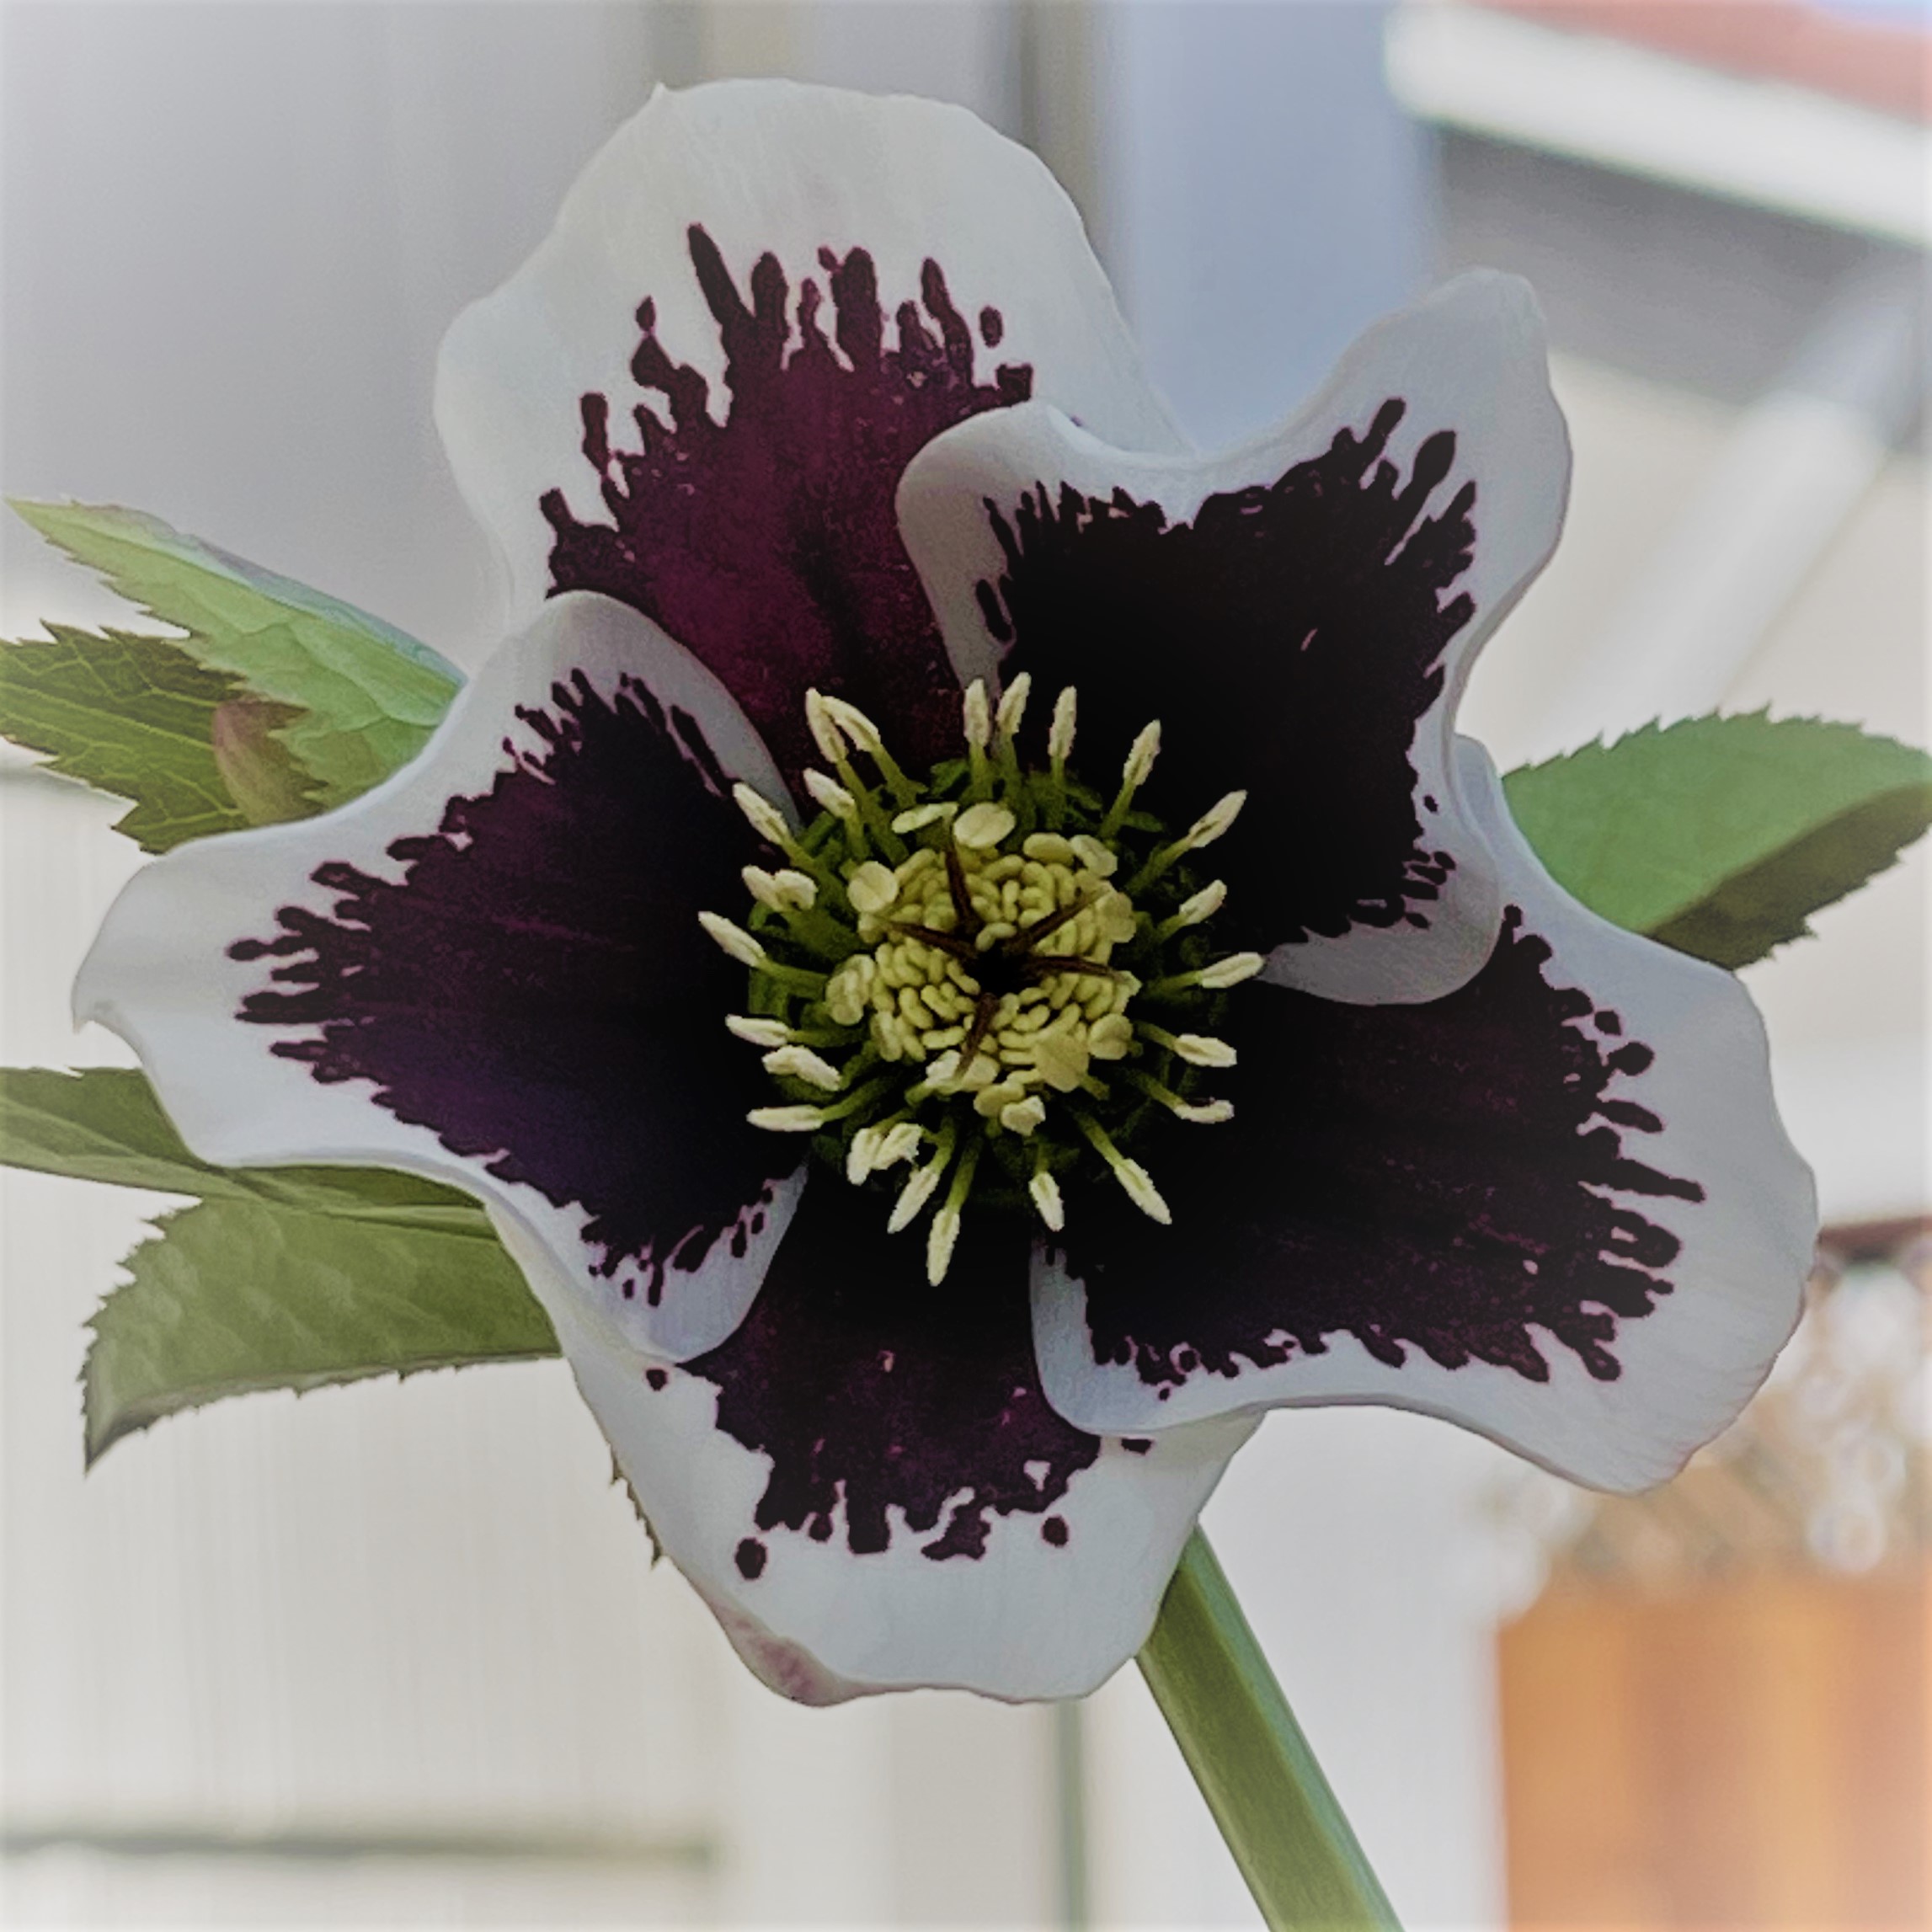 |
Flower
click
to enlarge 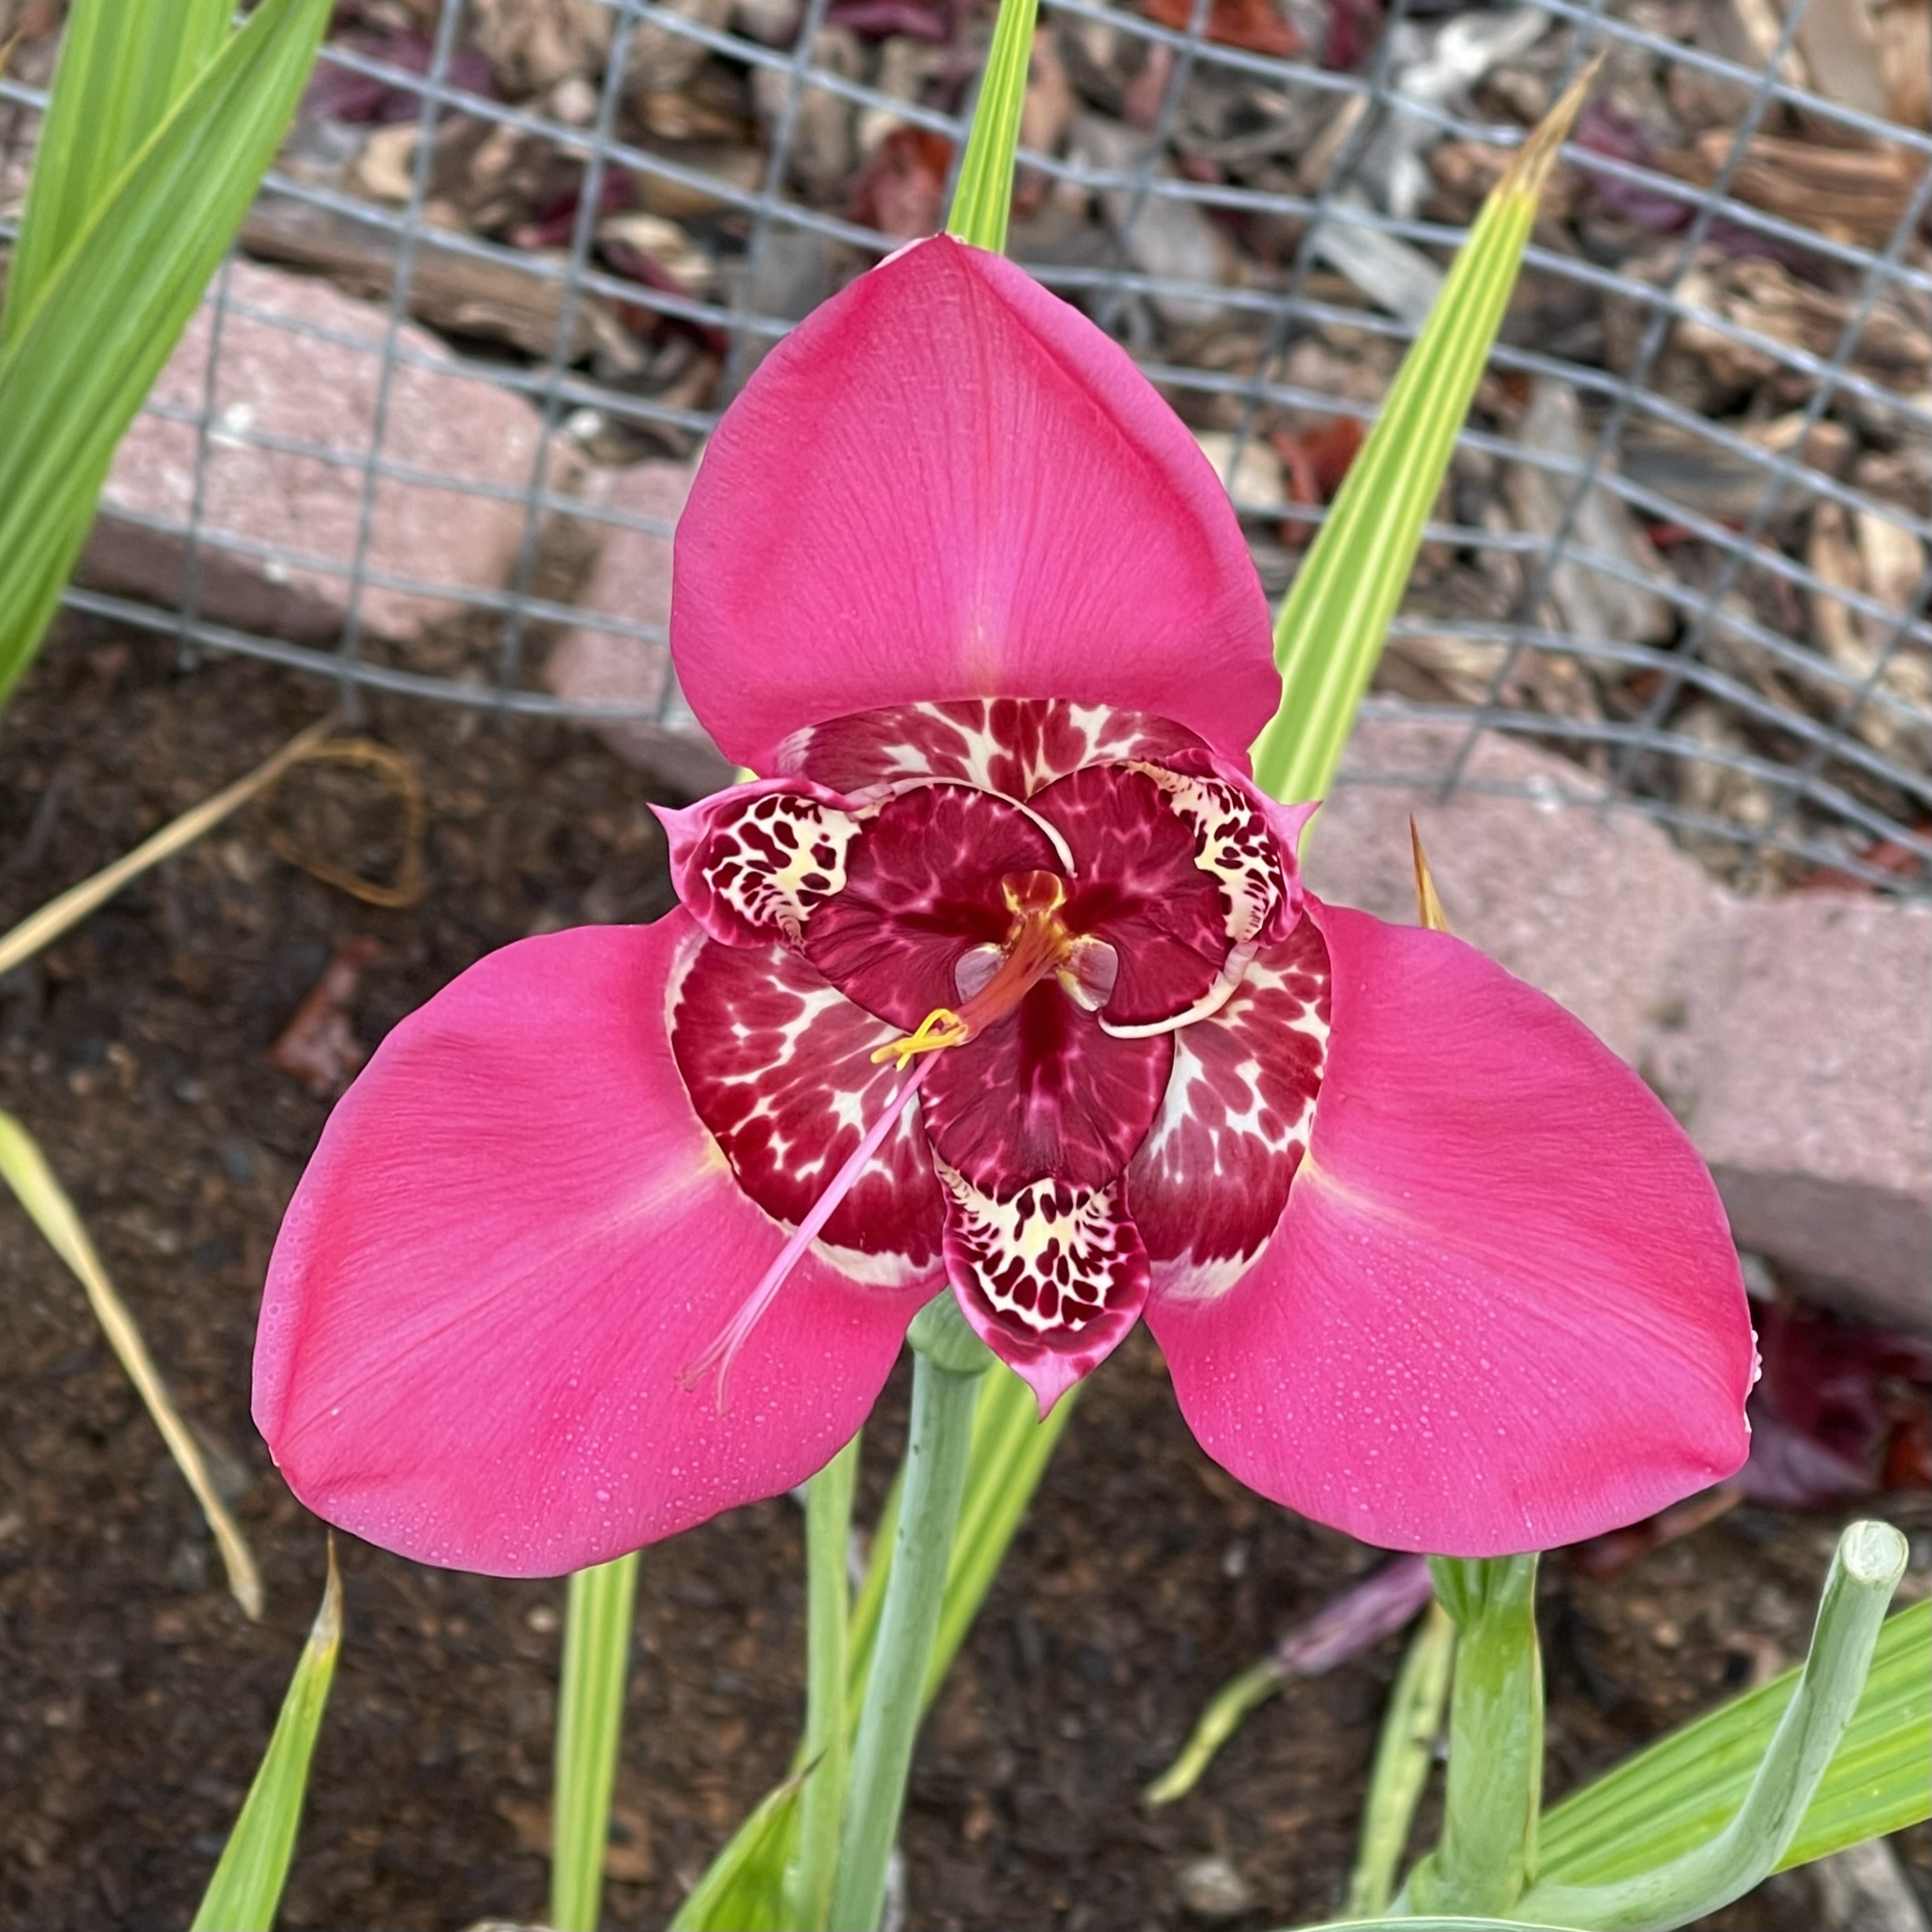 |
Flower
click
to enlarge 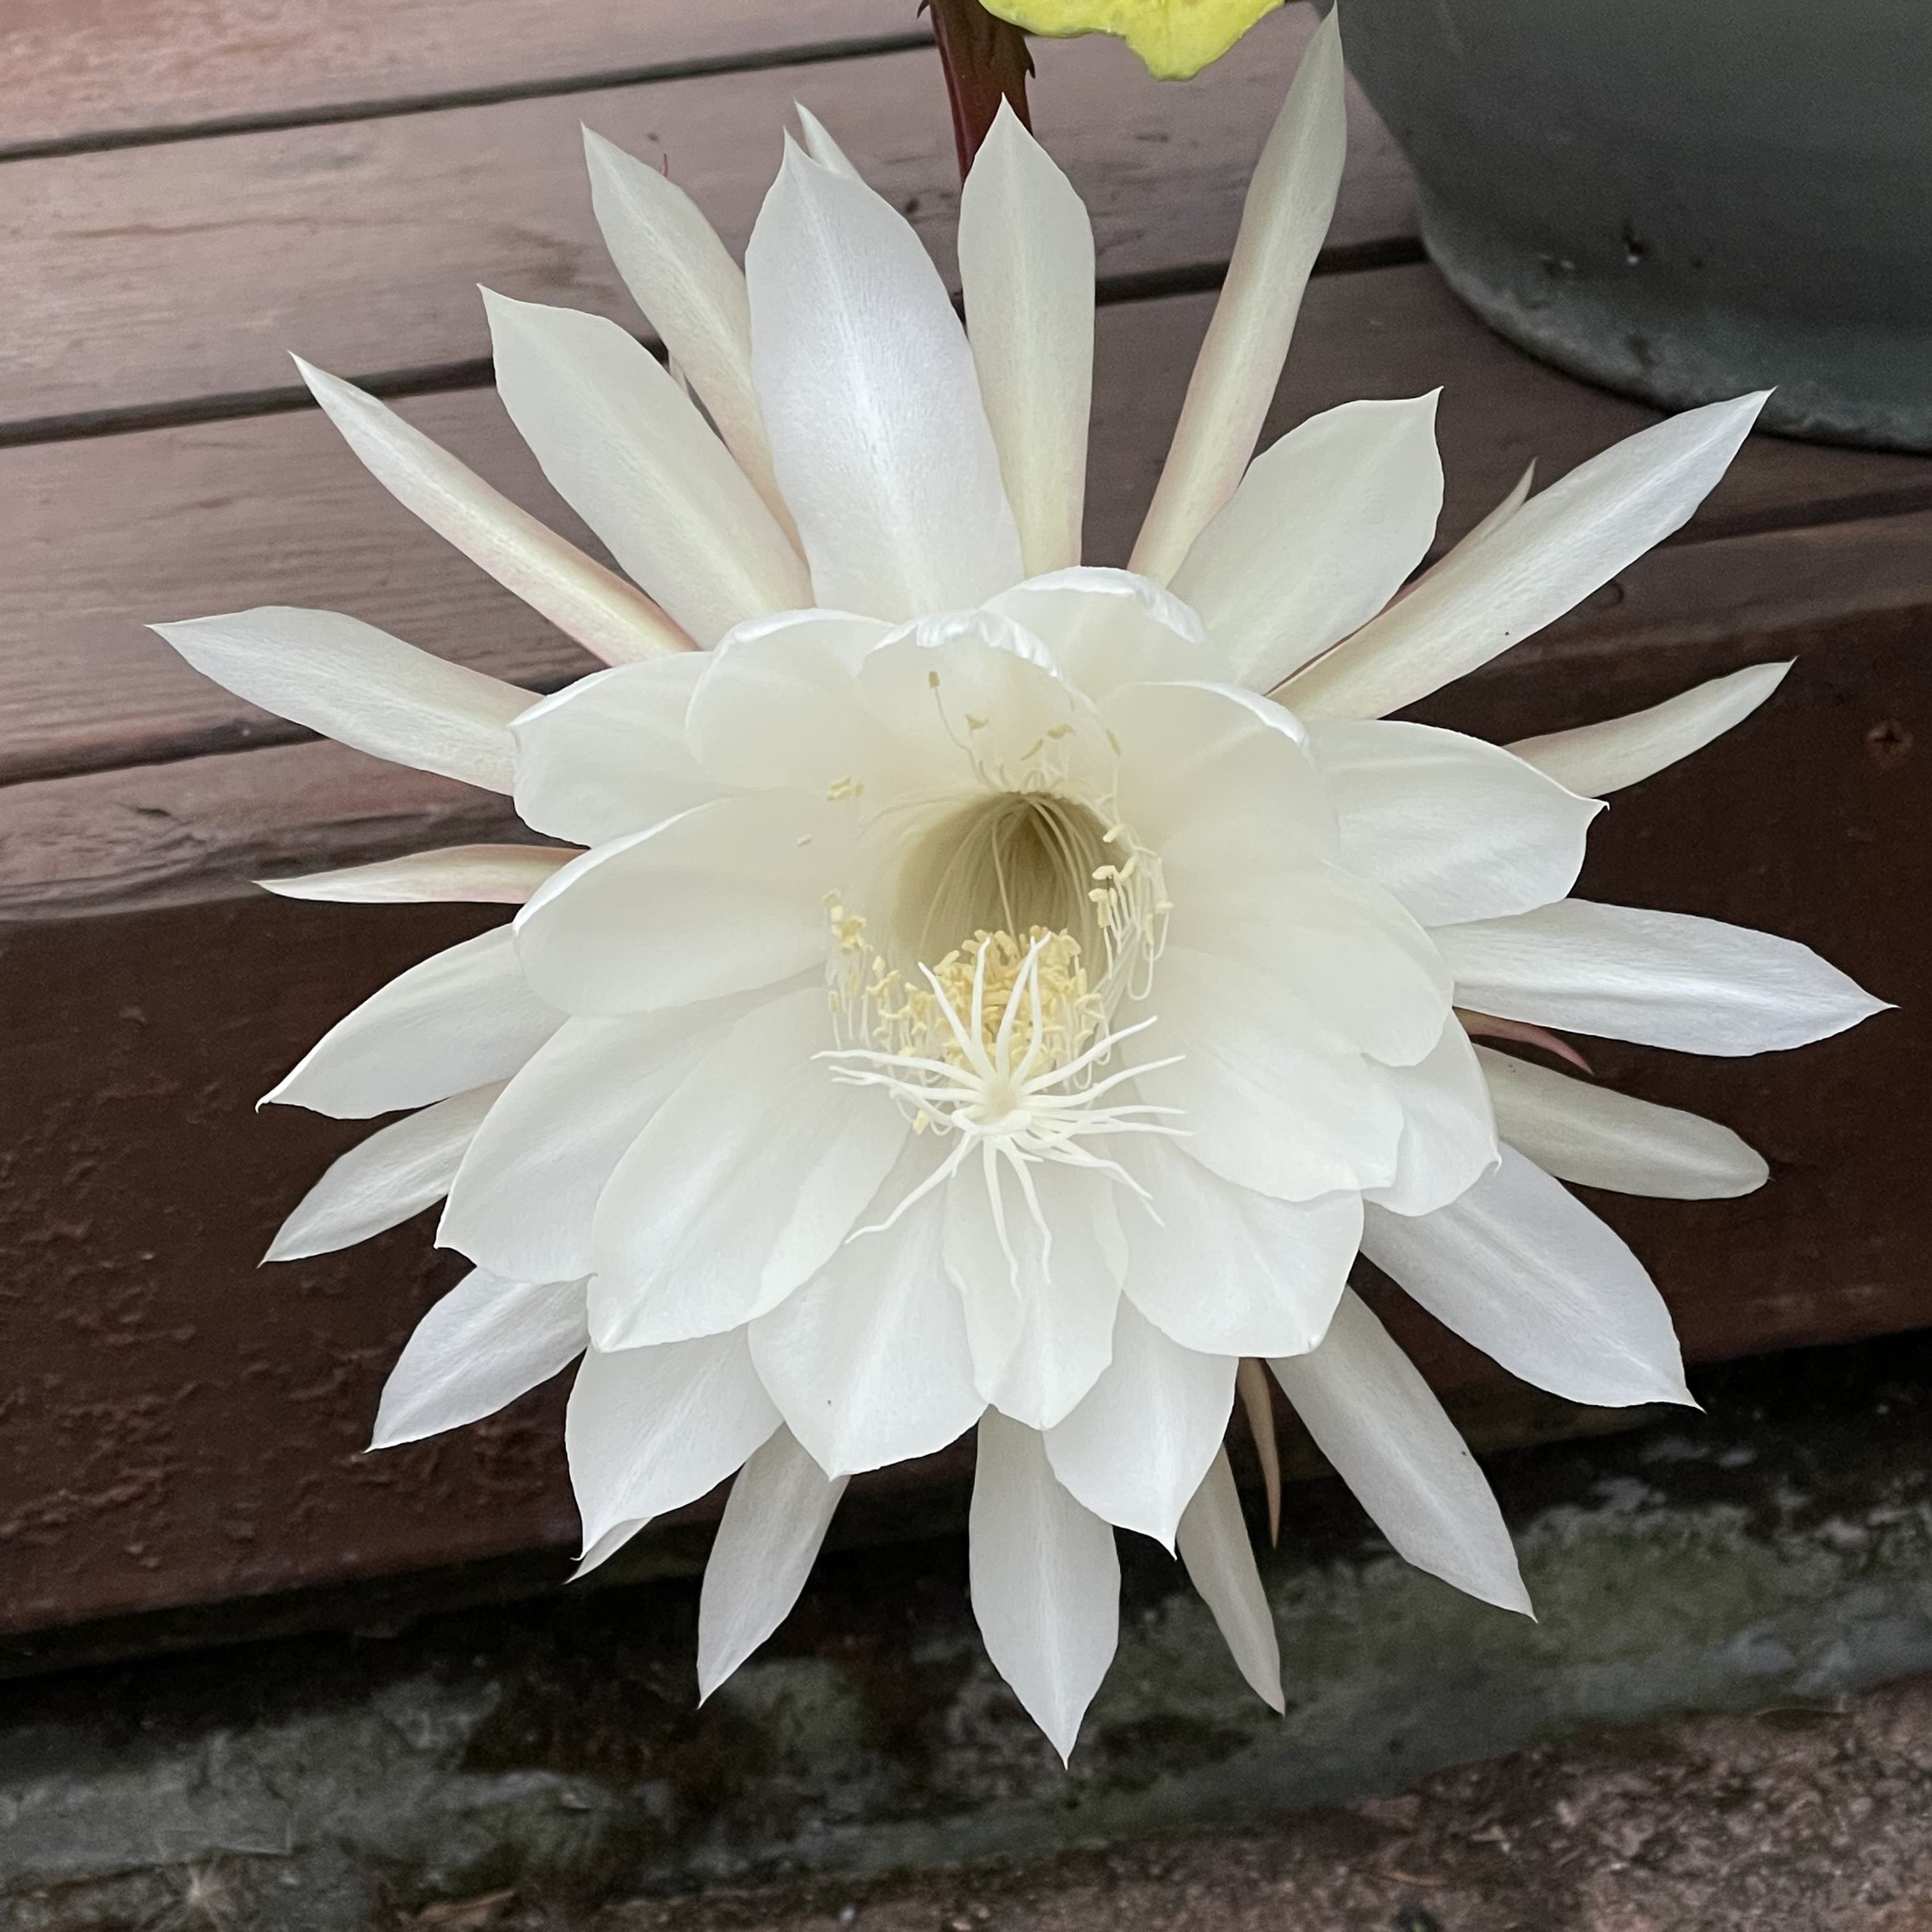 |
Flower
click
to enlarge 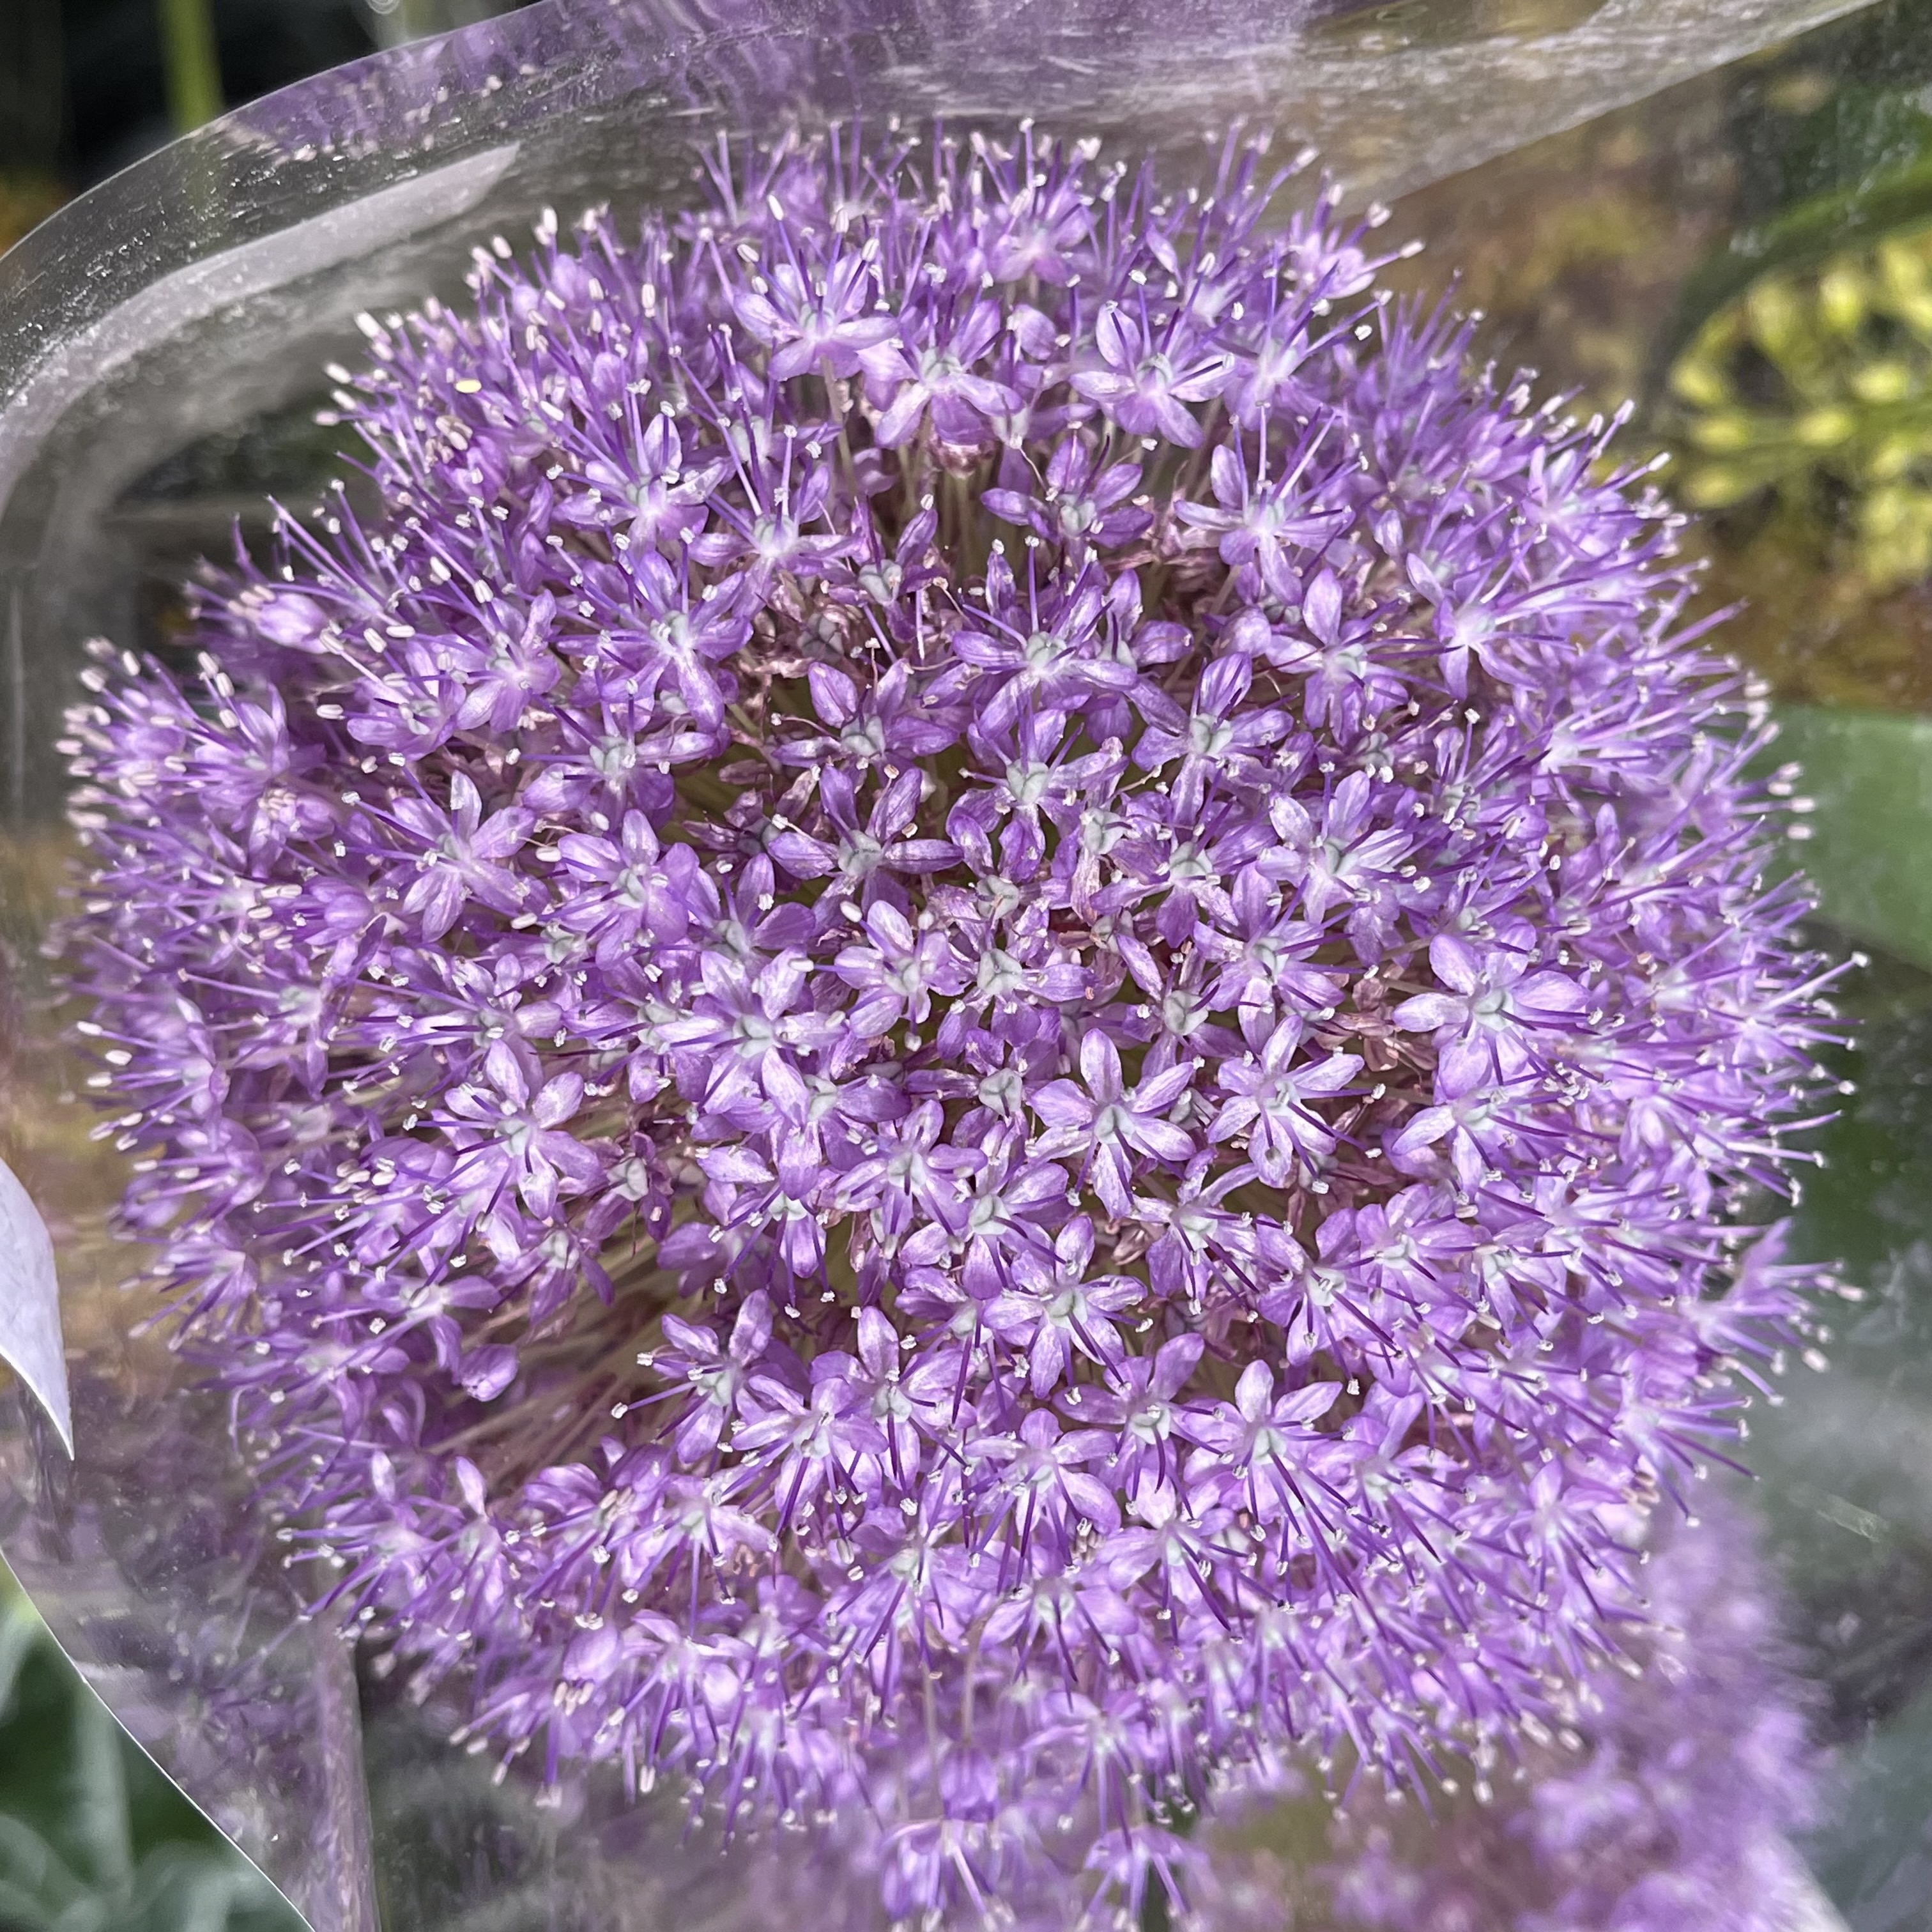 |
Flower
click
to enlarge 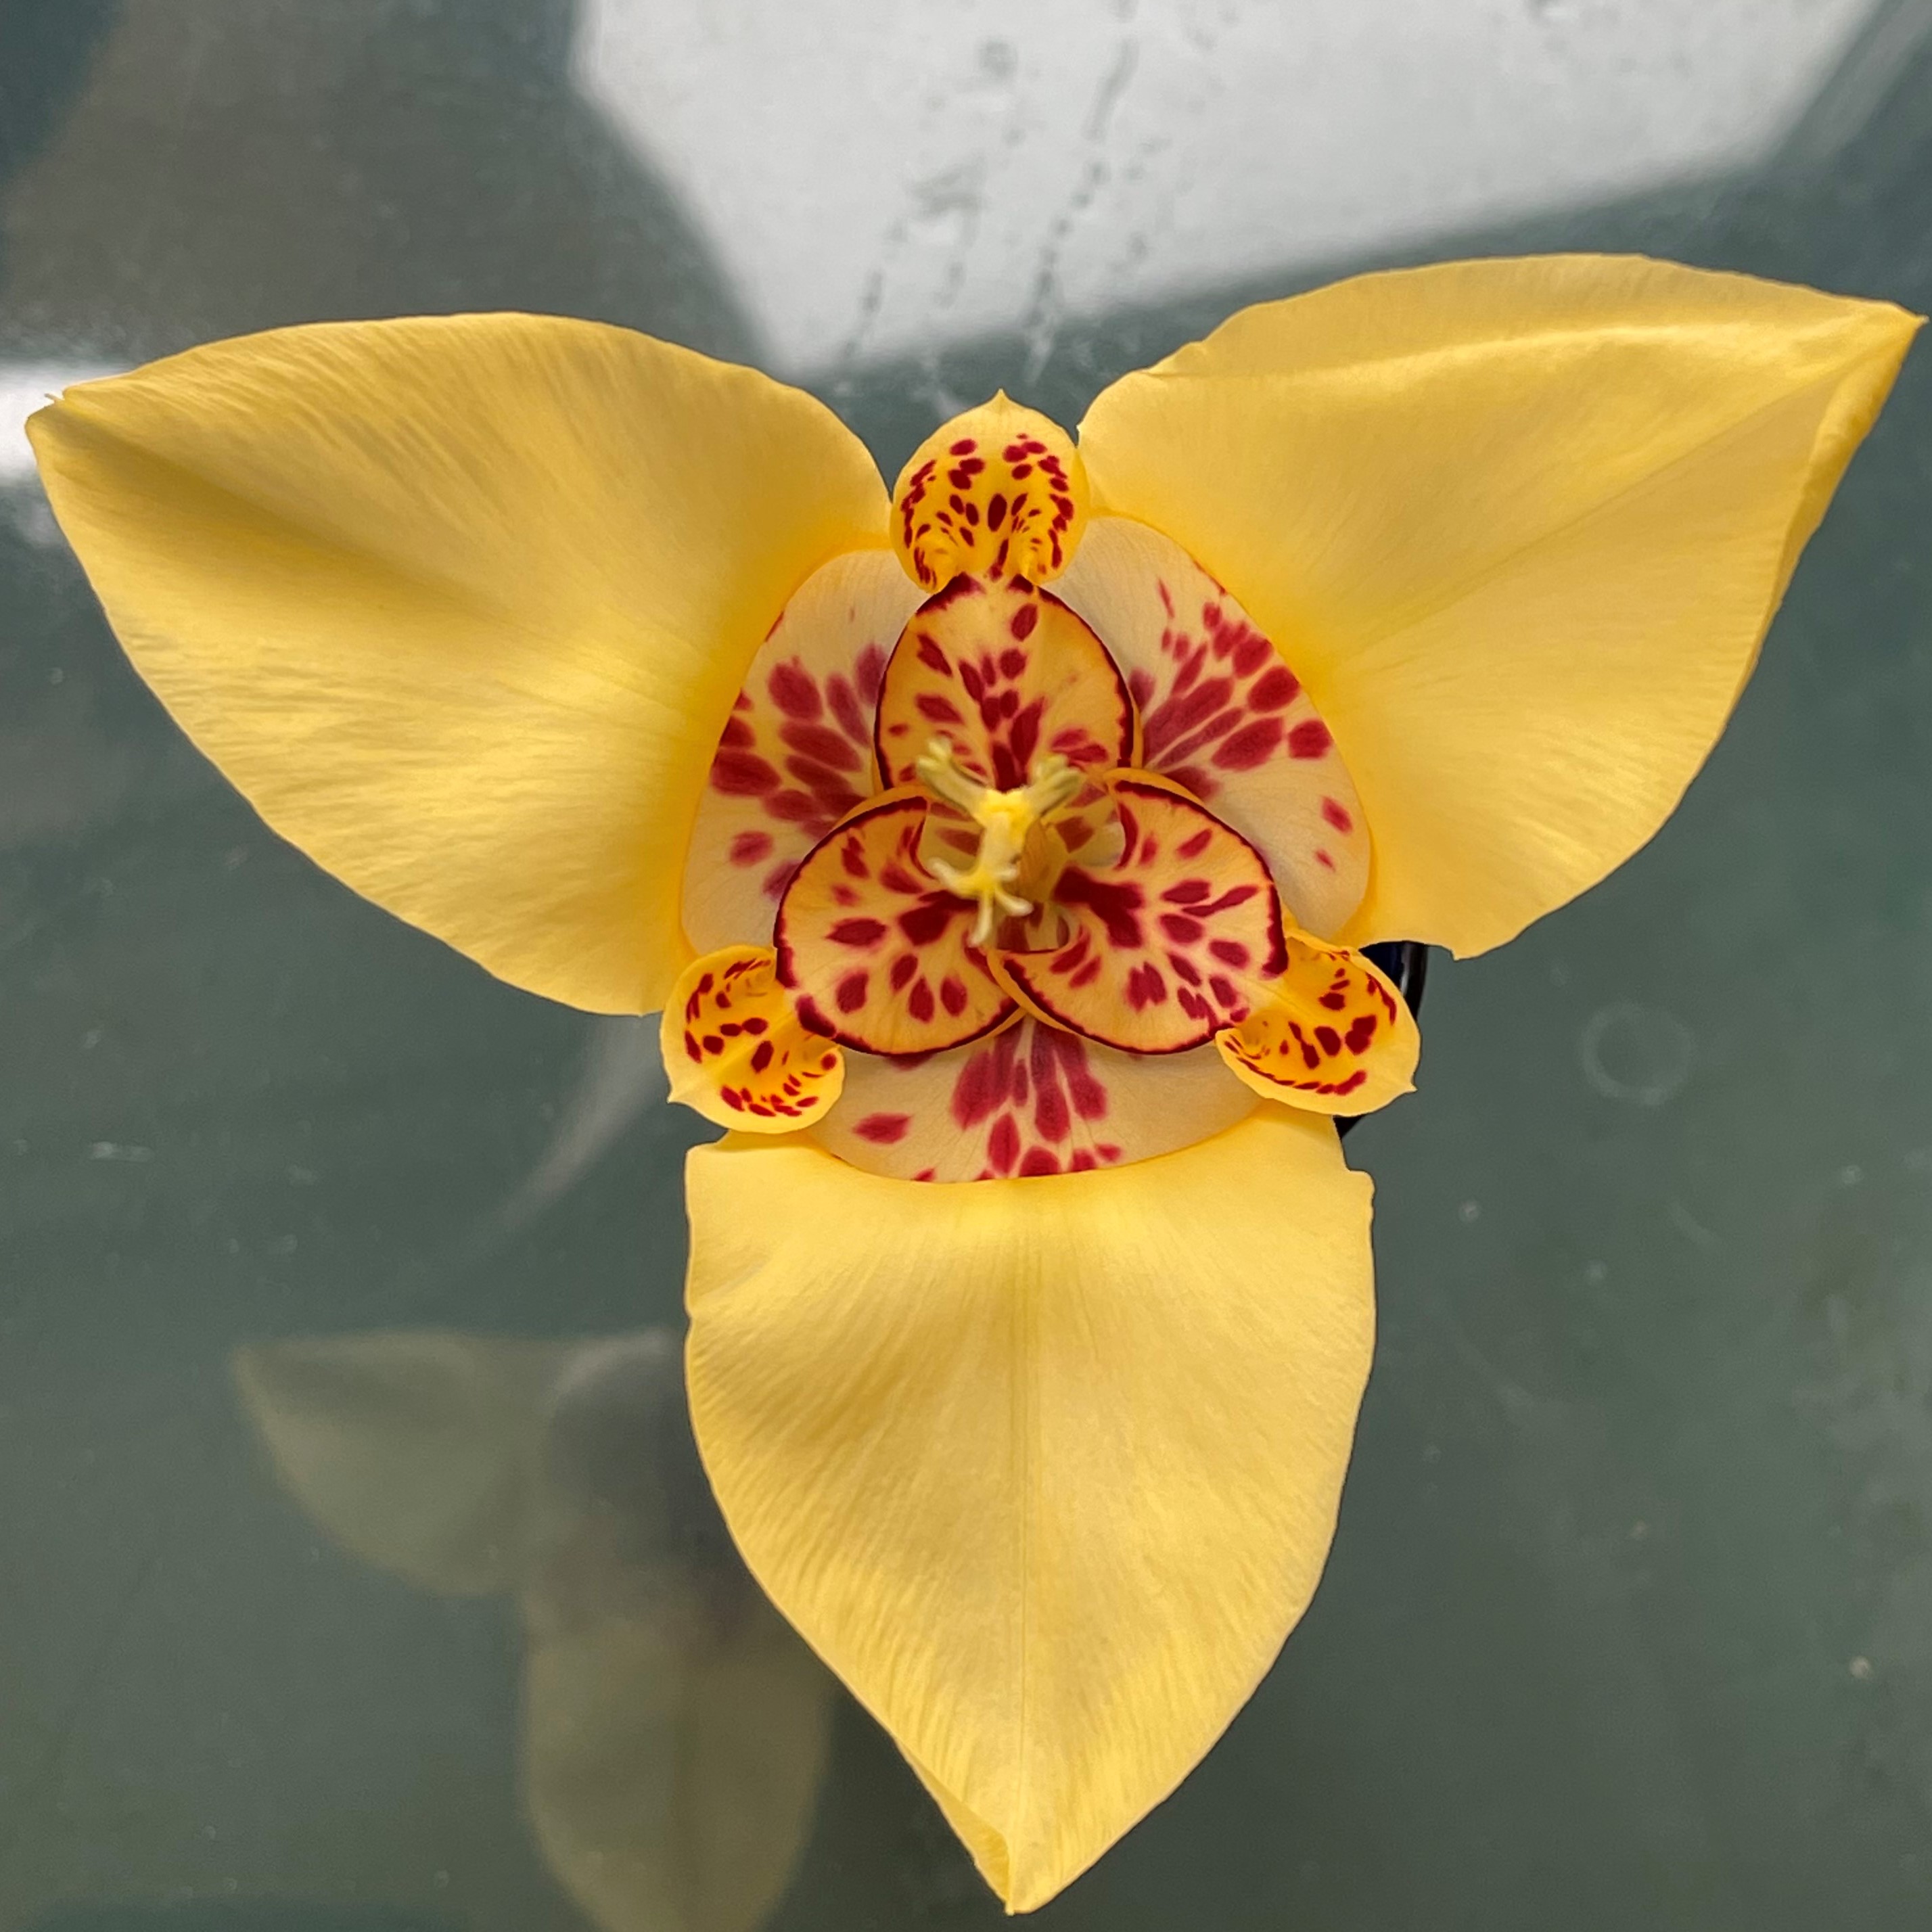 |
Flower
click
to enlarge 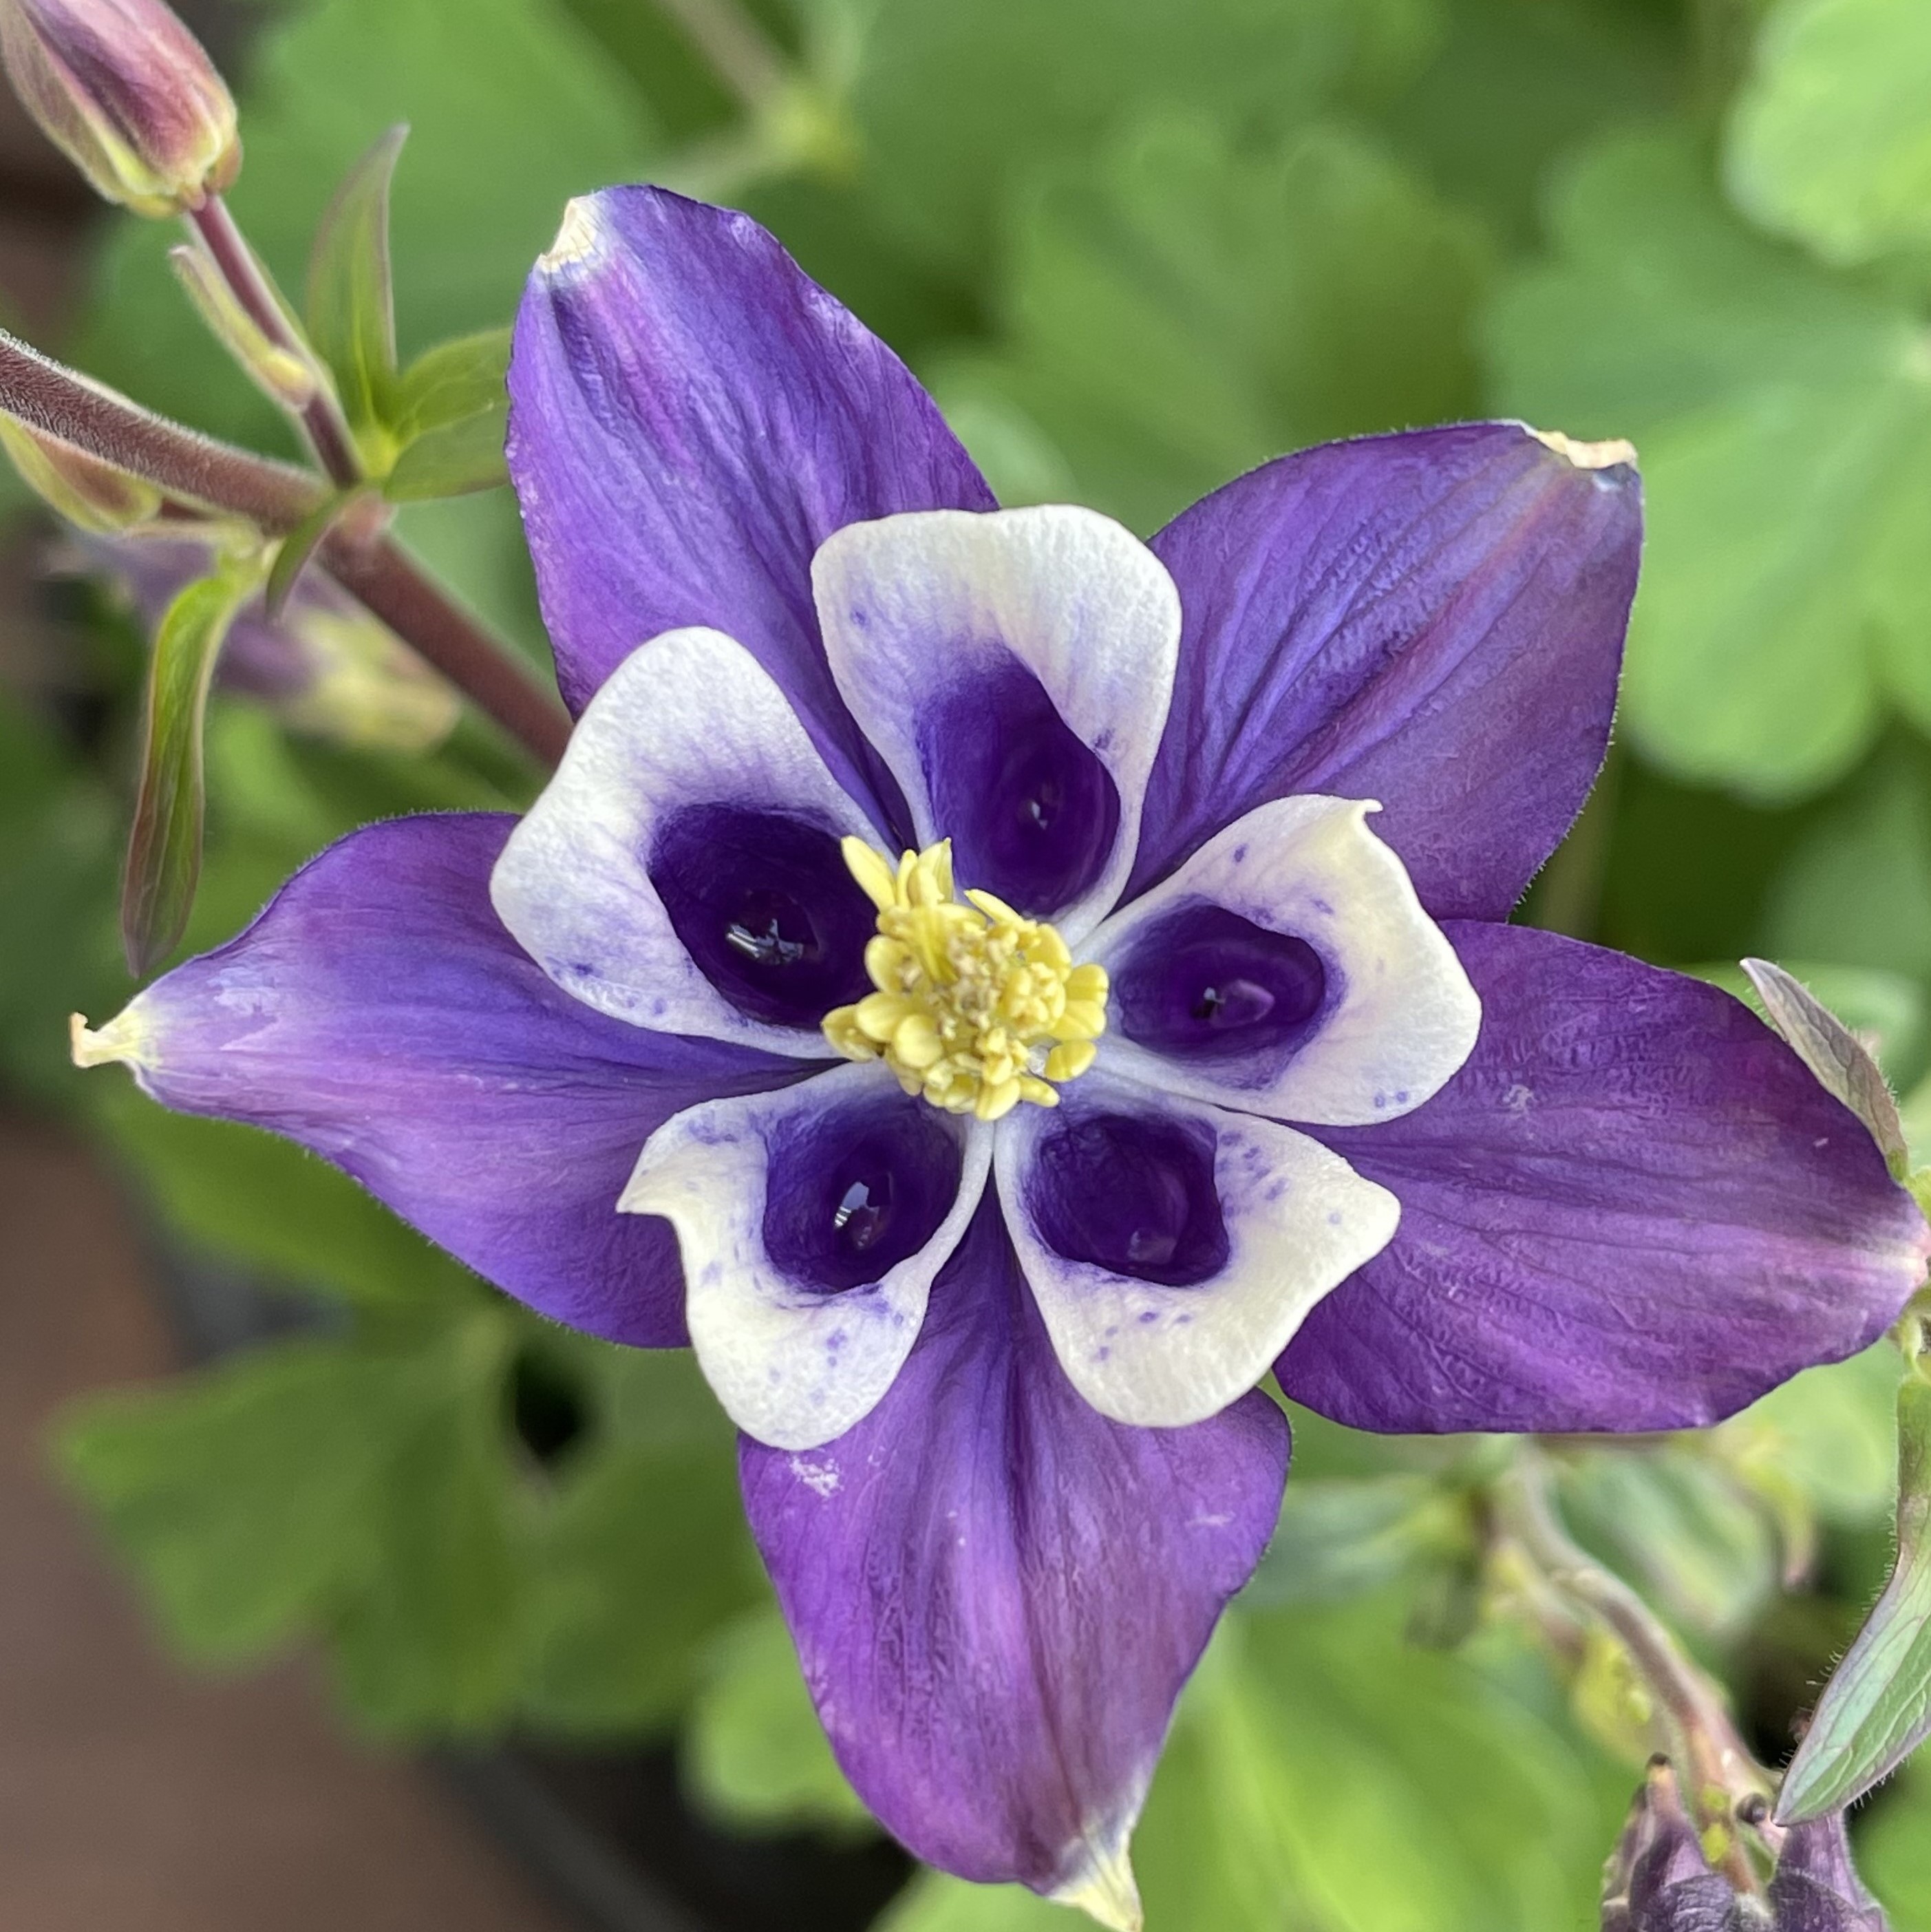 |
Flower
click
to enlarge 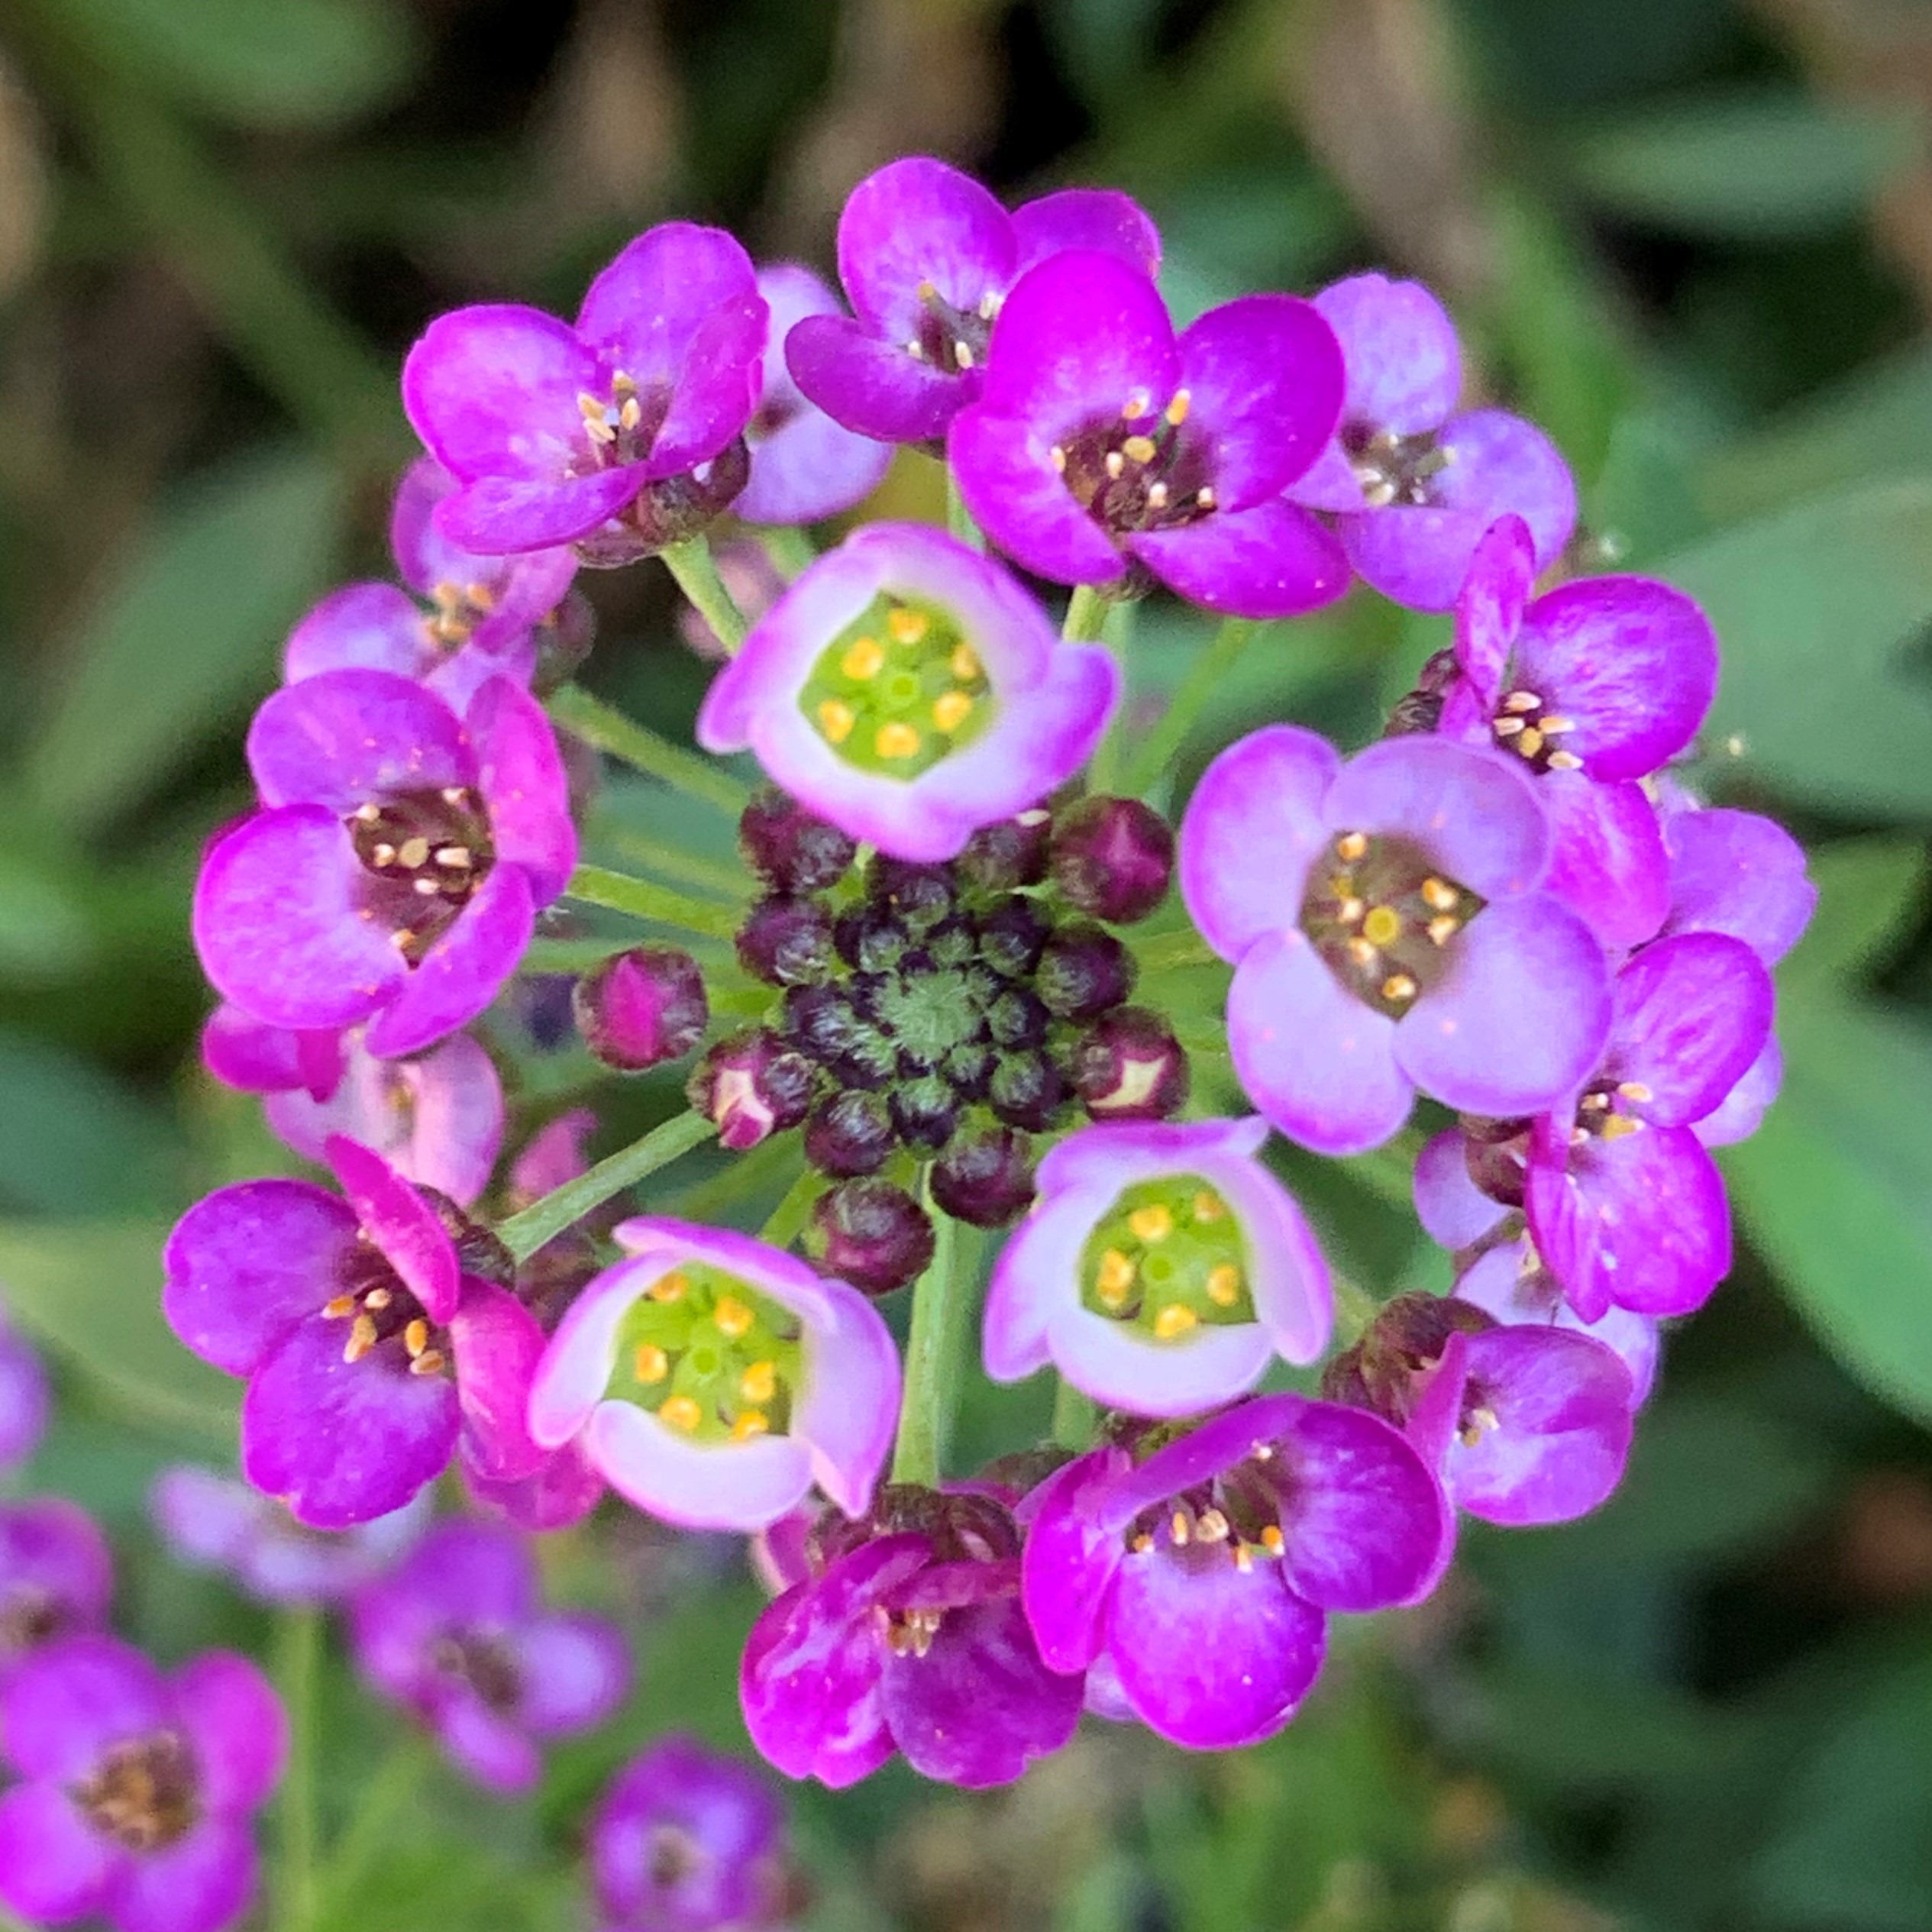 |
Flower
click
to enlarge 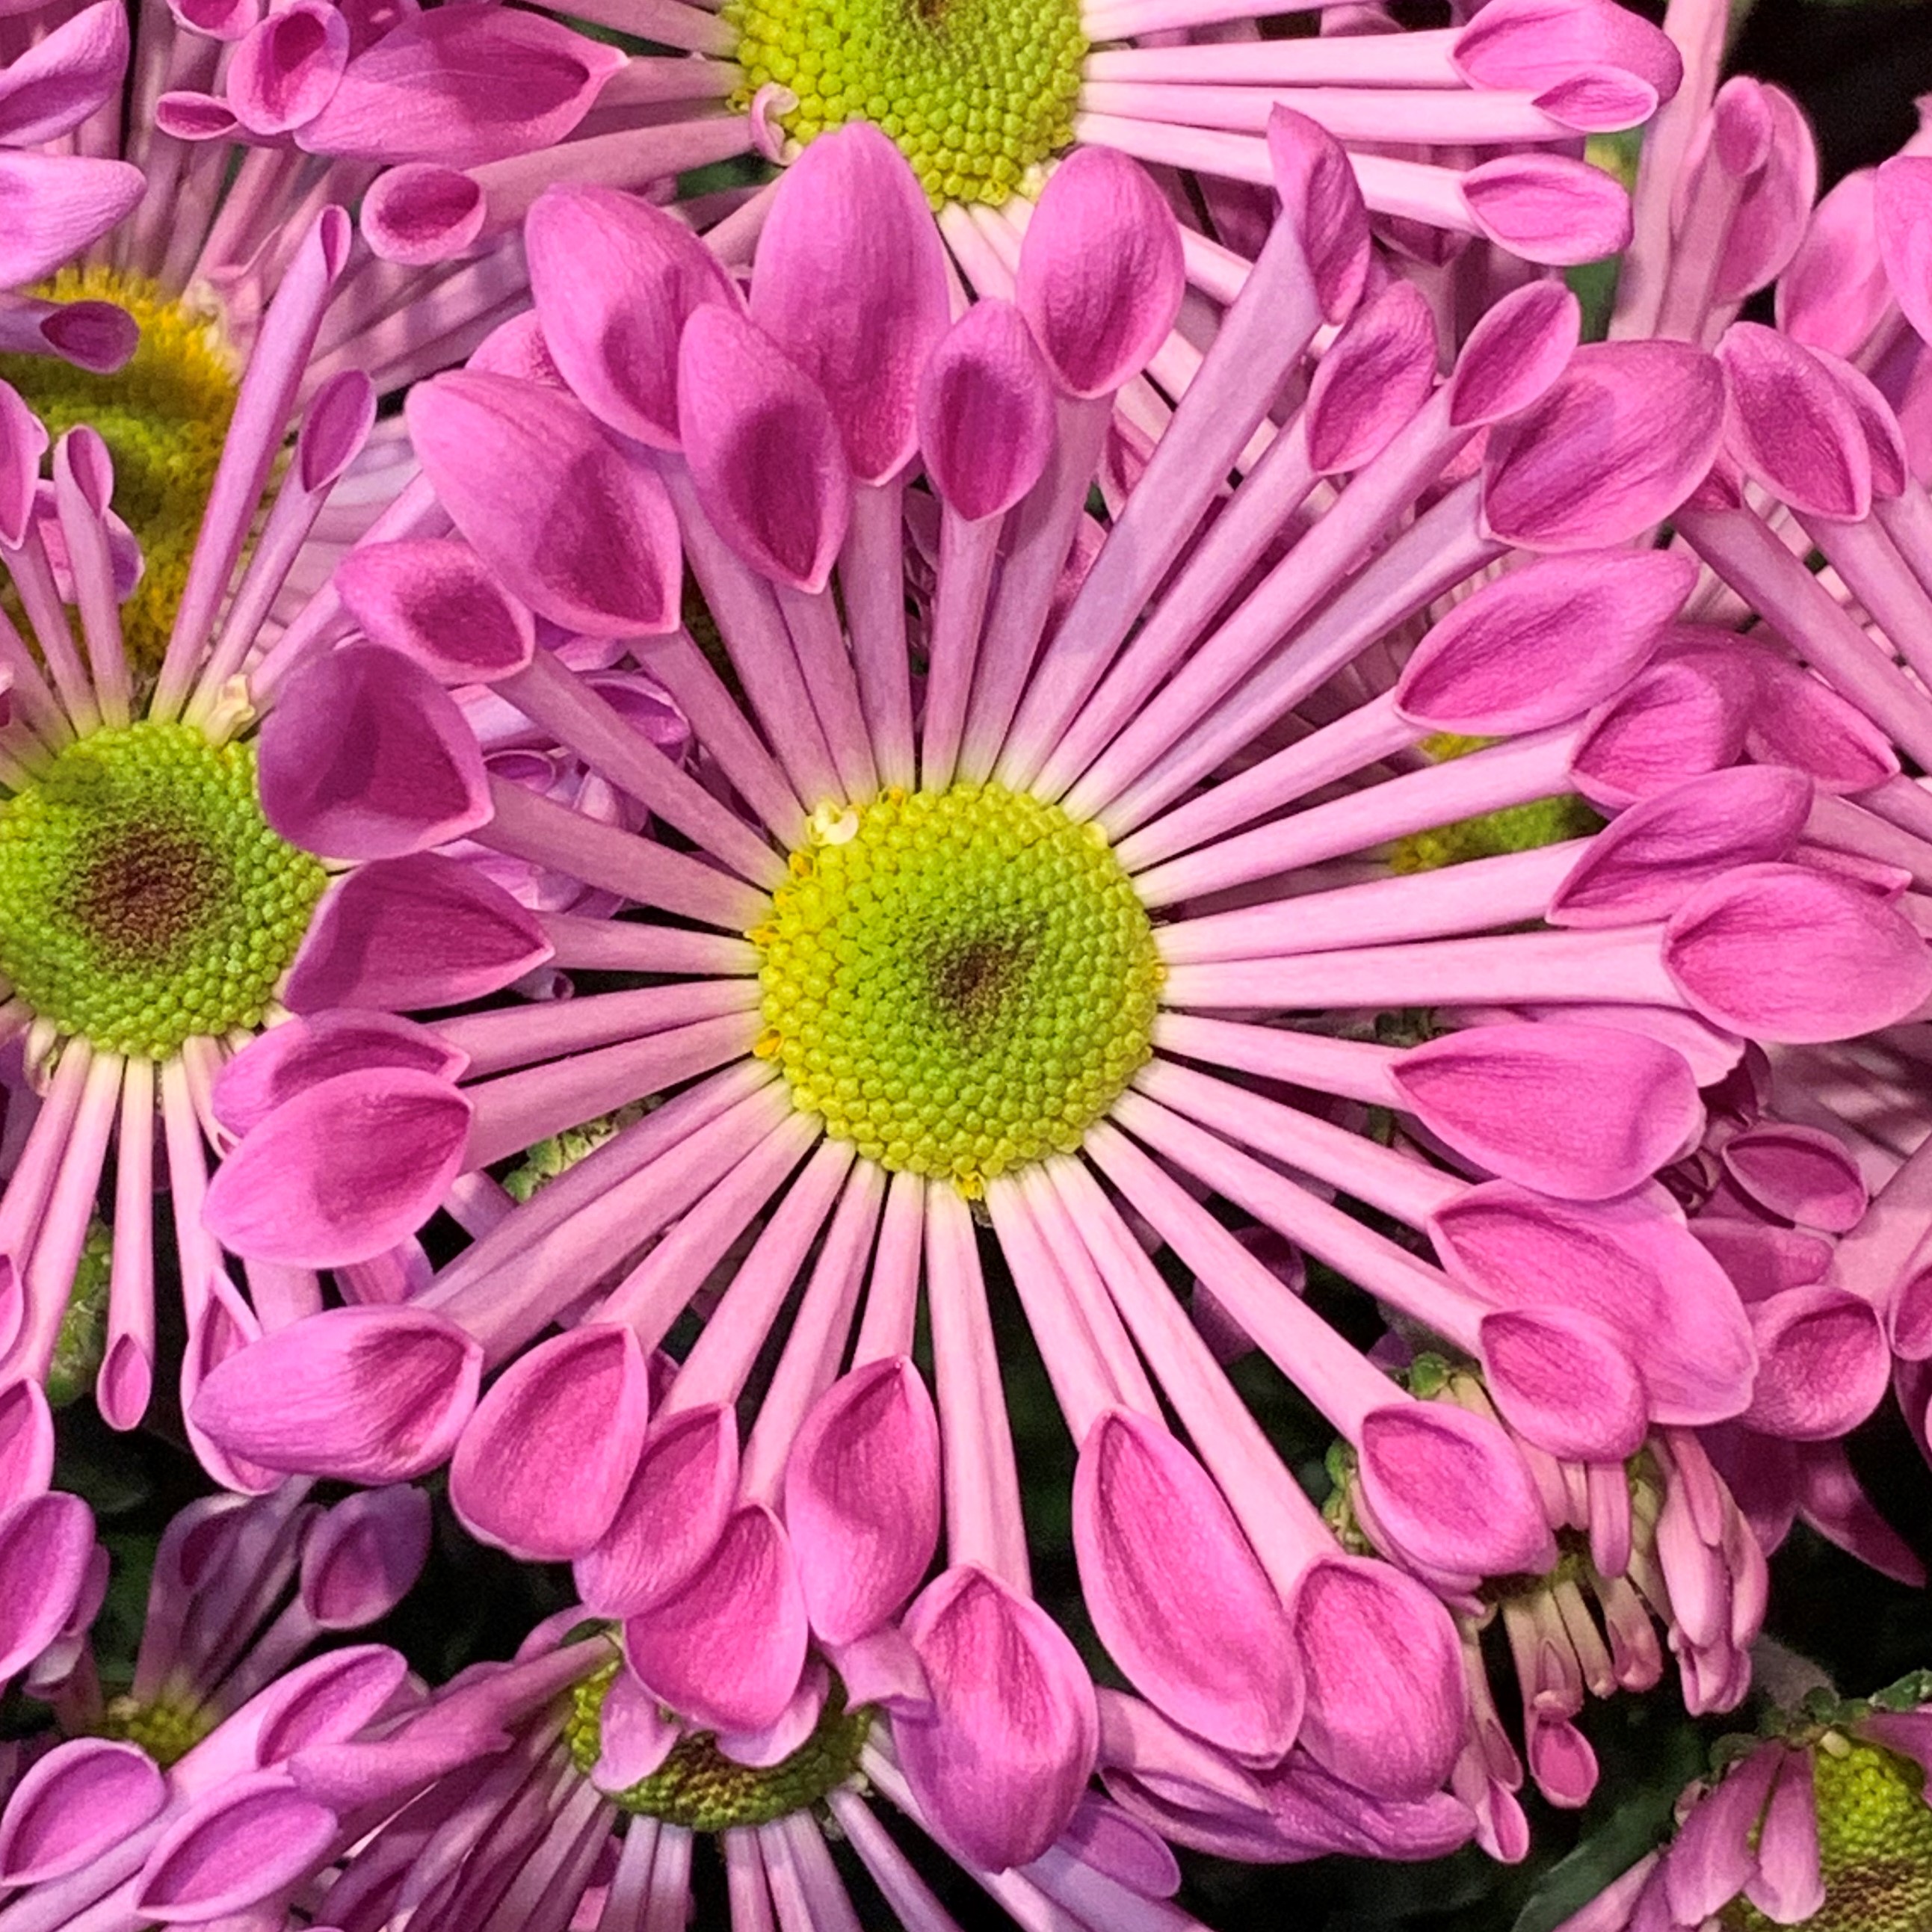 |
Flower
click
to enlarge 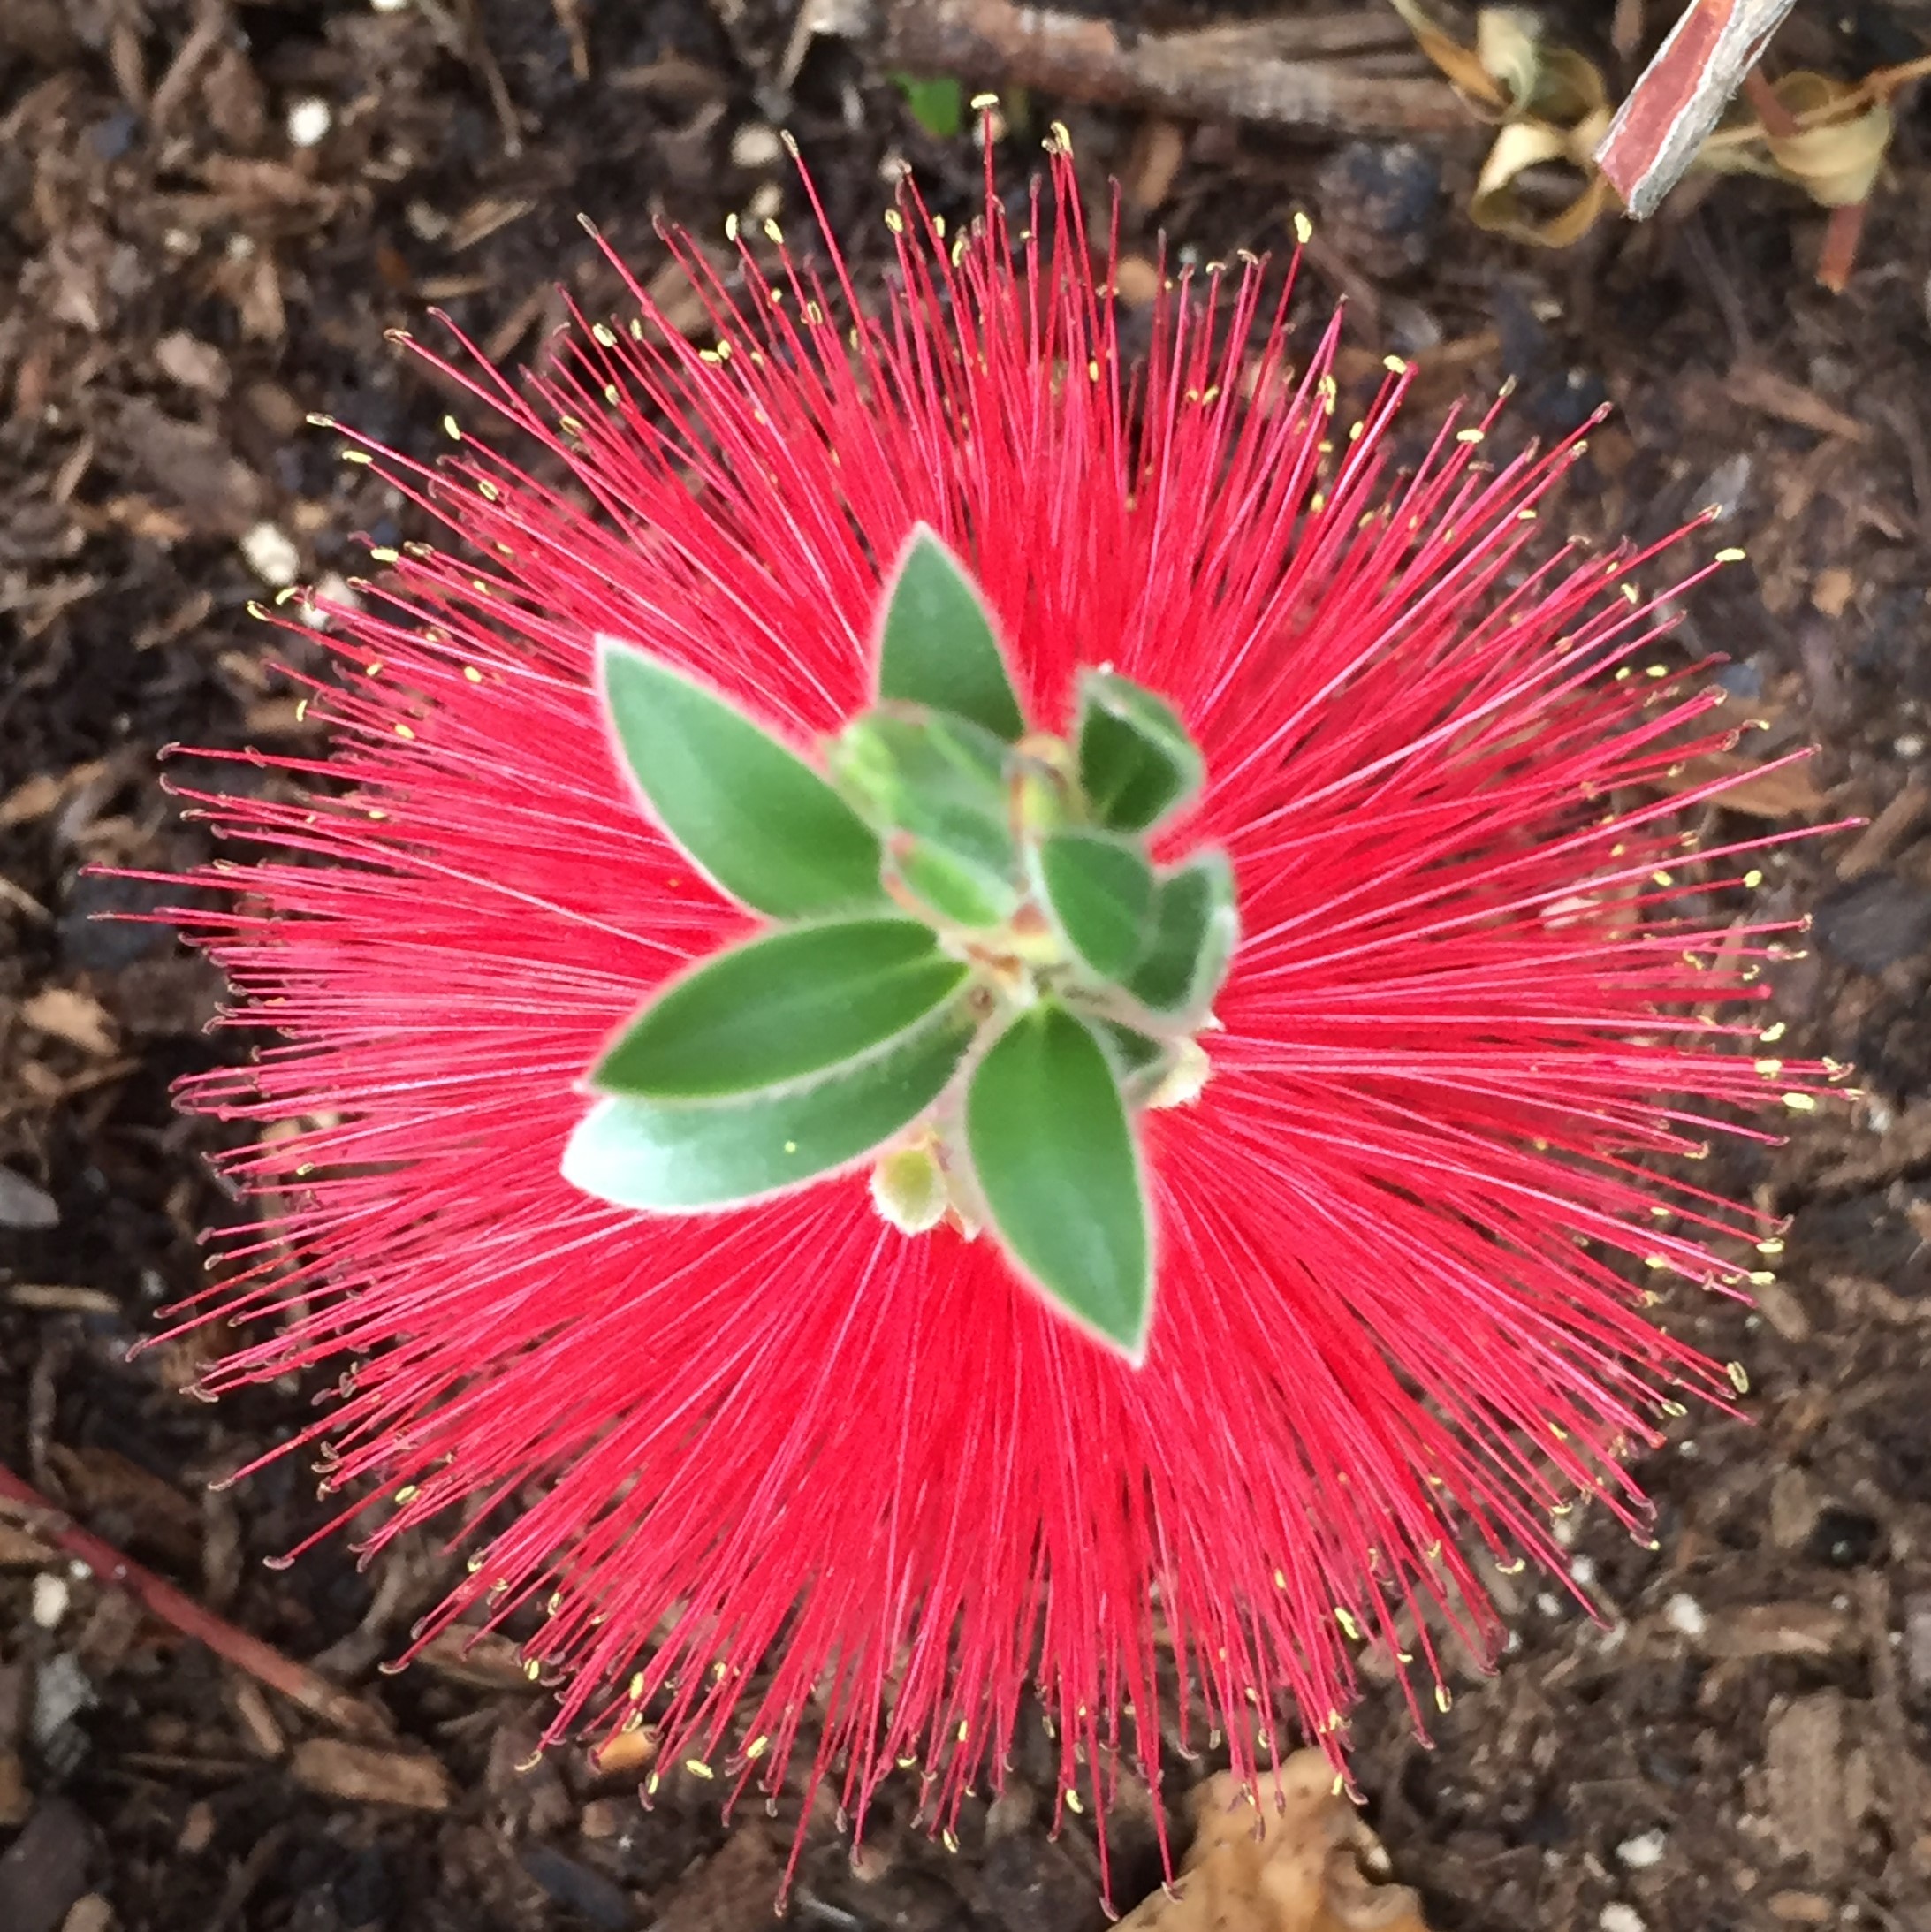 |
Flower
click
to enlarge  |
Flower
click
to enlarge 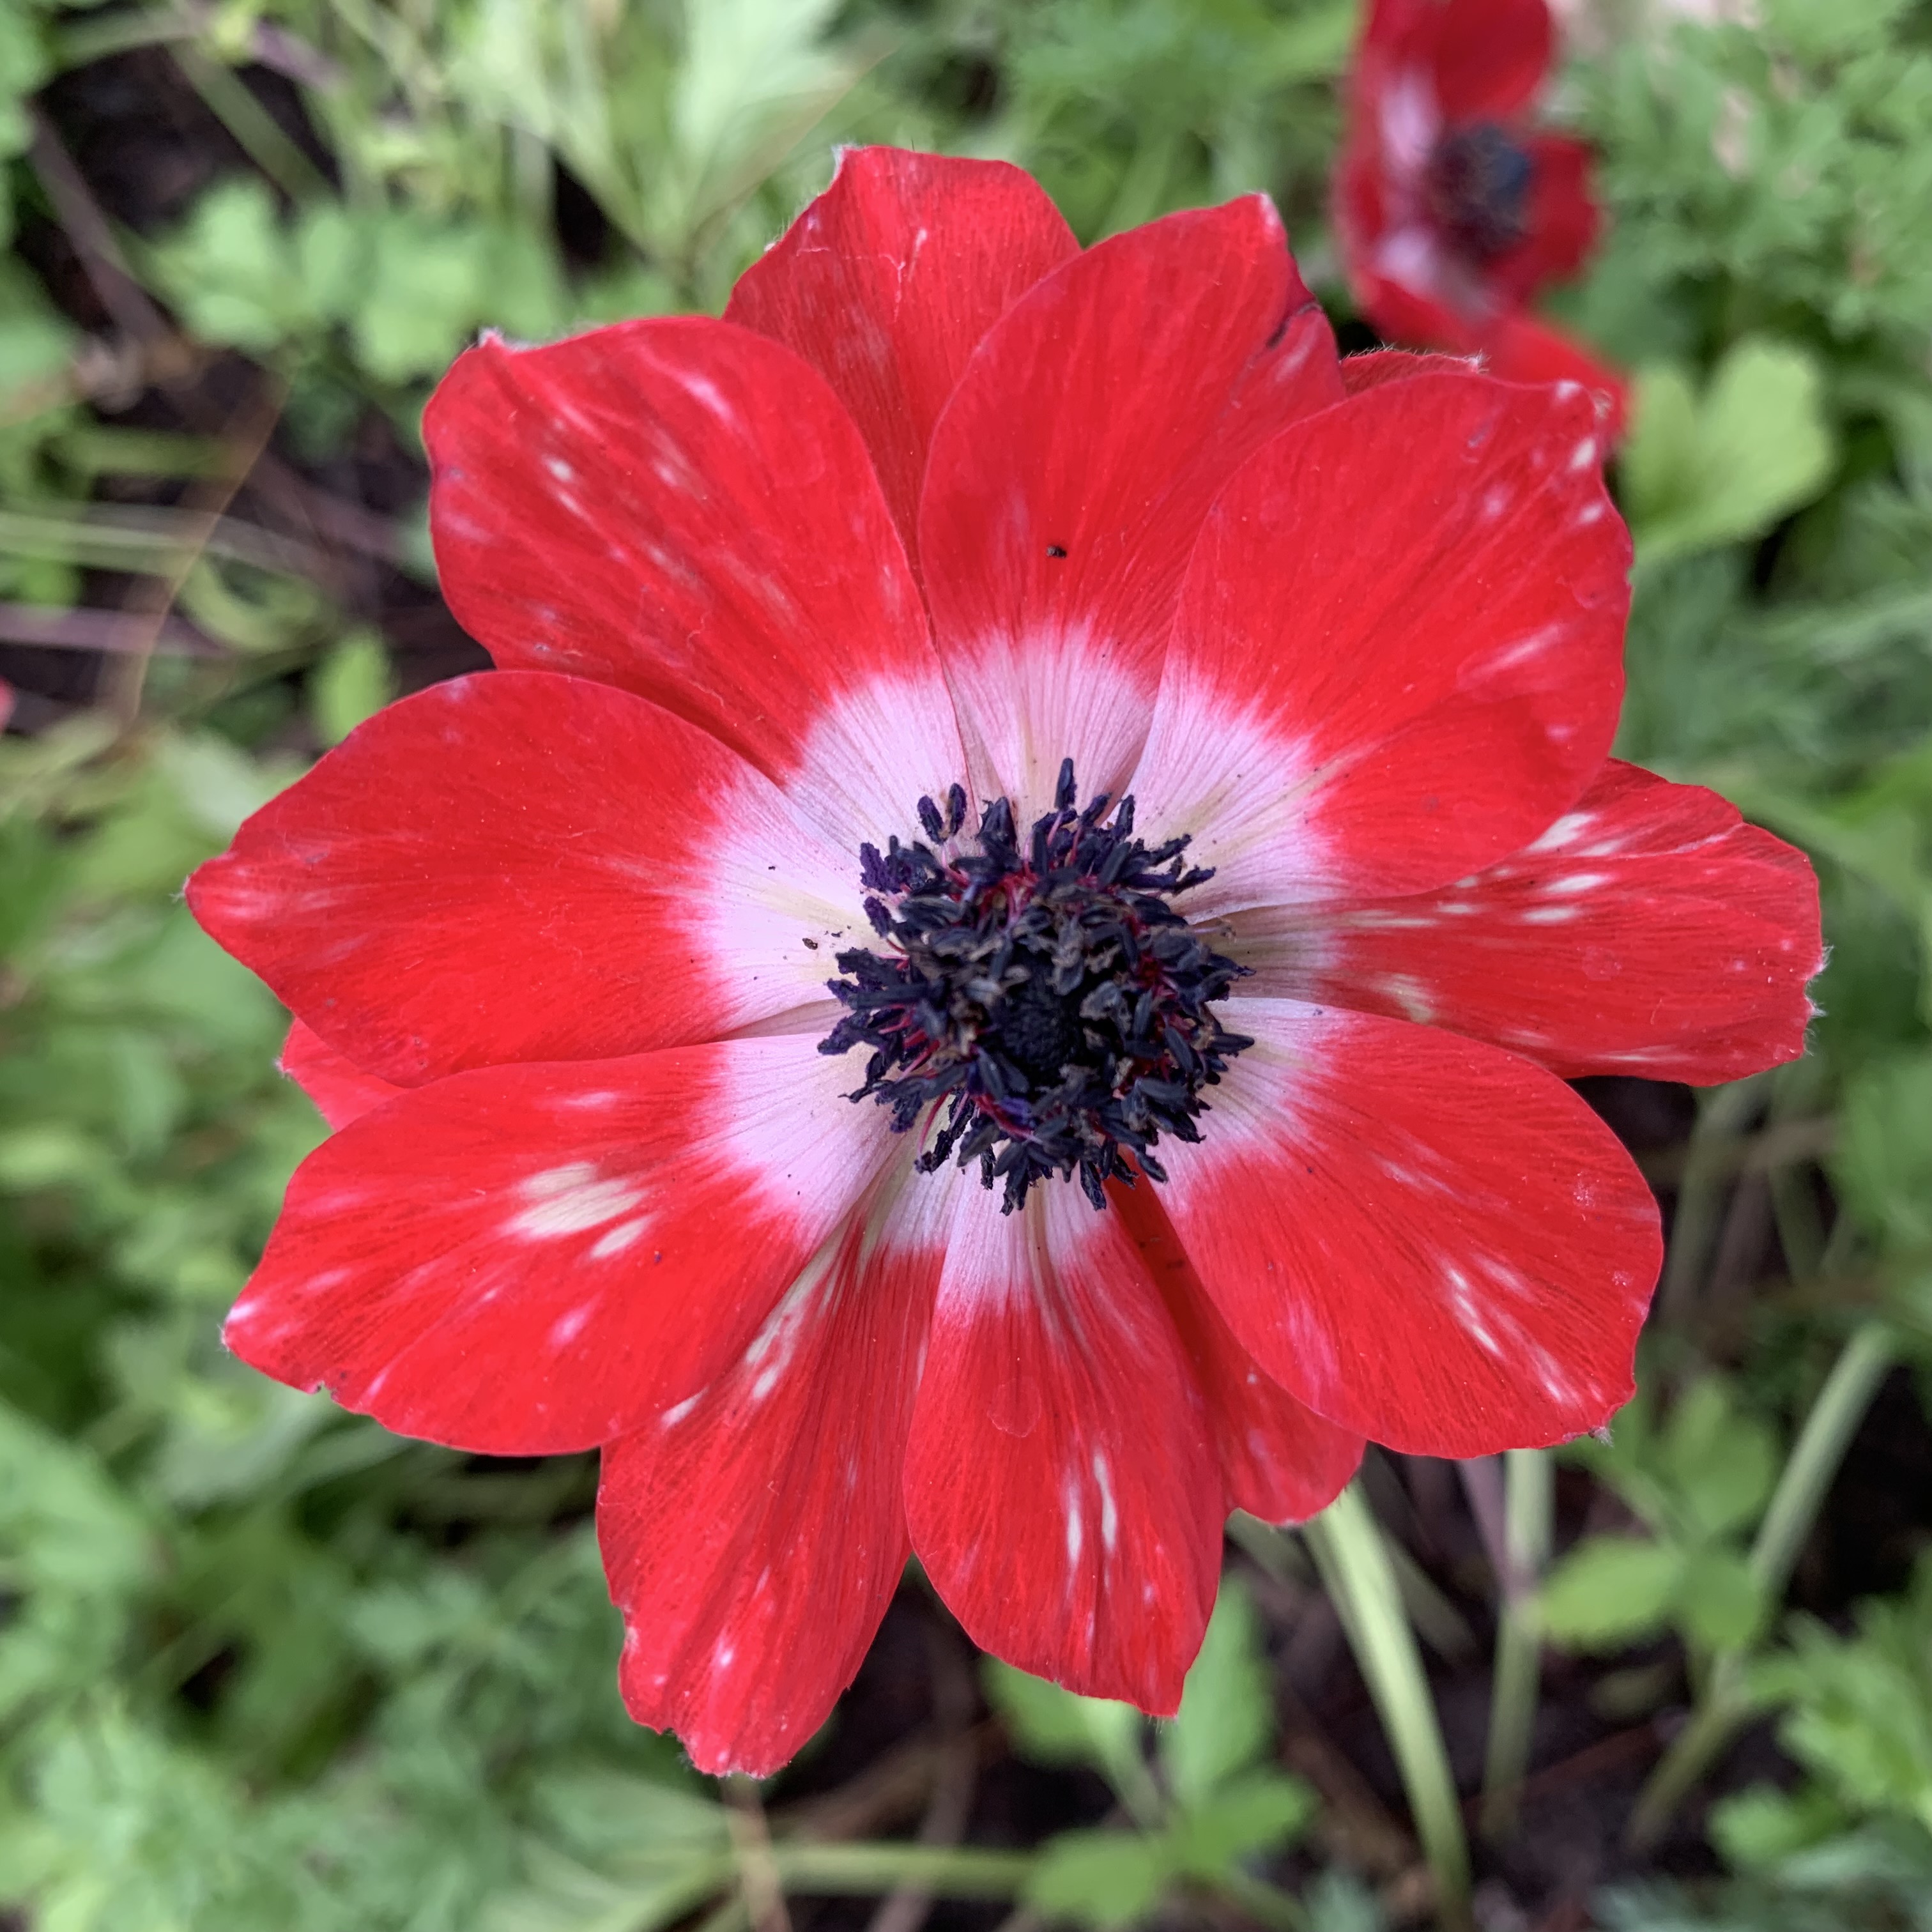 |
Flower
click
to enlarge 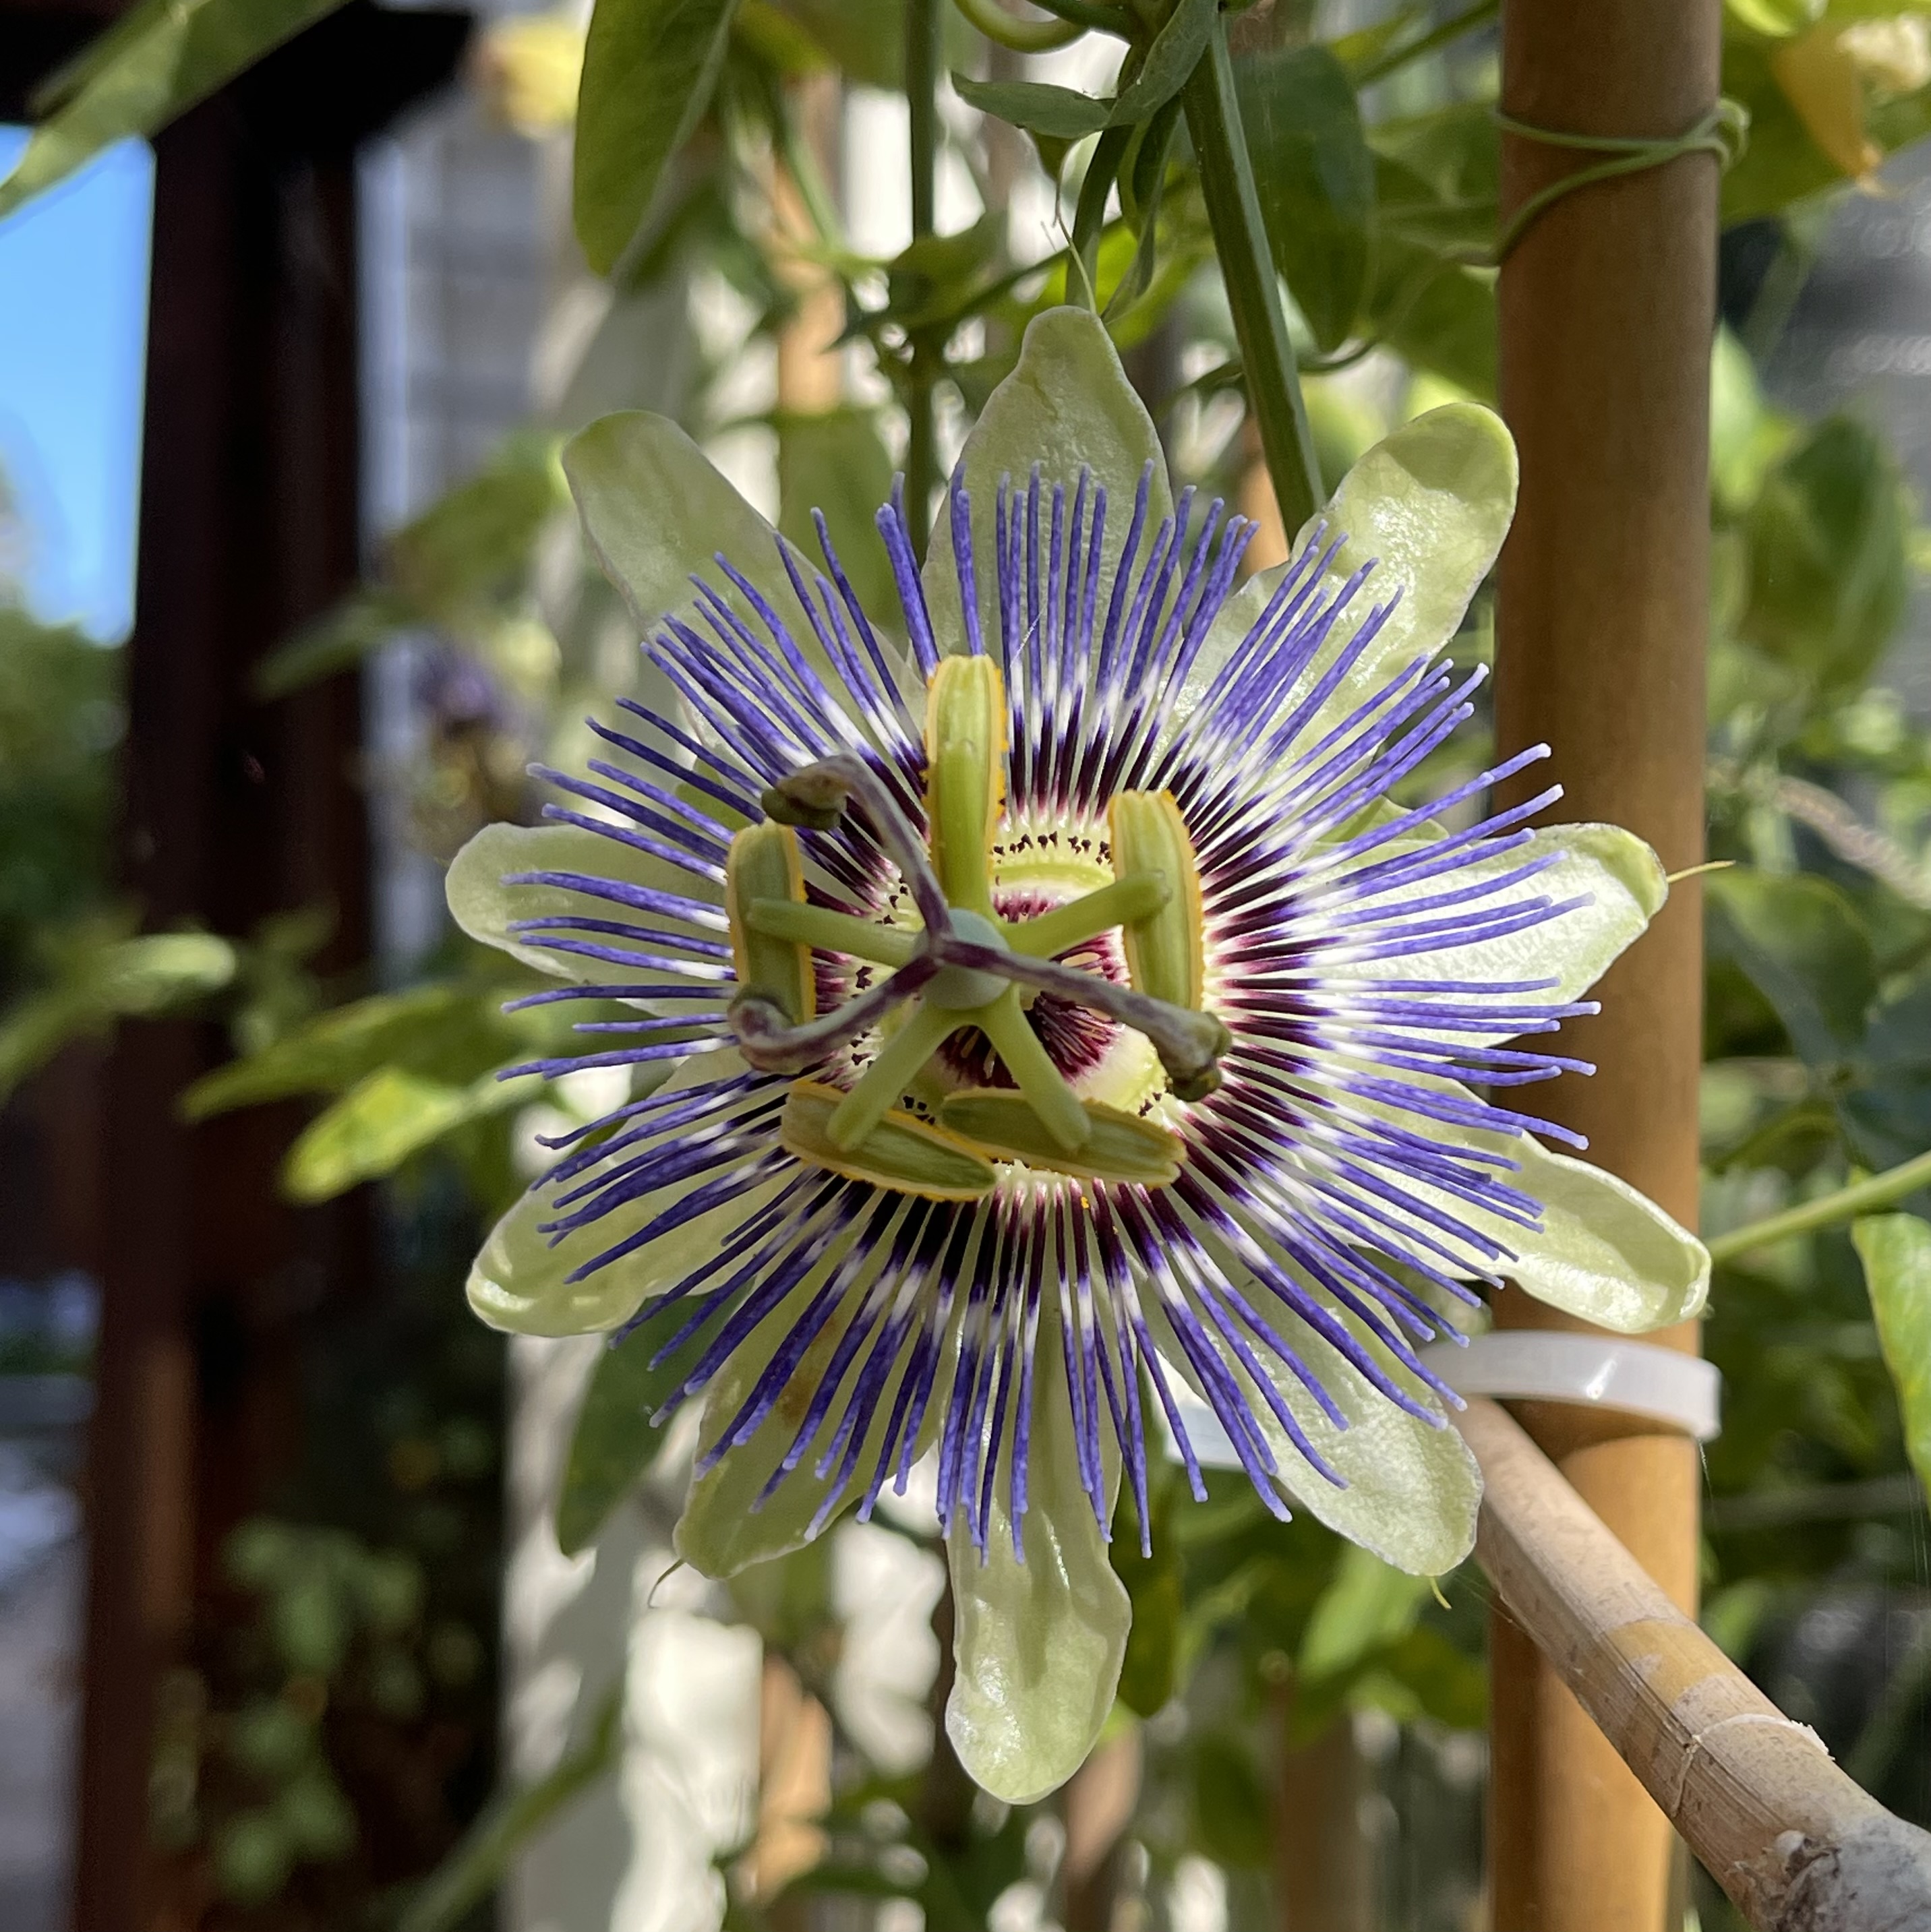 |
Flower
click
to enlarge 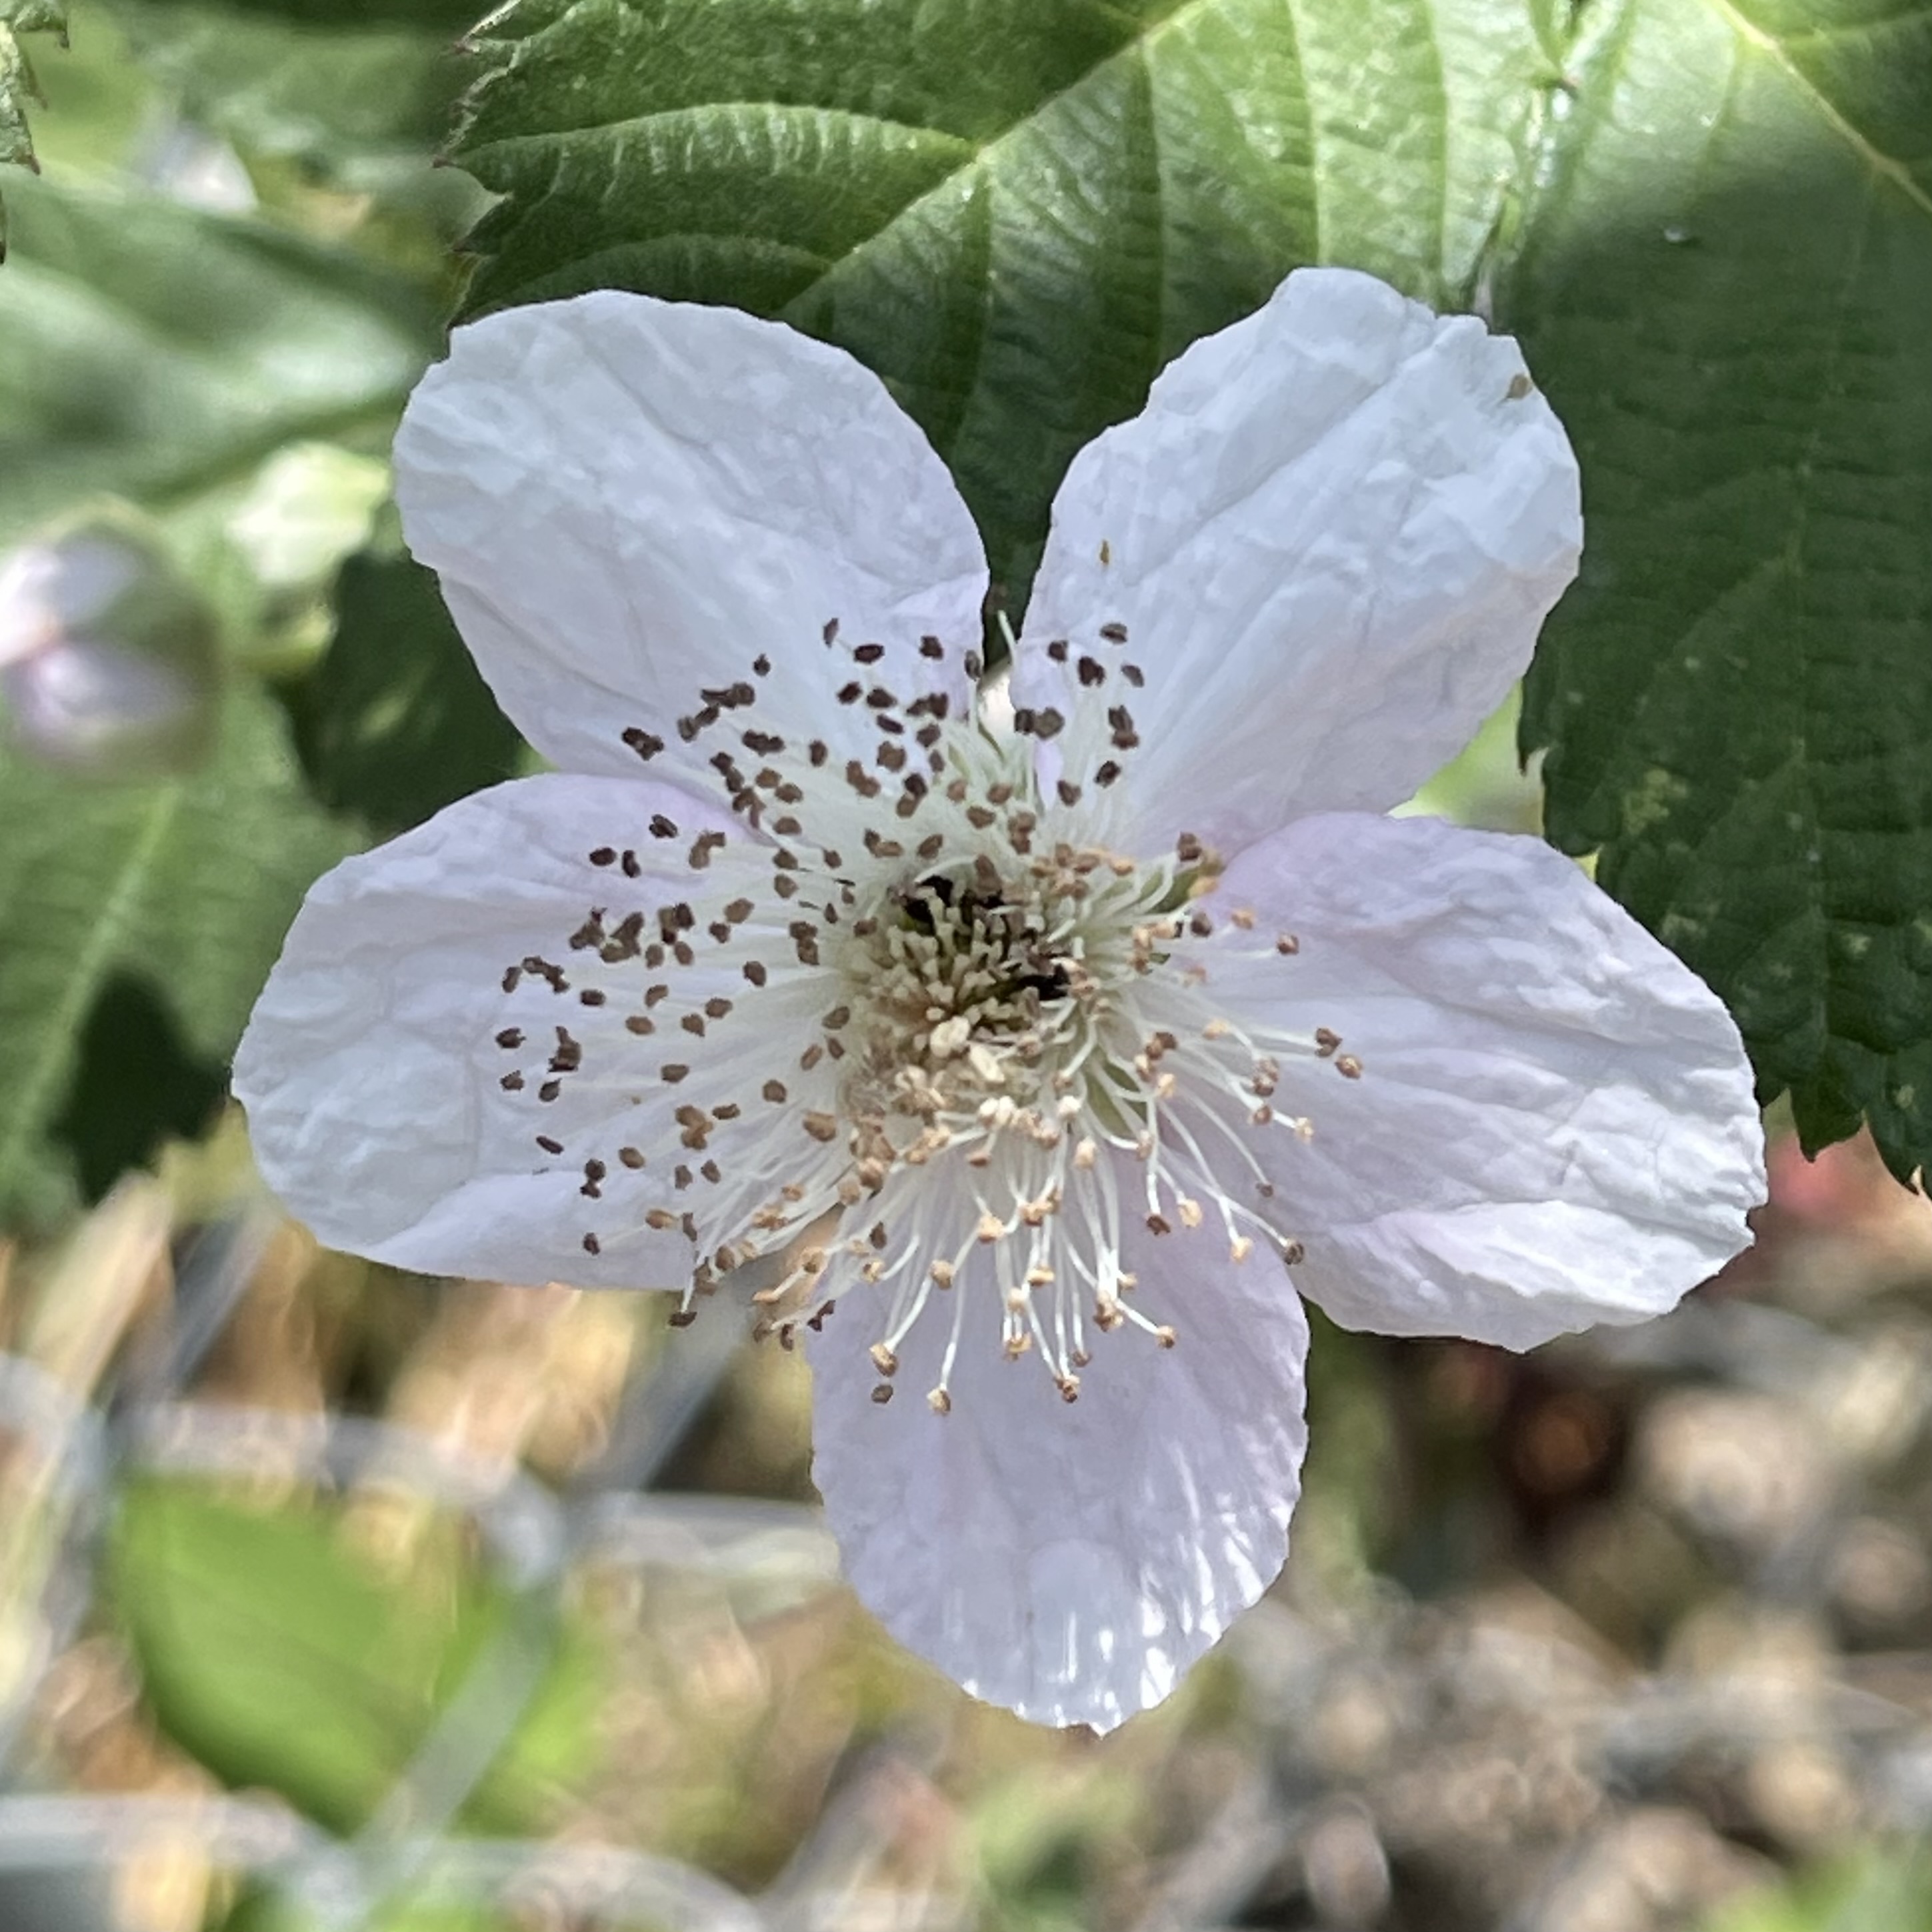 |
Flower
click
to enlarge 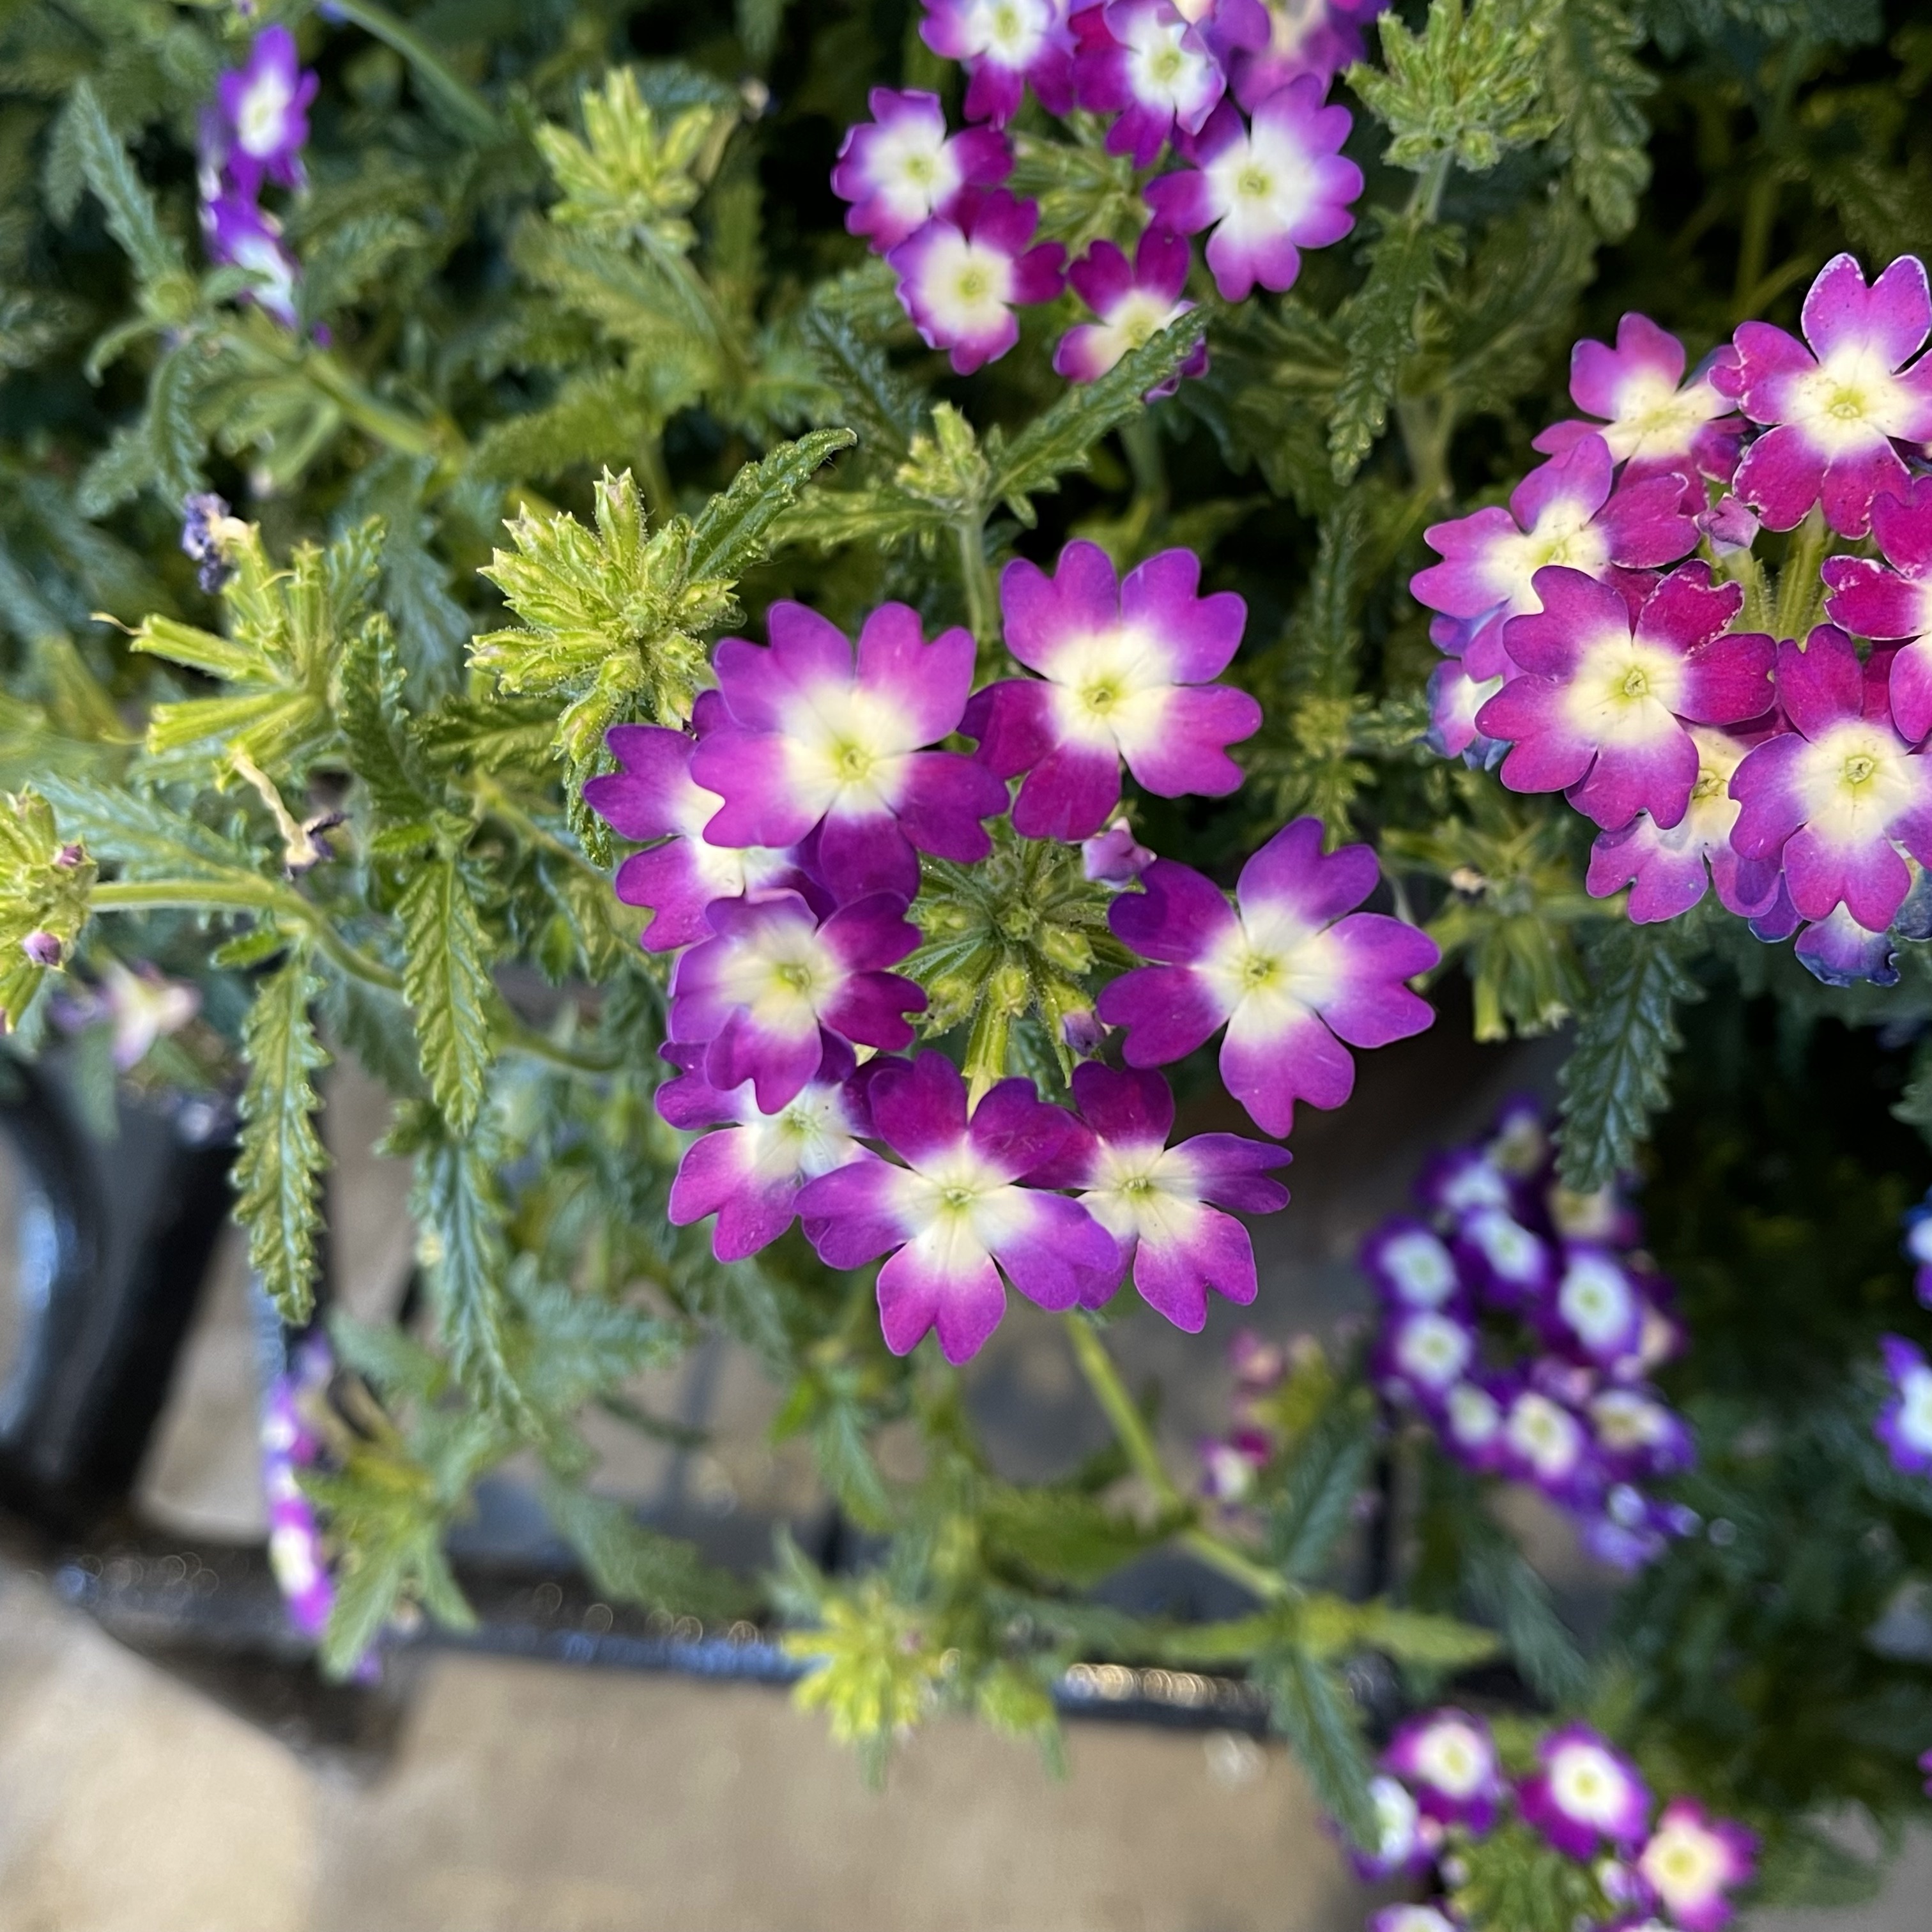 |
Flower
click
to enlarge  |
Flower
click
to enlarge 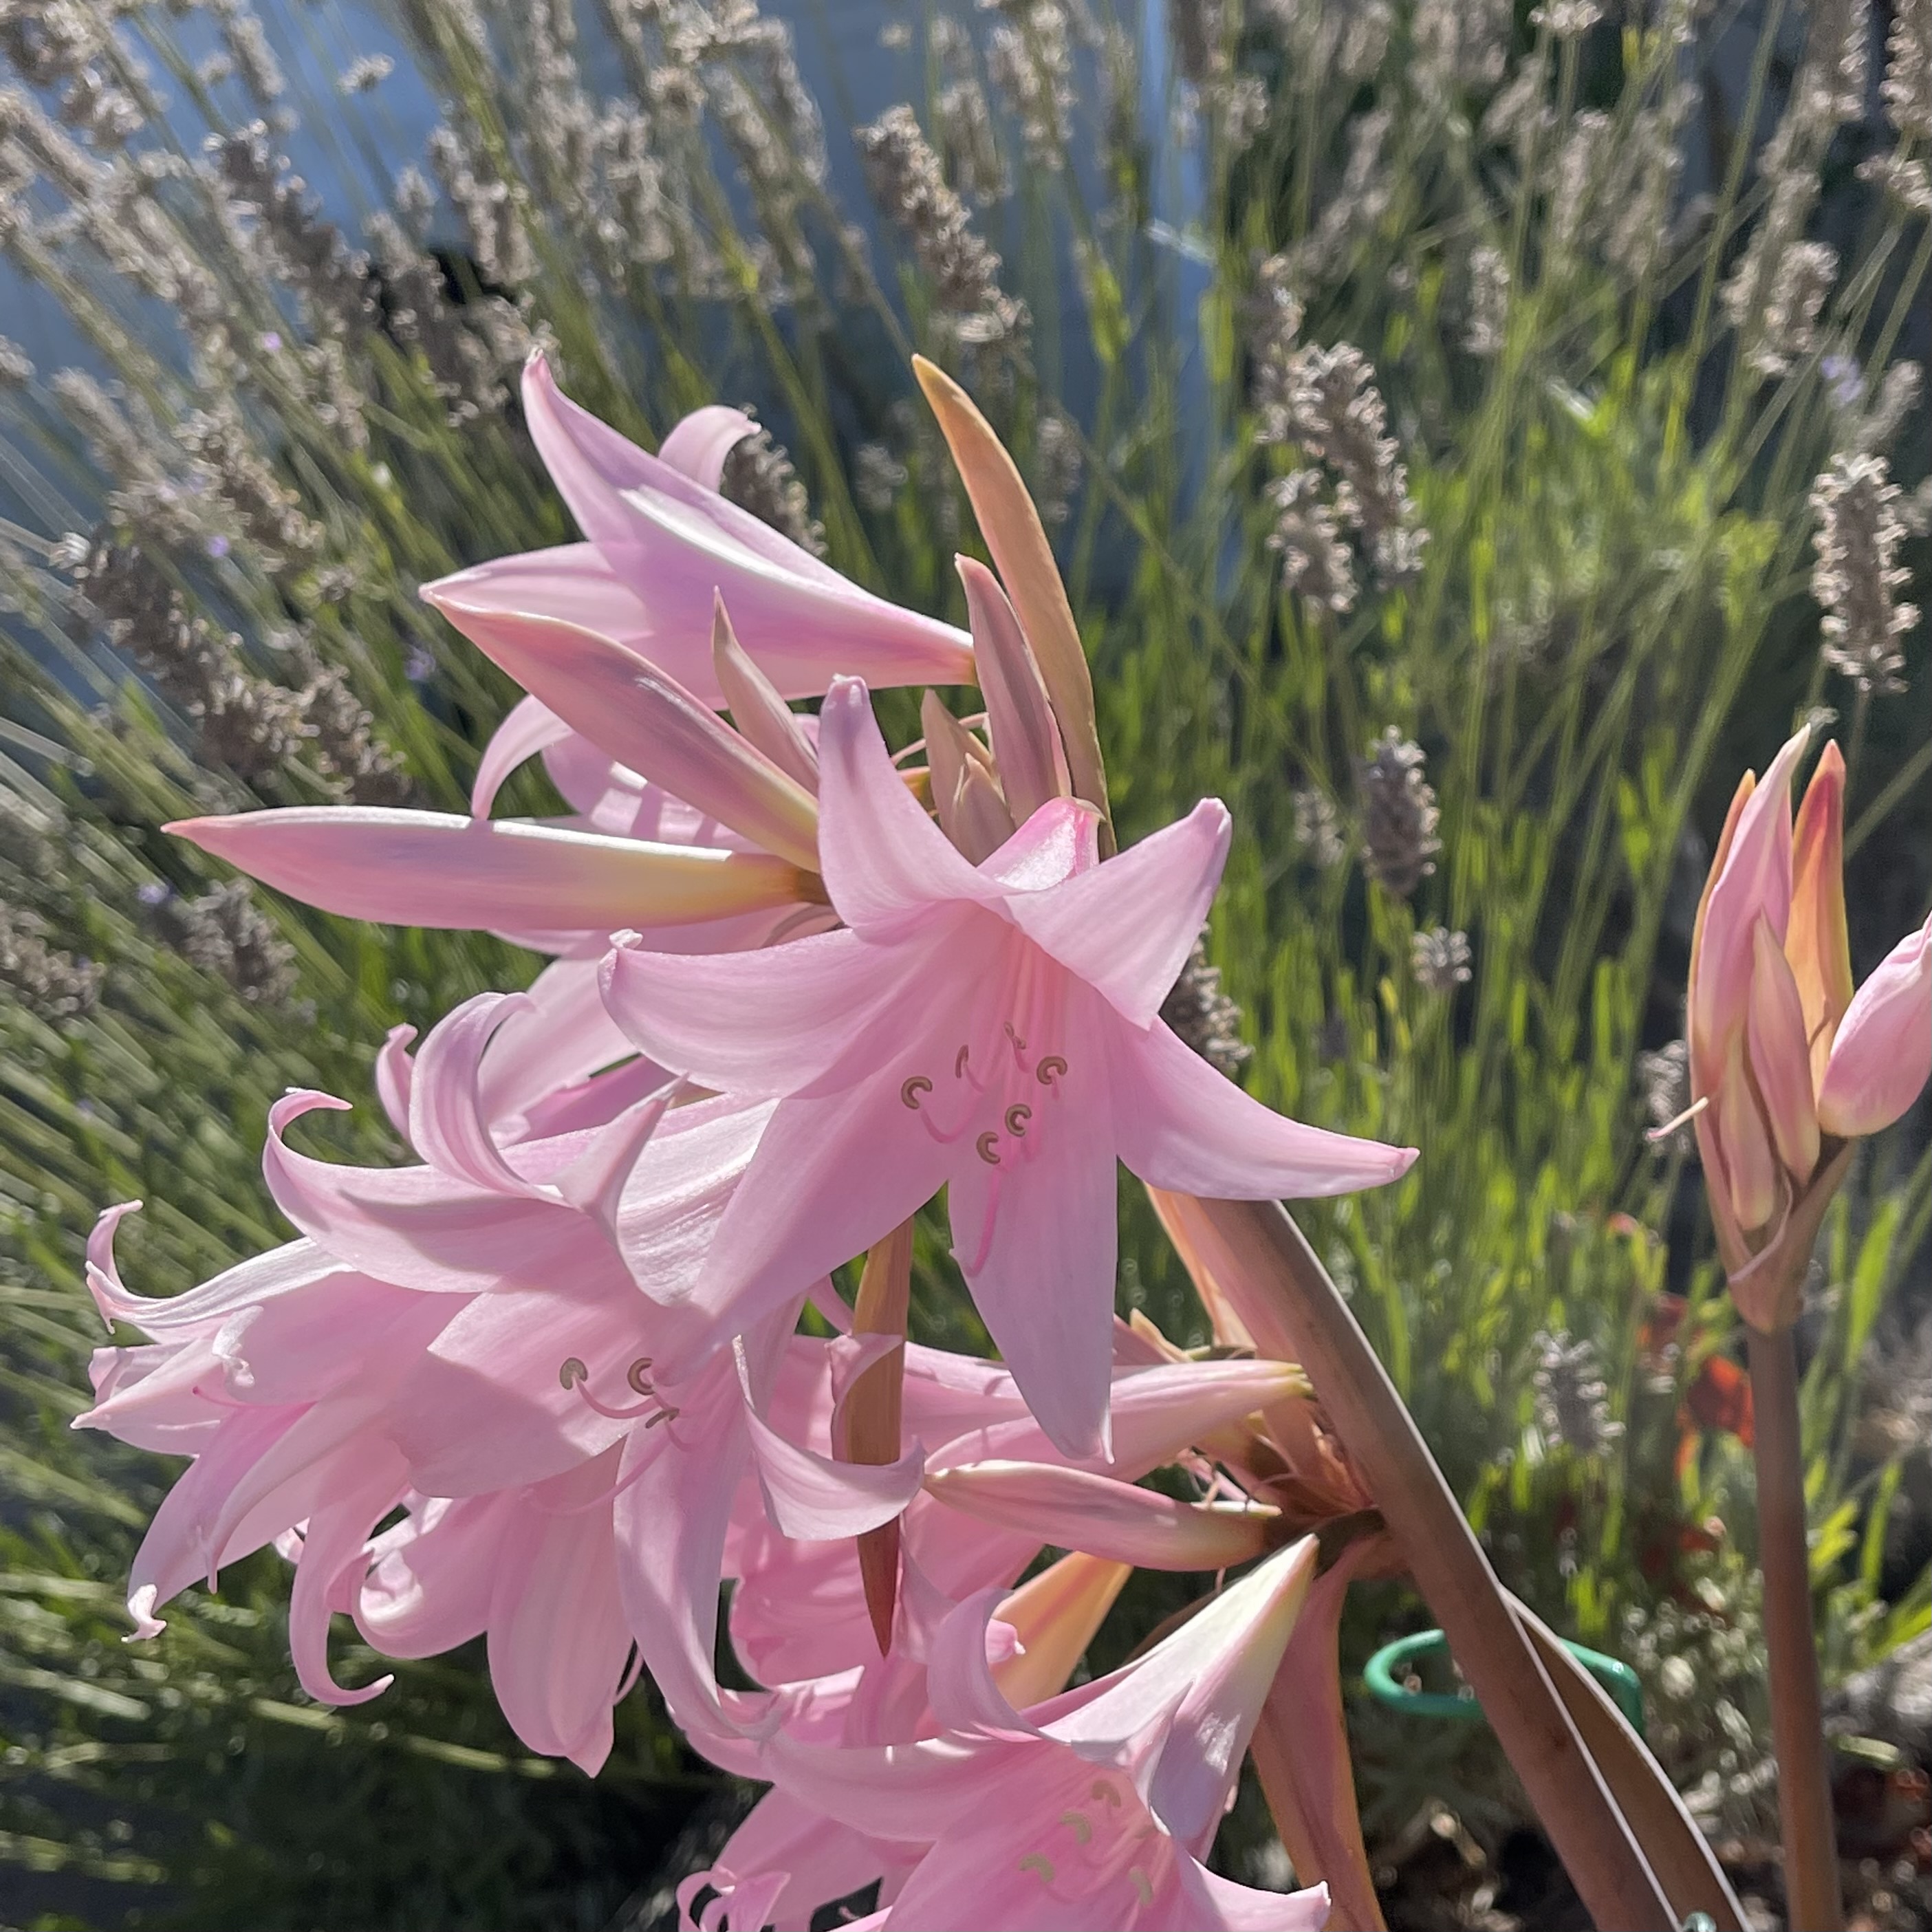 |
Flower
click
to enlarge 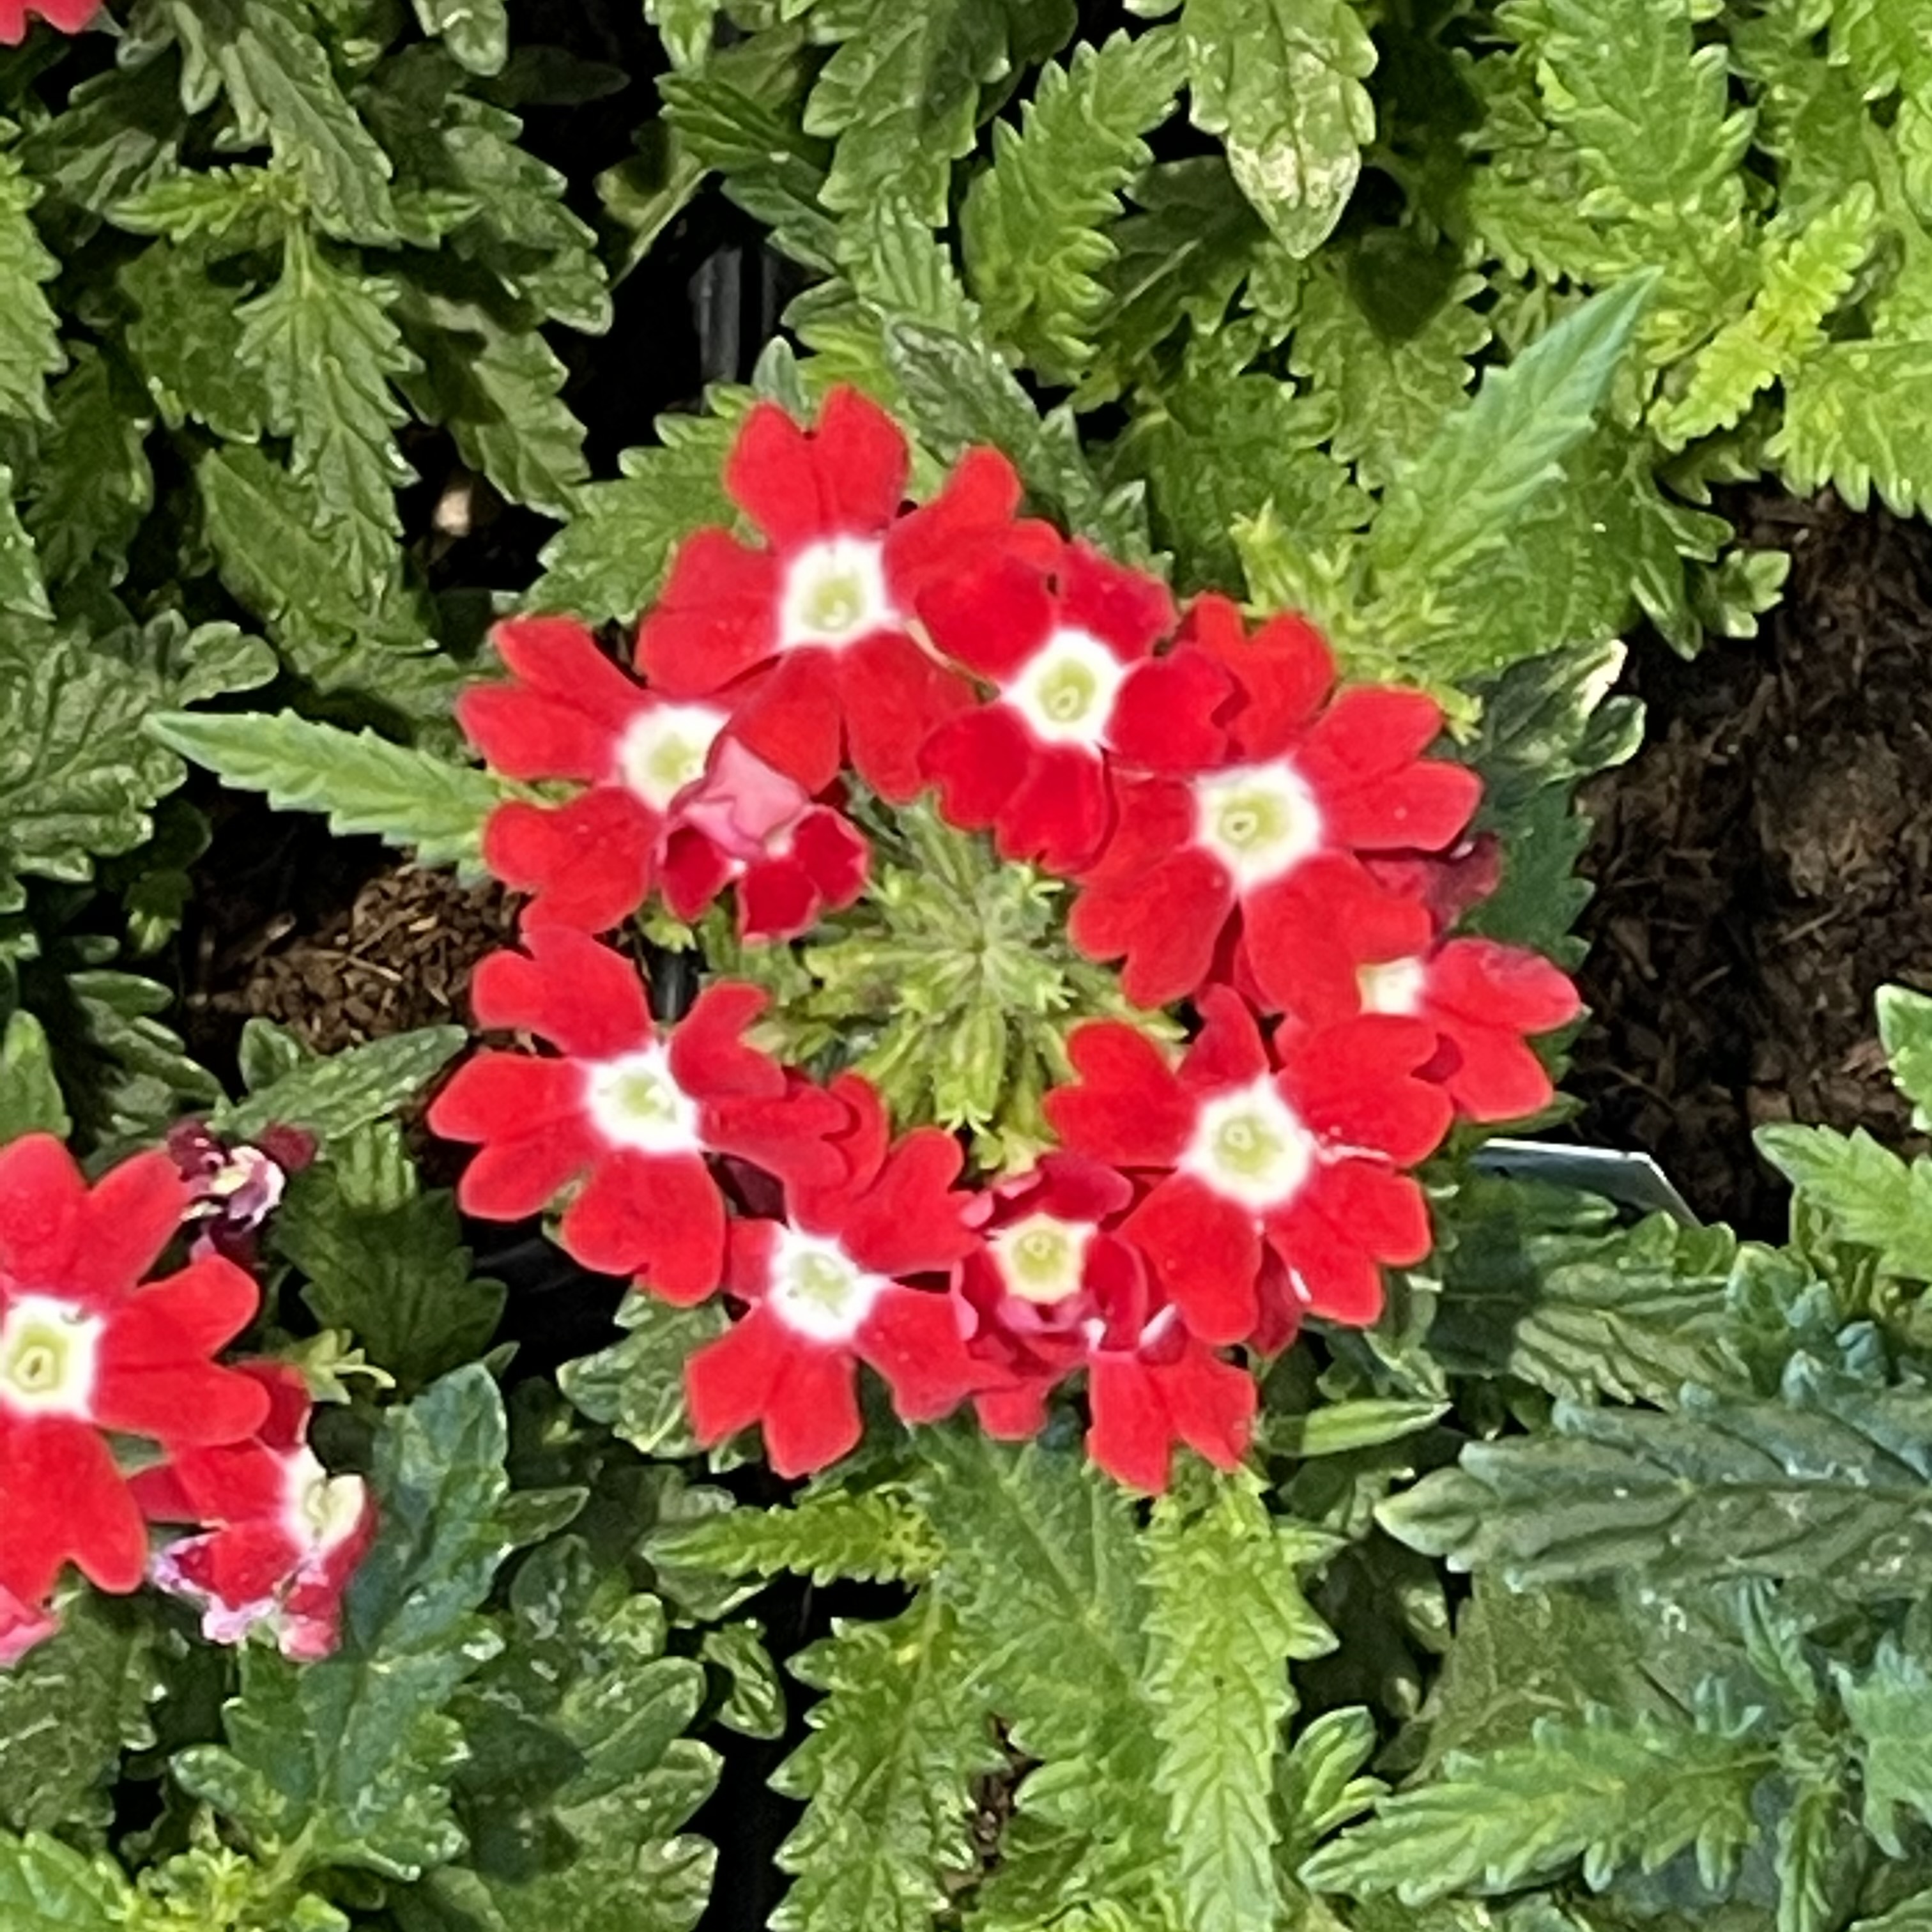 |
Flower
click
to enlarge 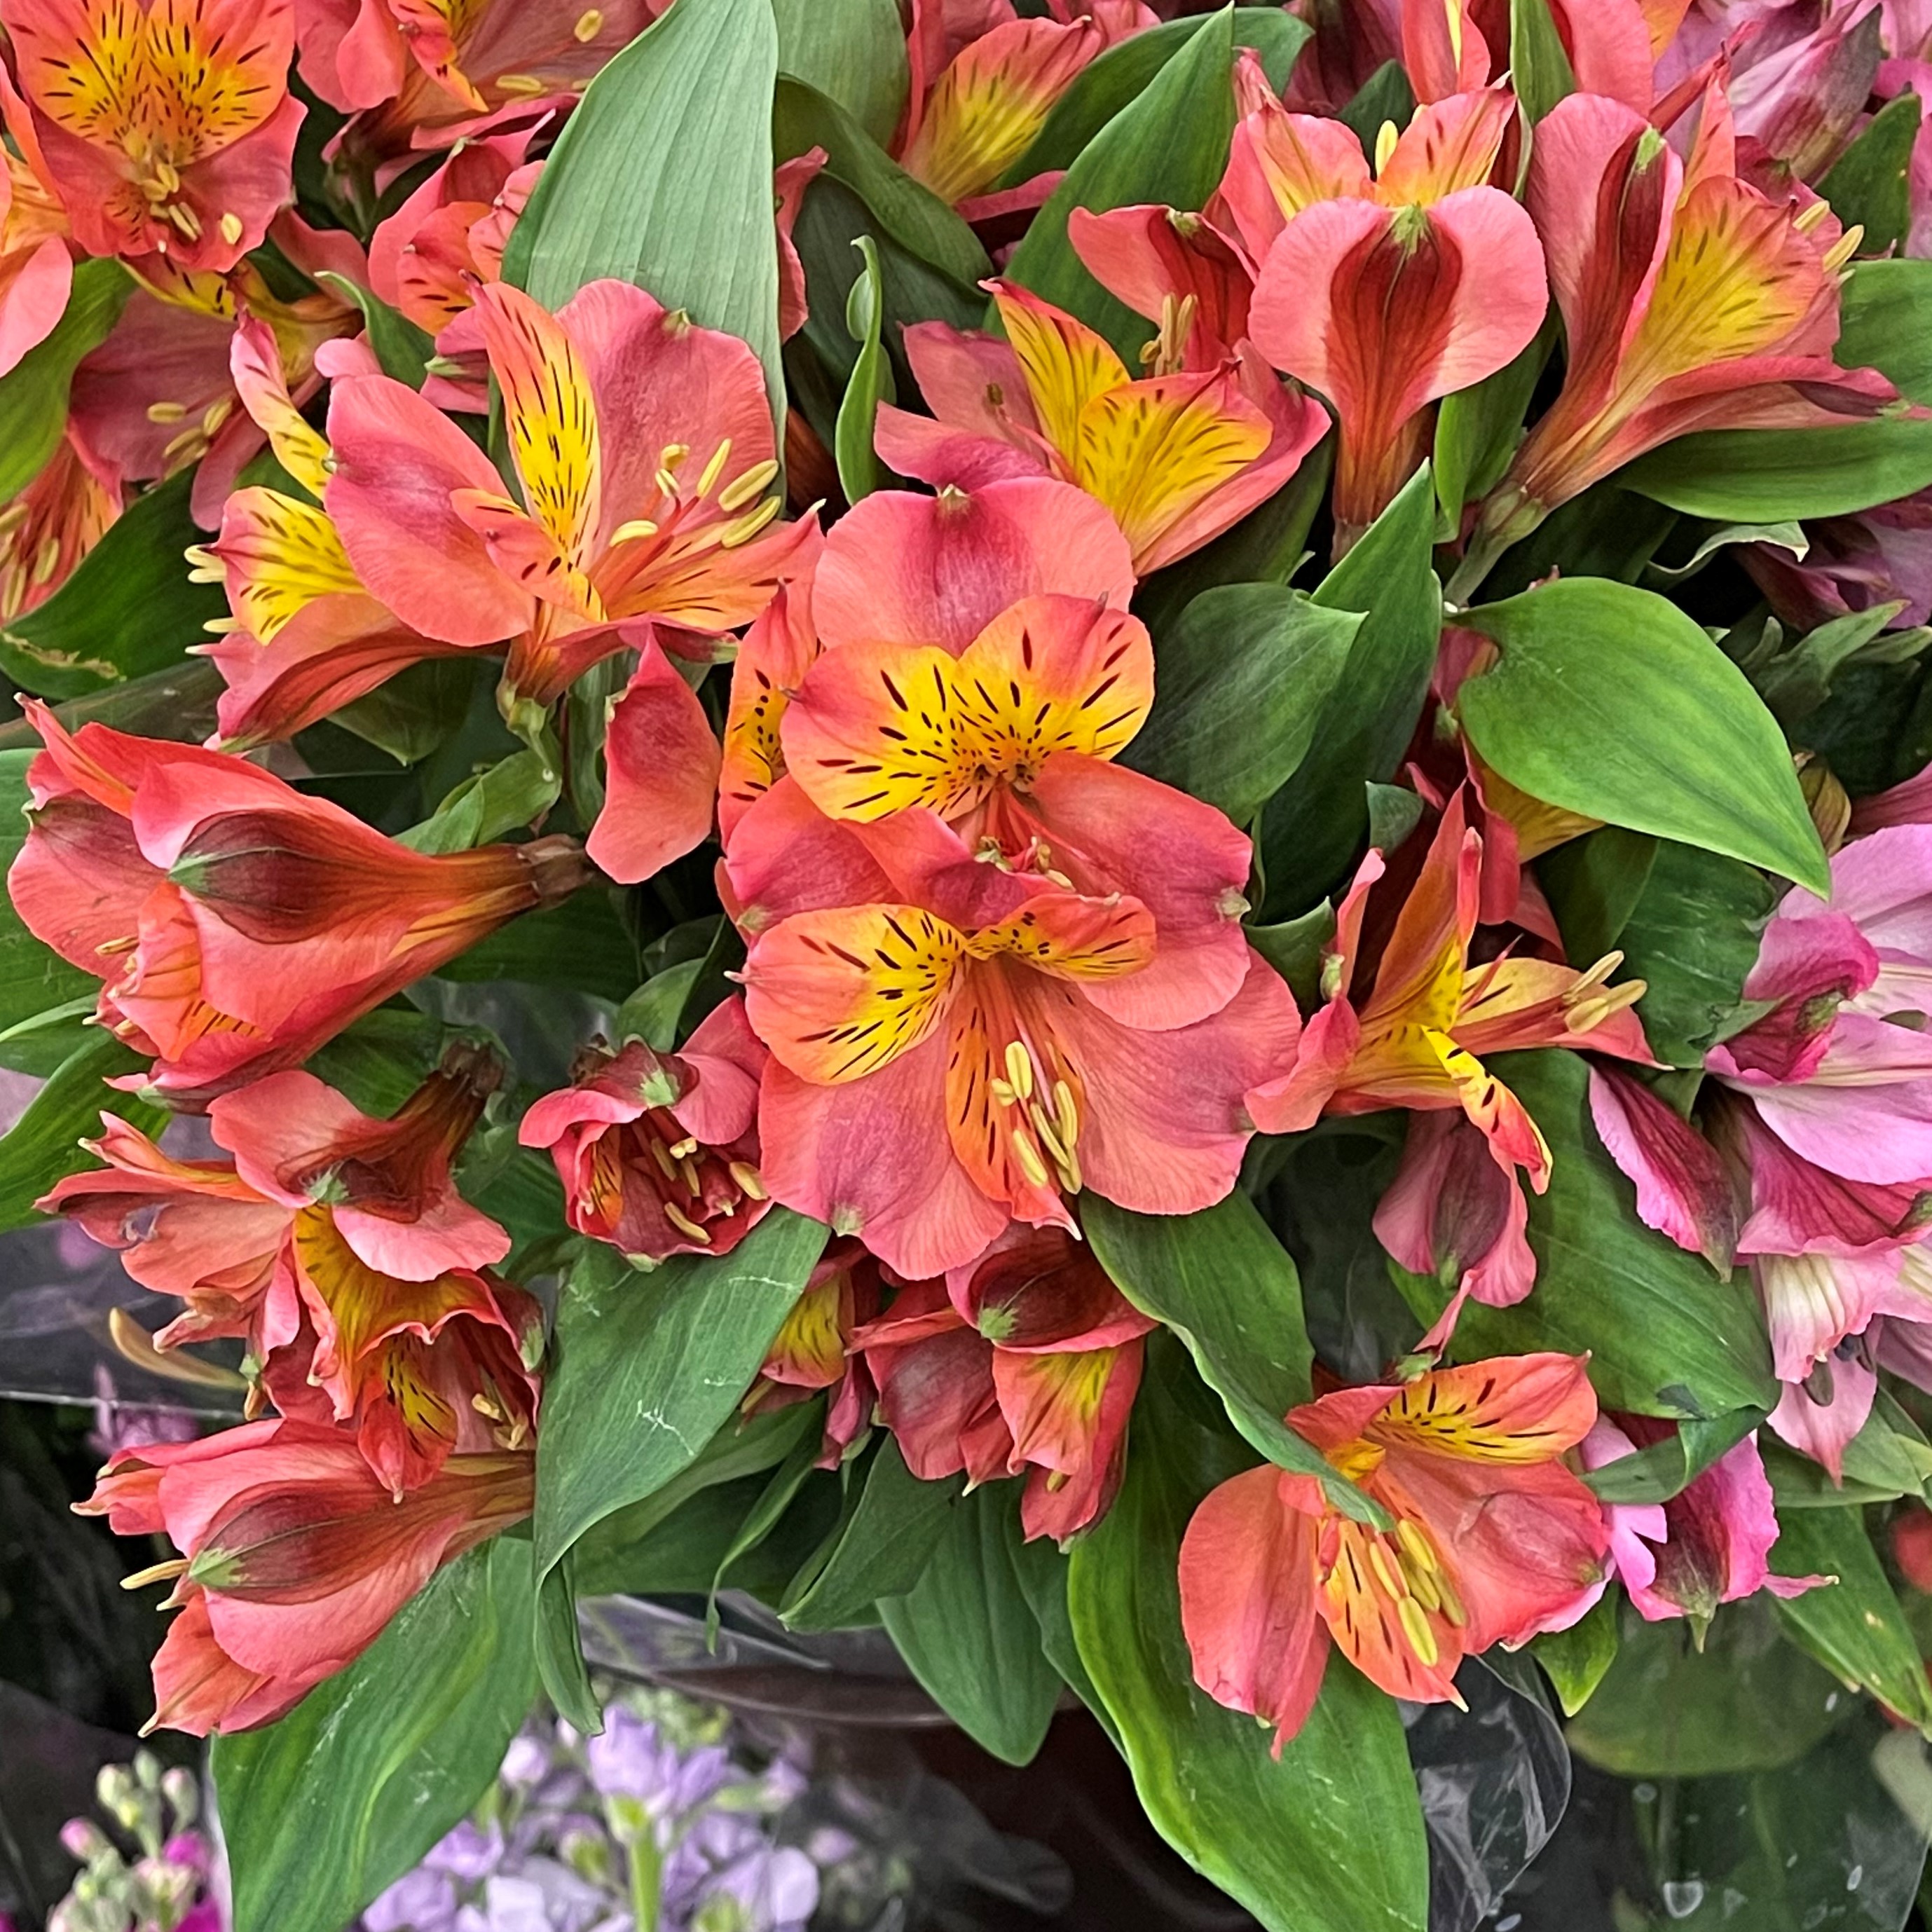 |
Flower
click
to enlarge 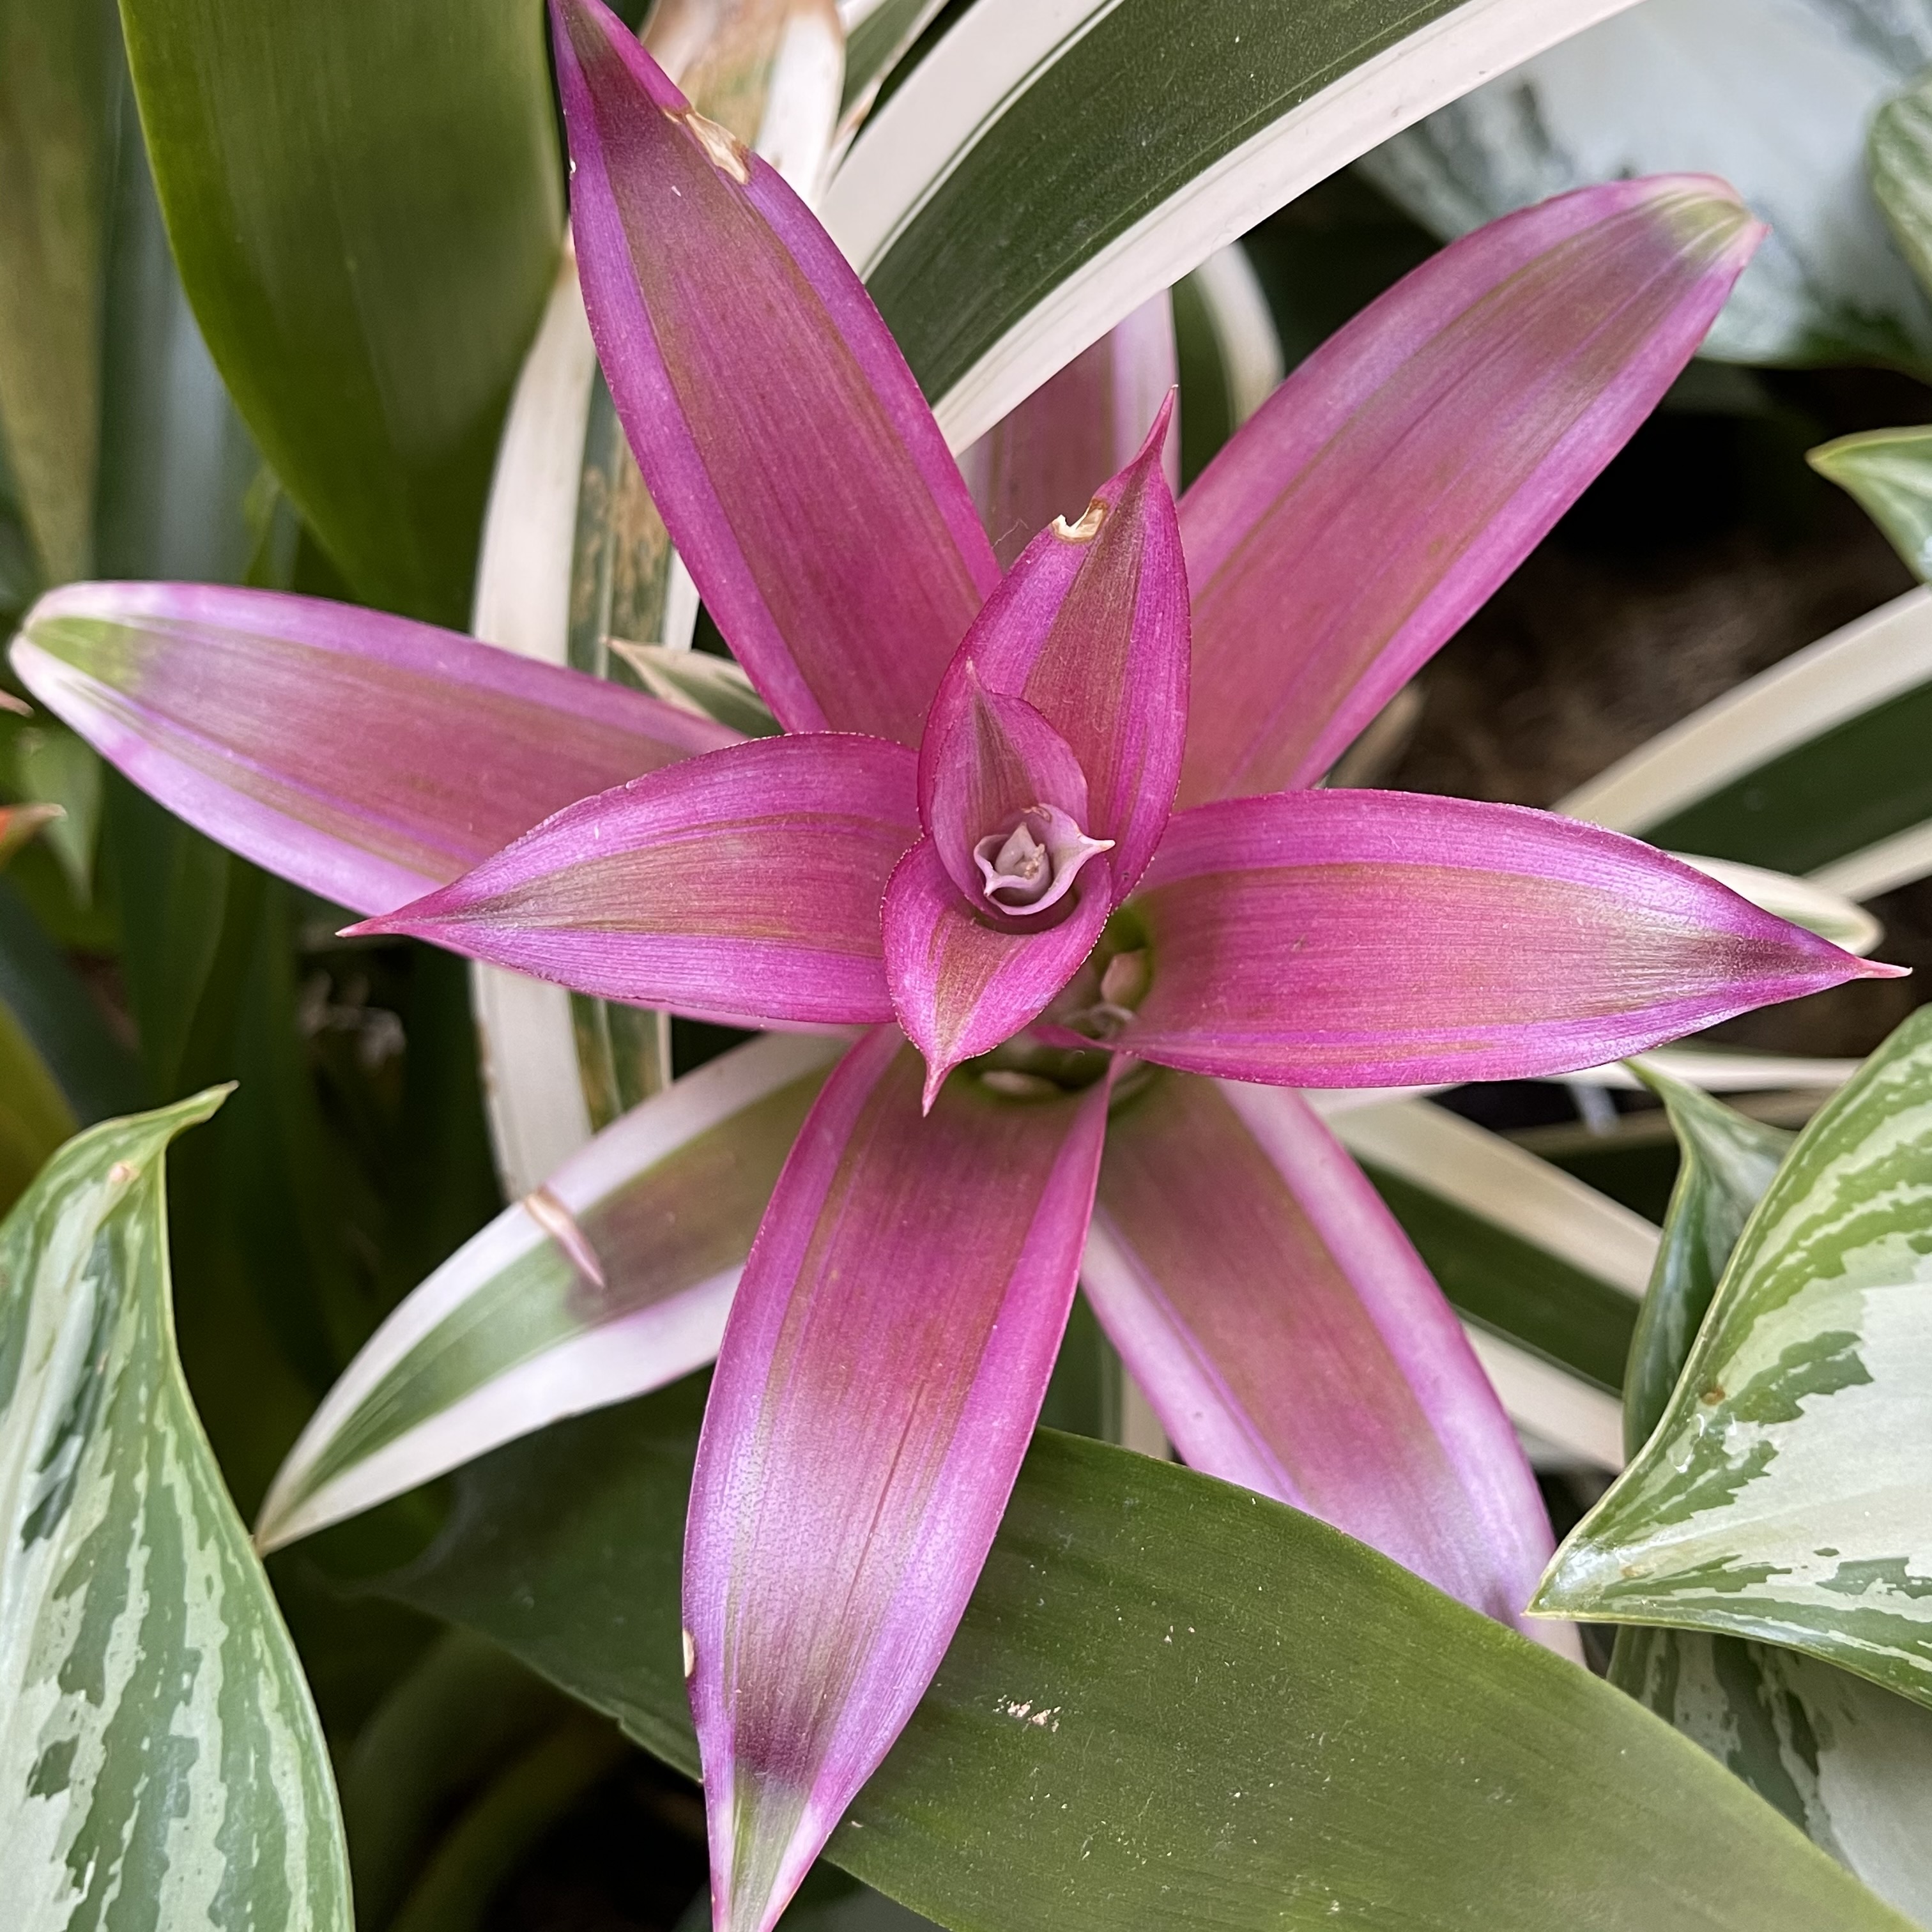 |
Flower
click
to enlarge 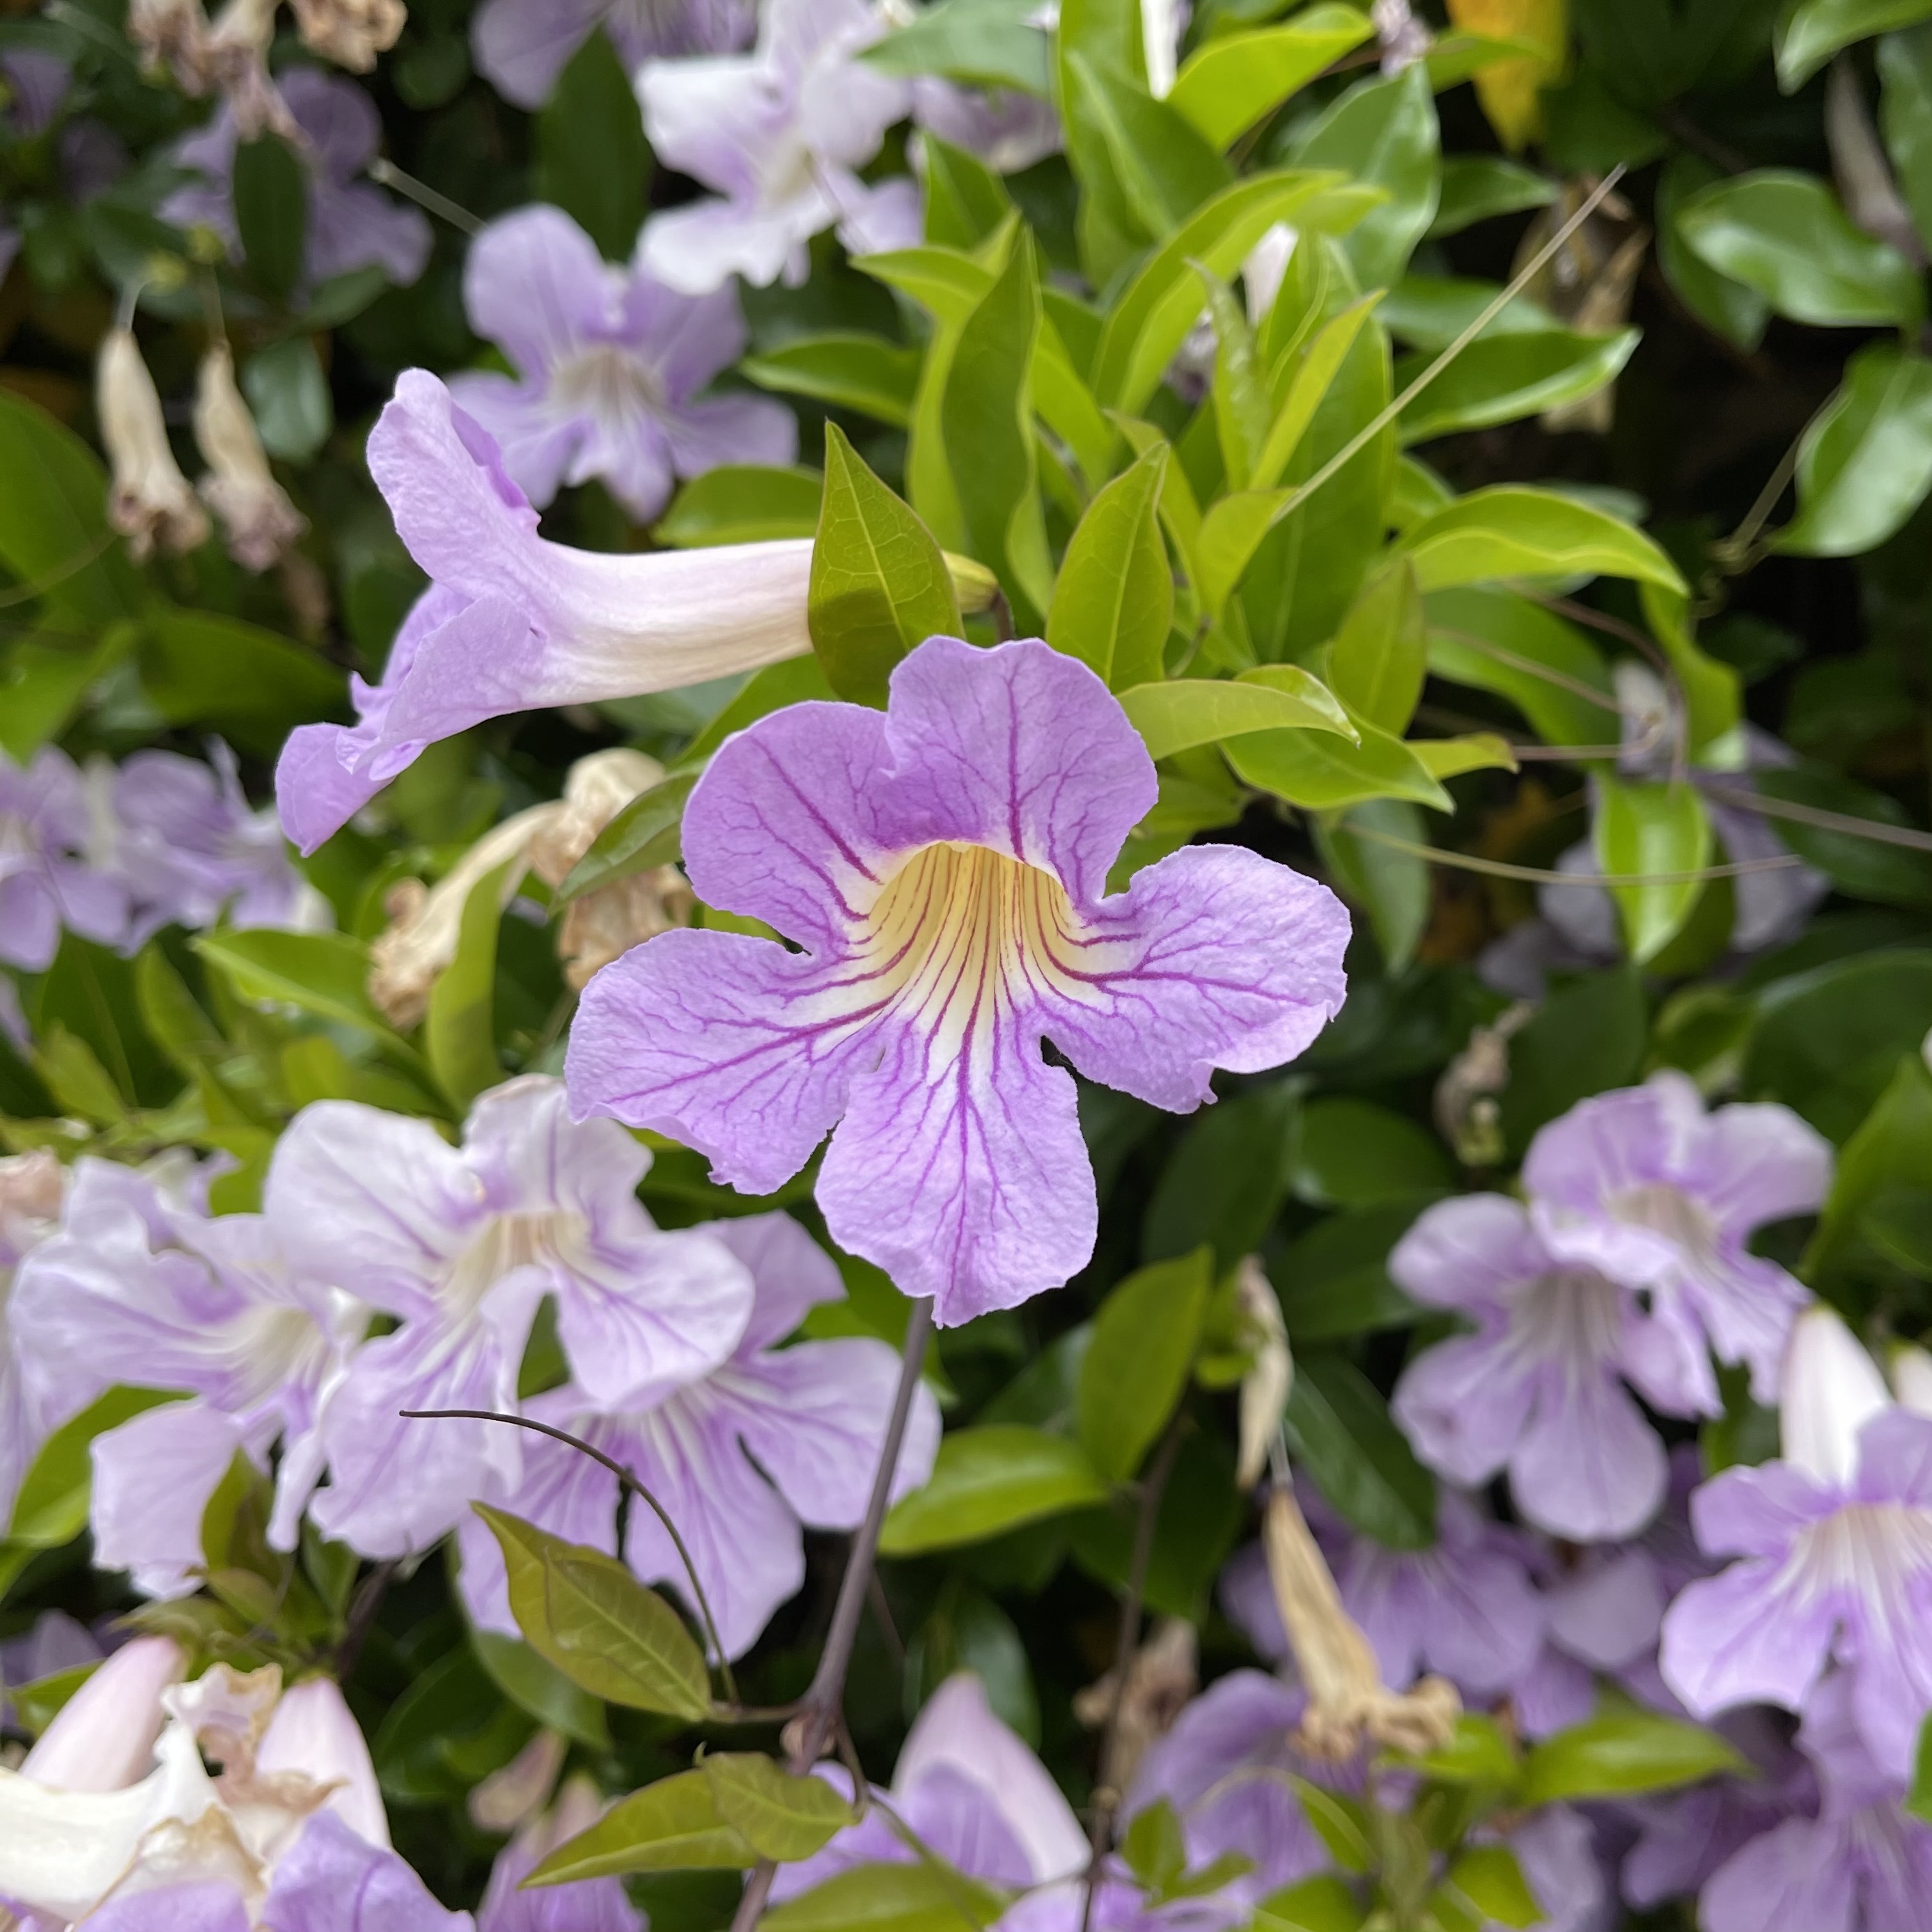 |
Flower
click
to enlarge 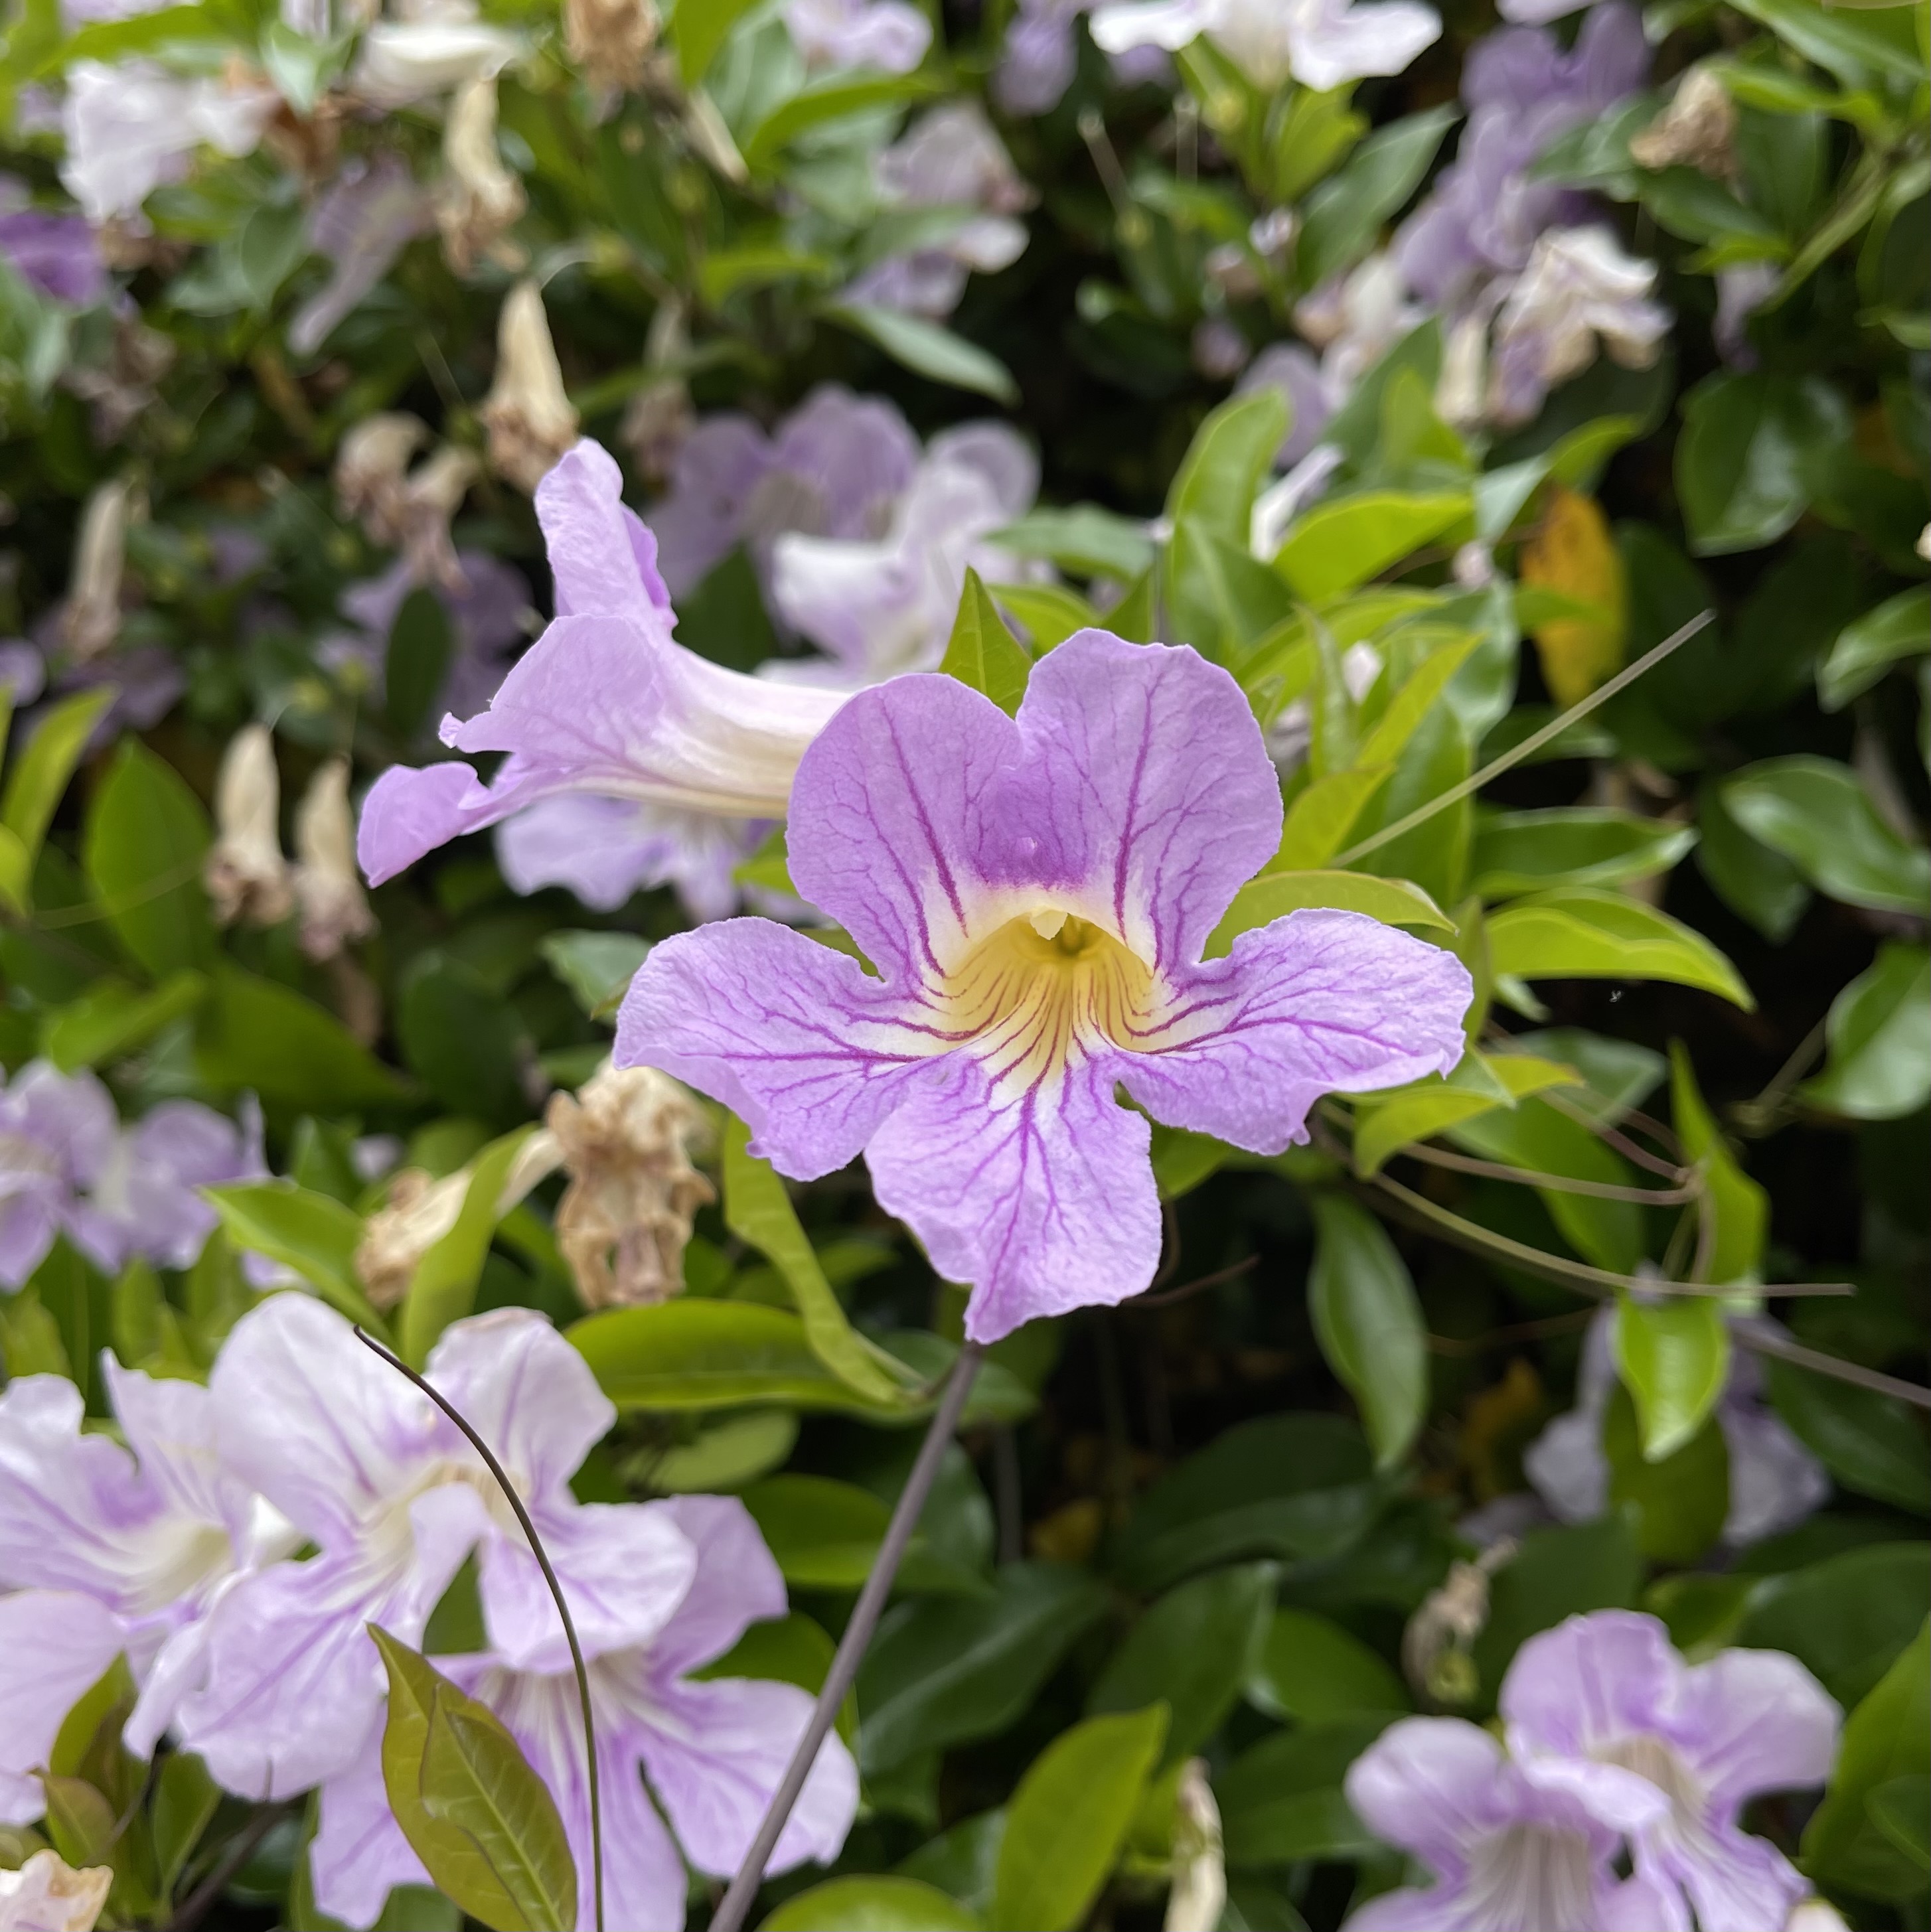 |
Flower
click
to enlarge 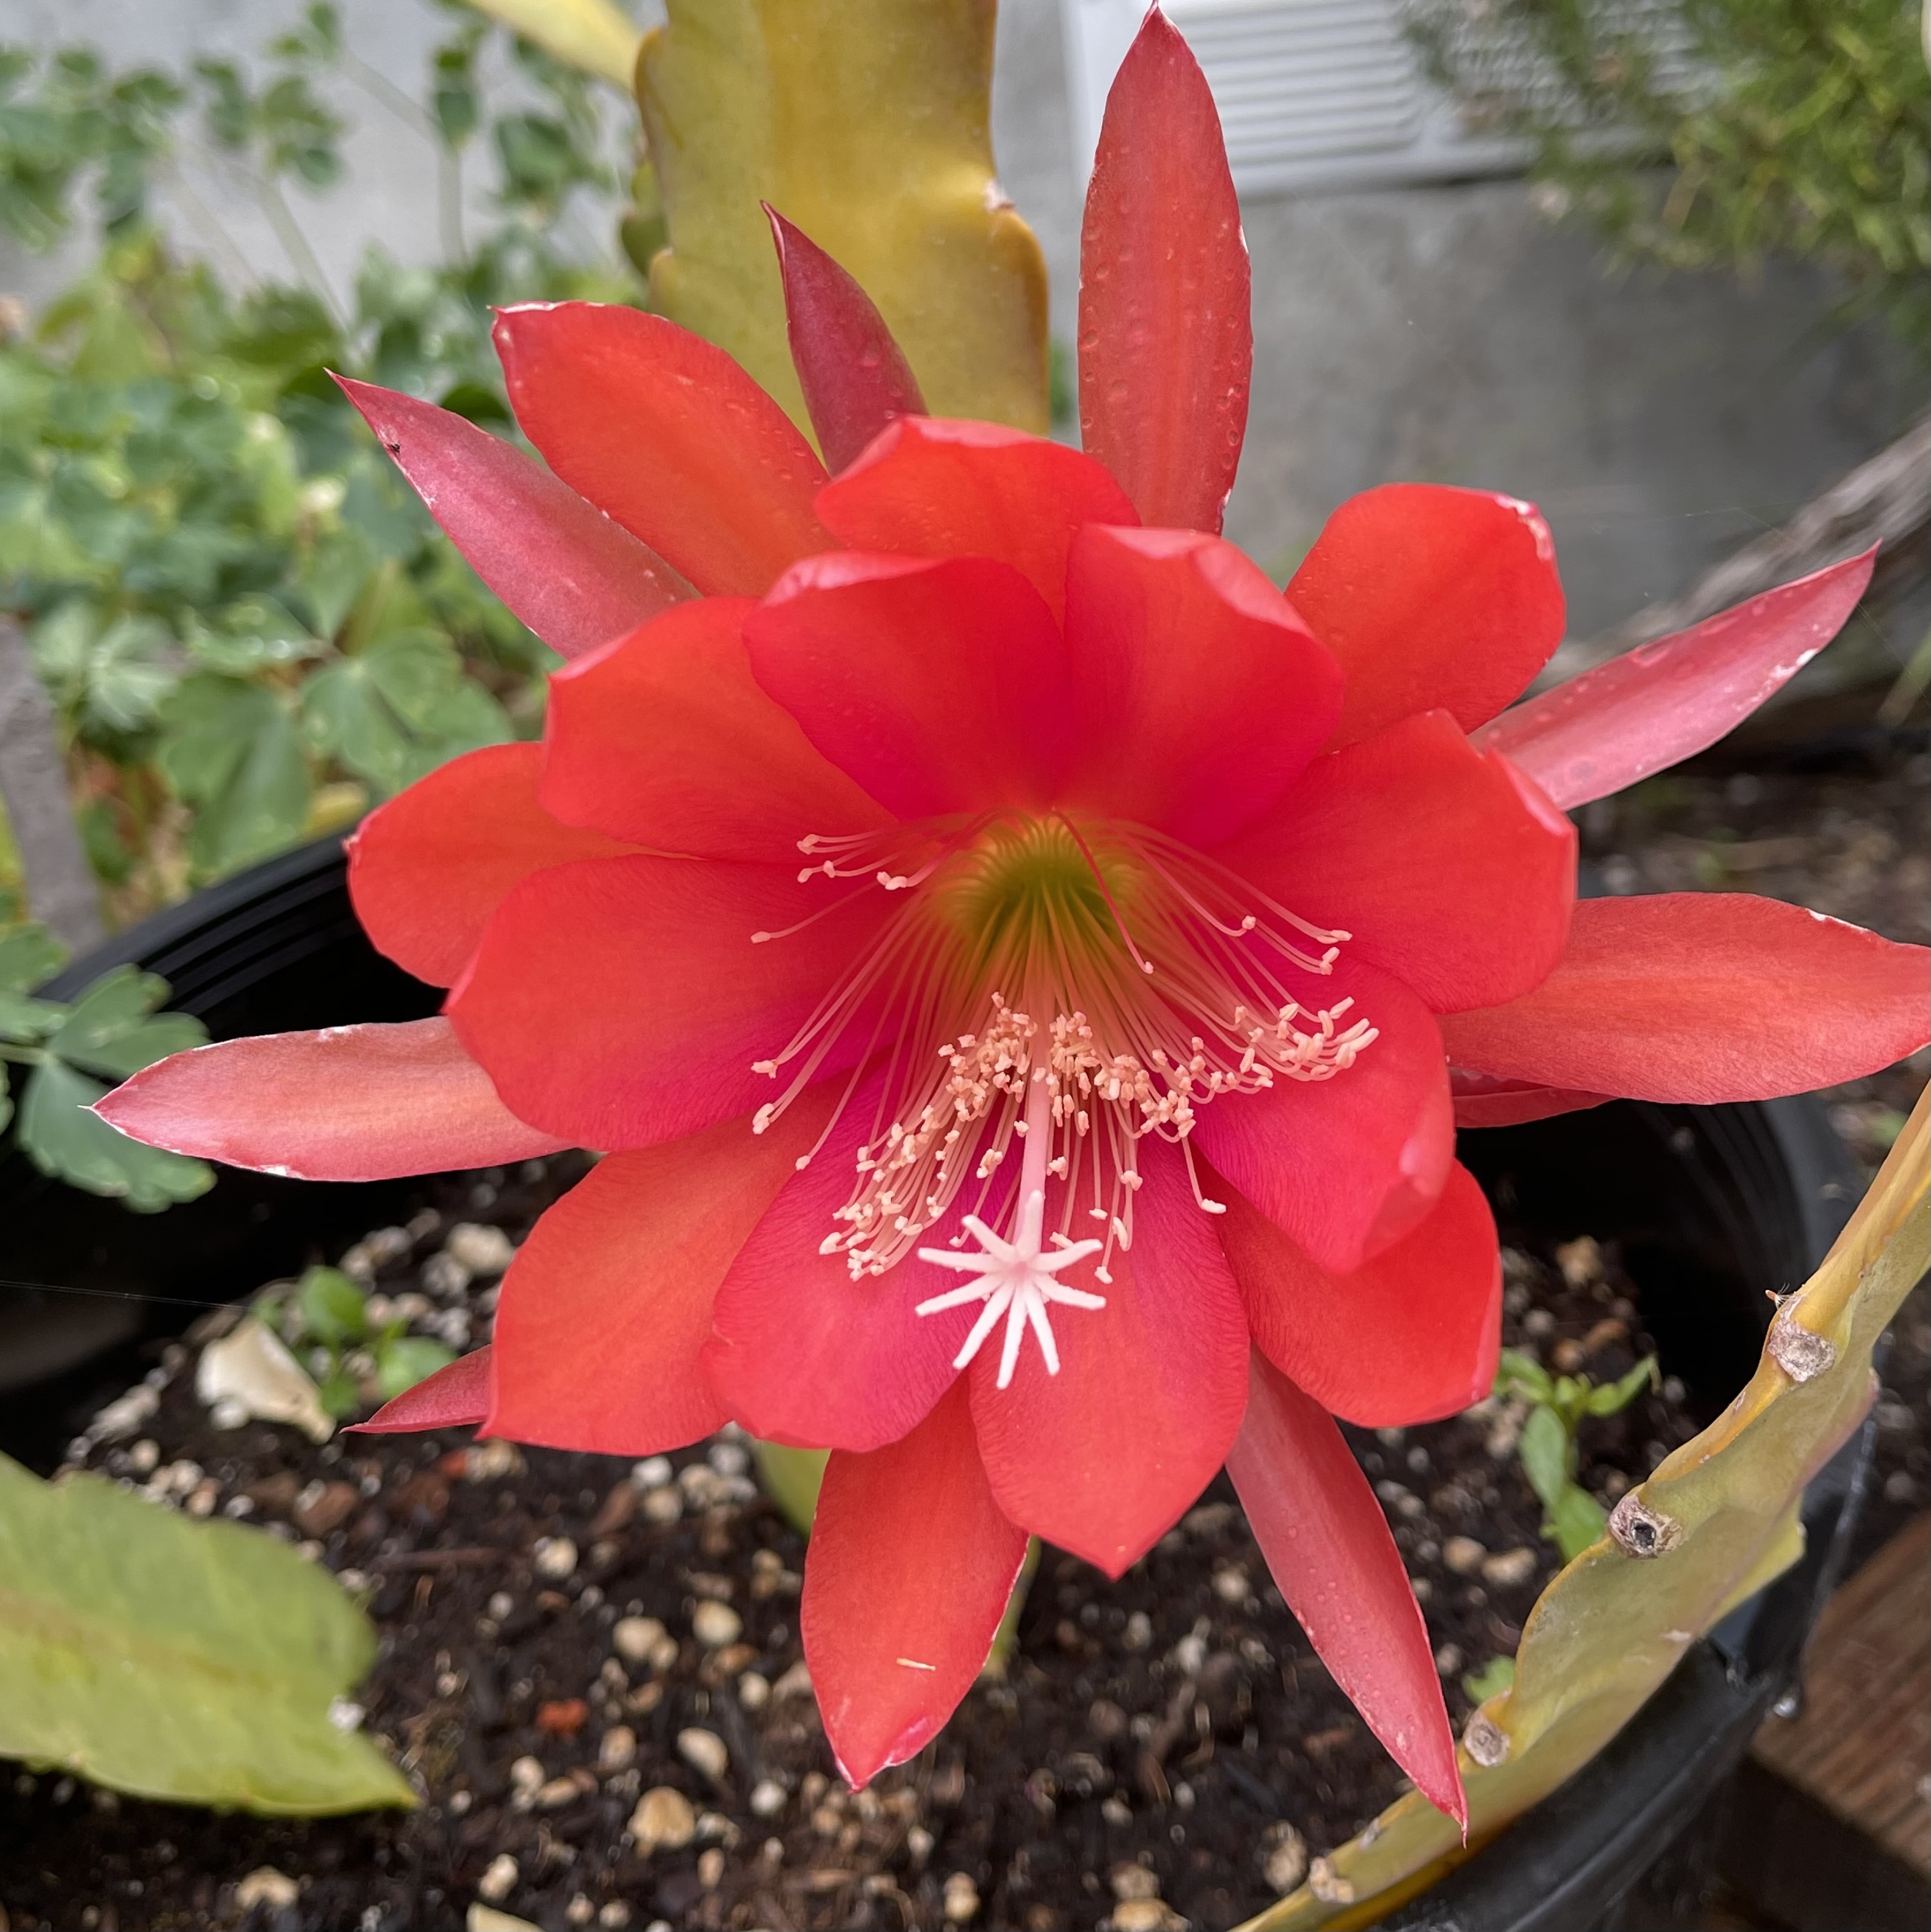 |
Flower
click
to enlarge  |
Flower
click
to enlarge 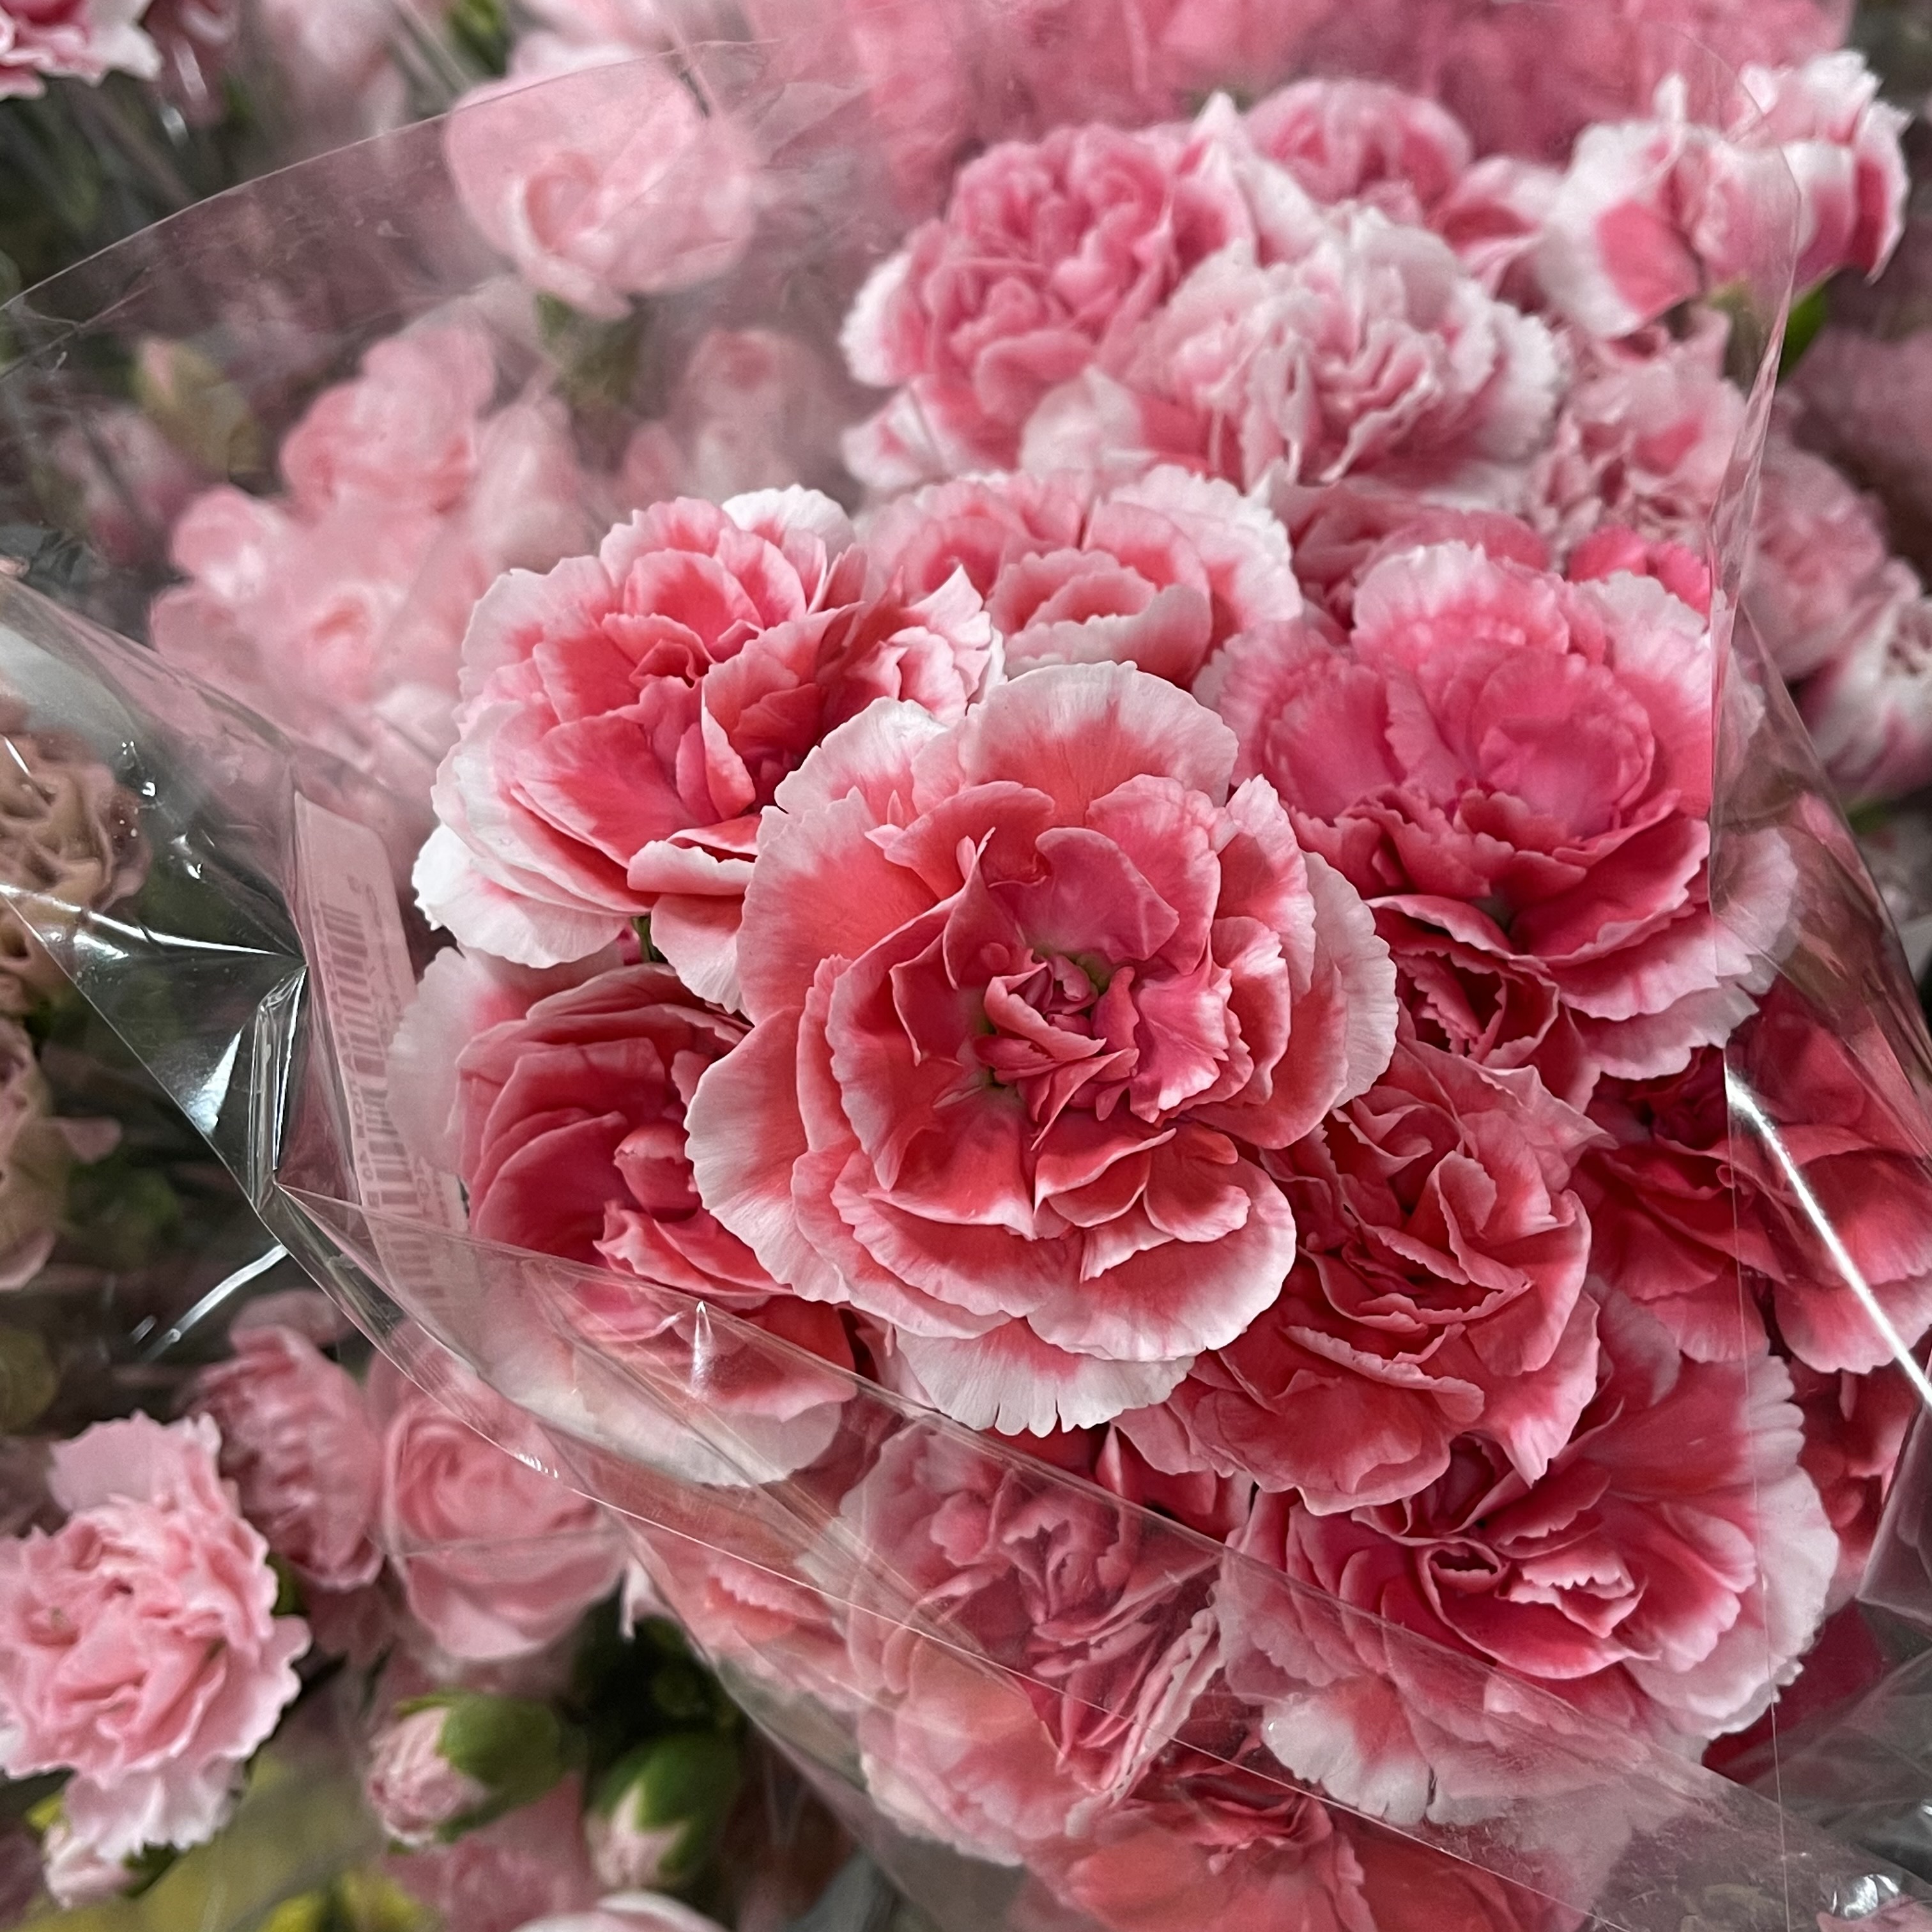 |
Flower
click
to enlarge 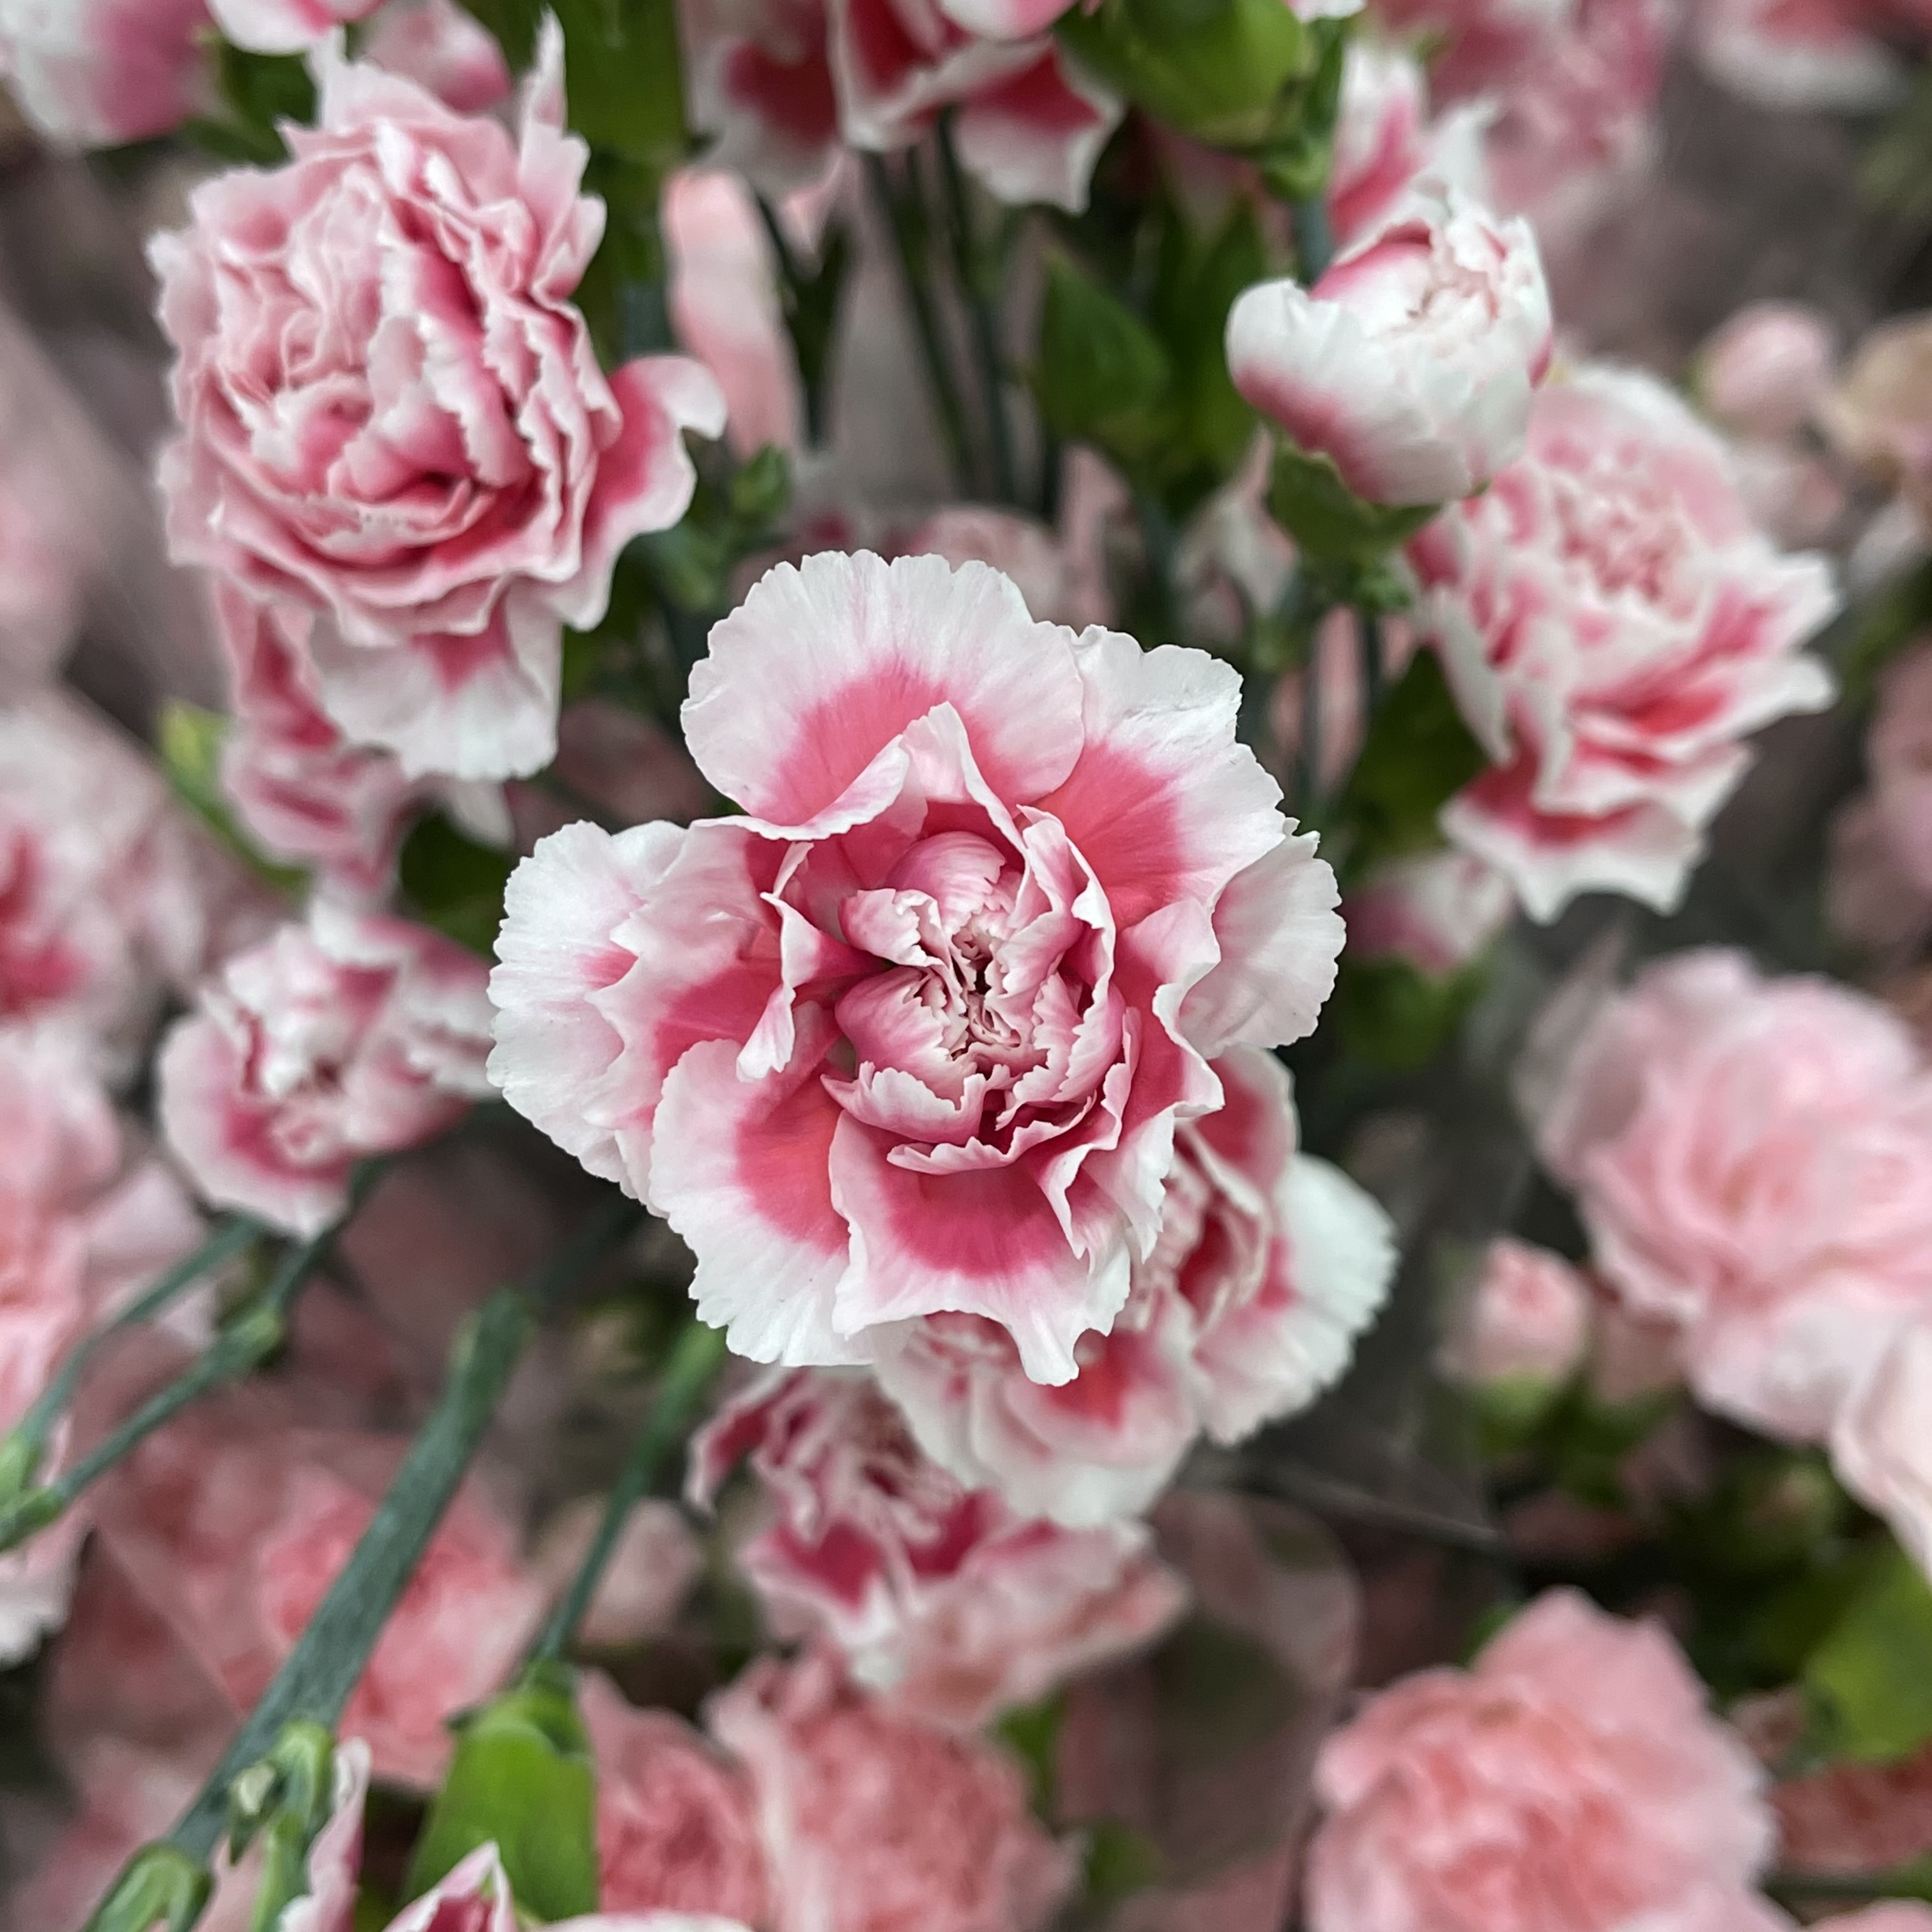 |
Flower
click
to enlarge  |
Flower
click
to enlarge 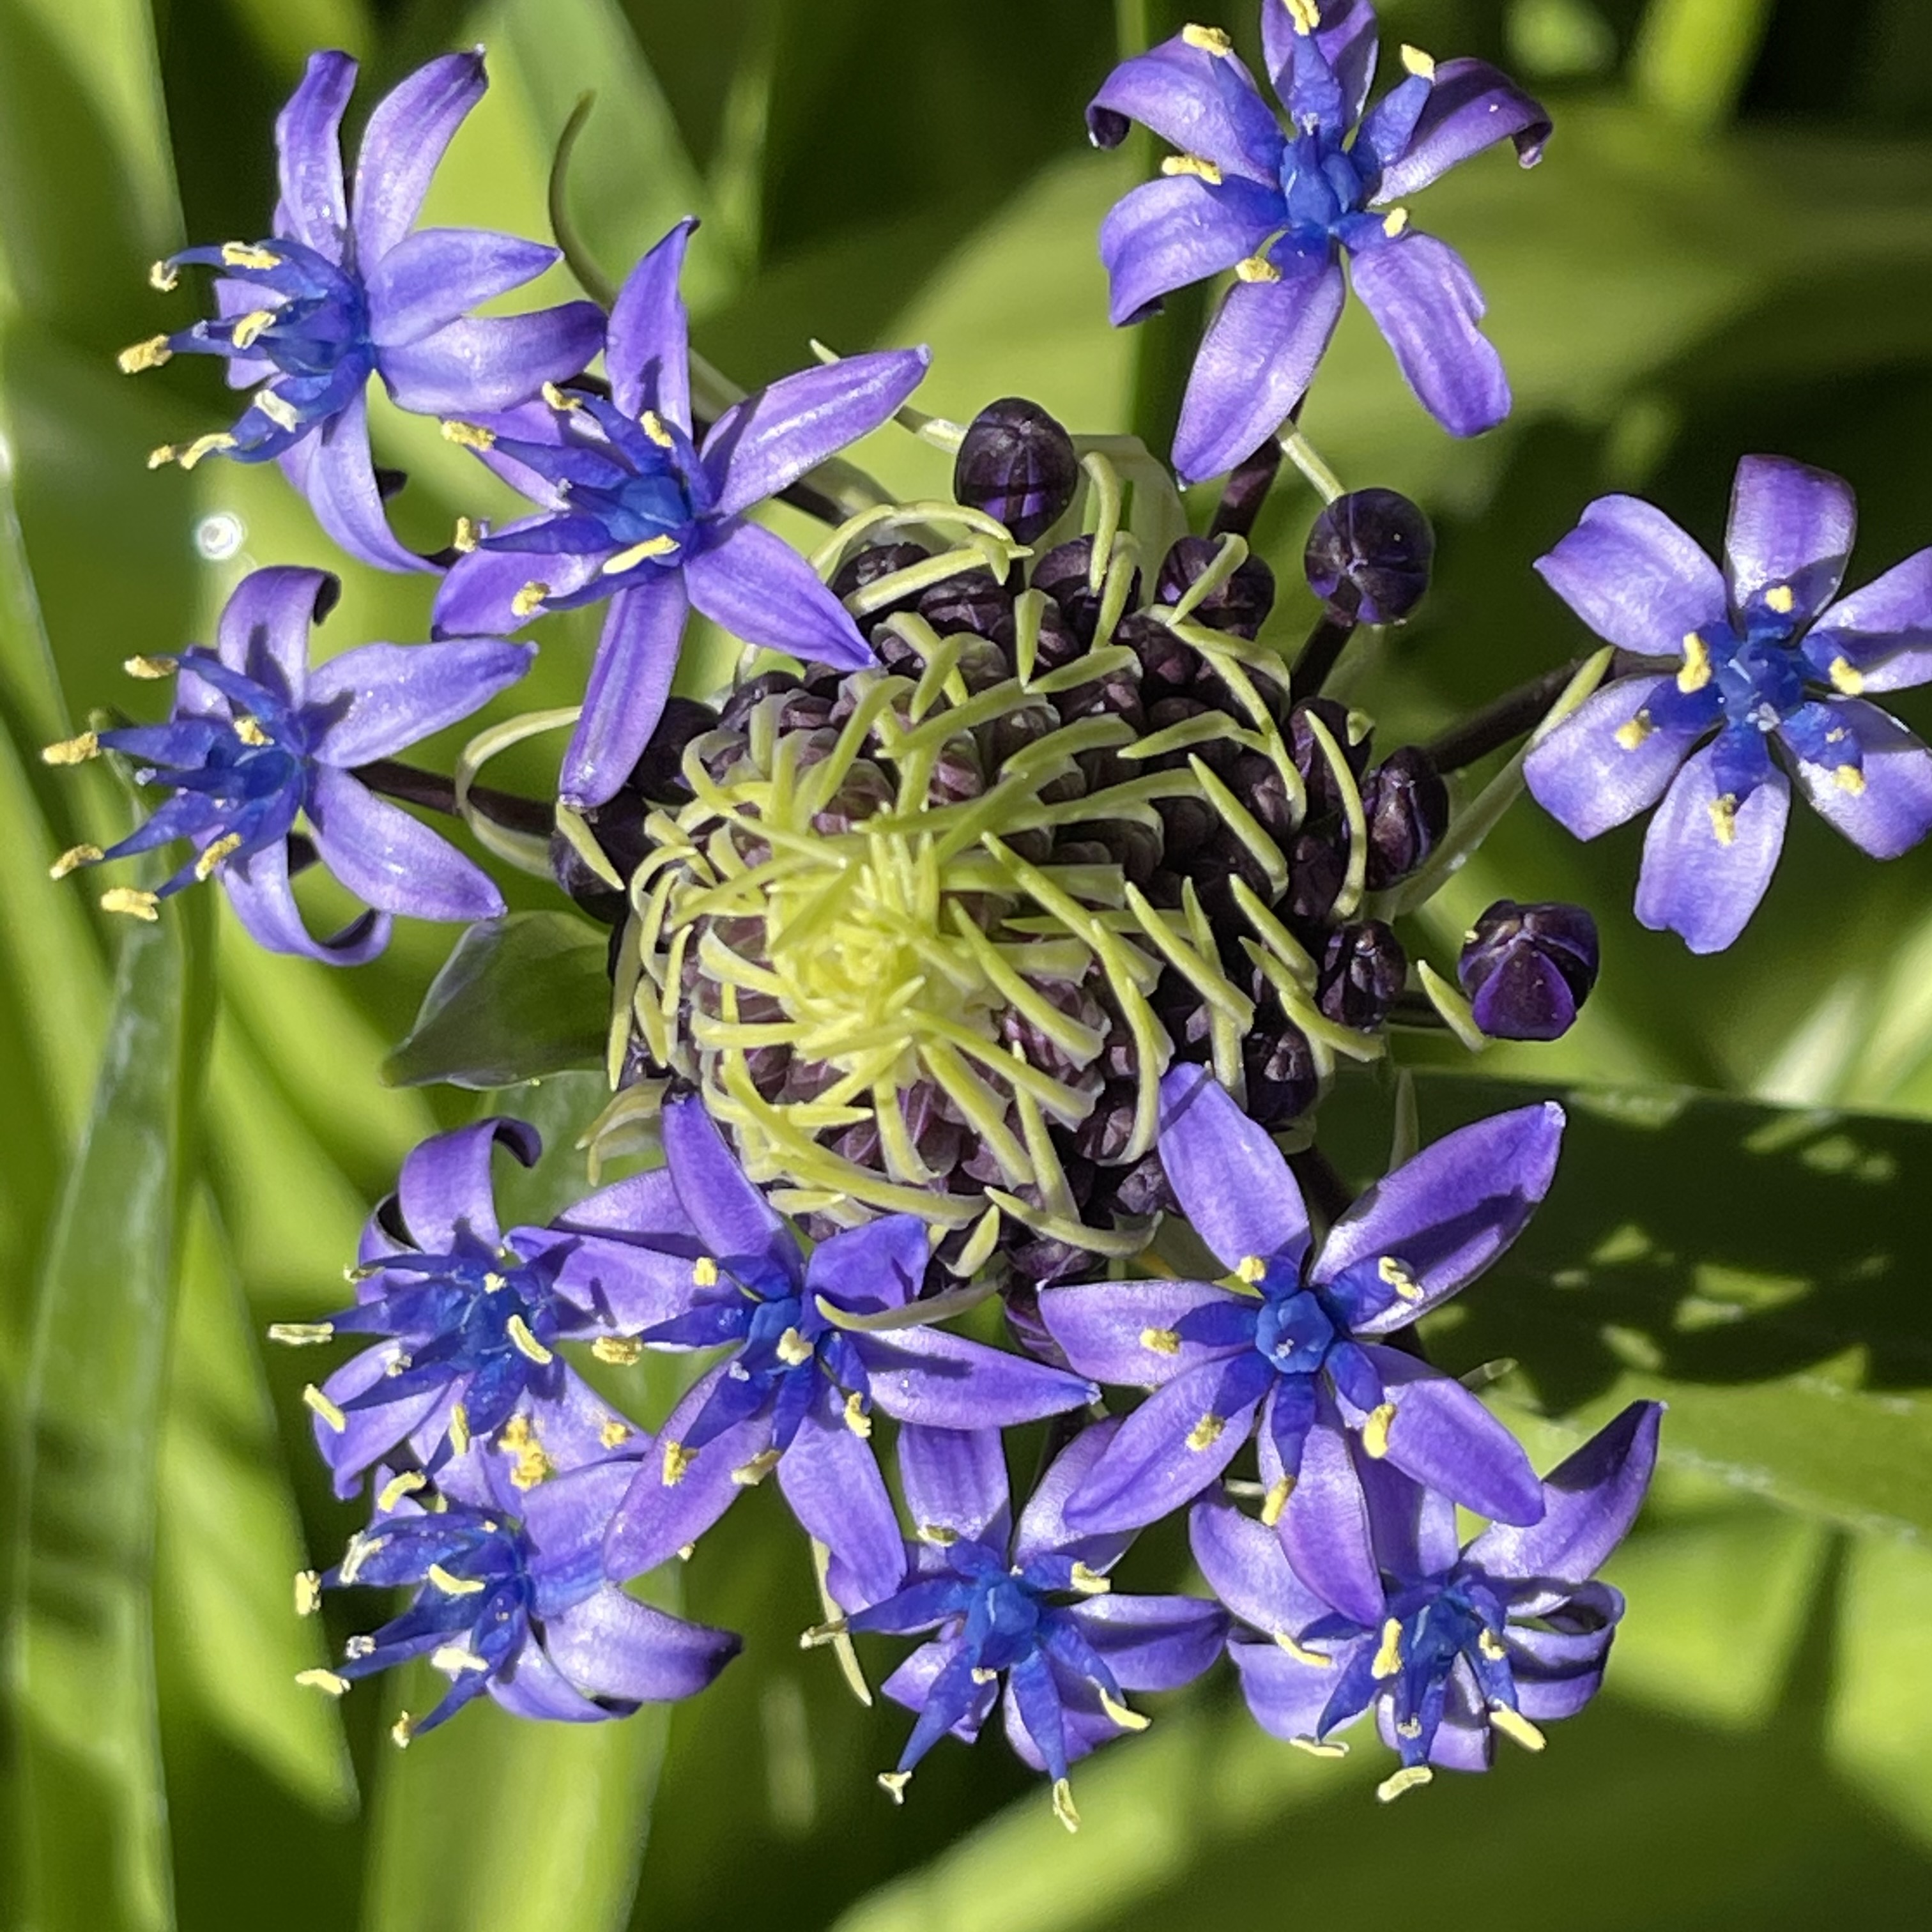 |
Flower
click
to enlarge 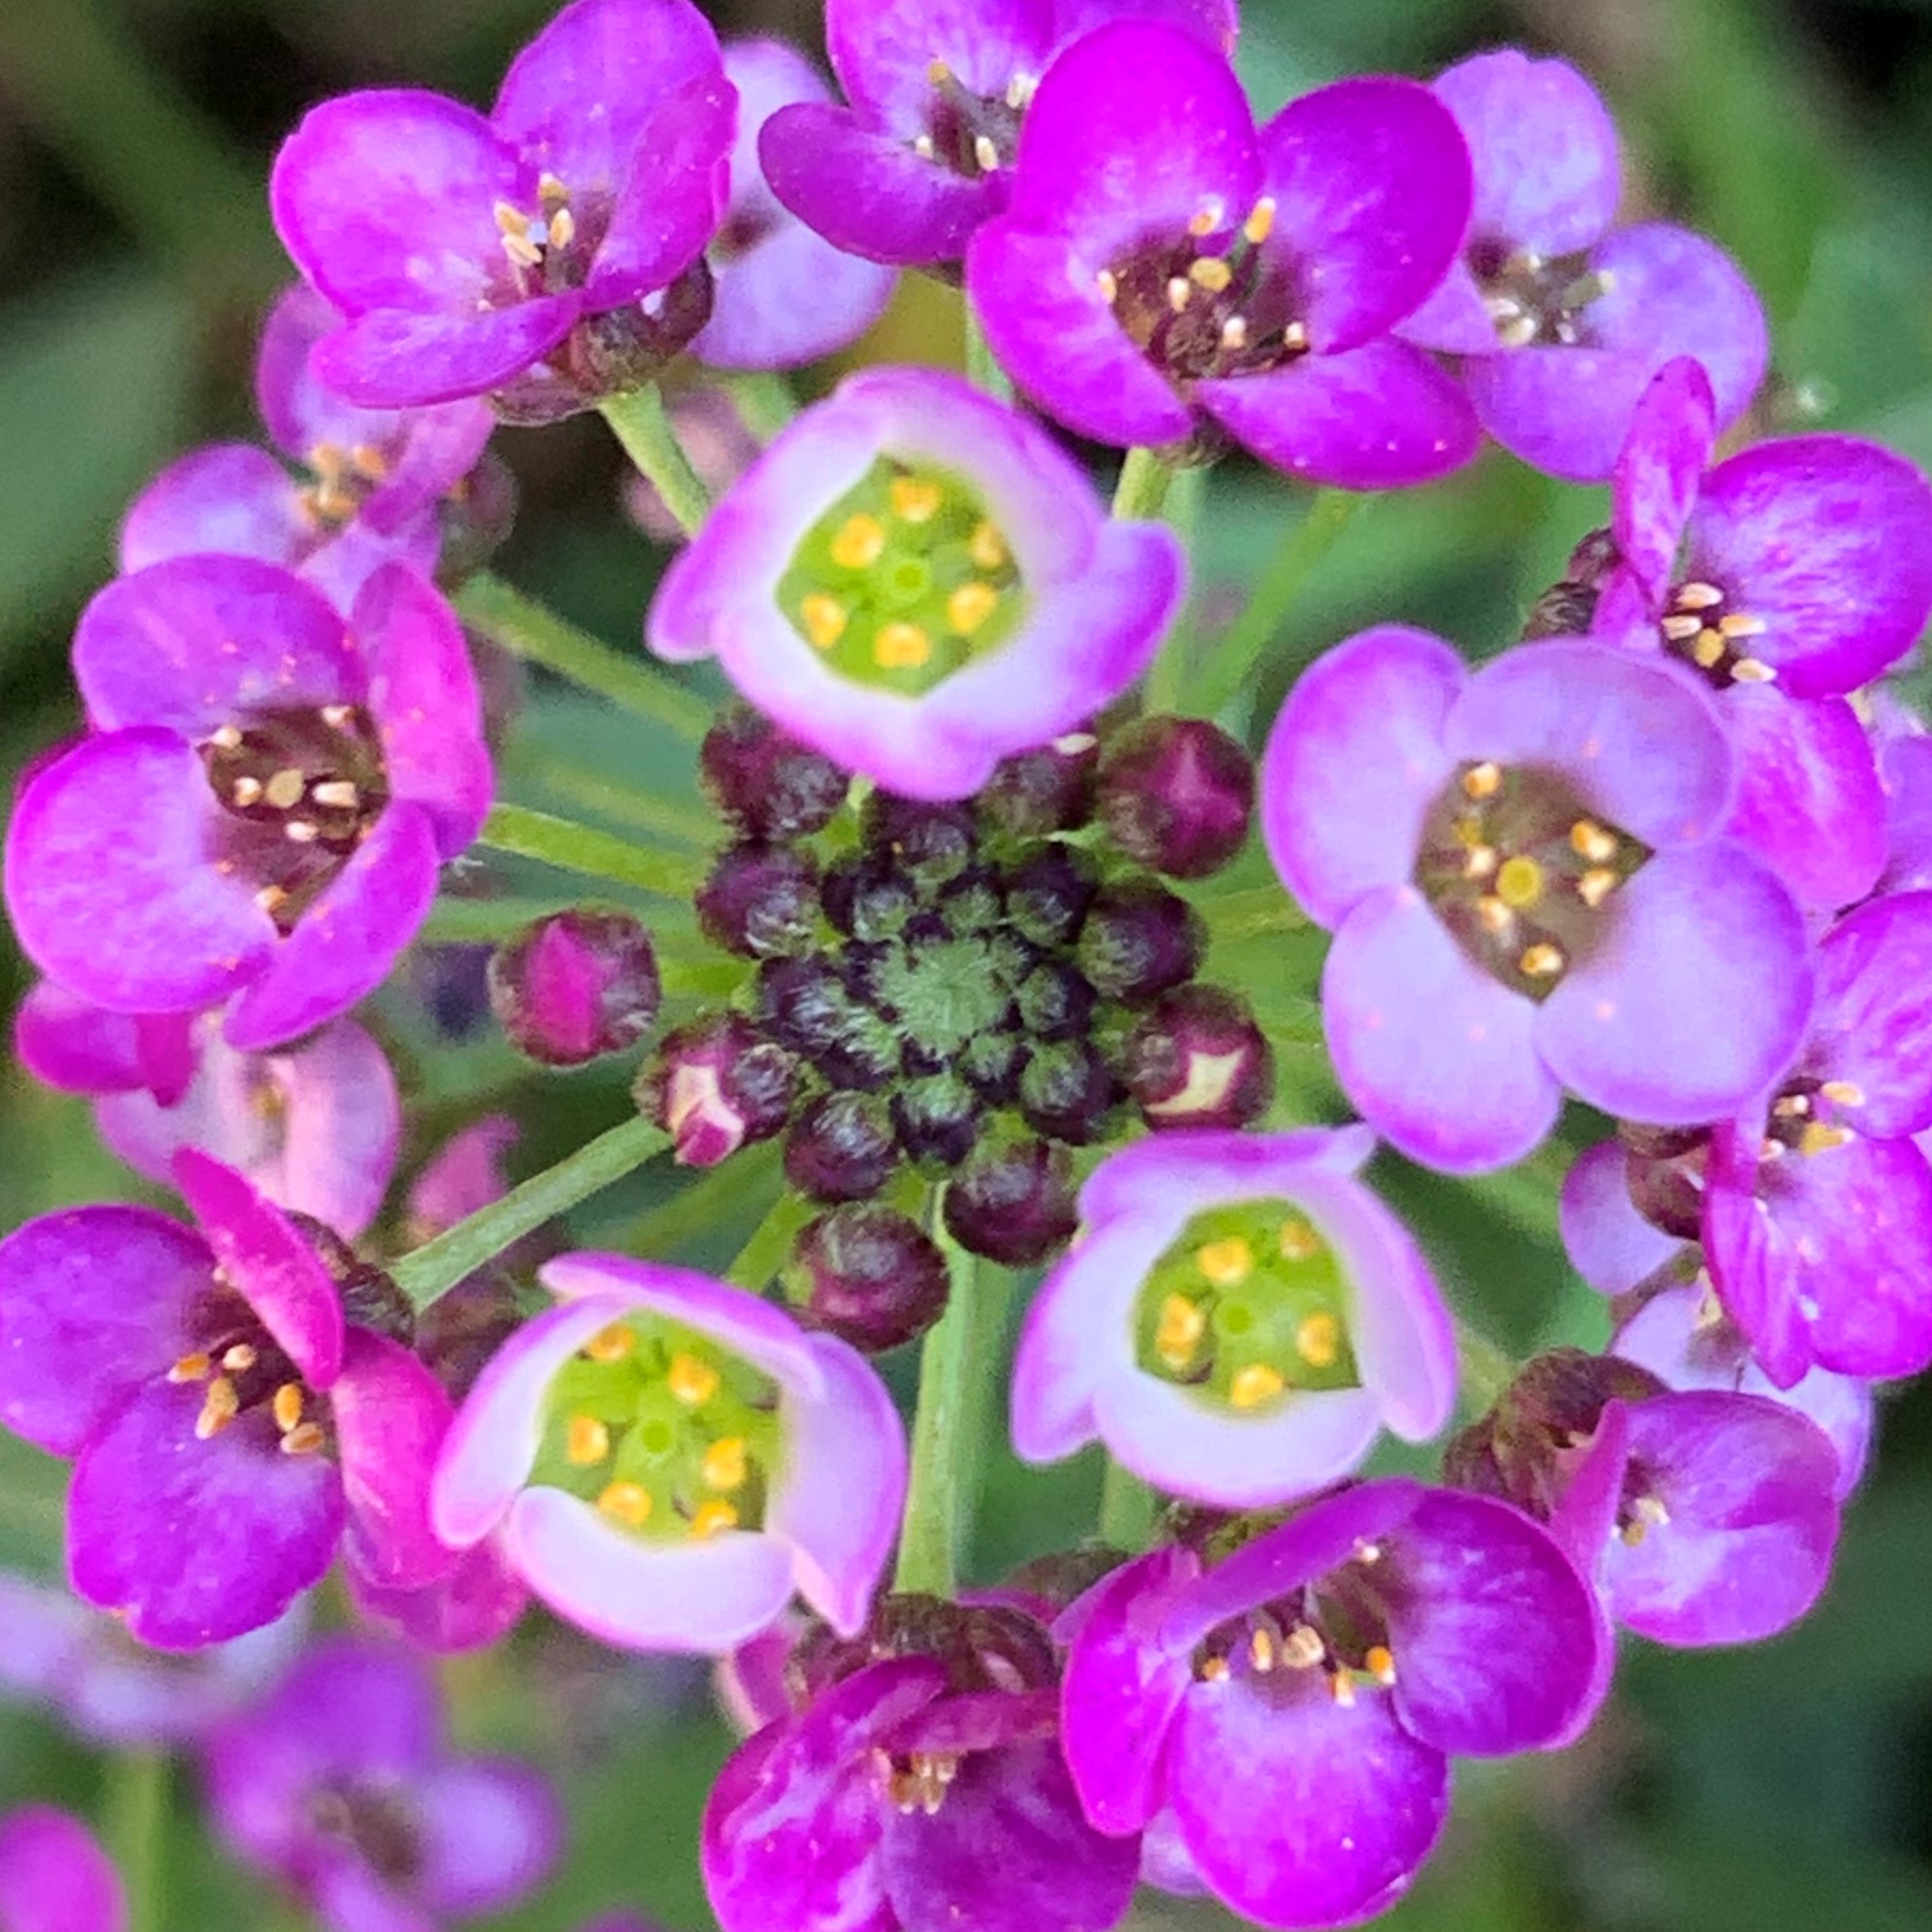 |
Flower
click
to enlarge 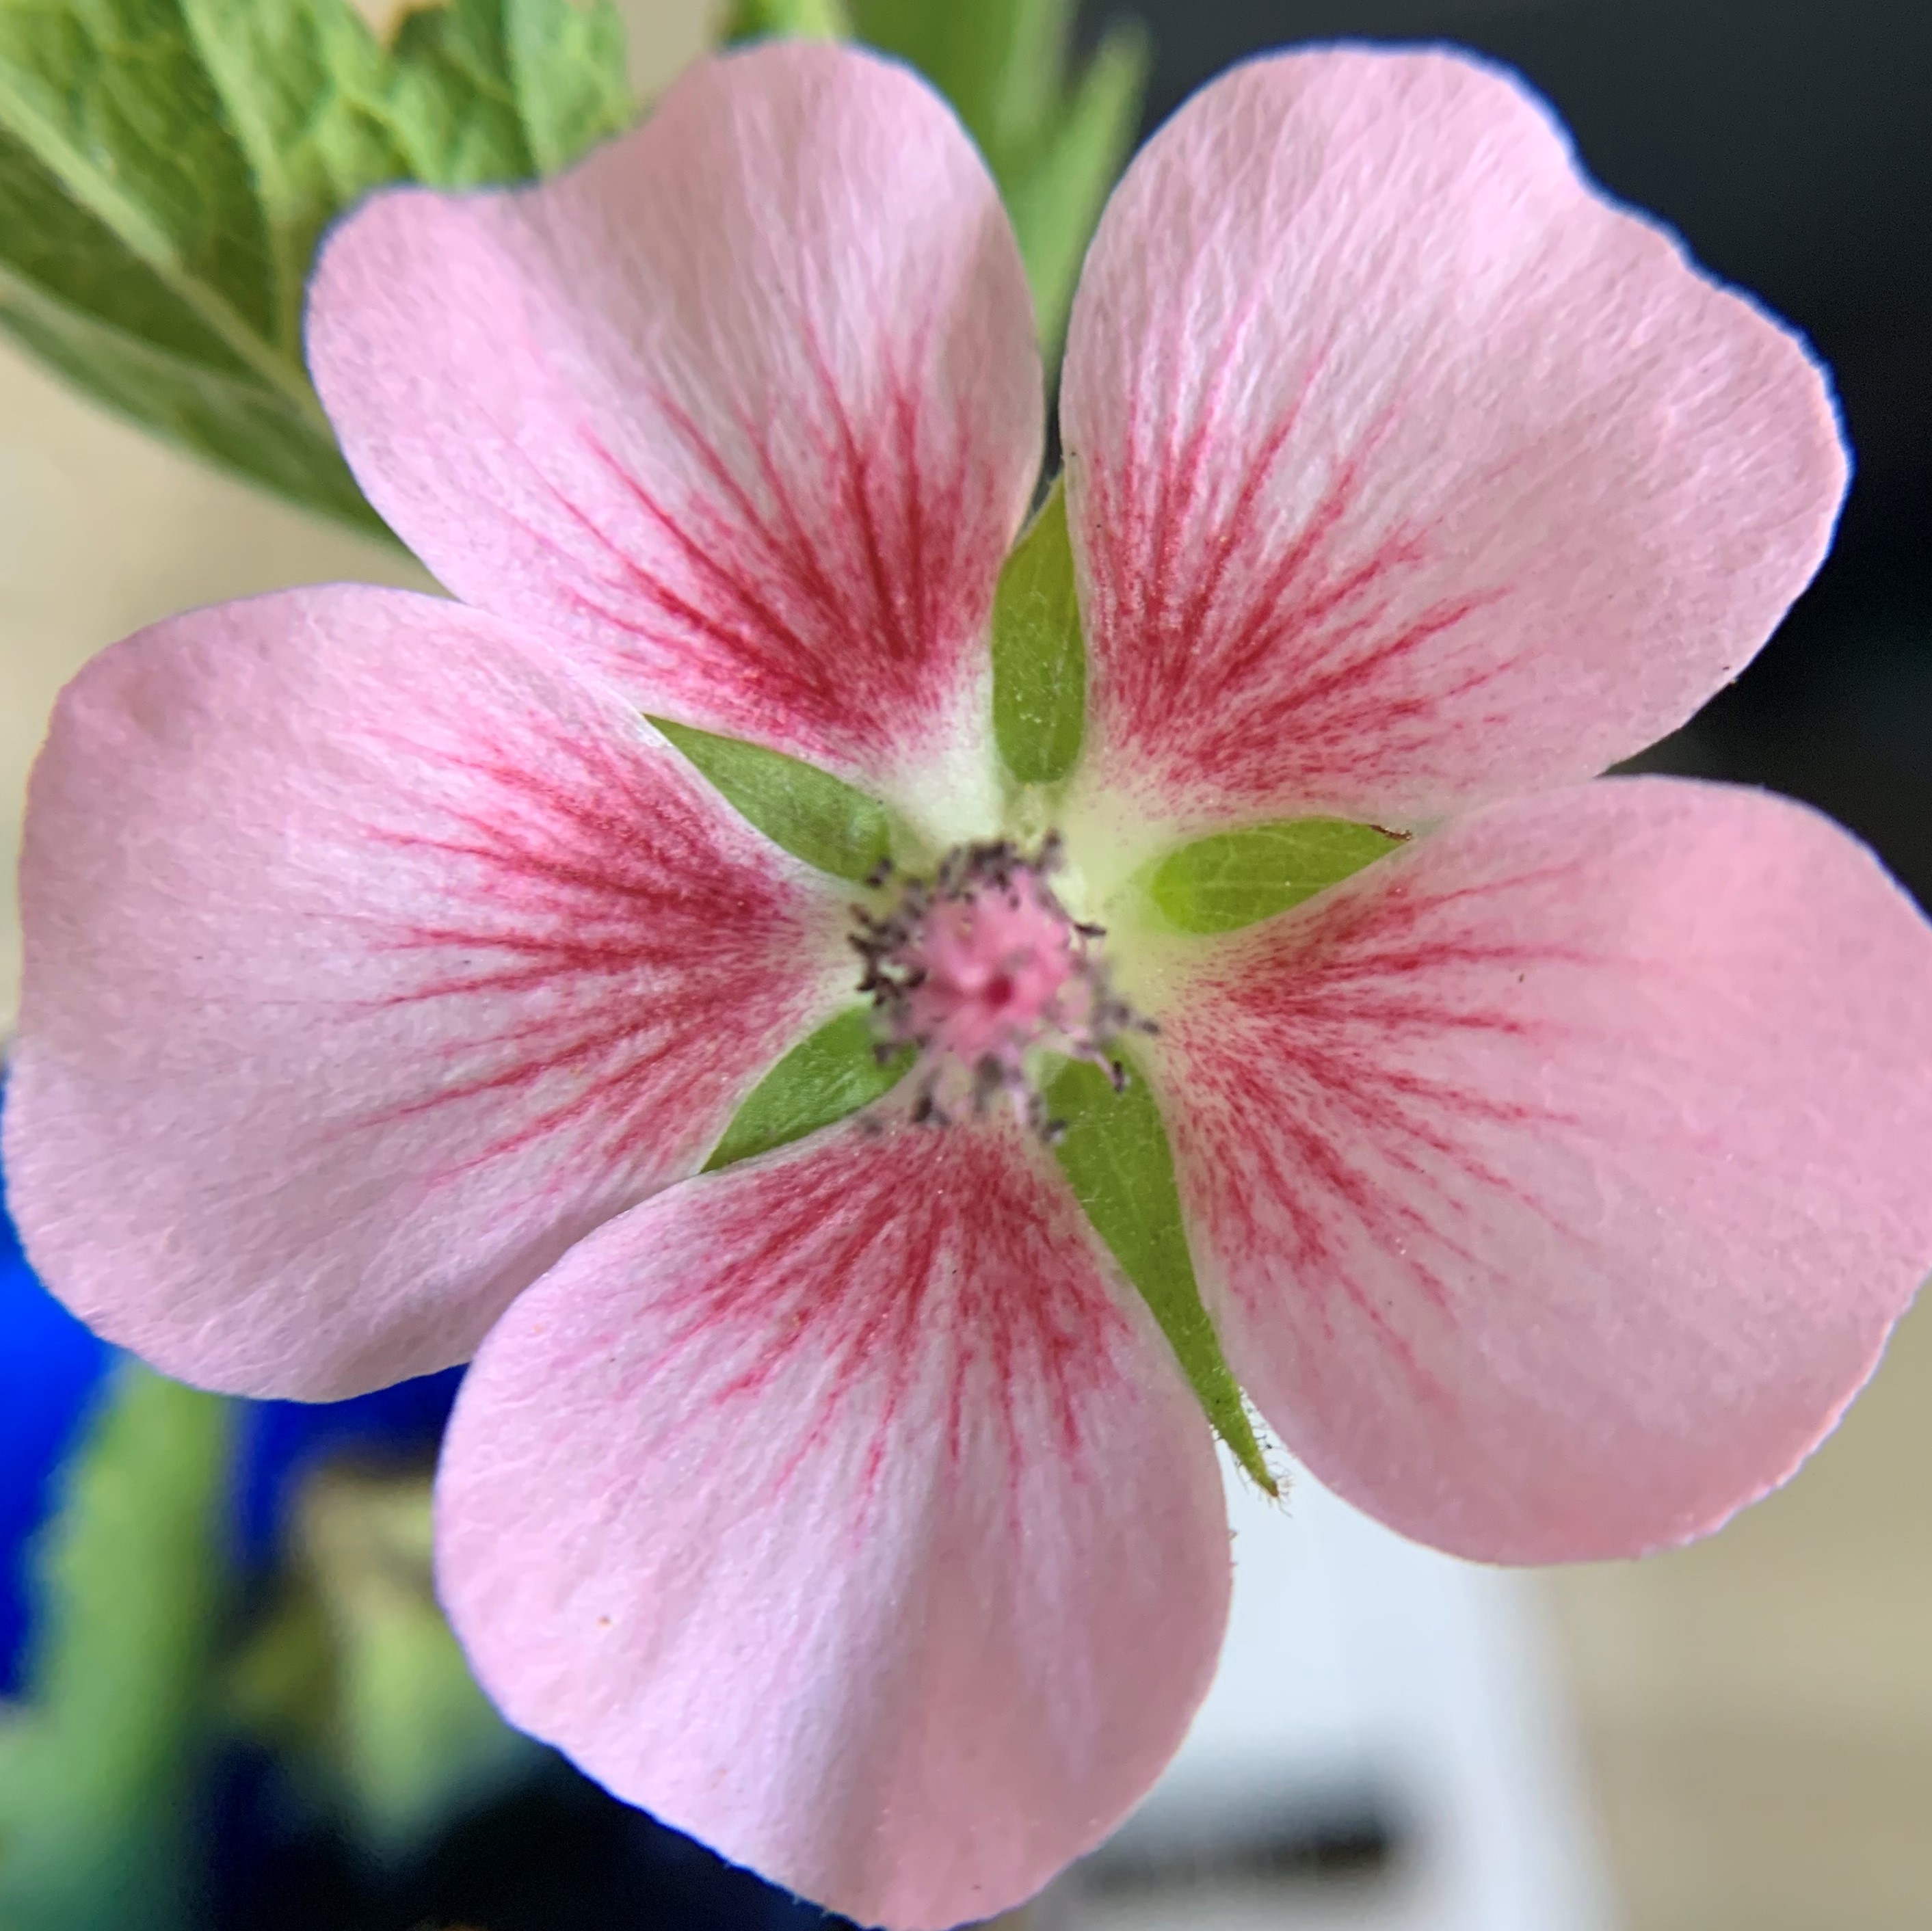 |
Flower
click
to enlarge 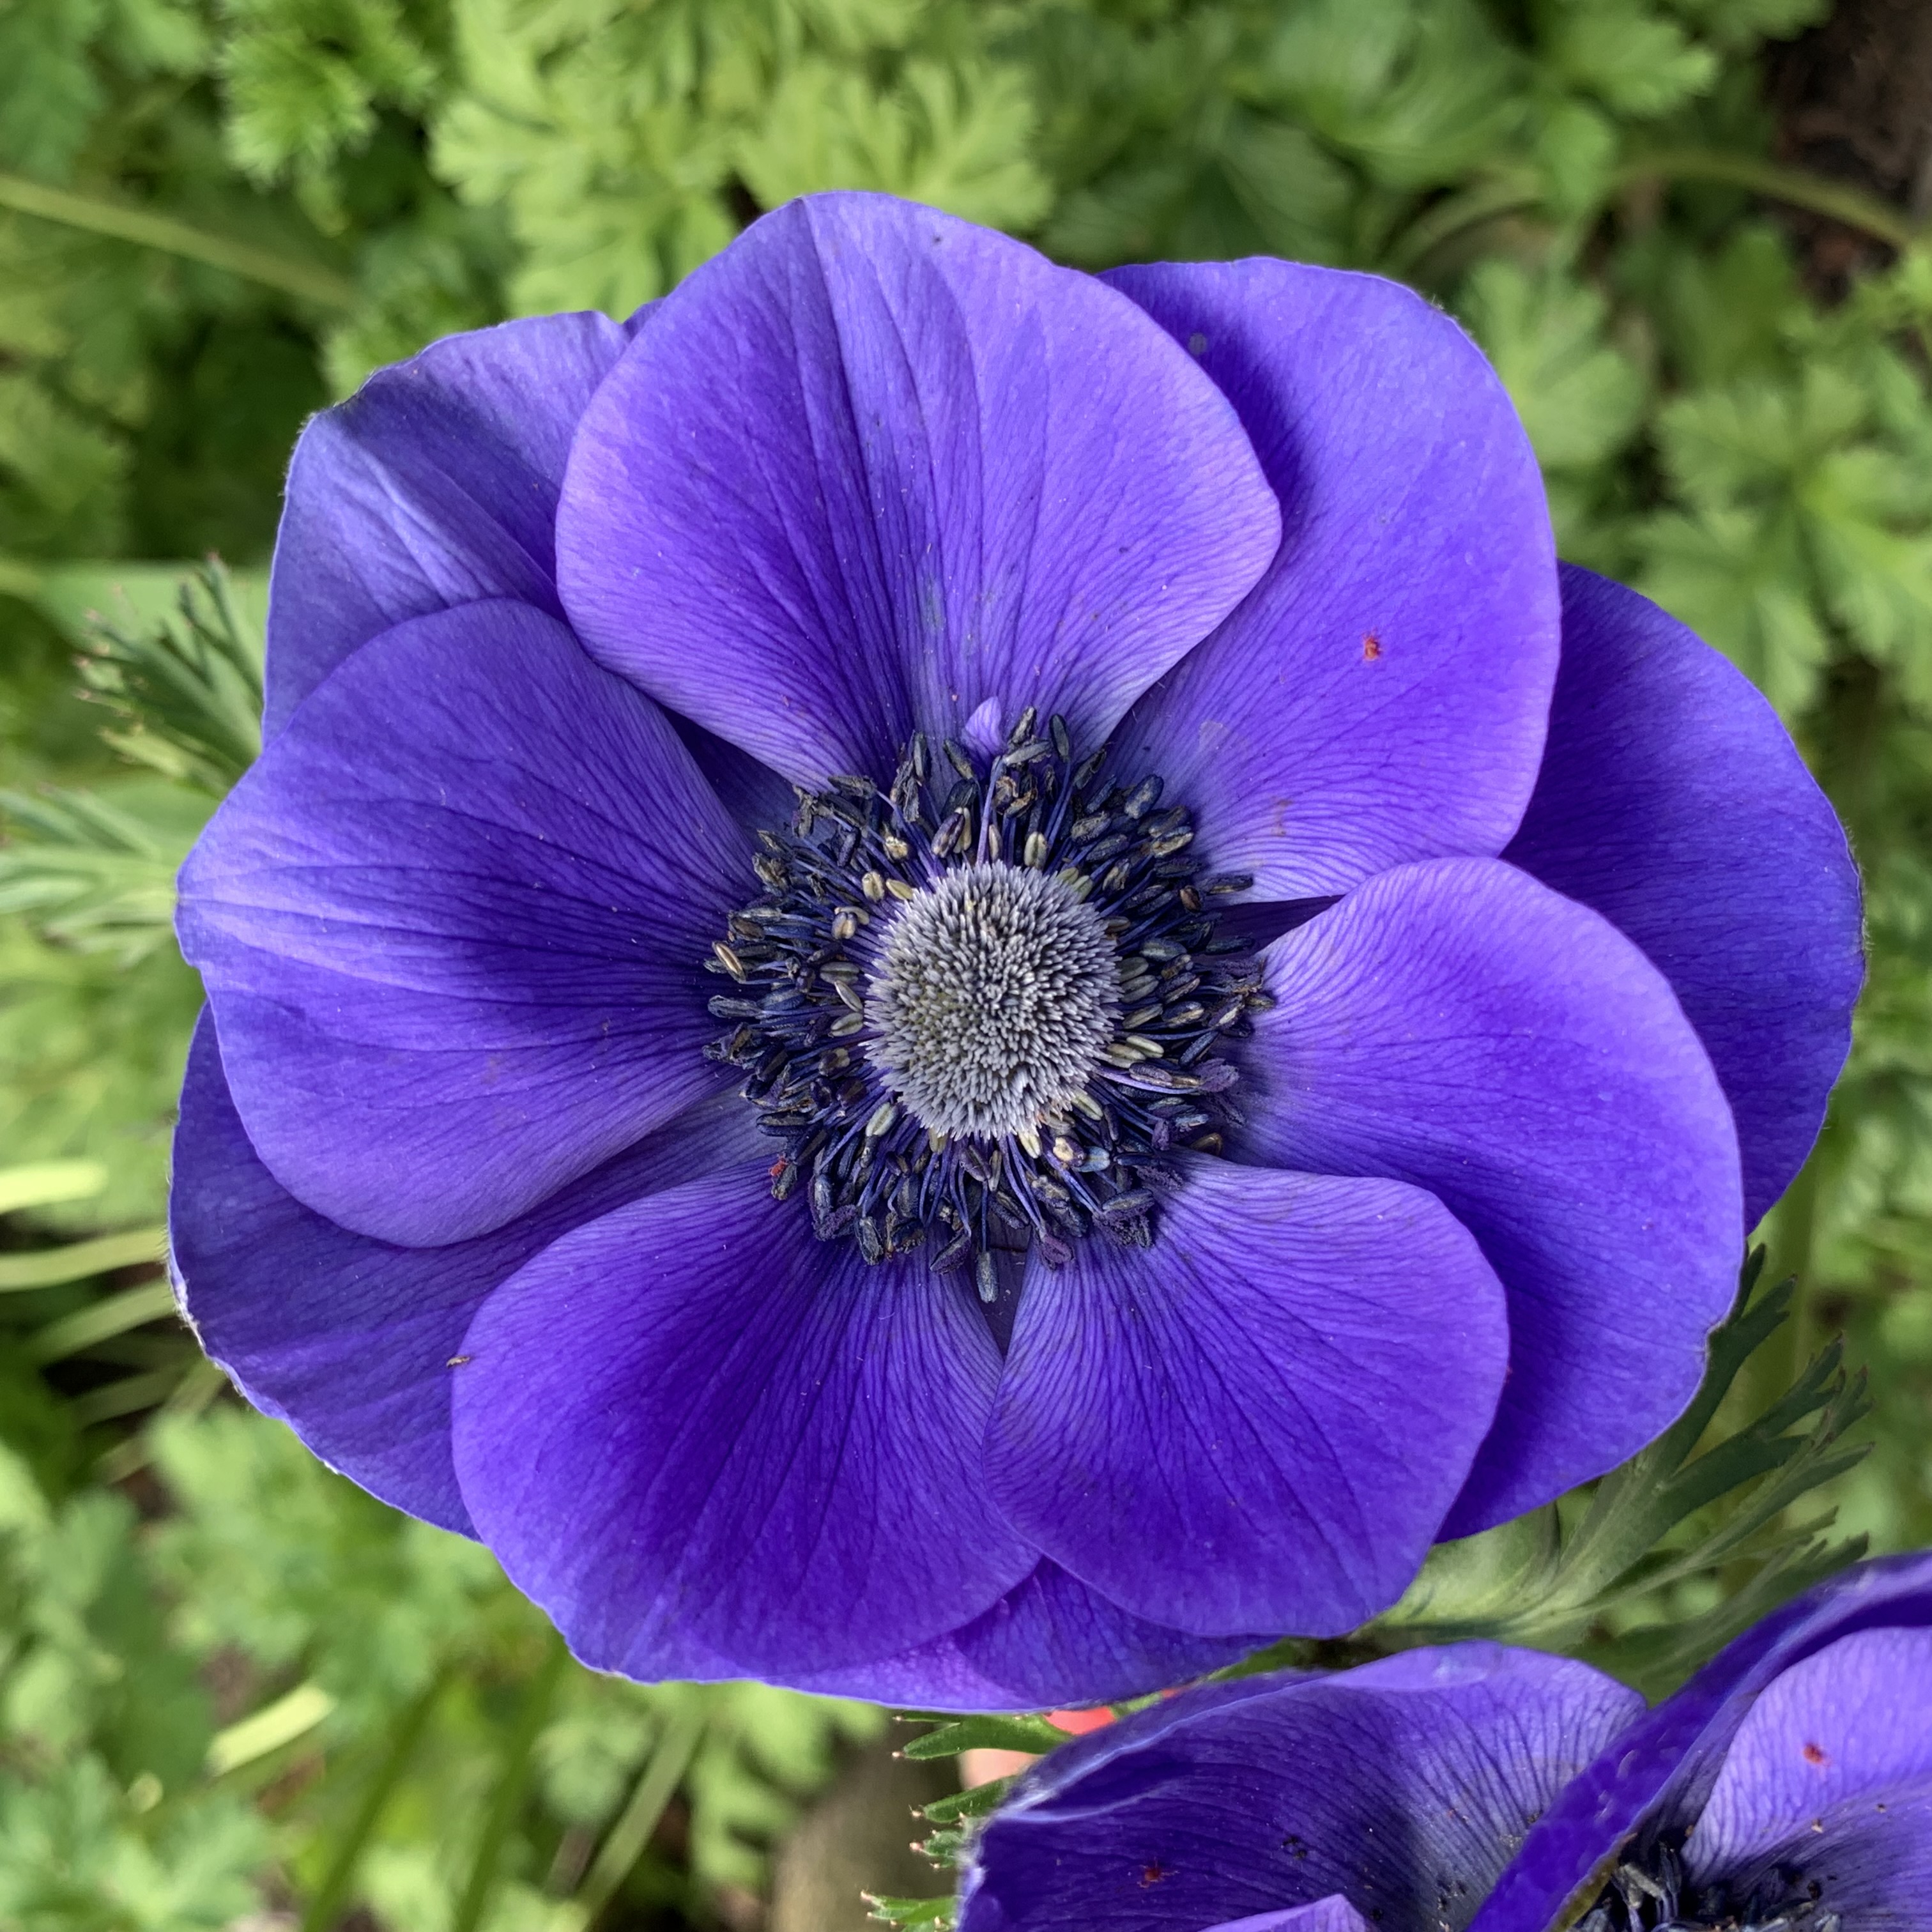 |
Flower
click
to enlarge 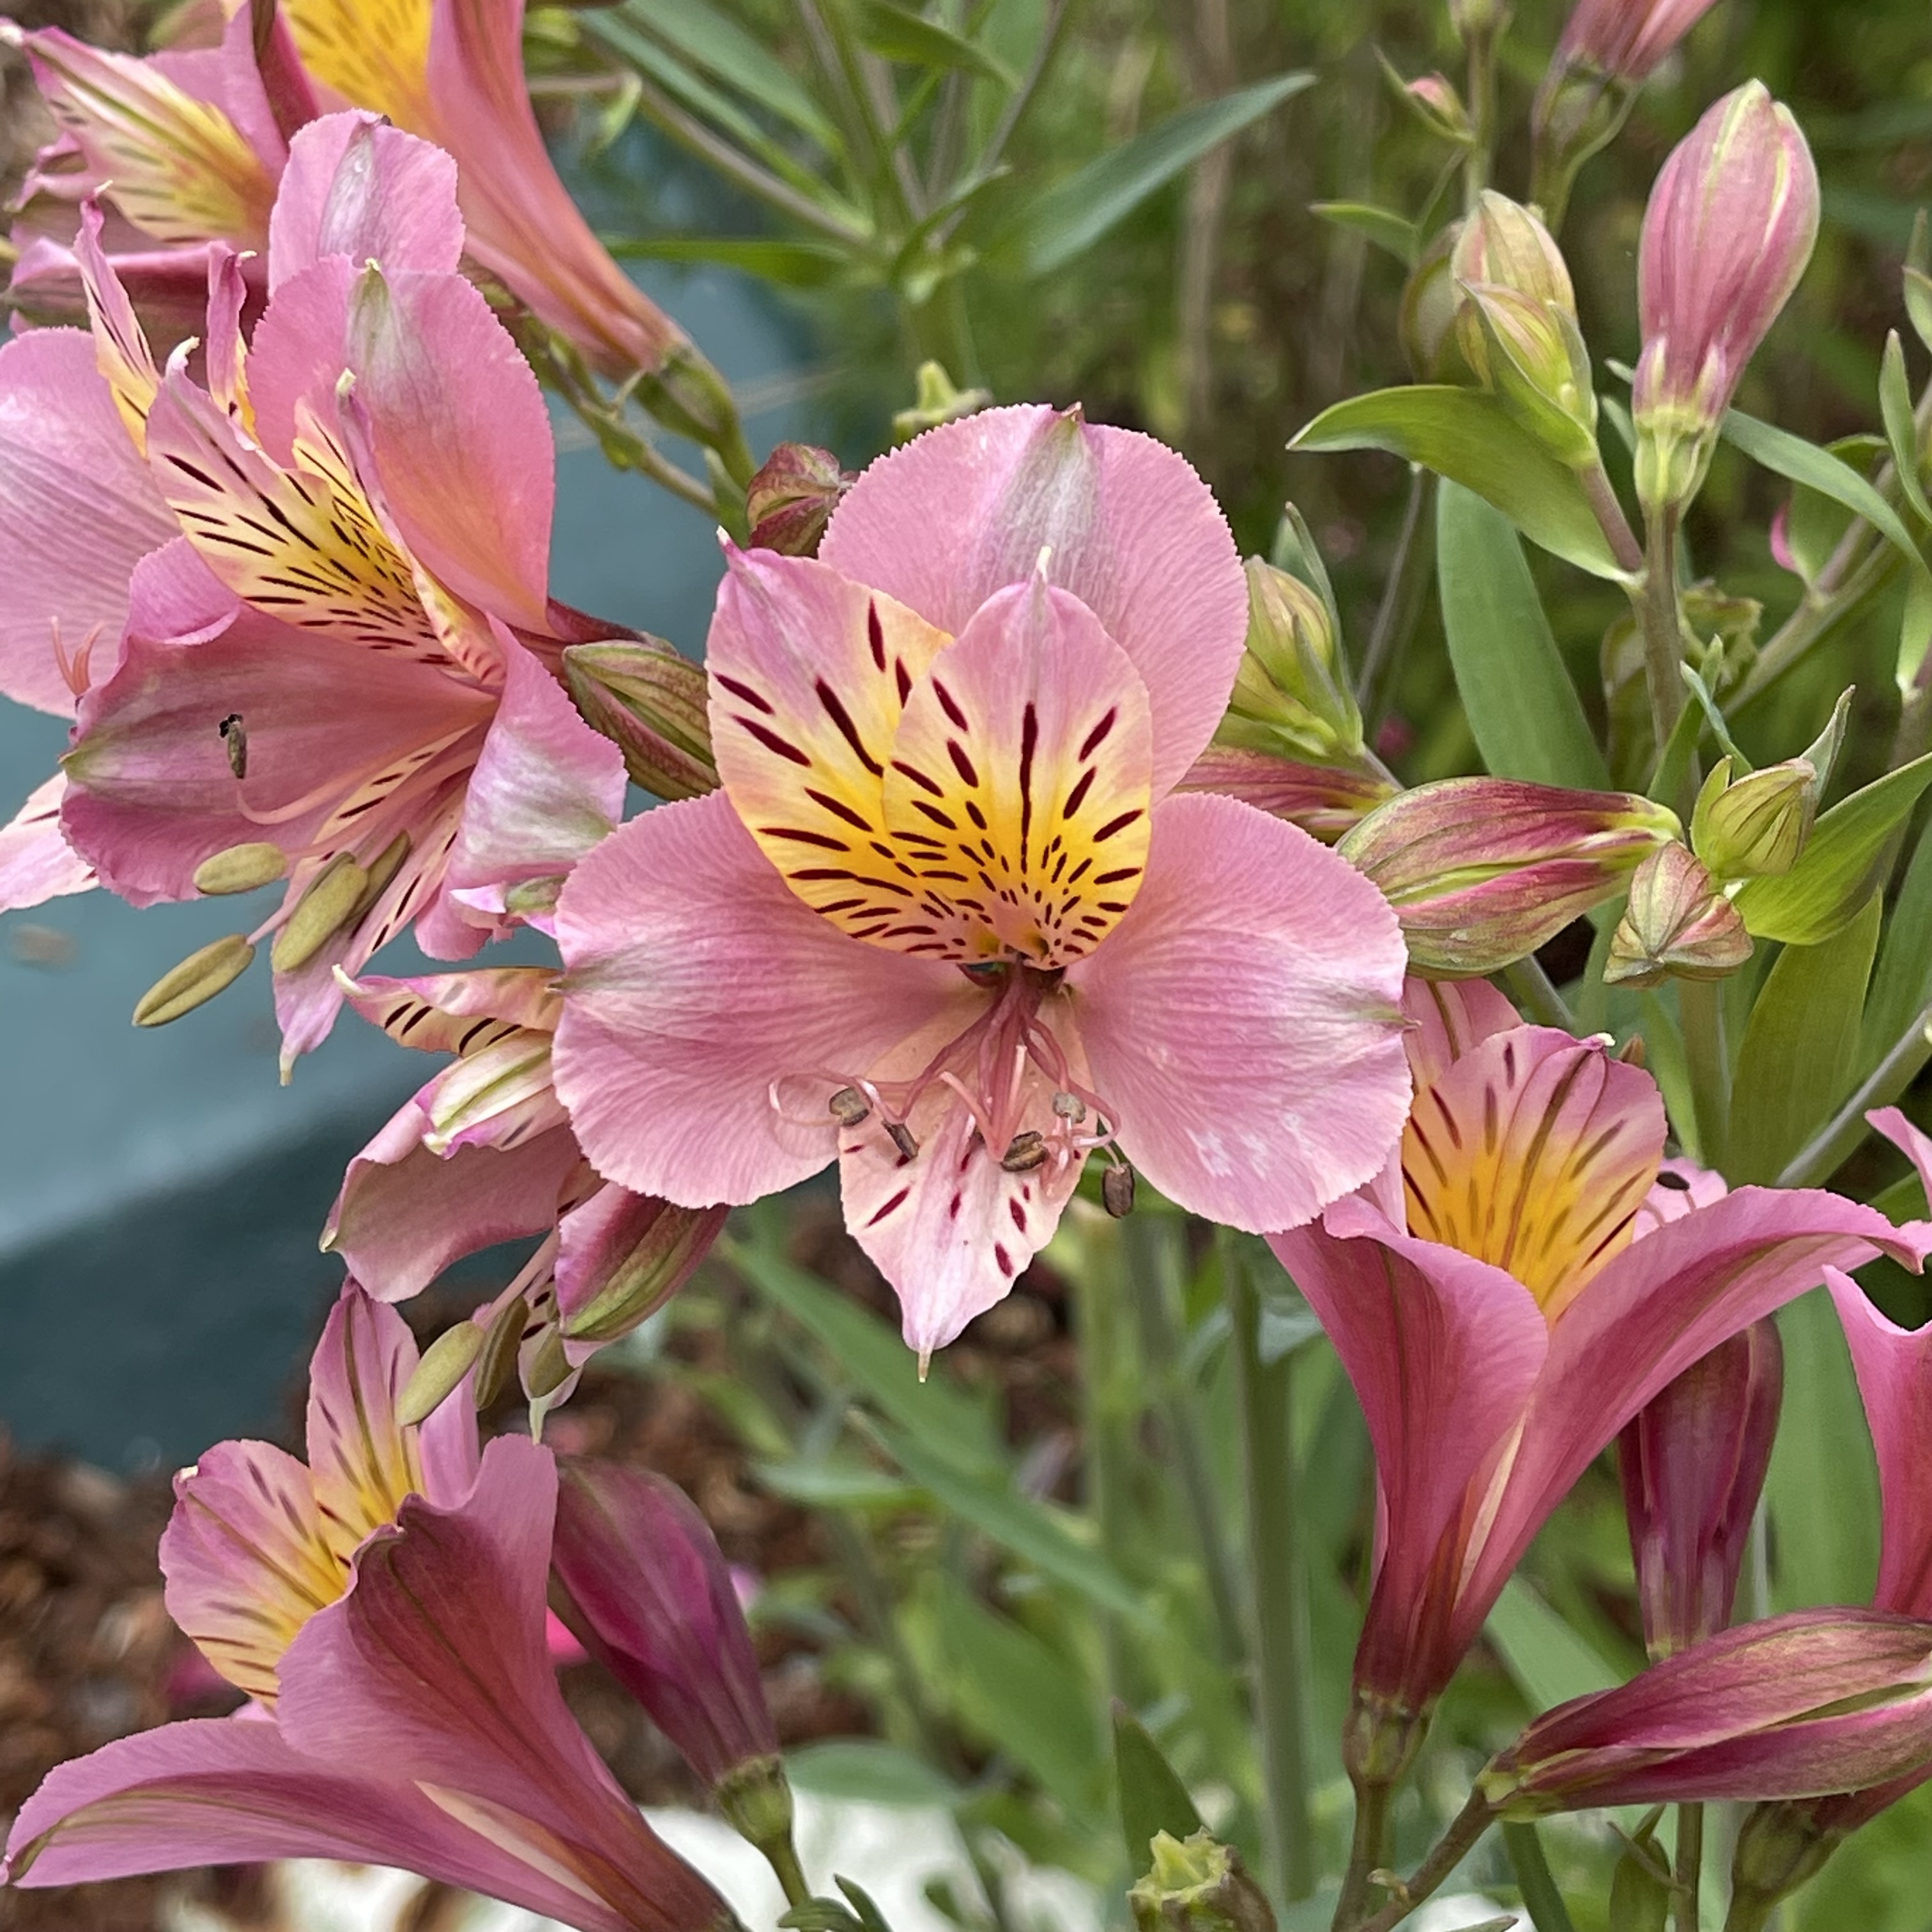 |
Here we will show the sample works created by the author. More will be added in the future. |
| Example click to enlarge 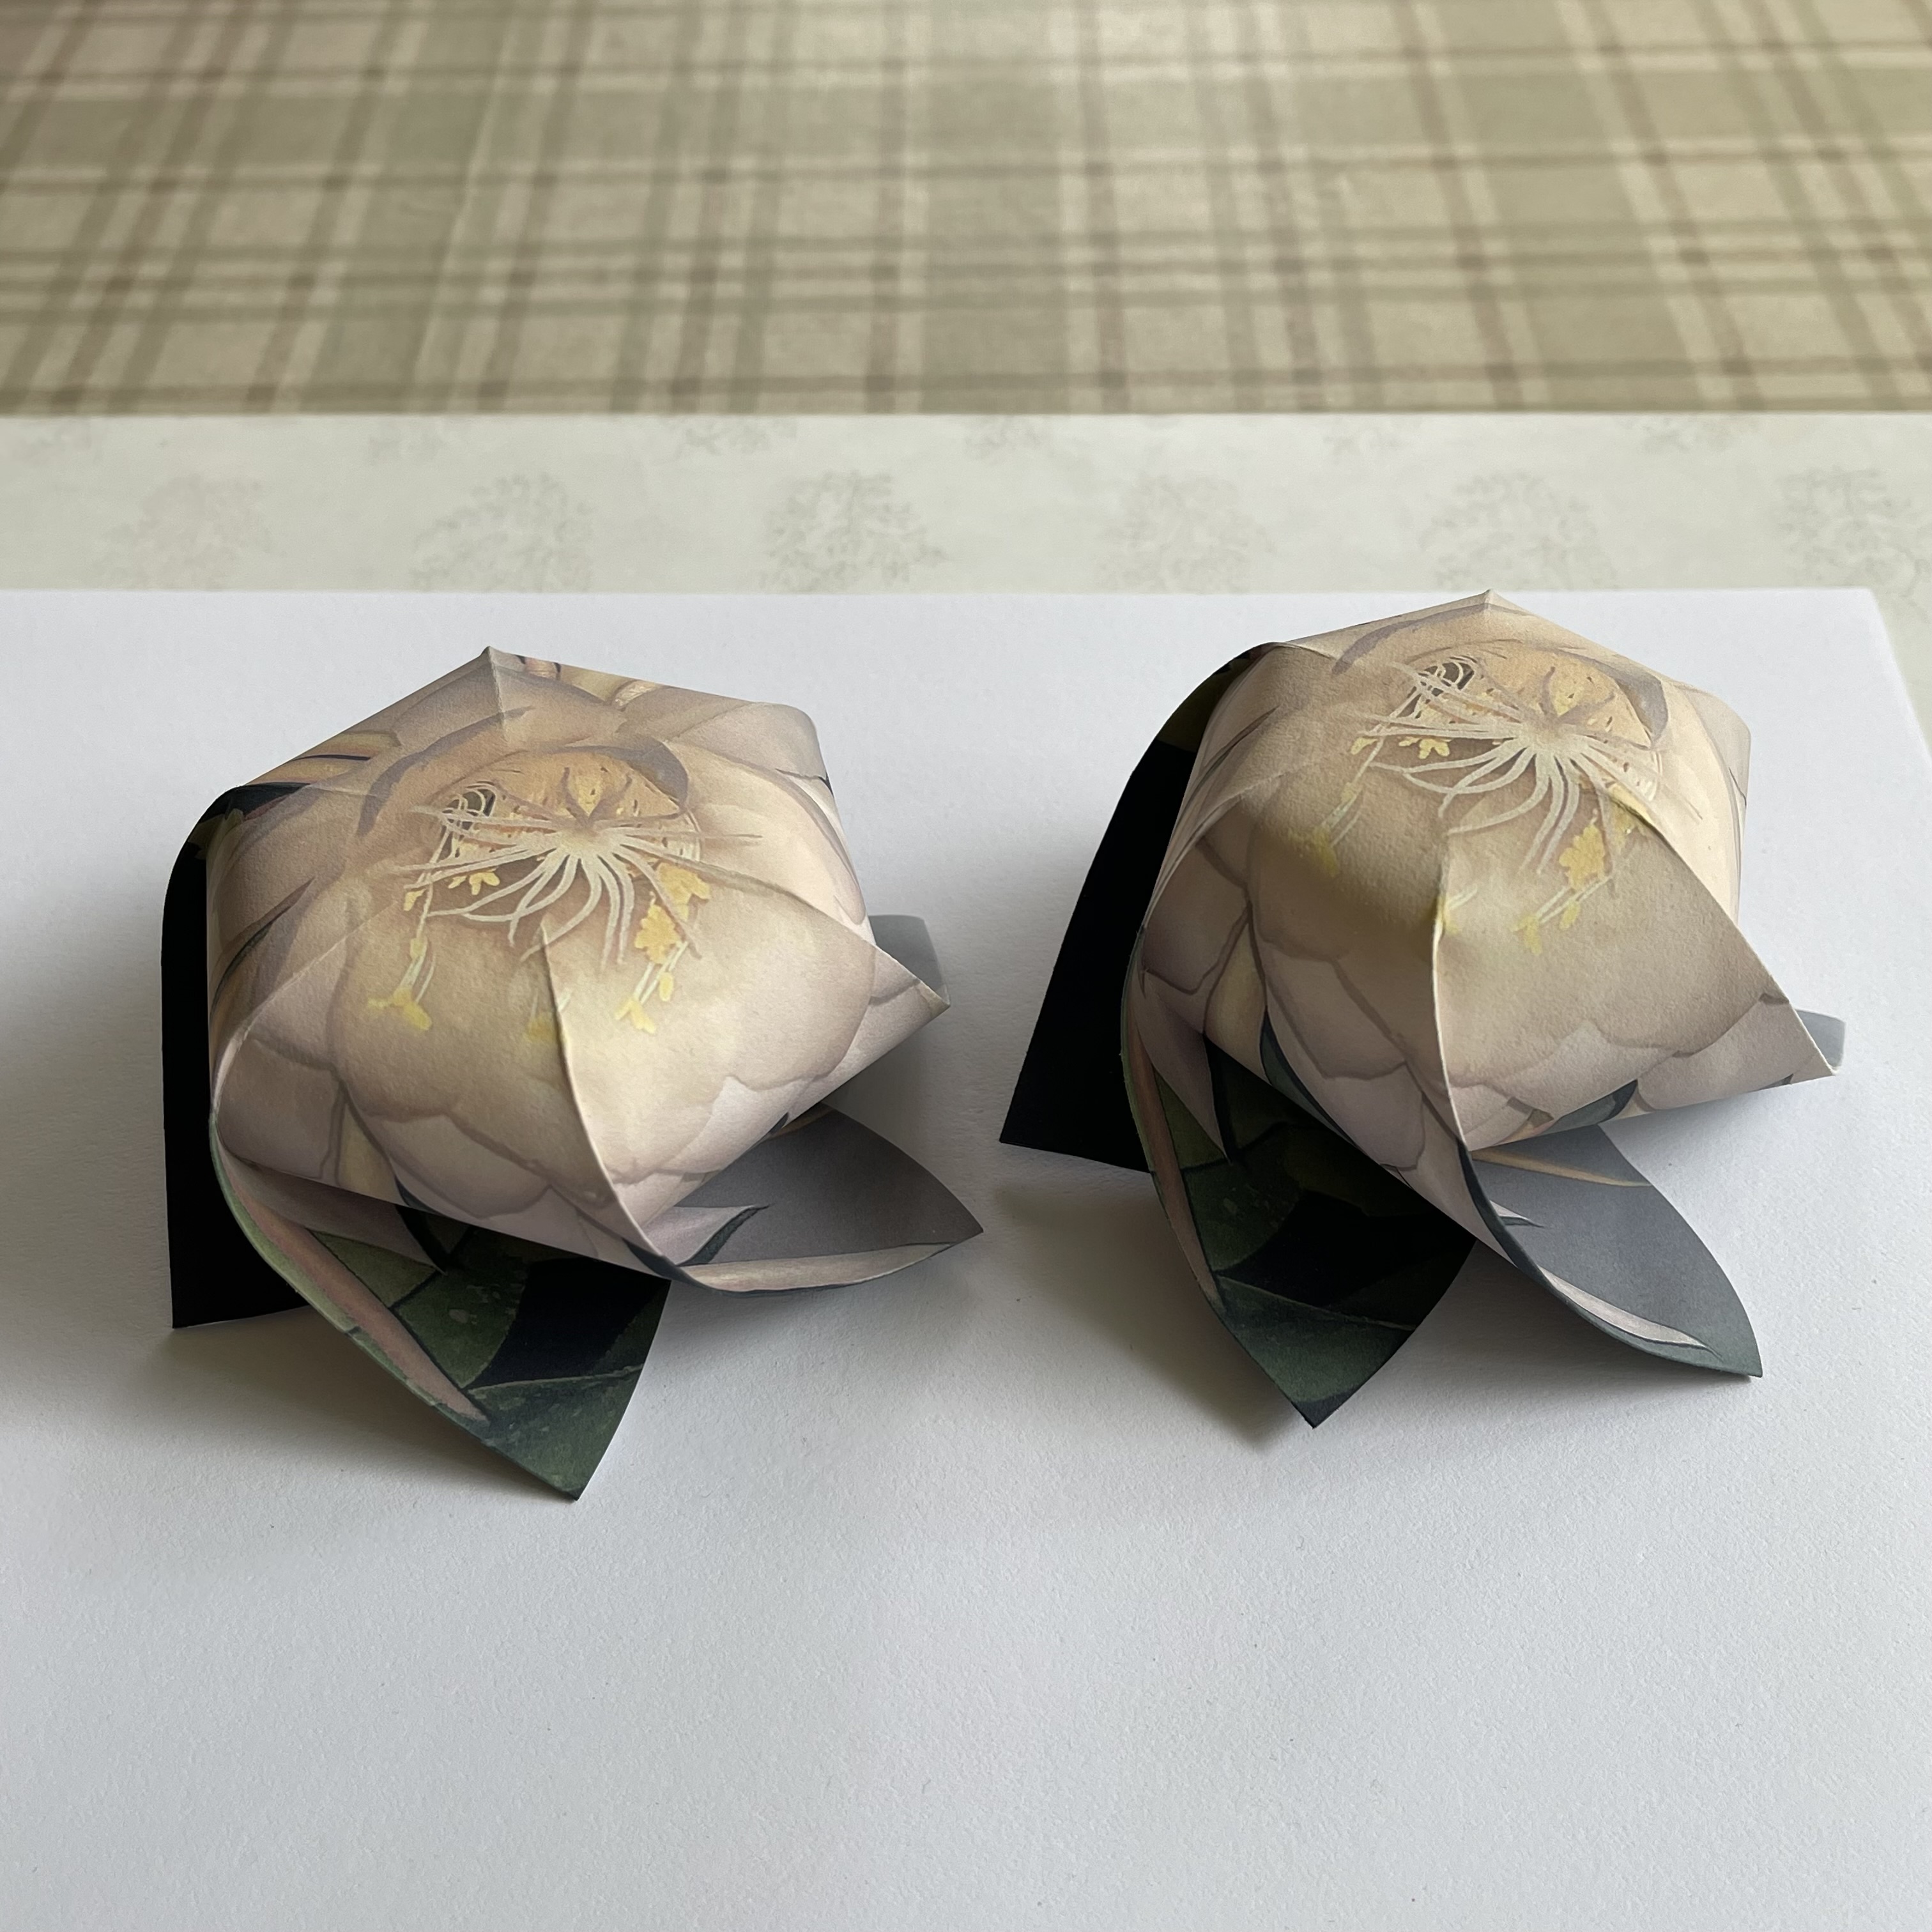 |
Example click to enlarge 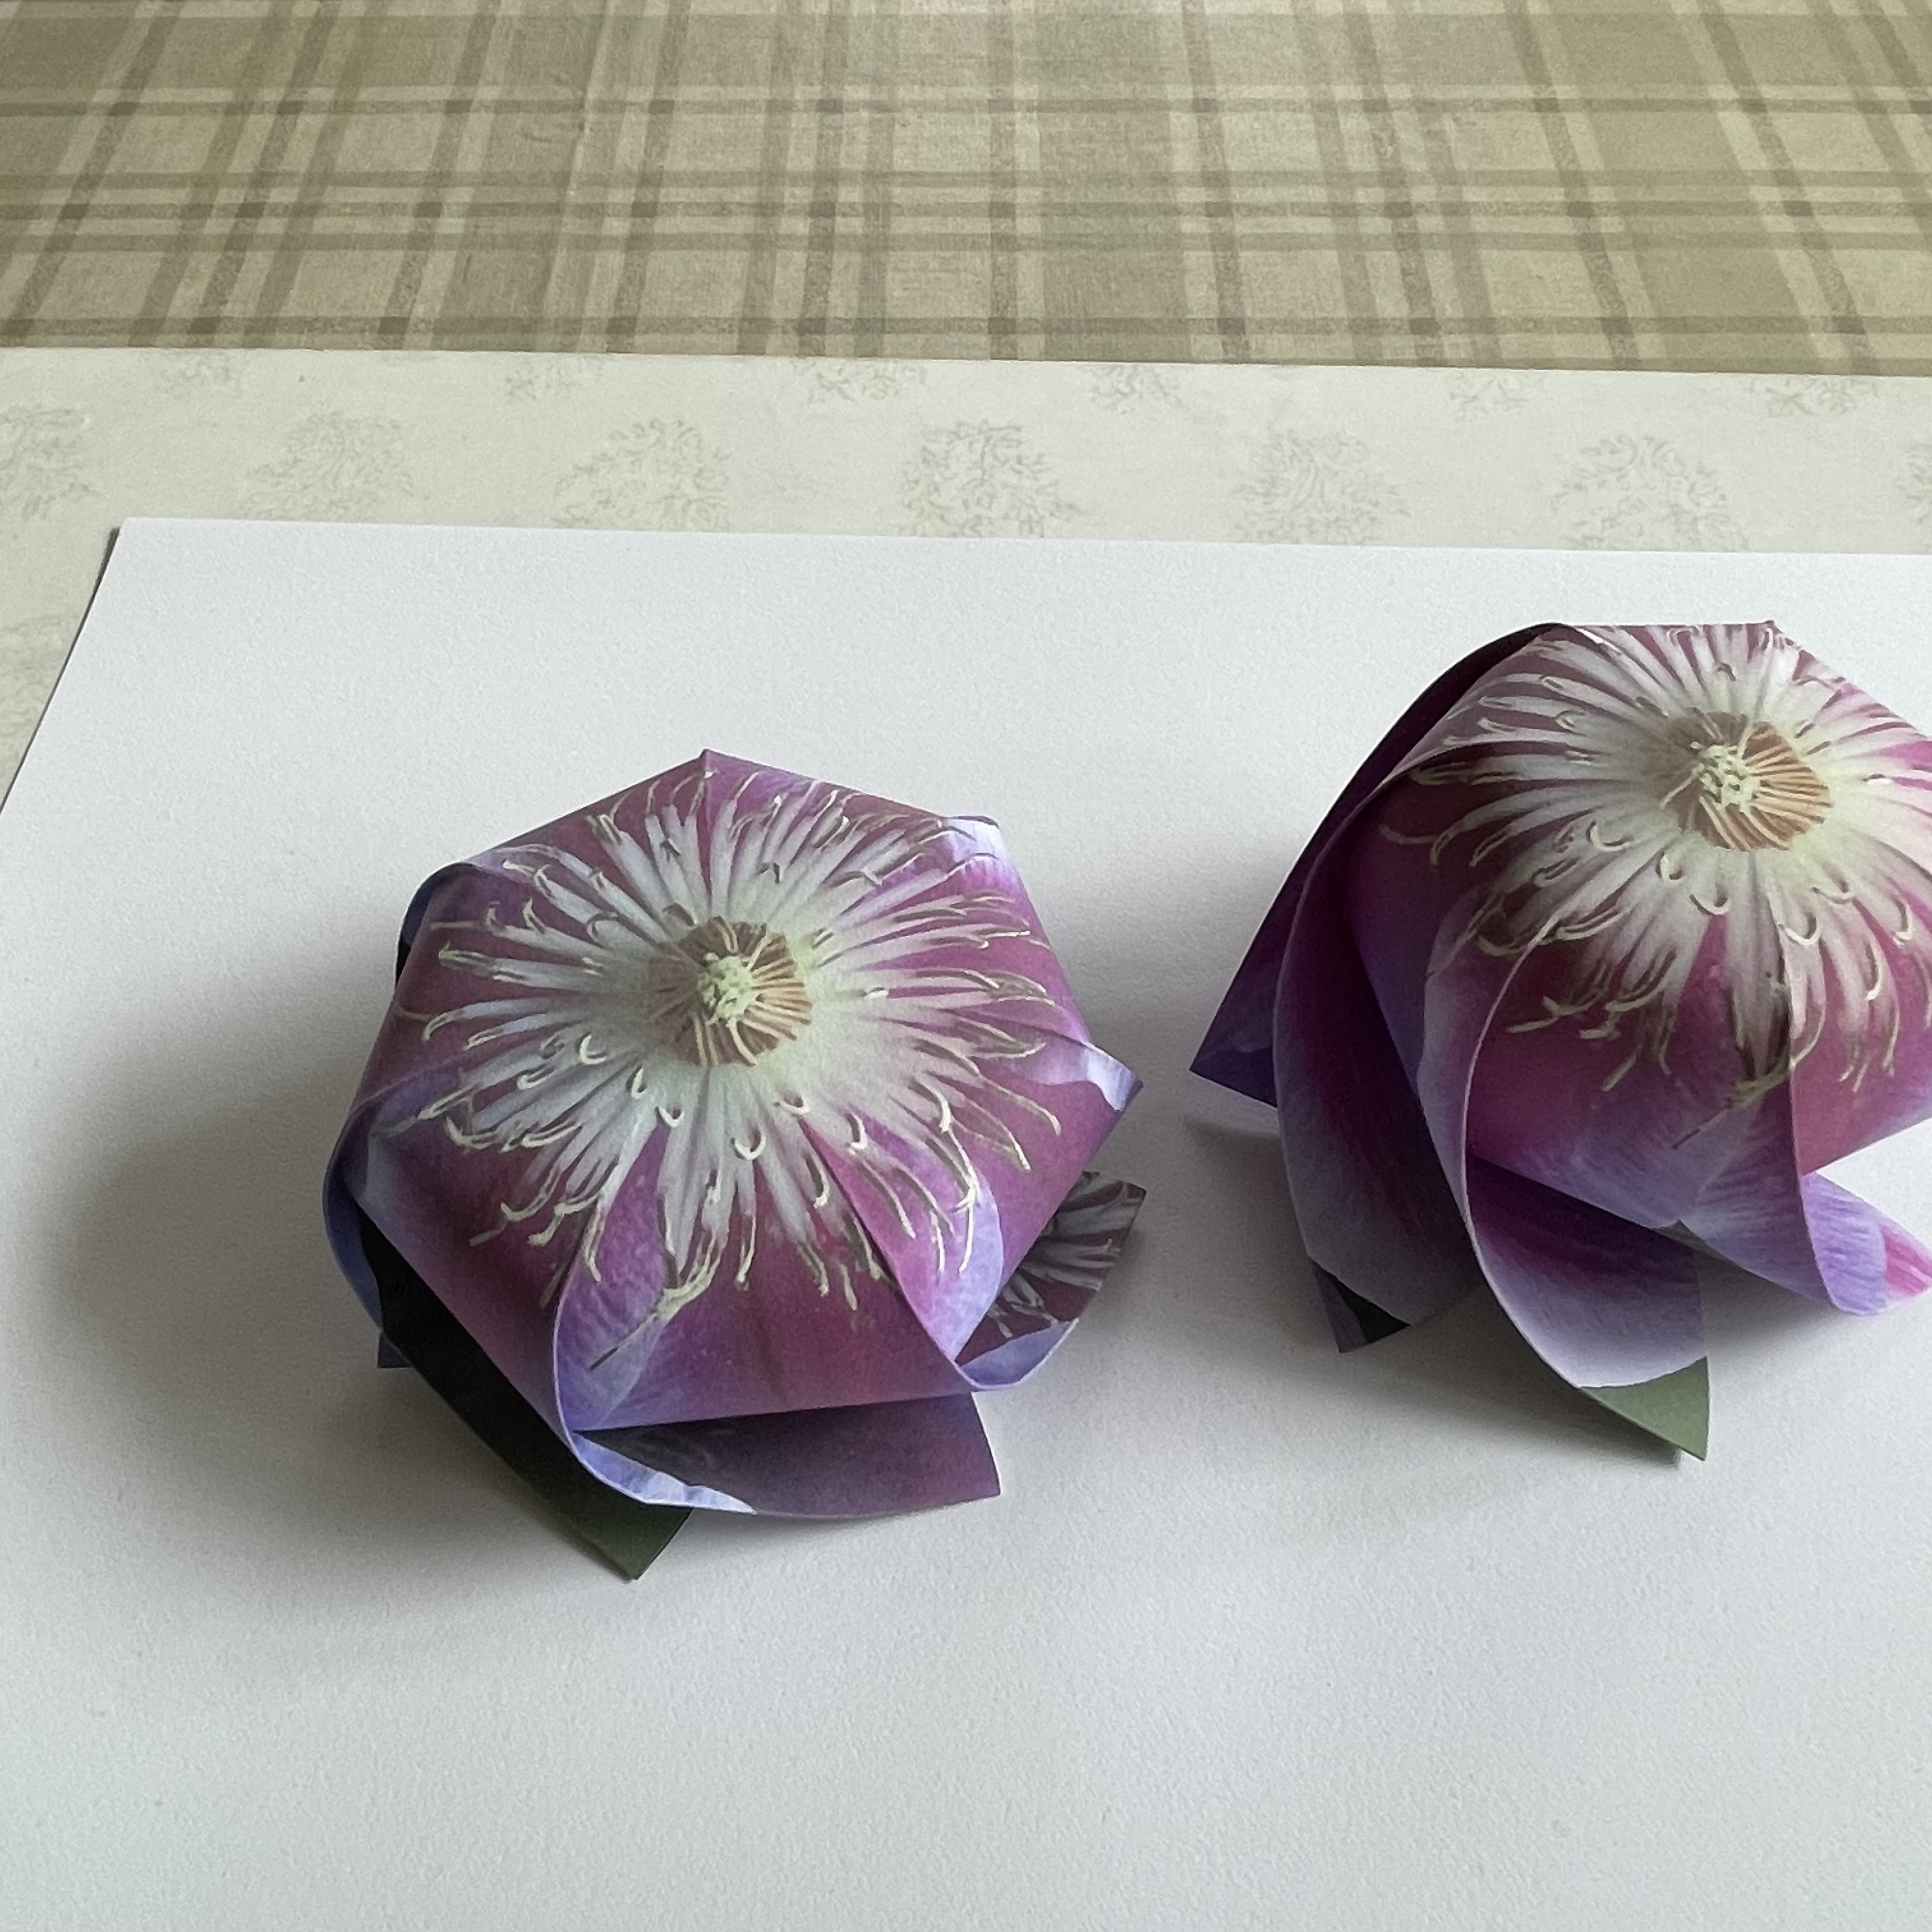 |
Example click to enlarge 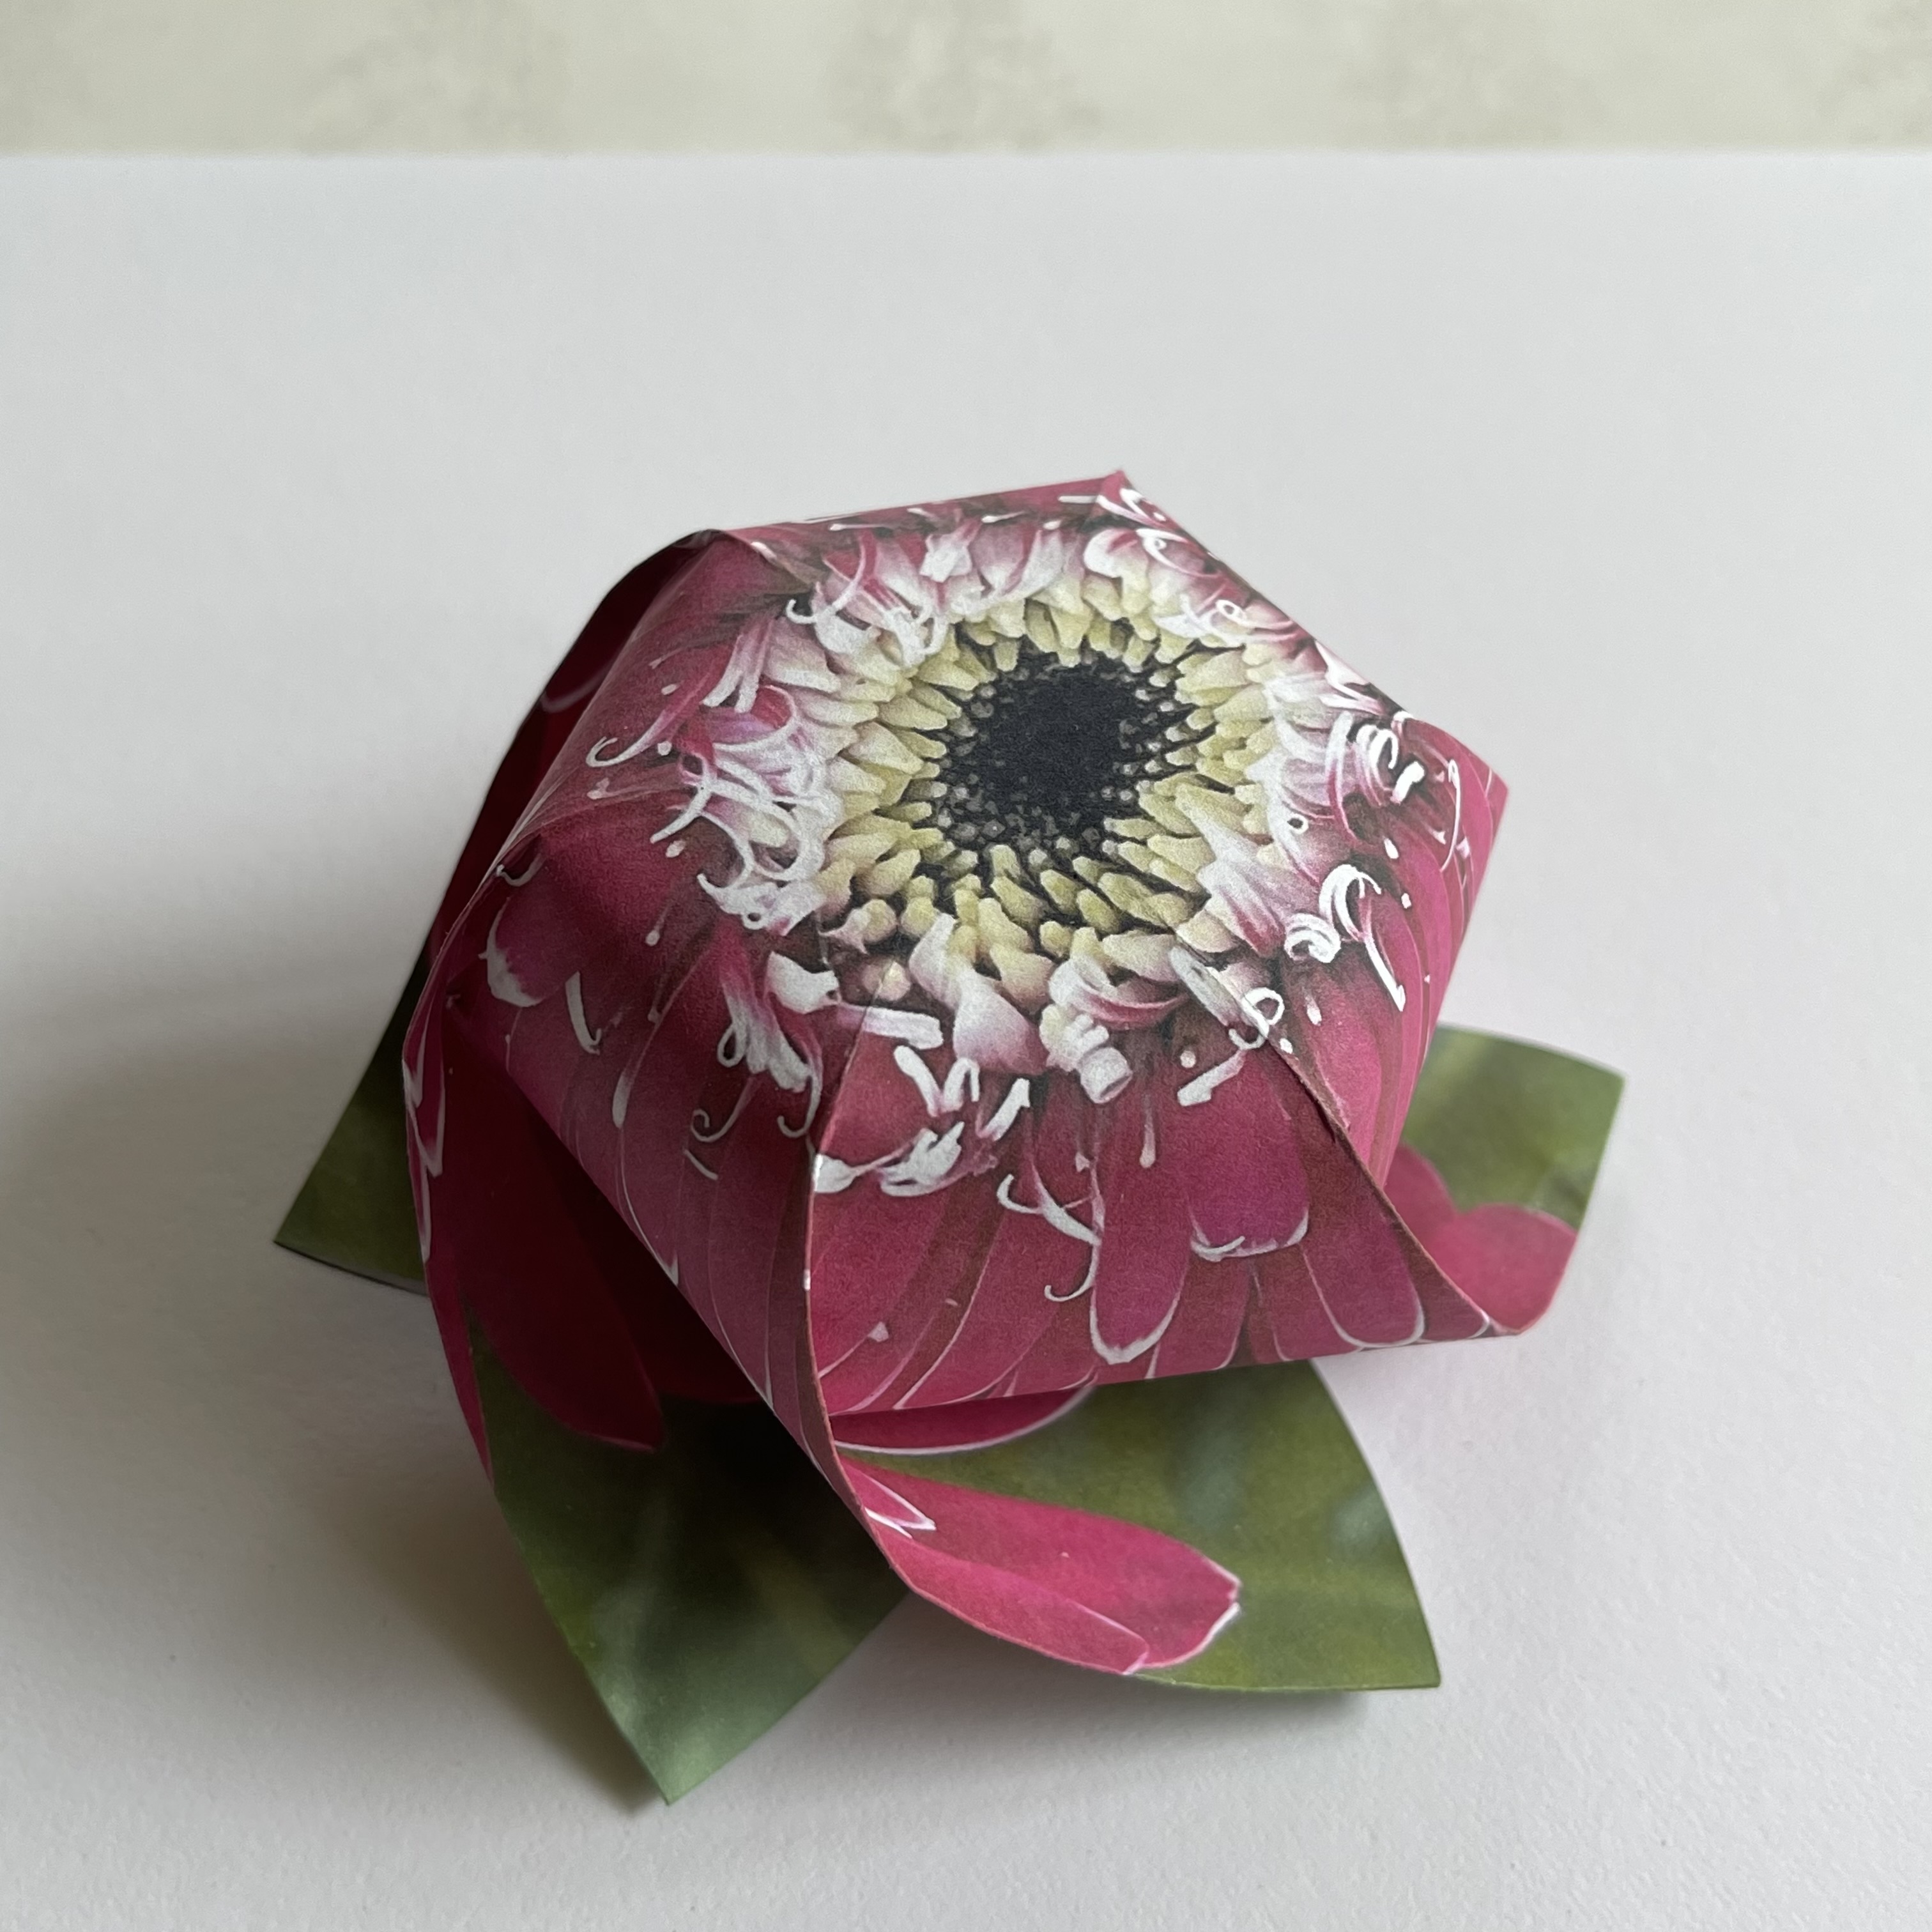 |
Example click to enlarge 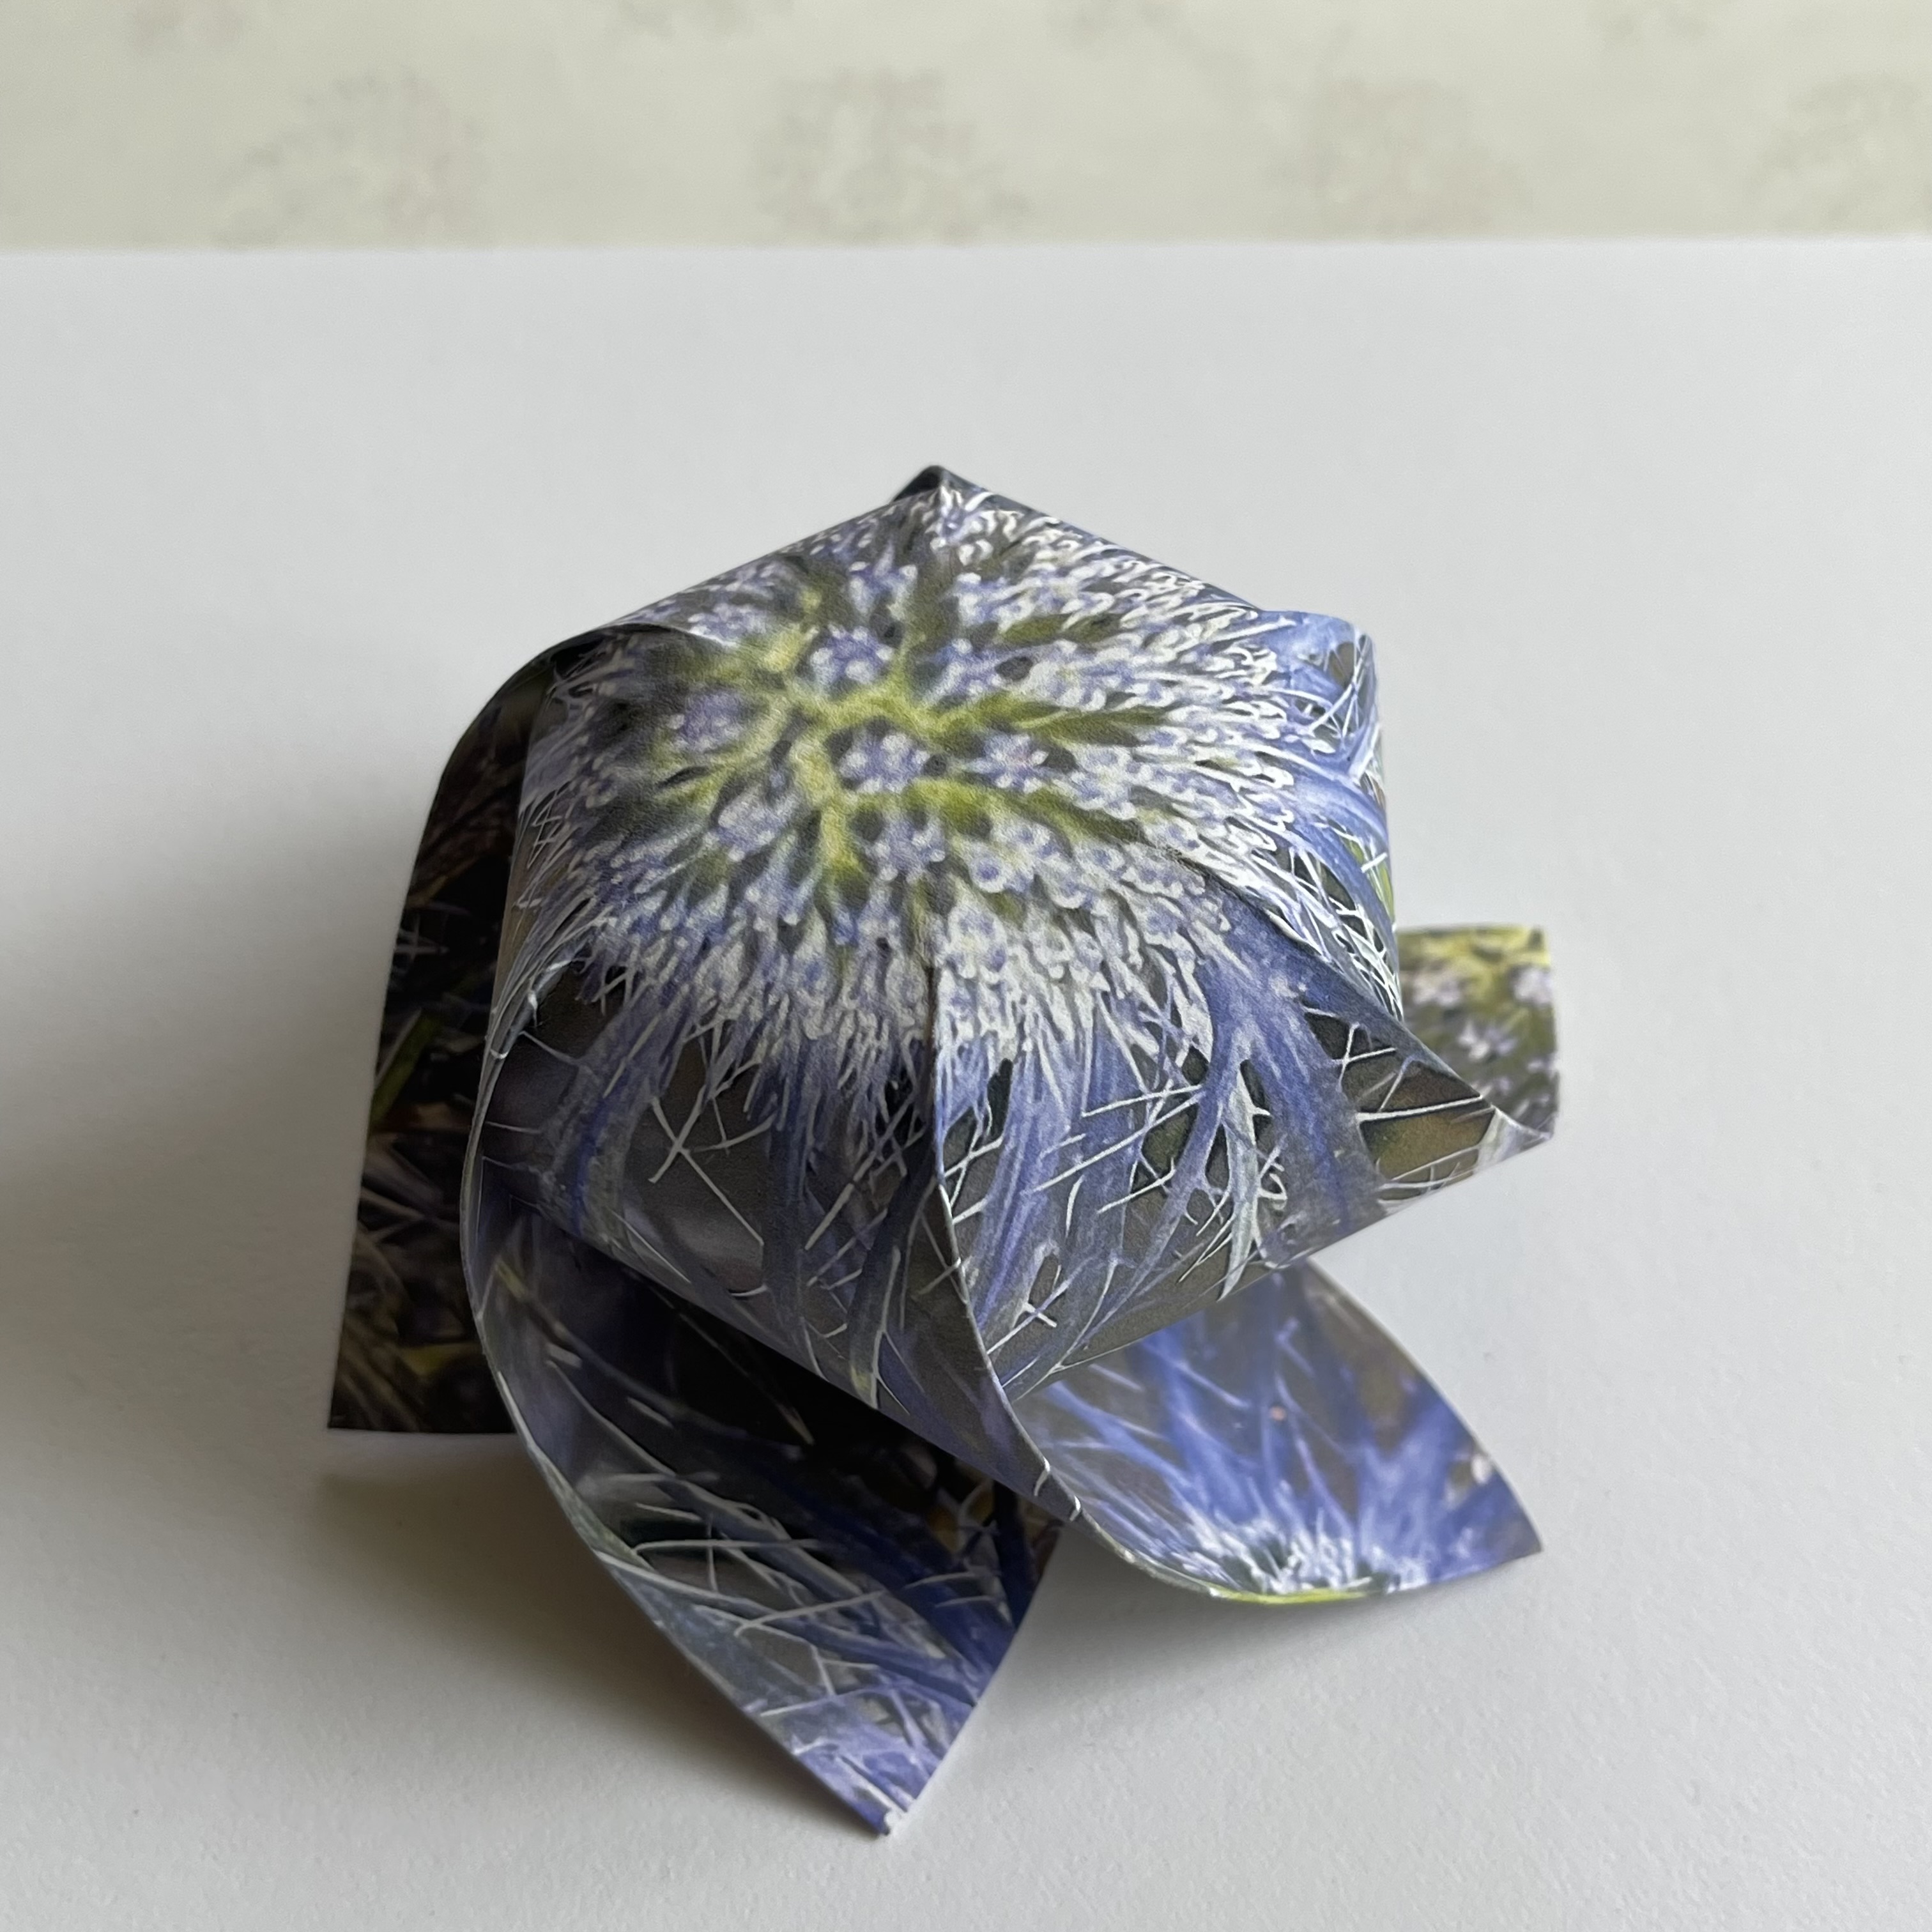 |
| Example click to enlarge  |
Example click to enlarge 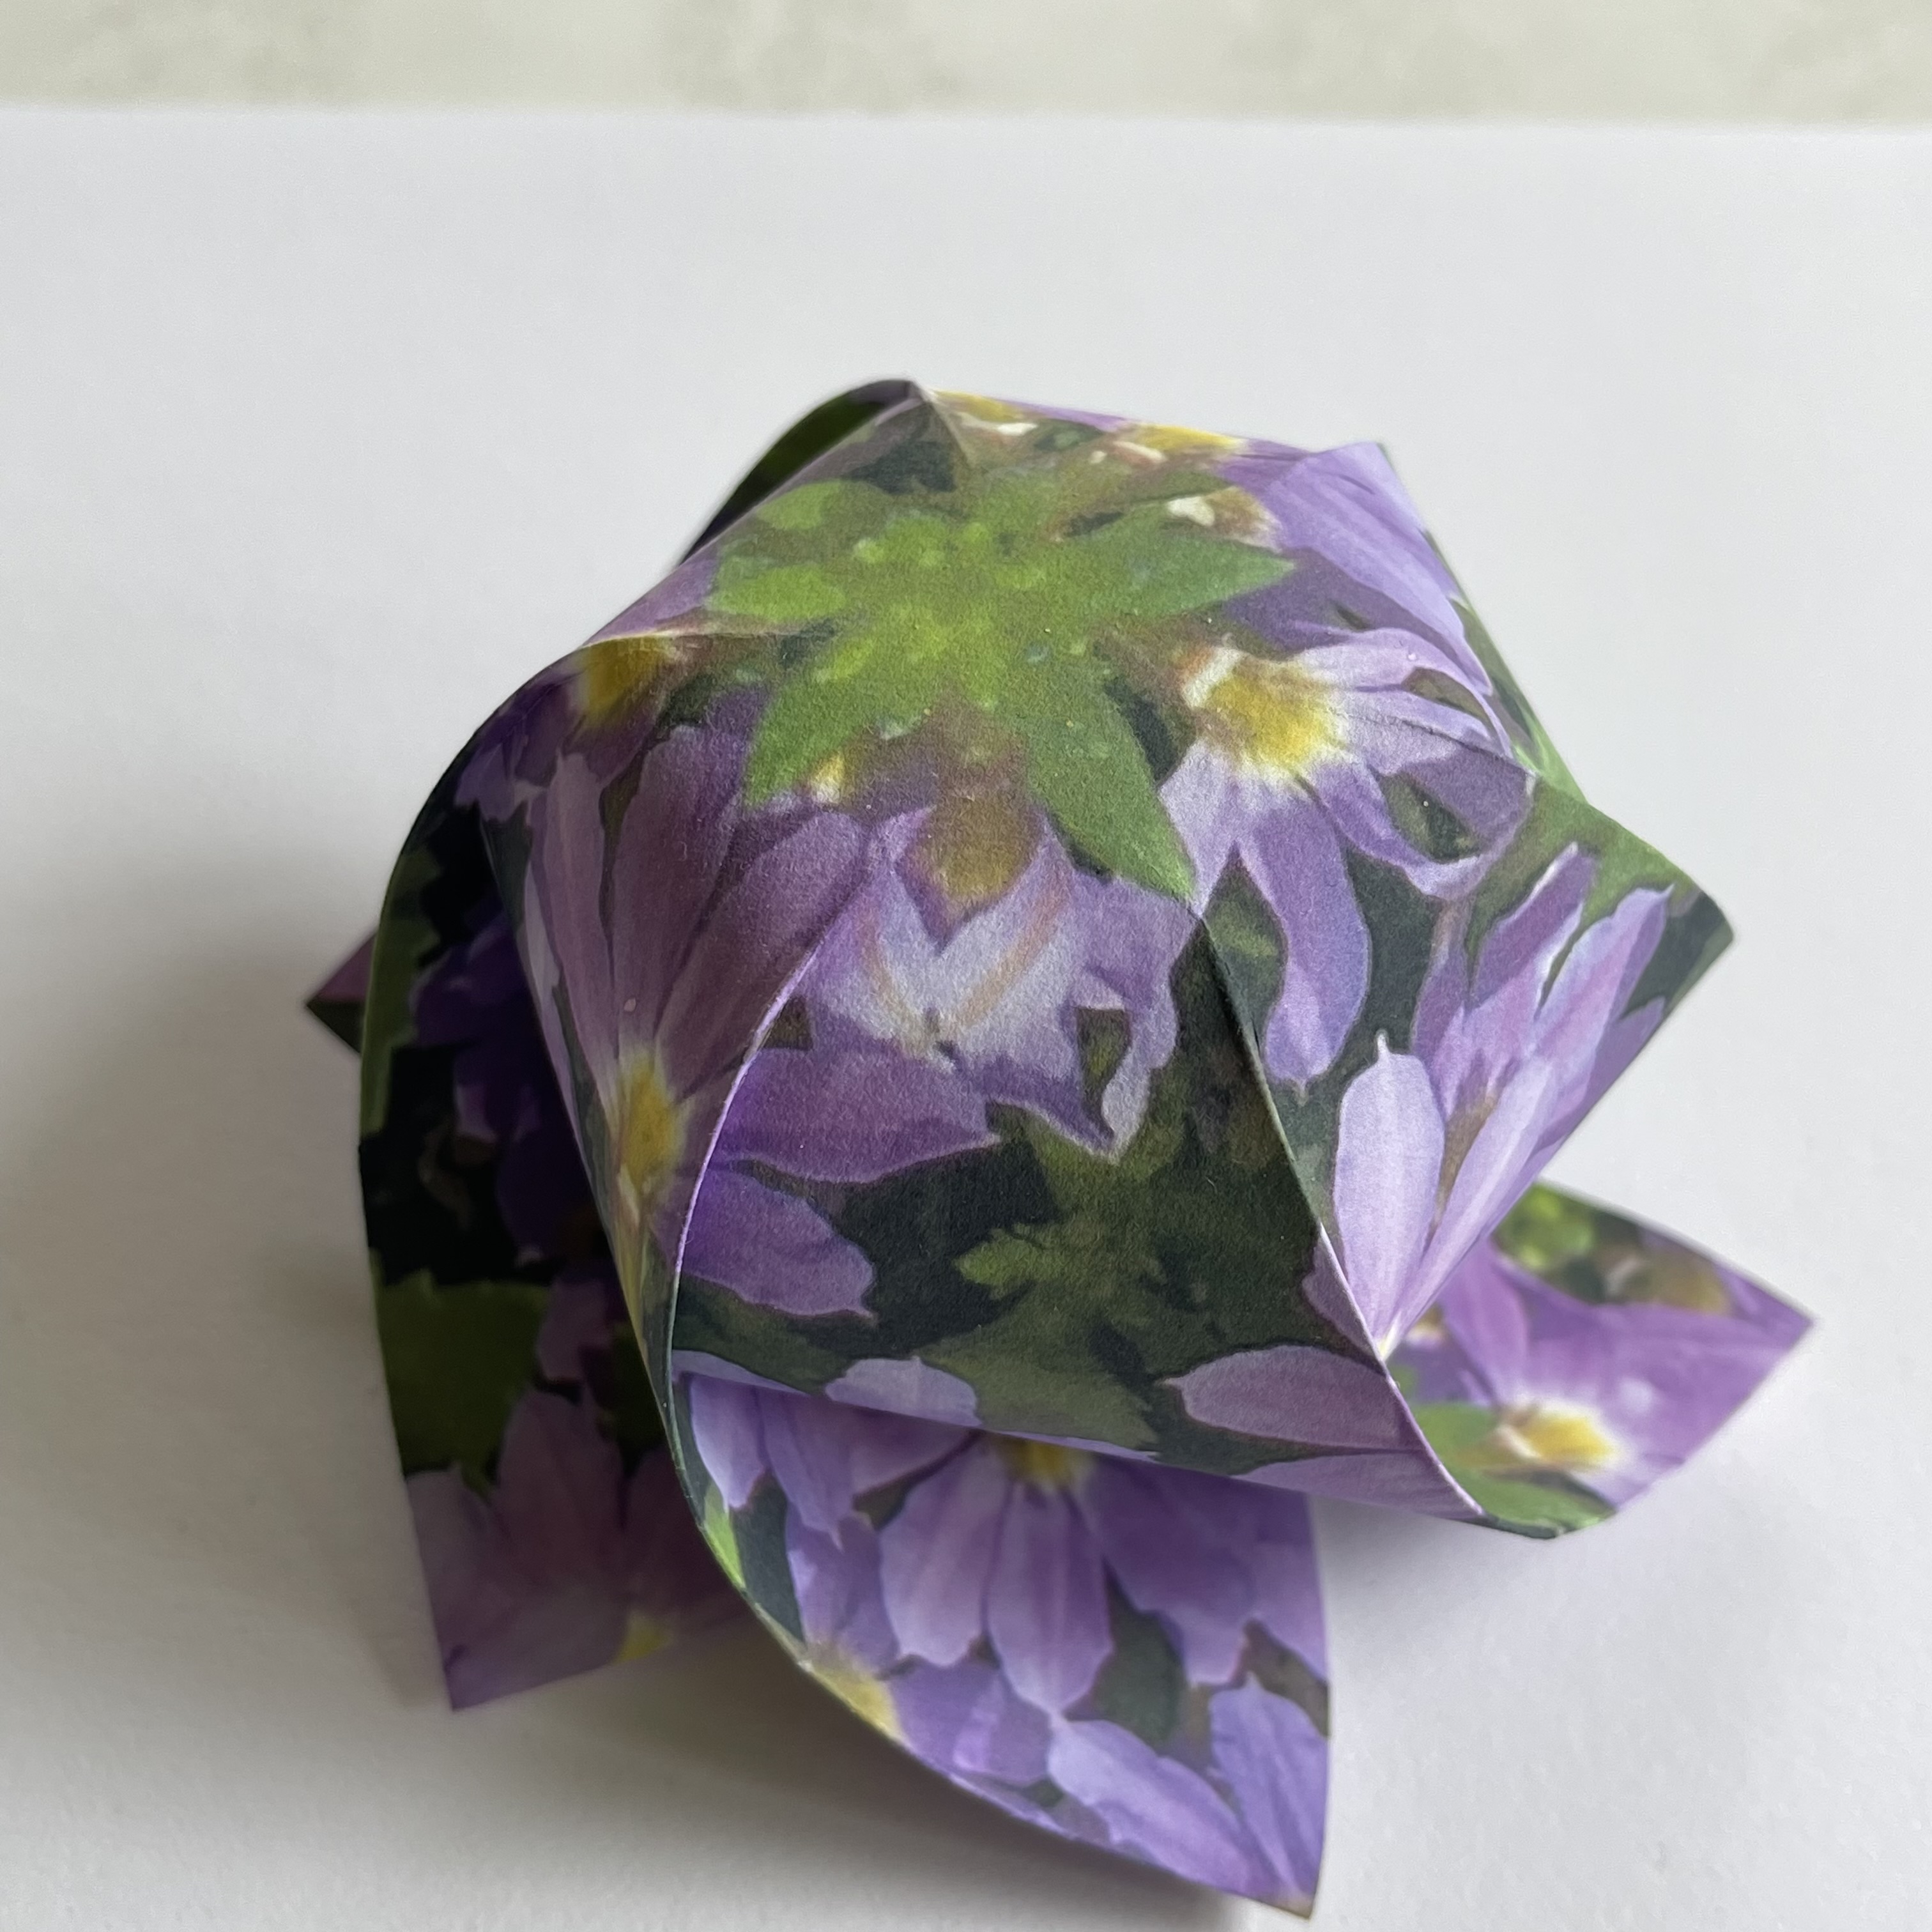 |
Example click to enlarge 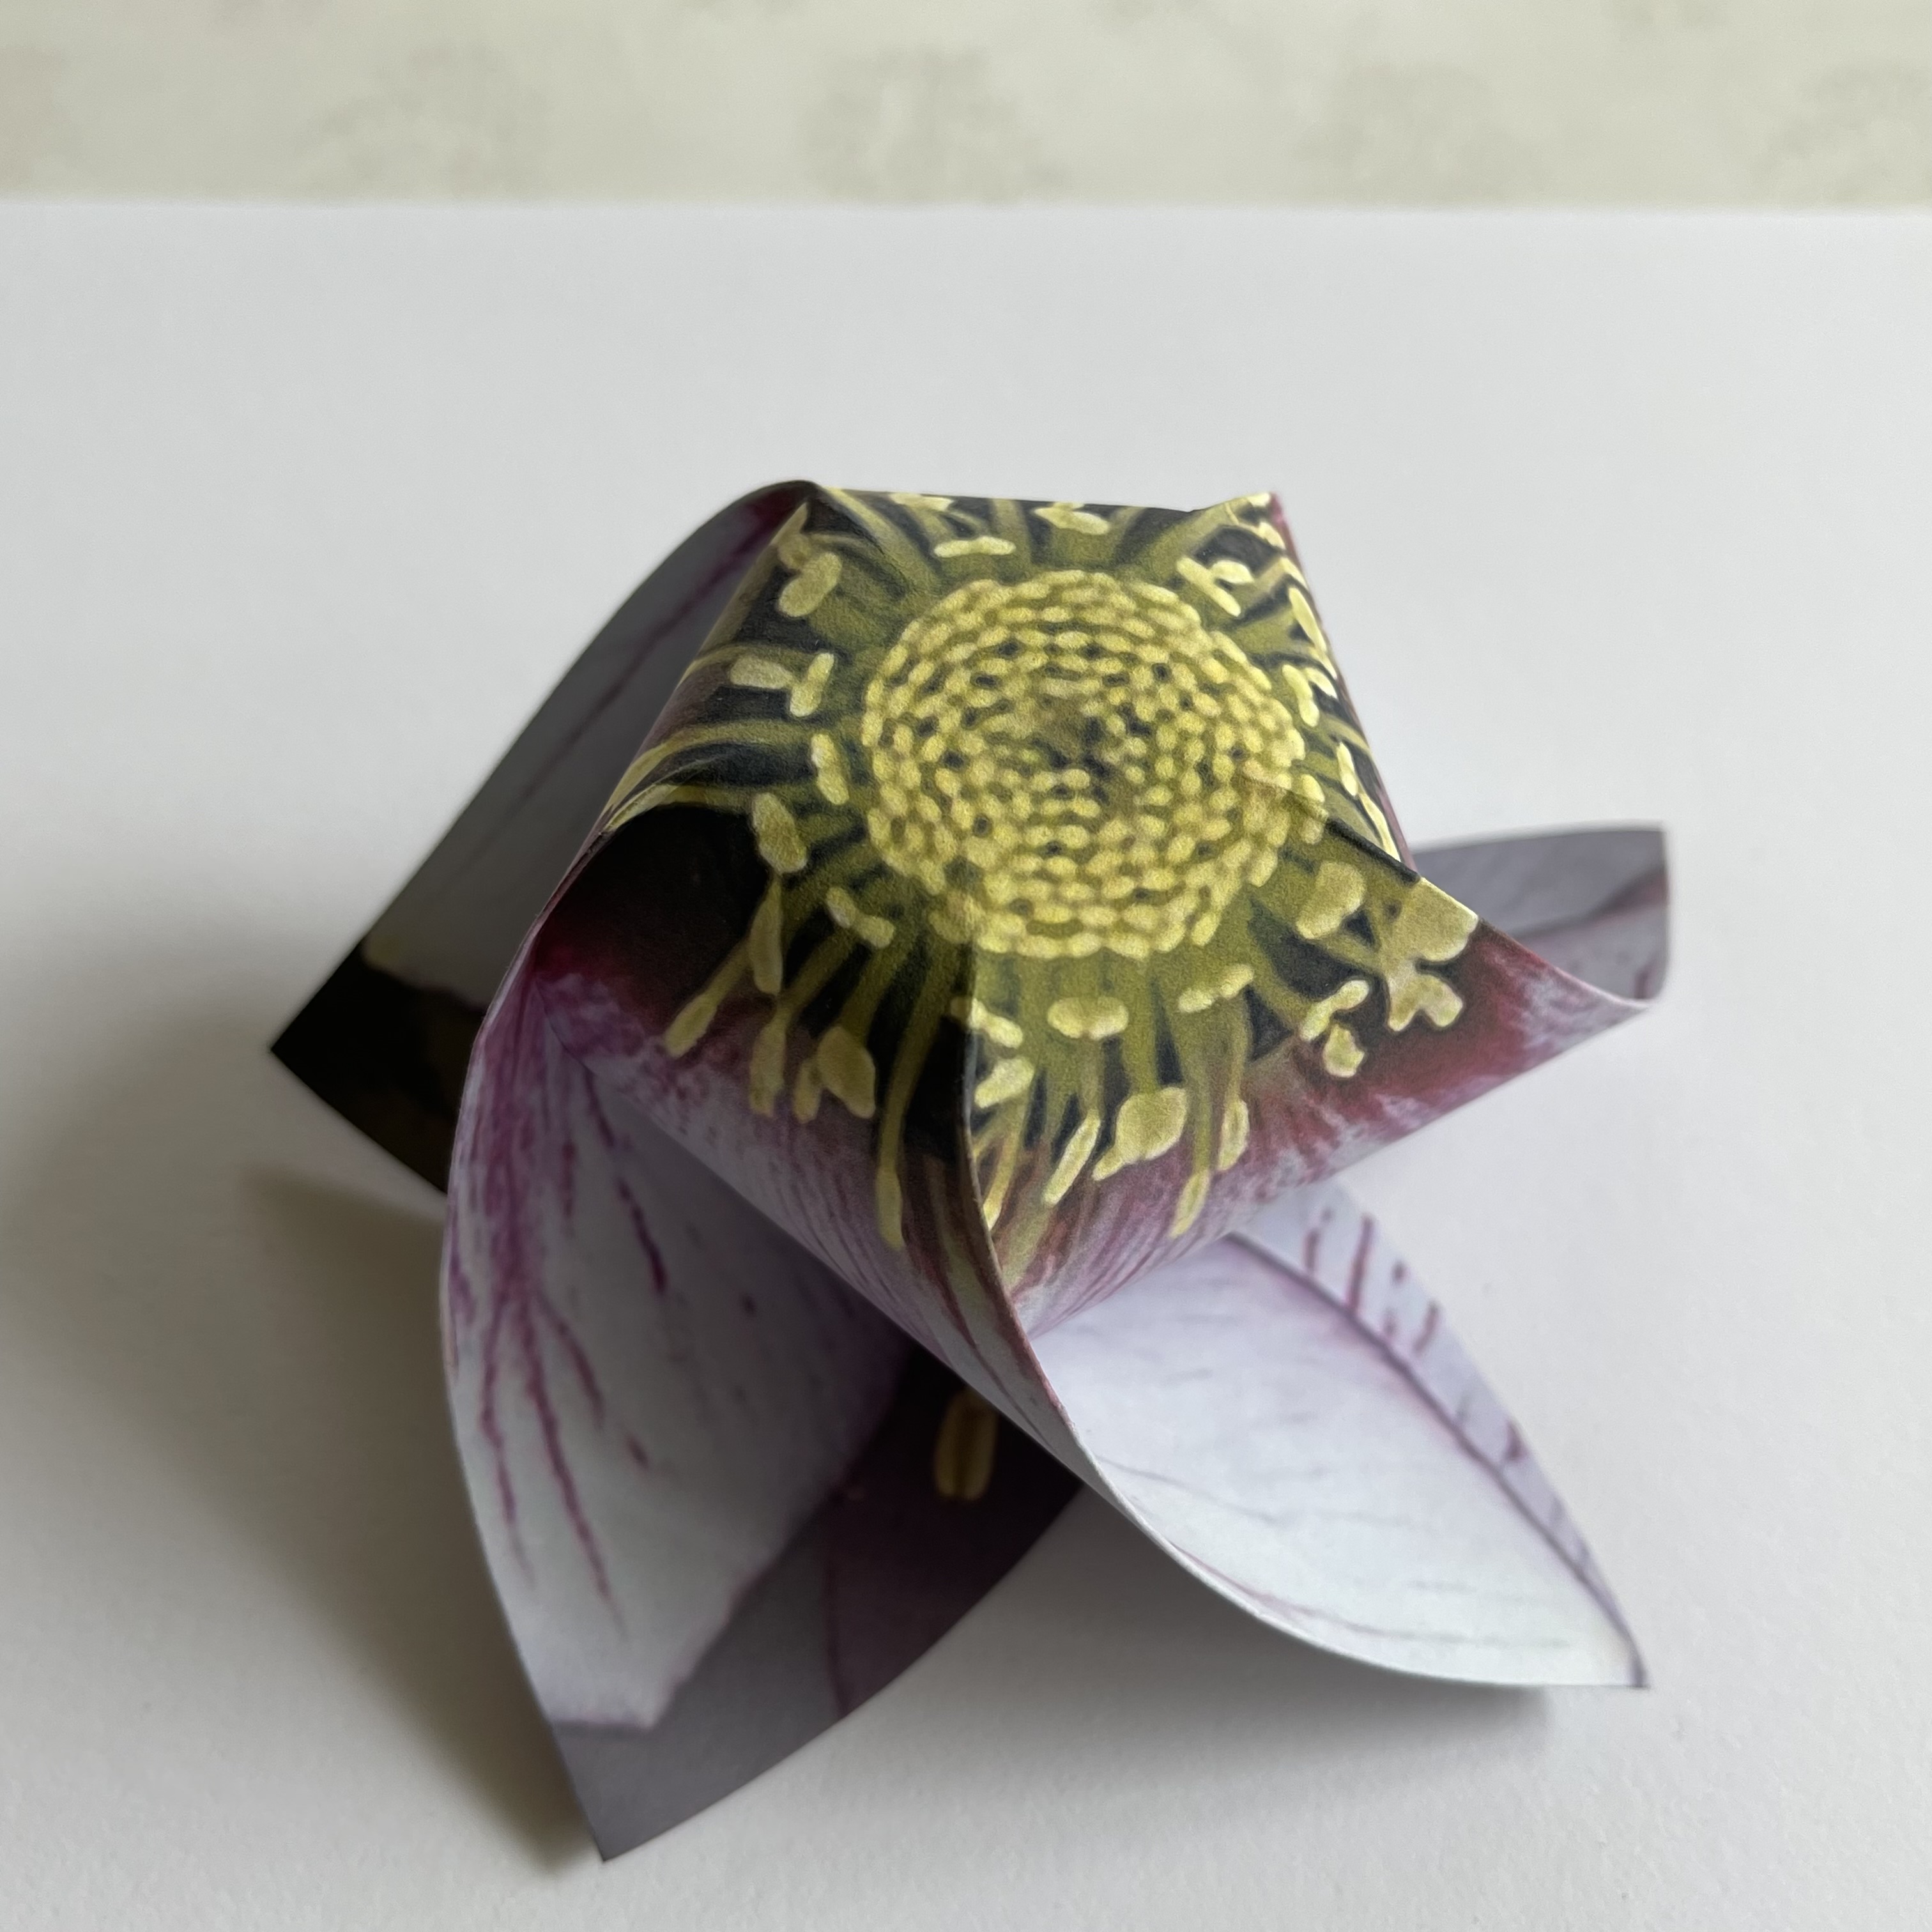 |
Example click to enlarge  |
| Example click to enlarge  |
Example click to enlarge 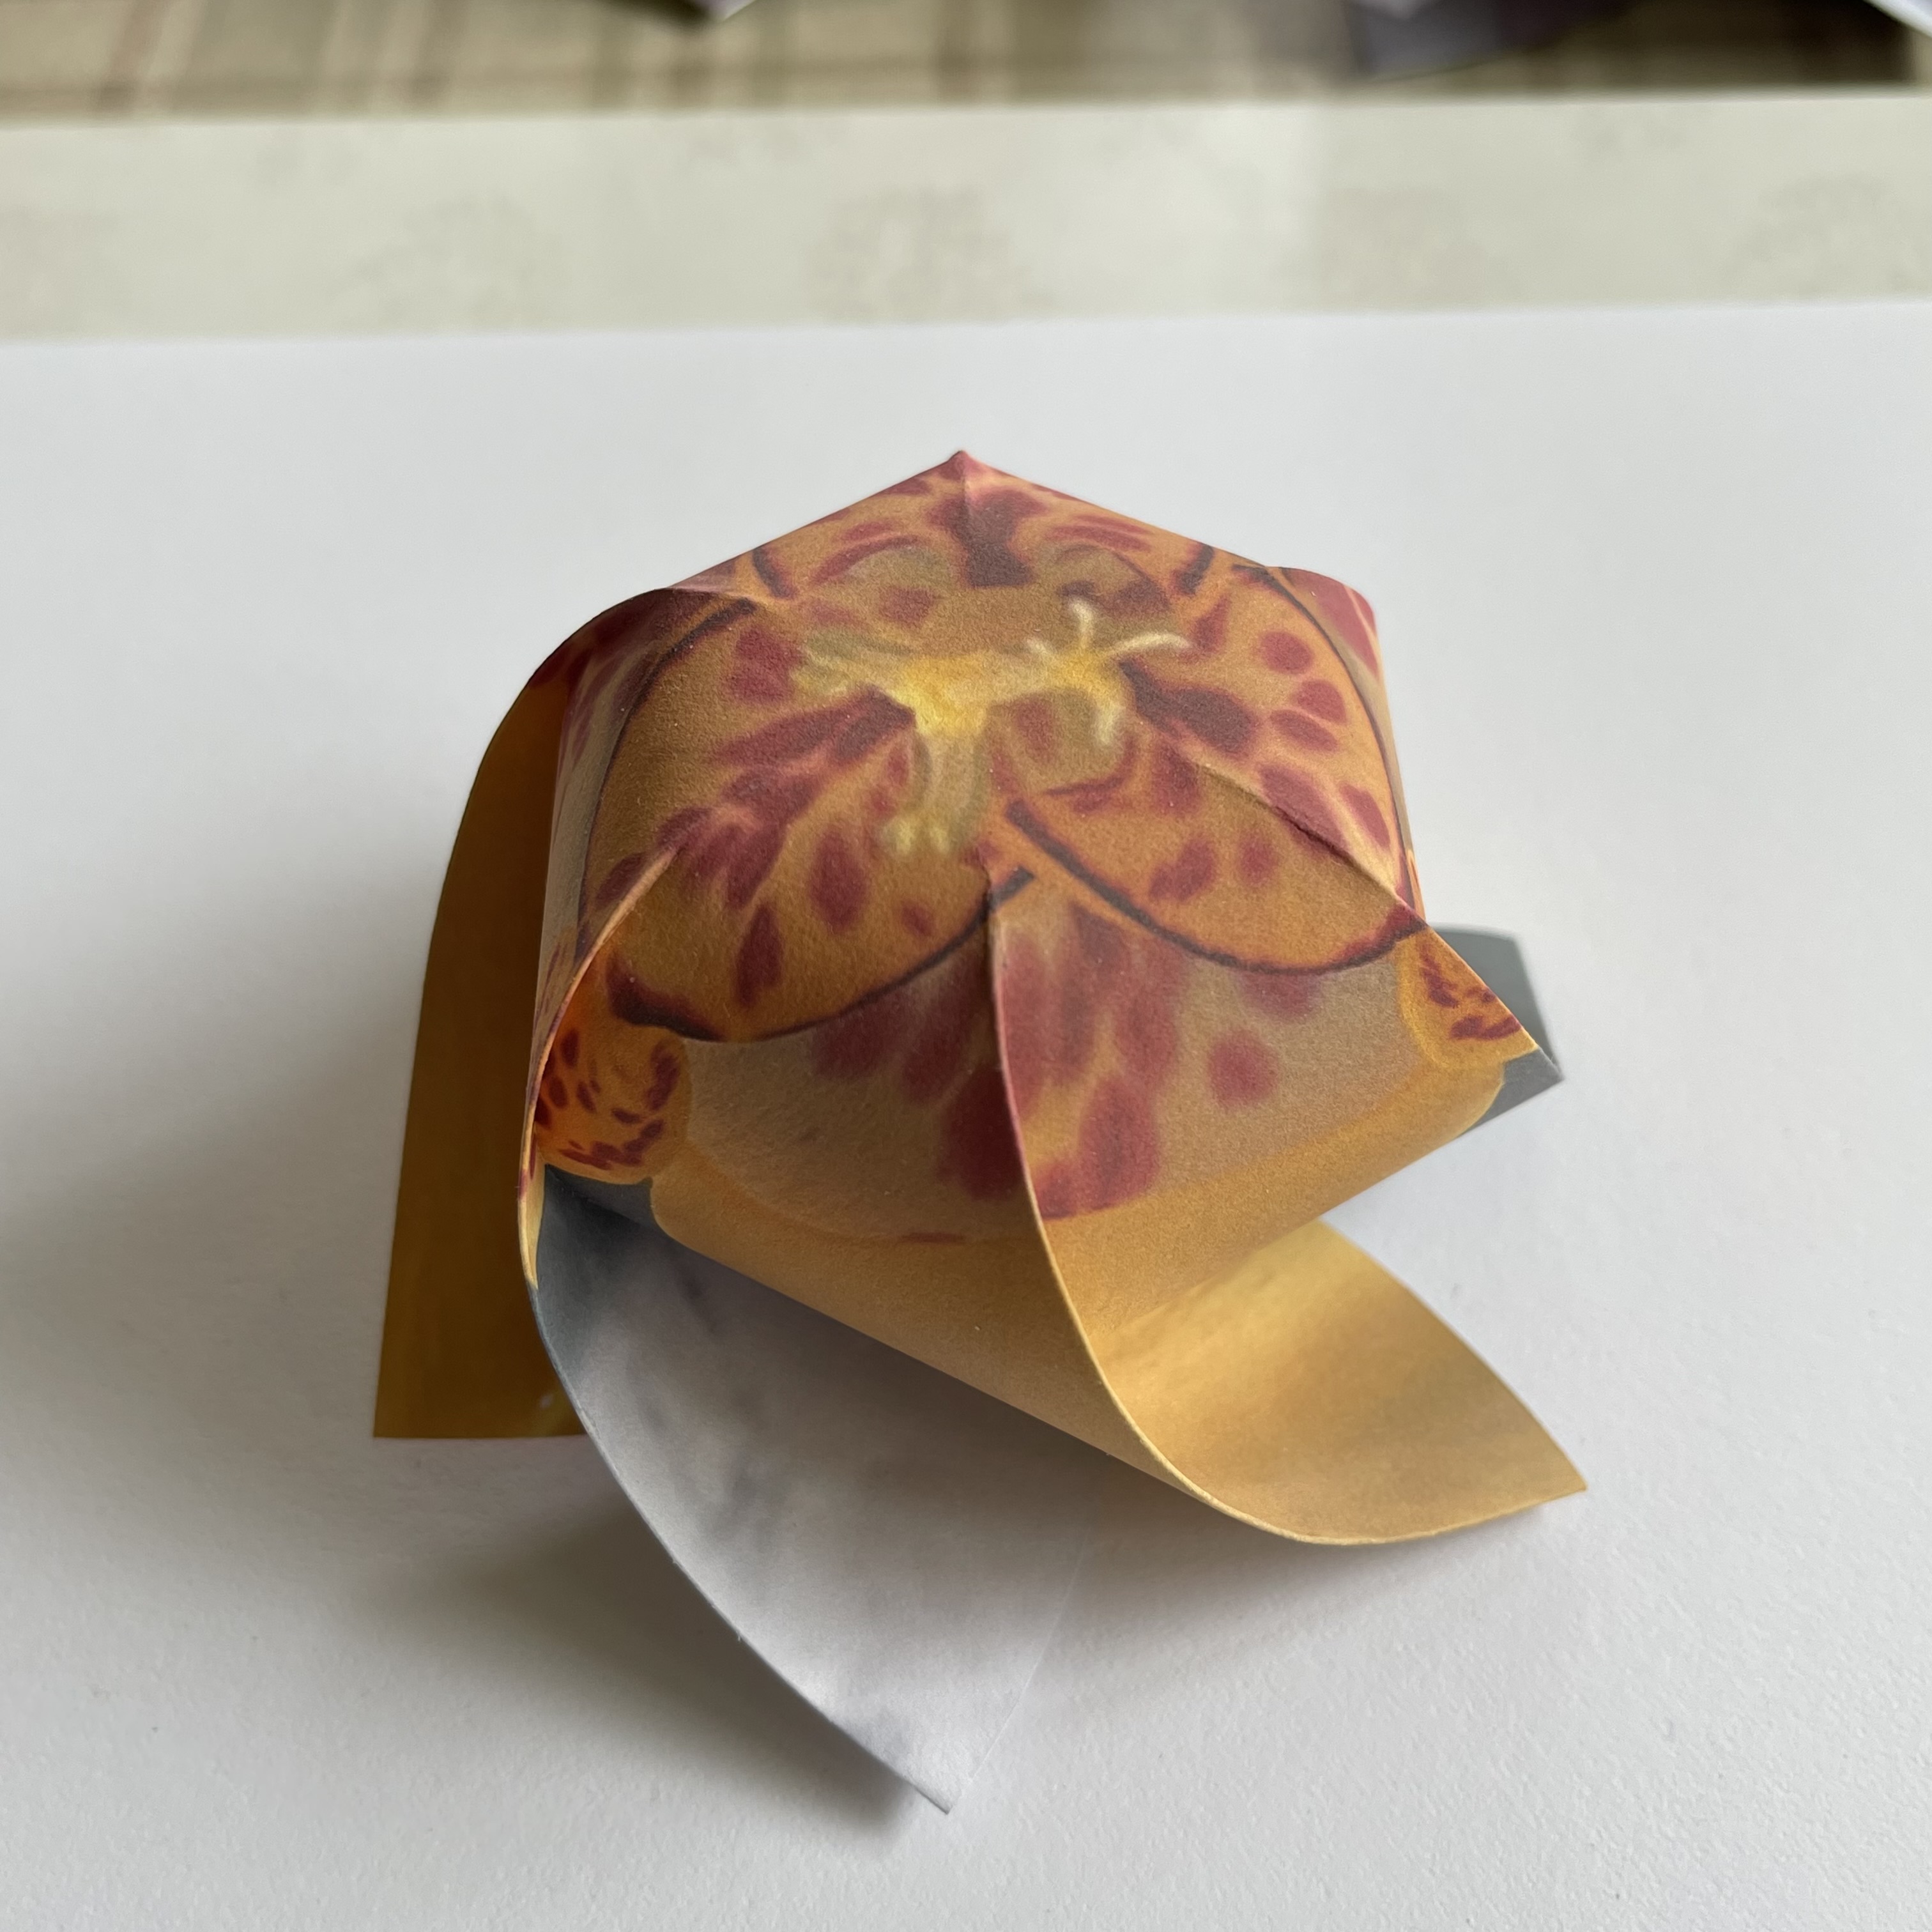 |
Example click to enlarge 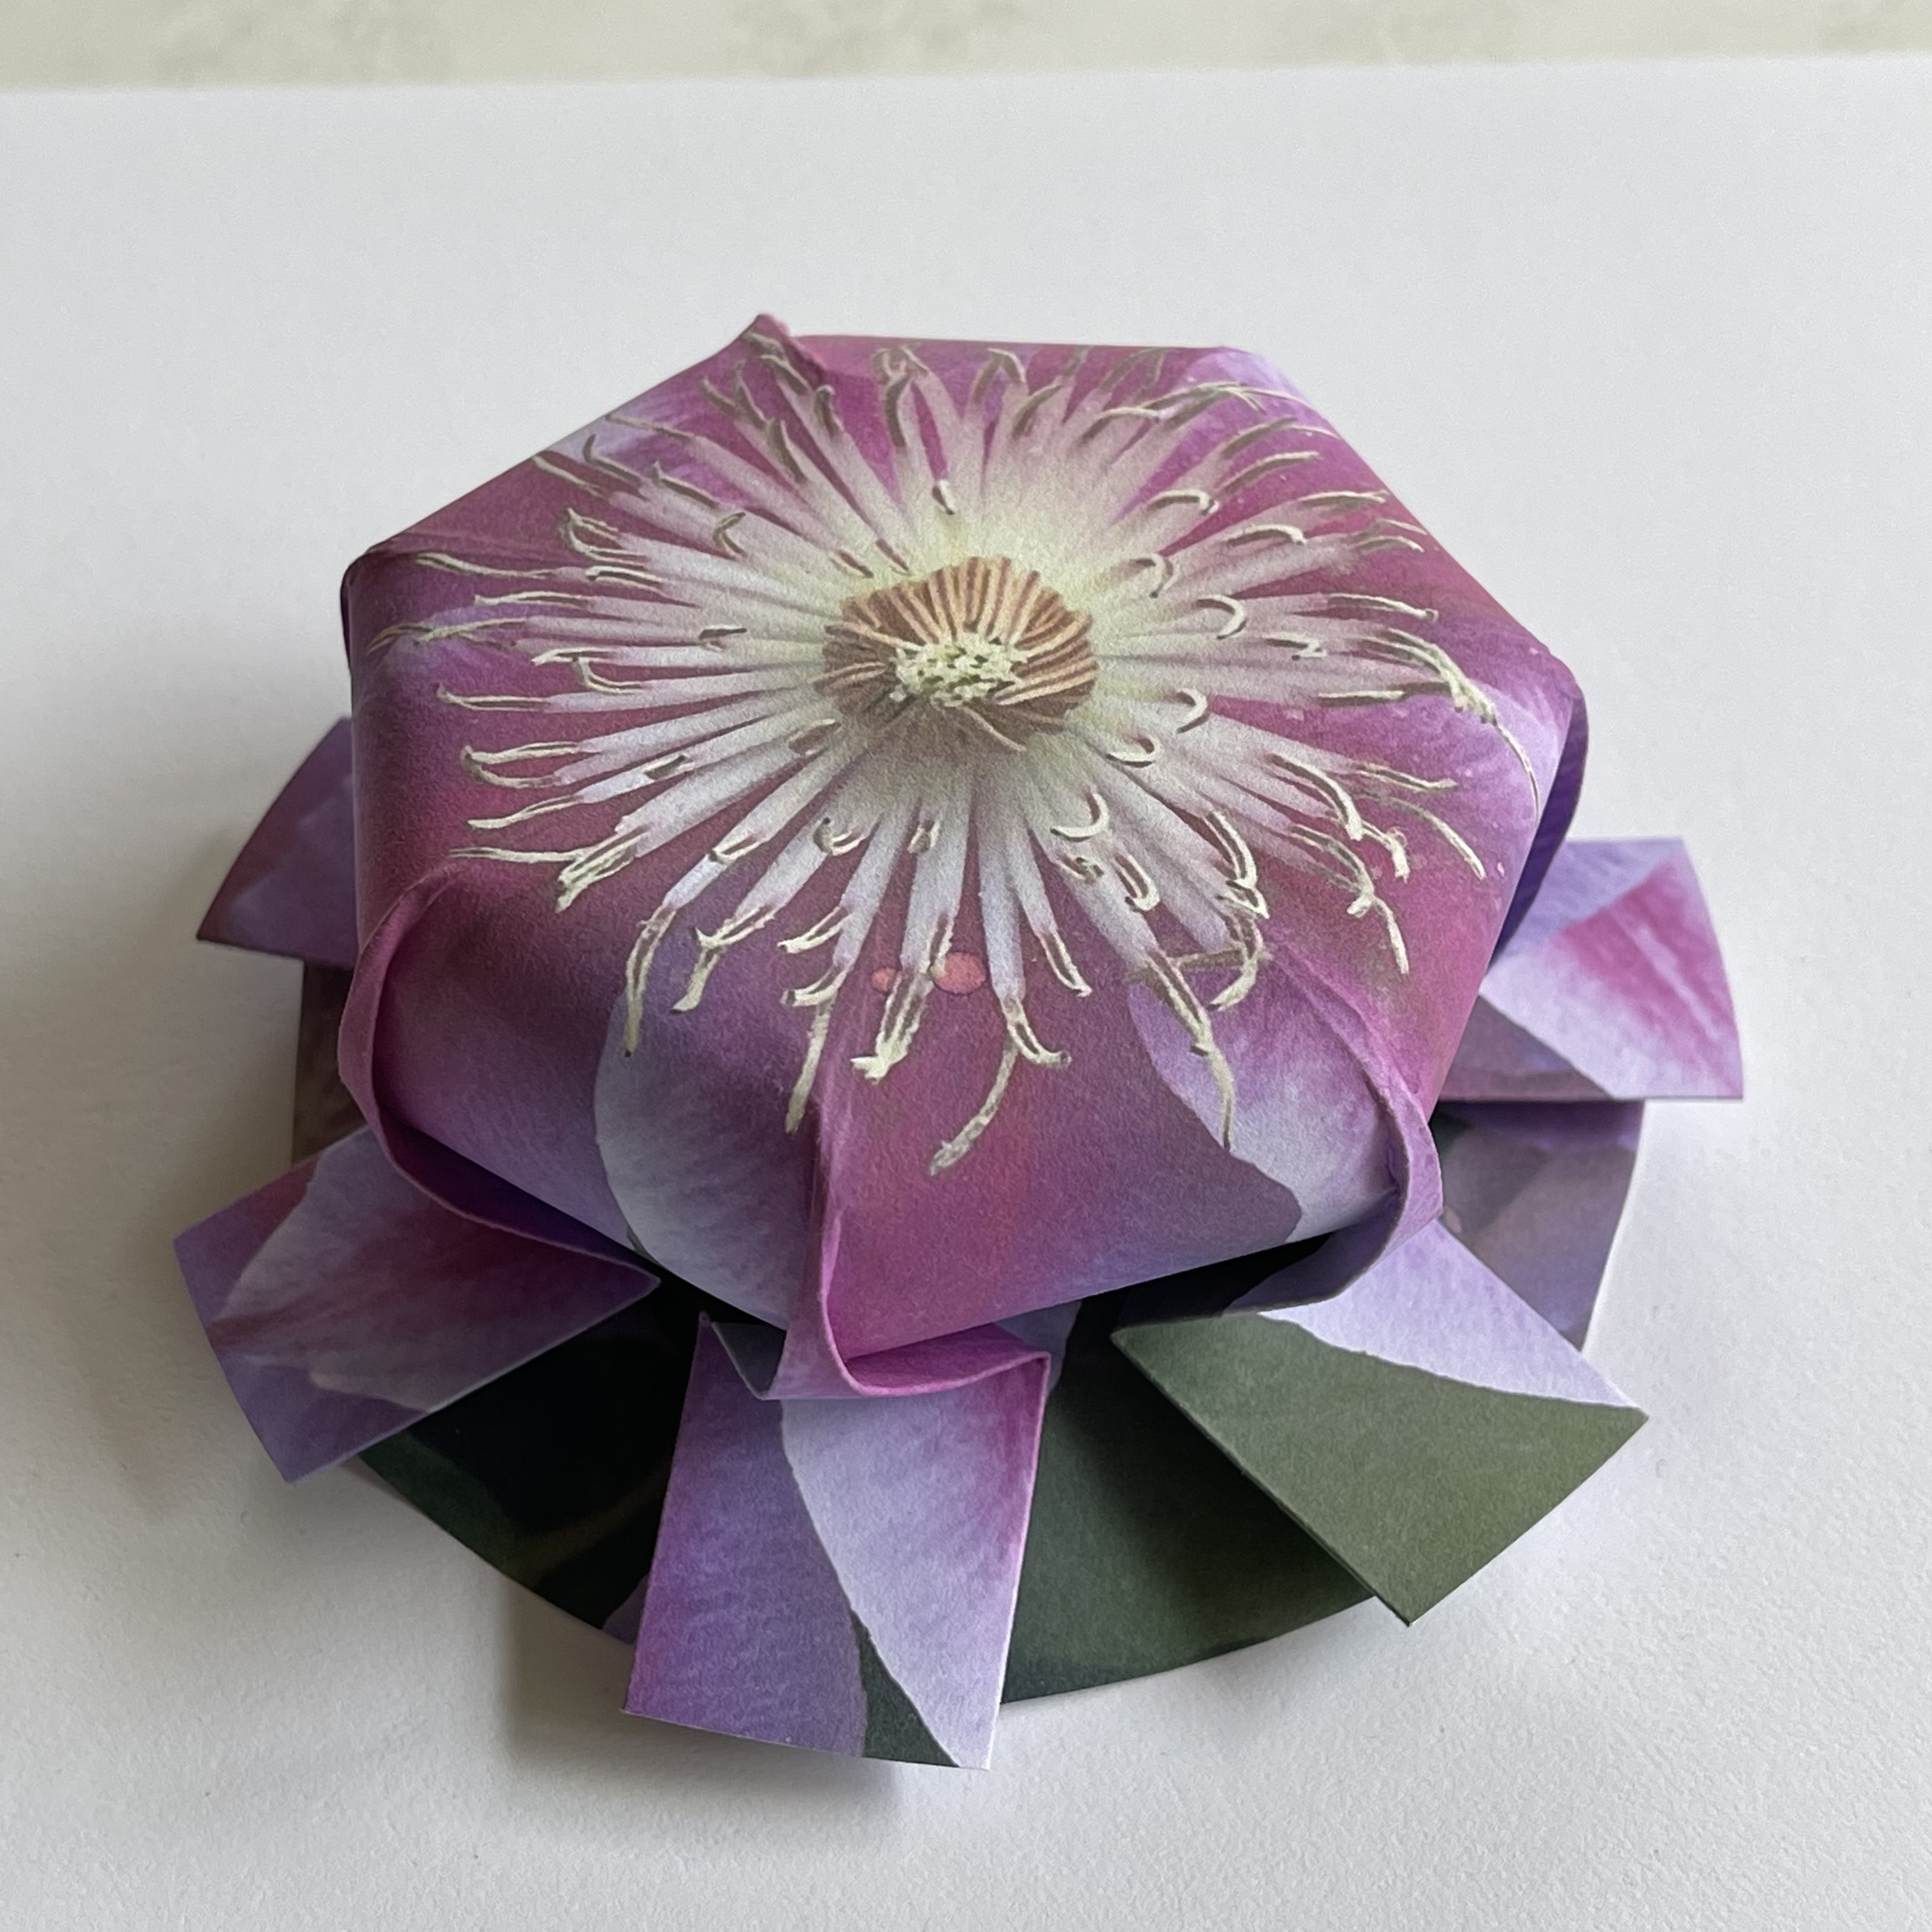 |
Example click to enlarge 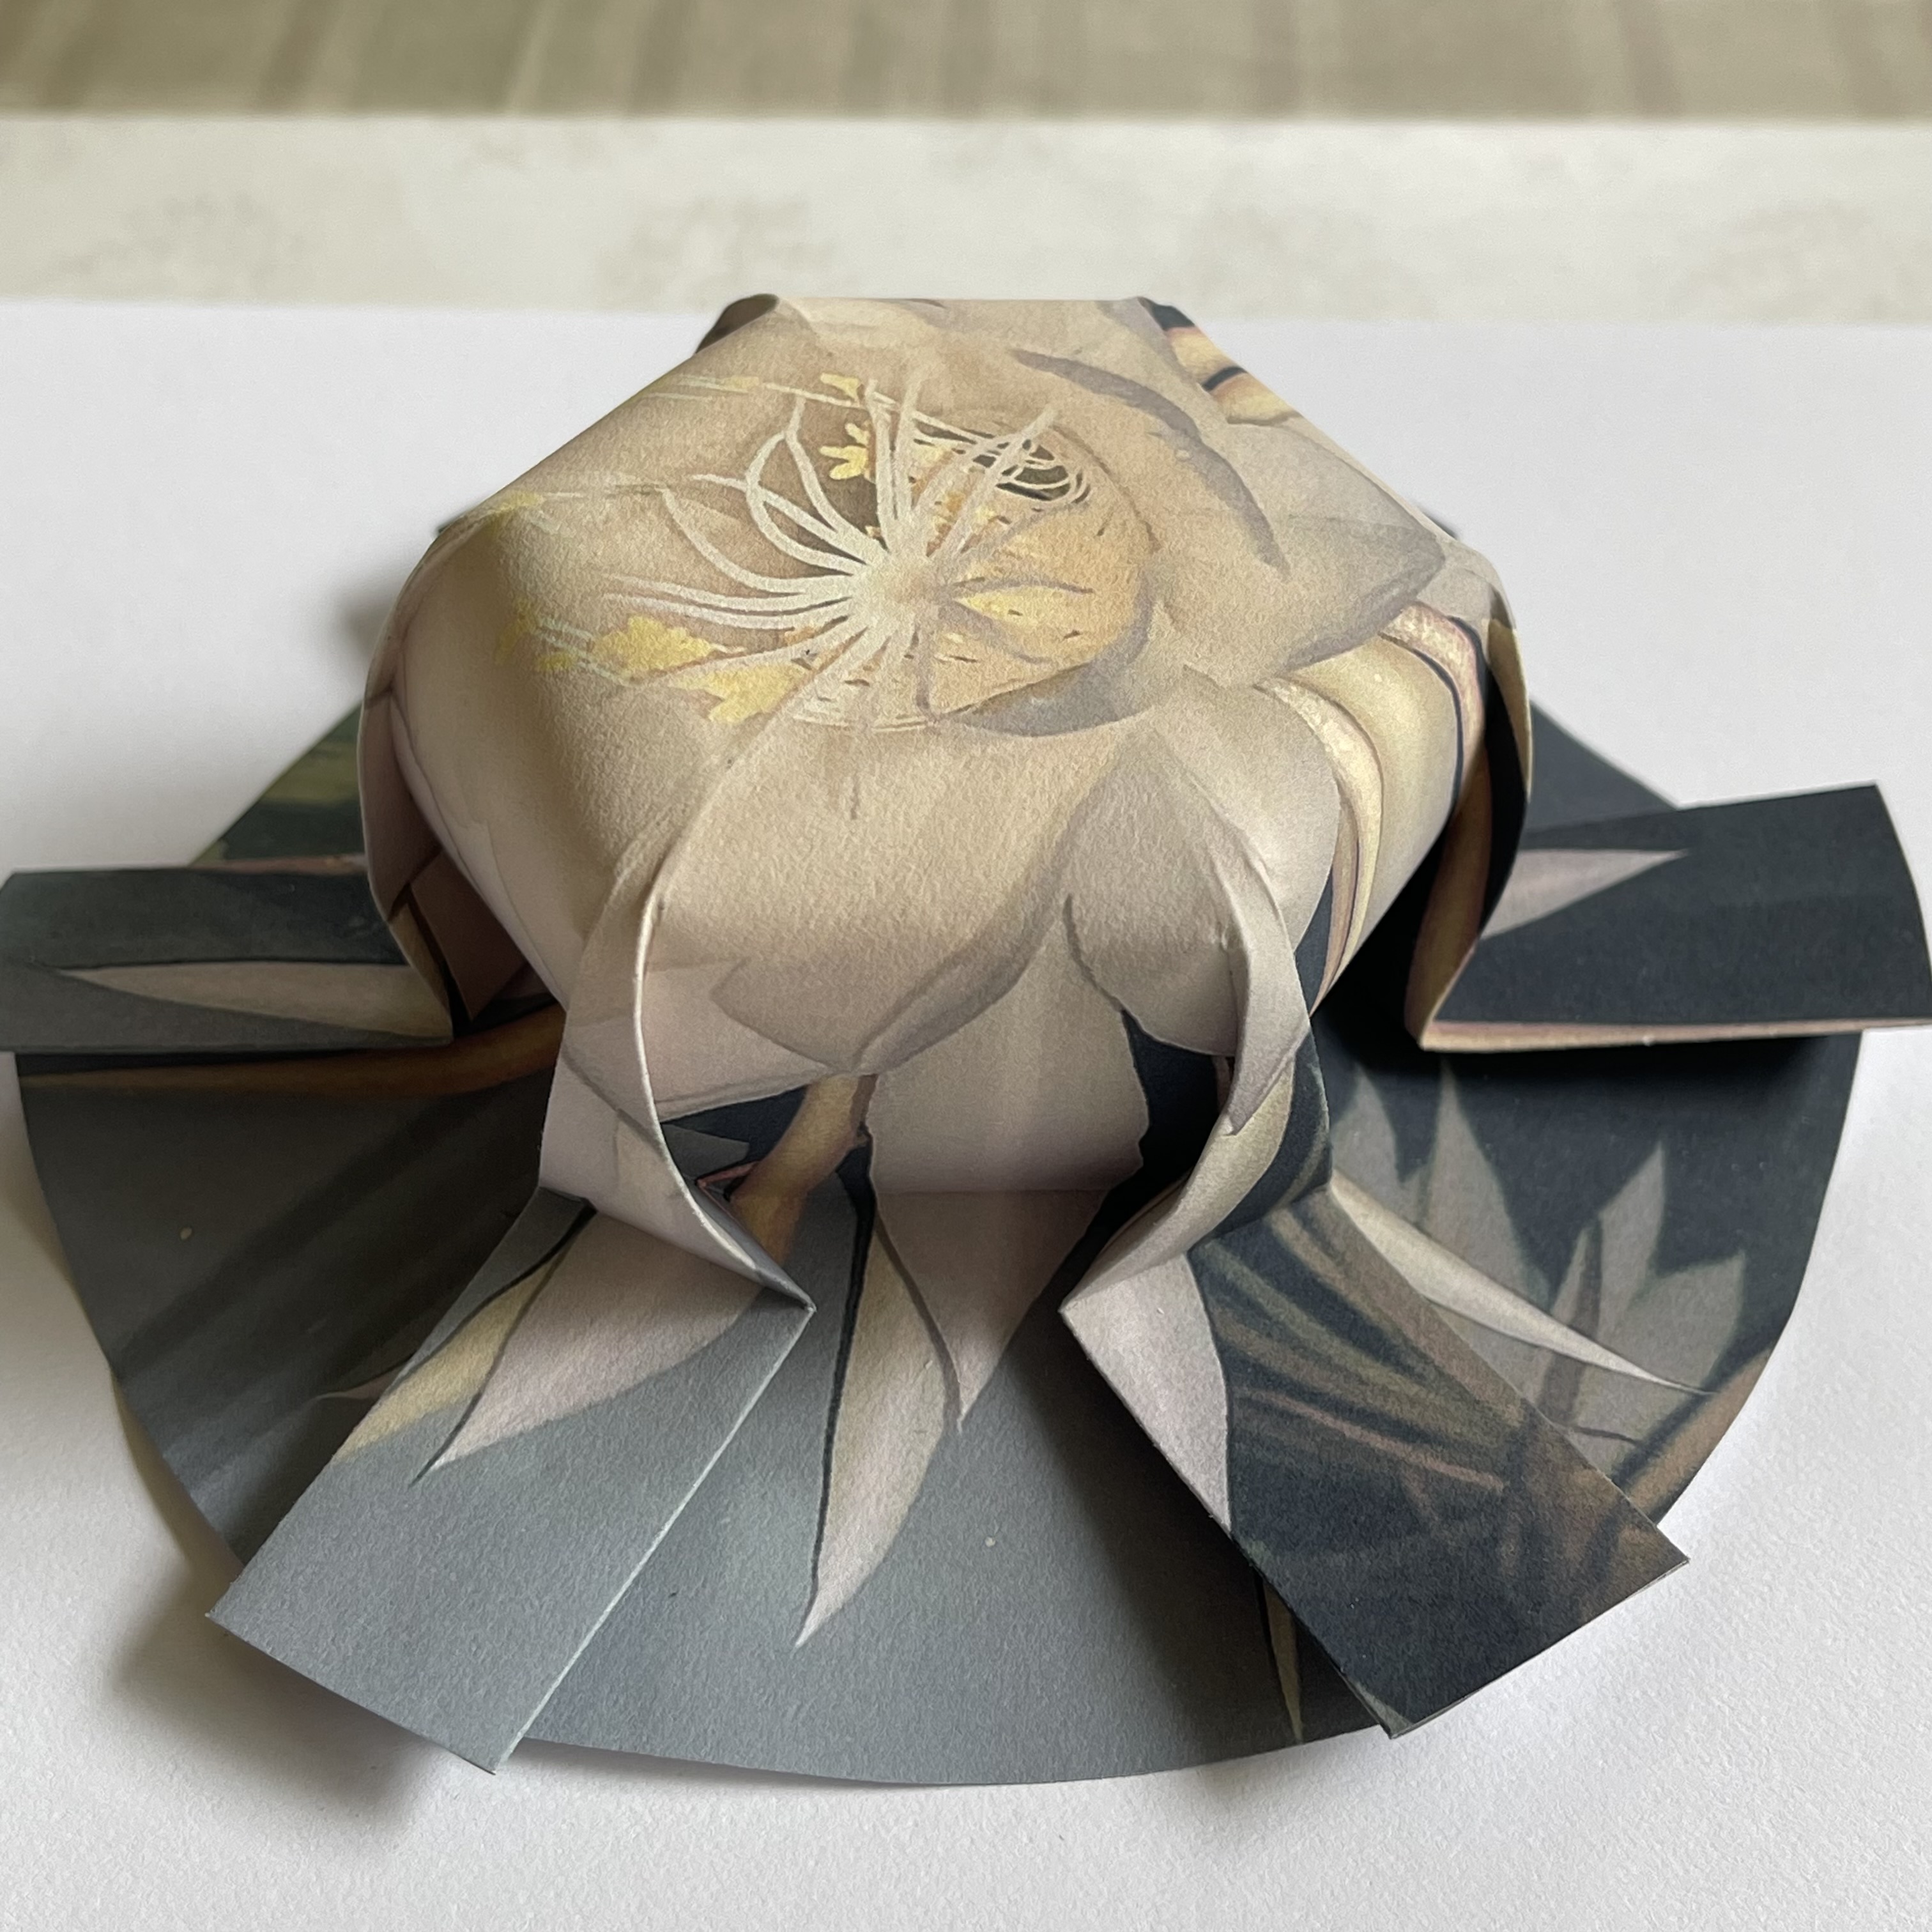 |
| Example click to enlarge 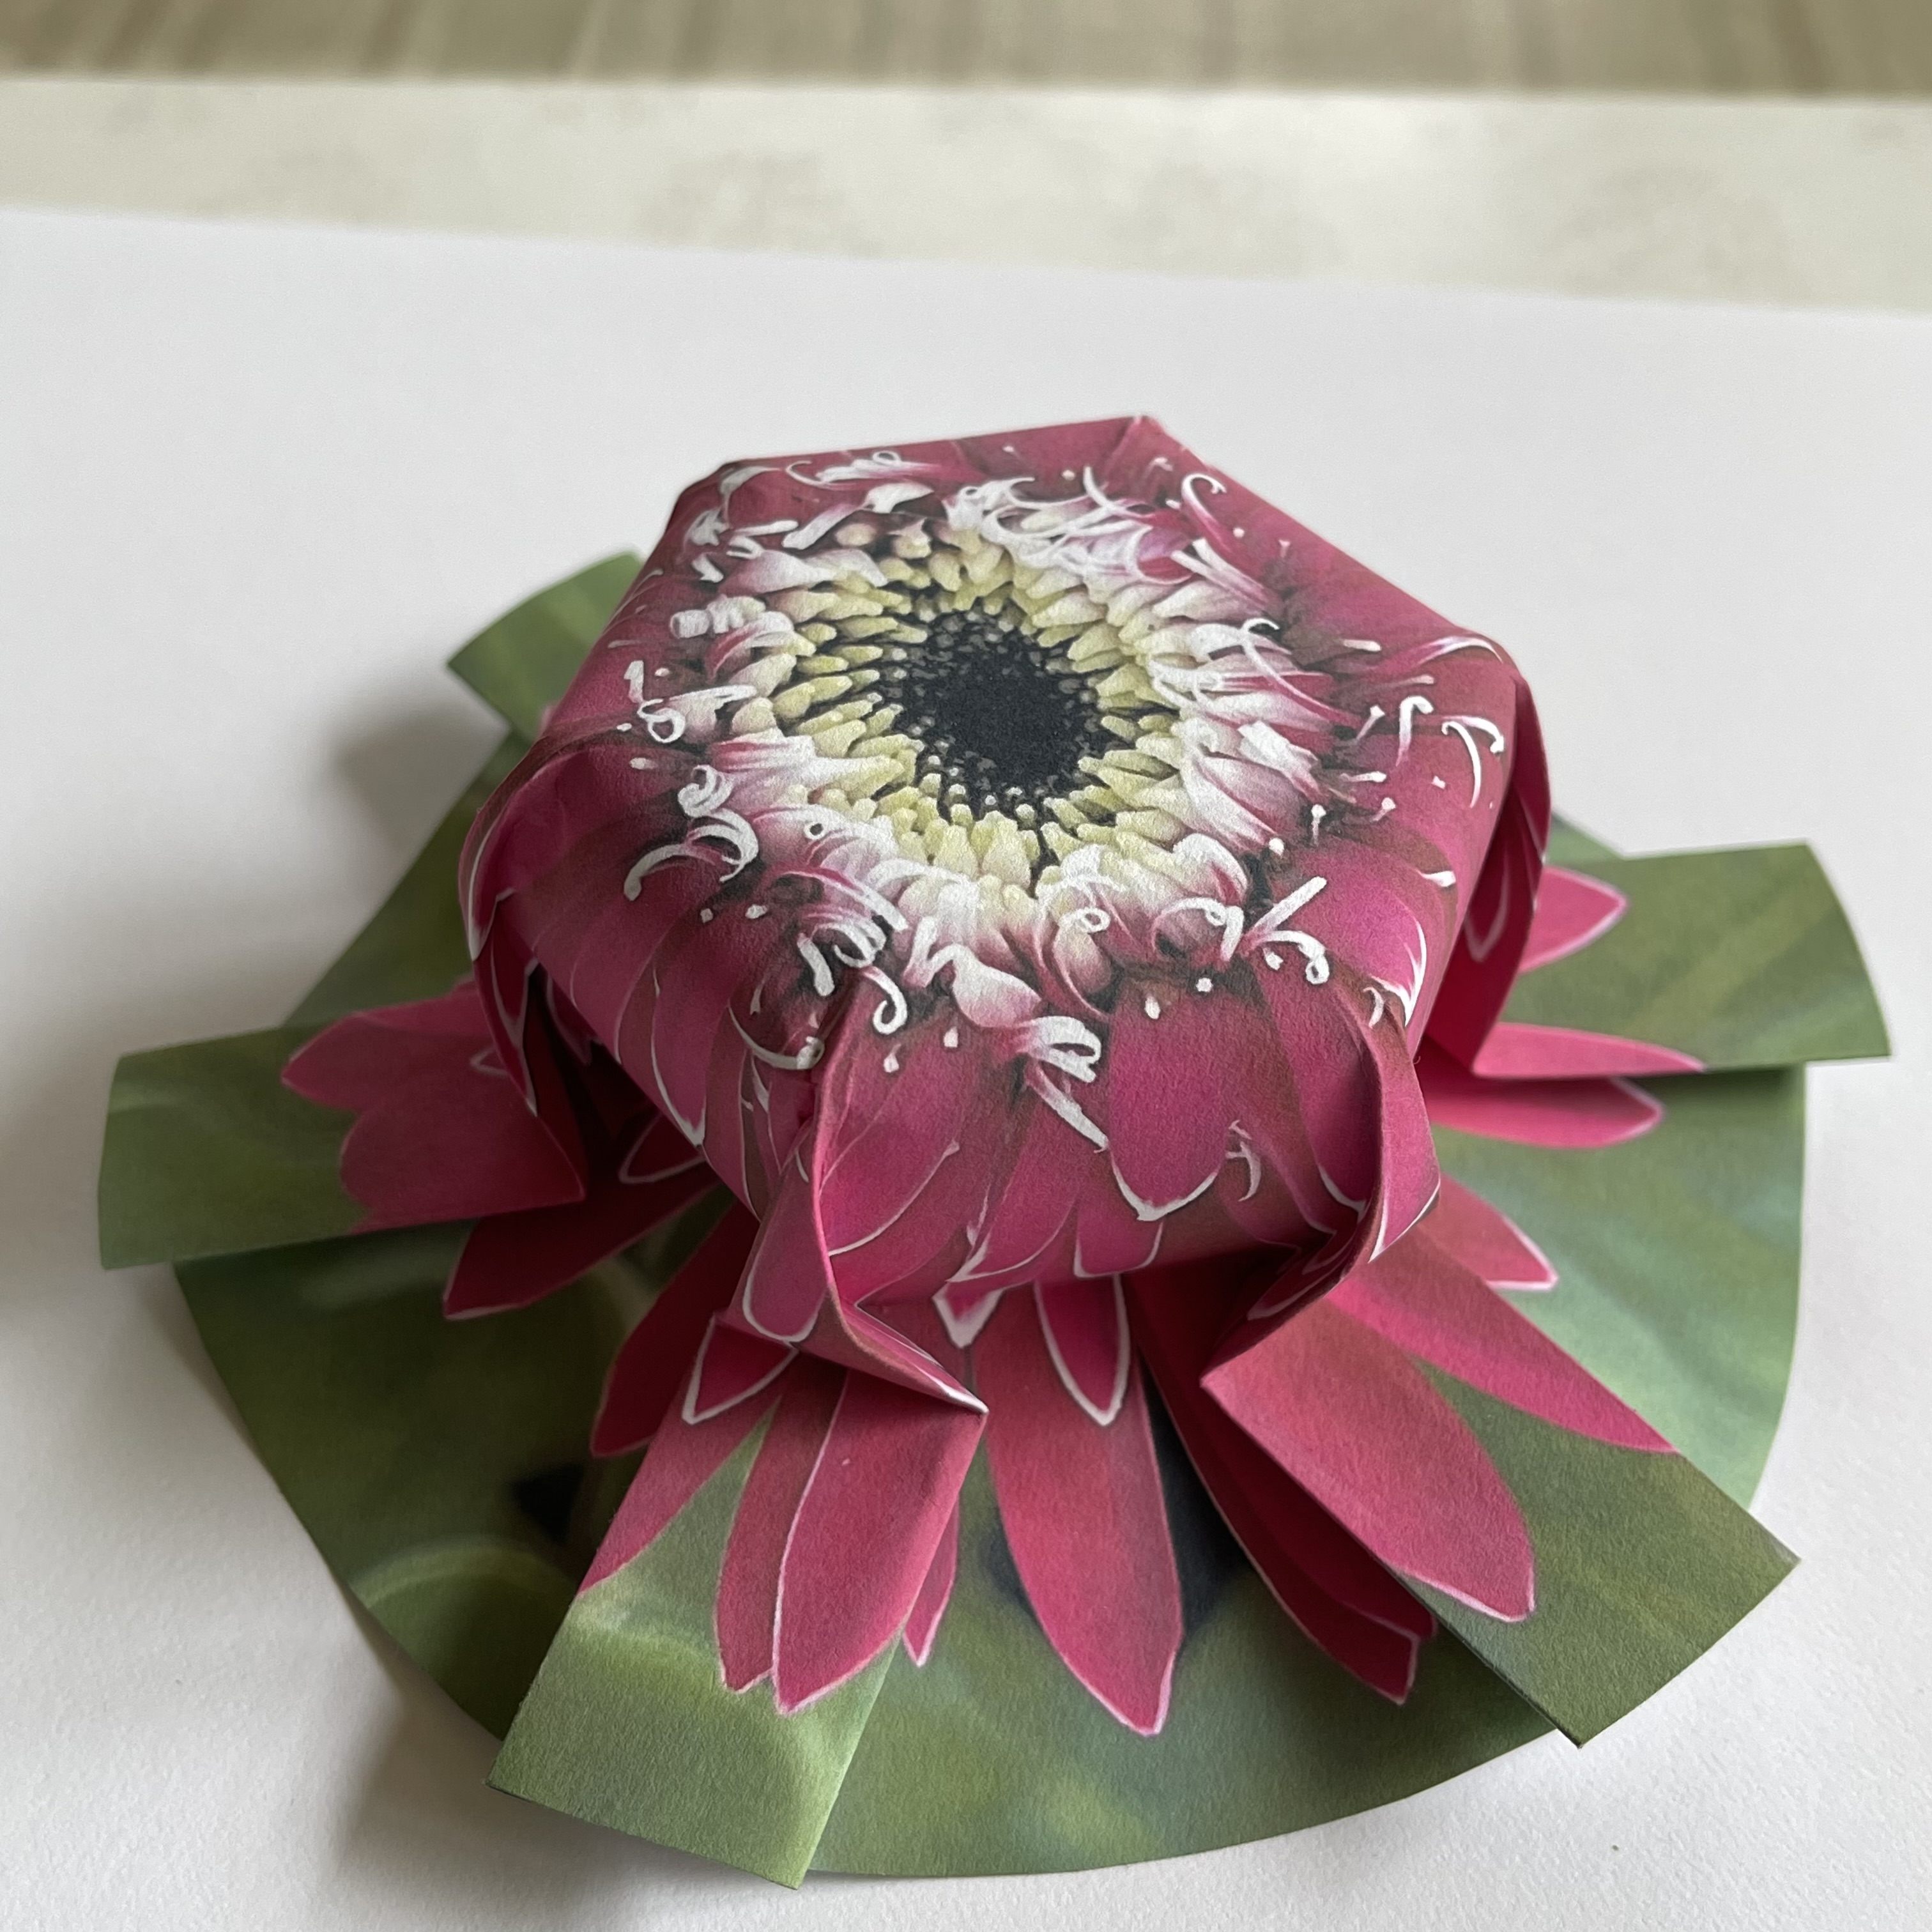 |
Example click to enlarge 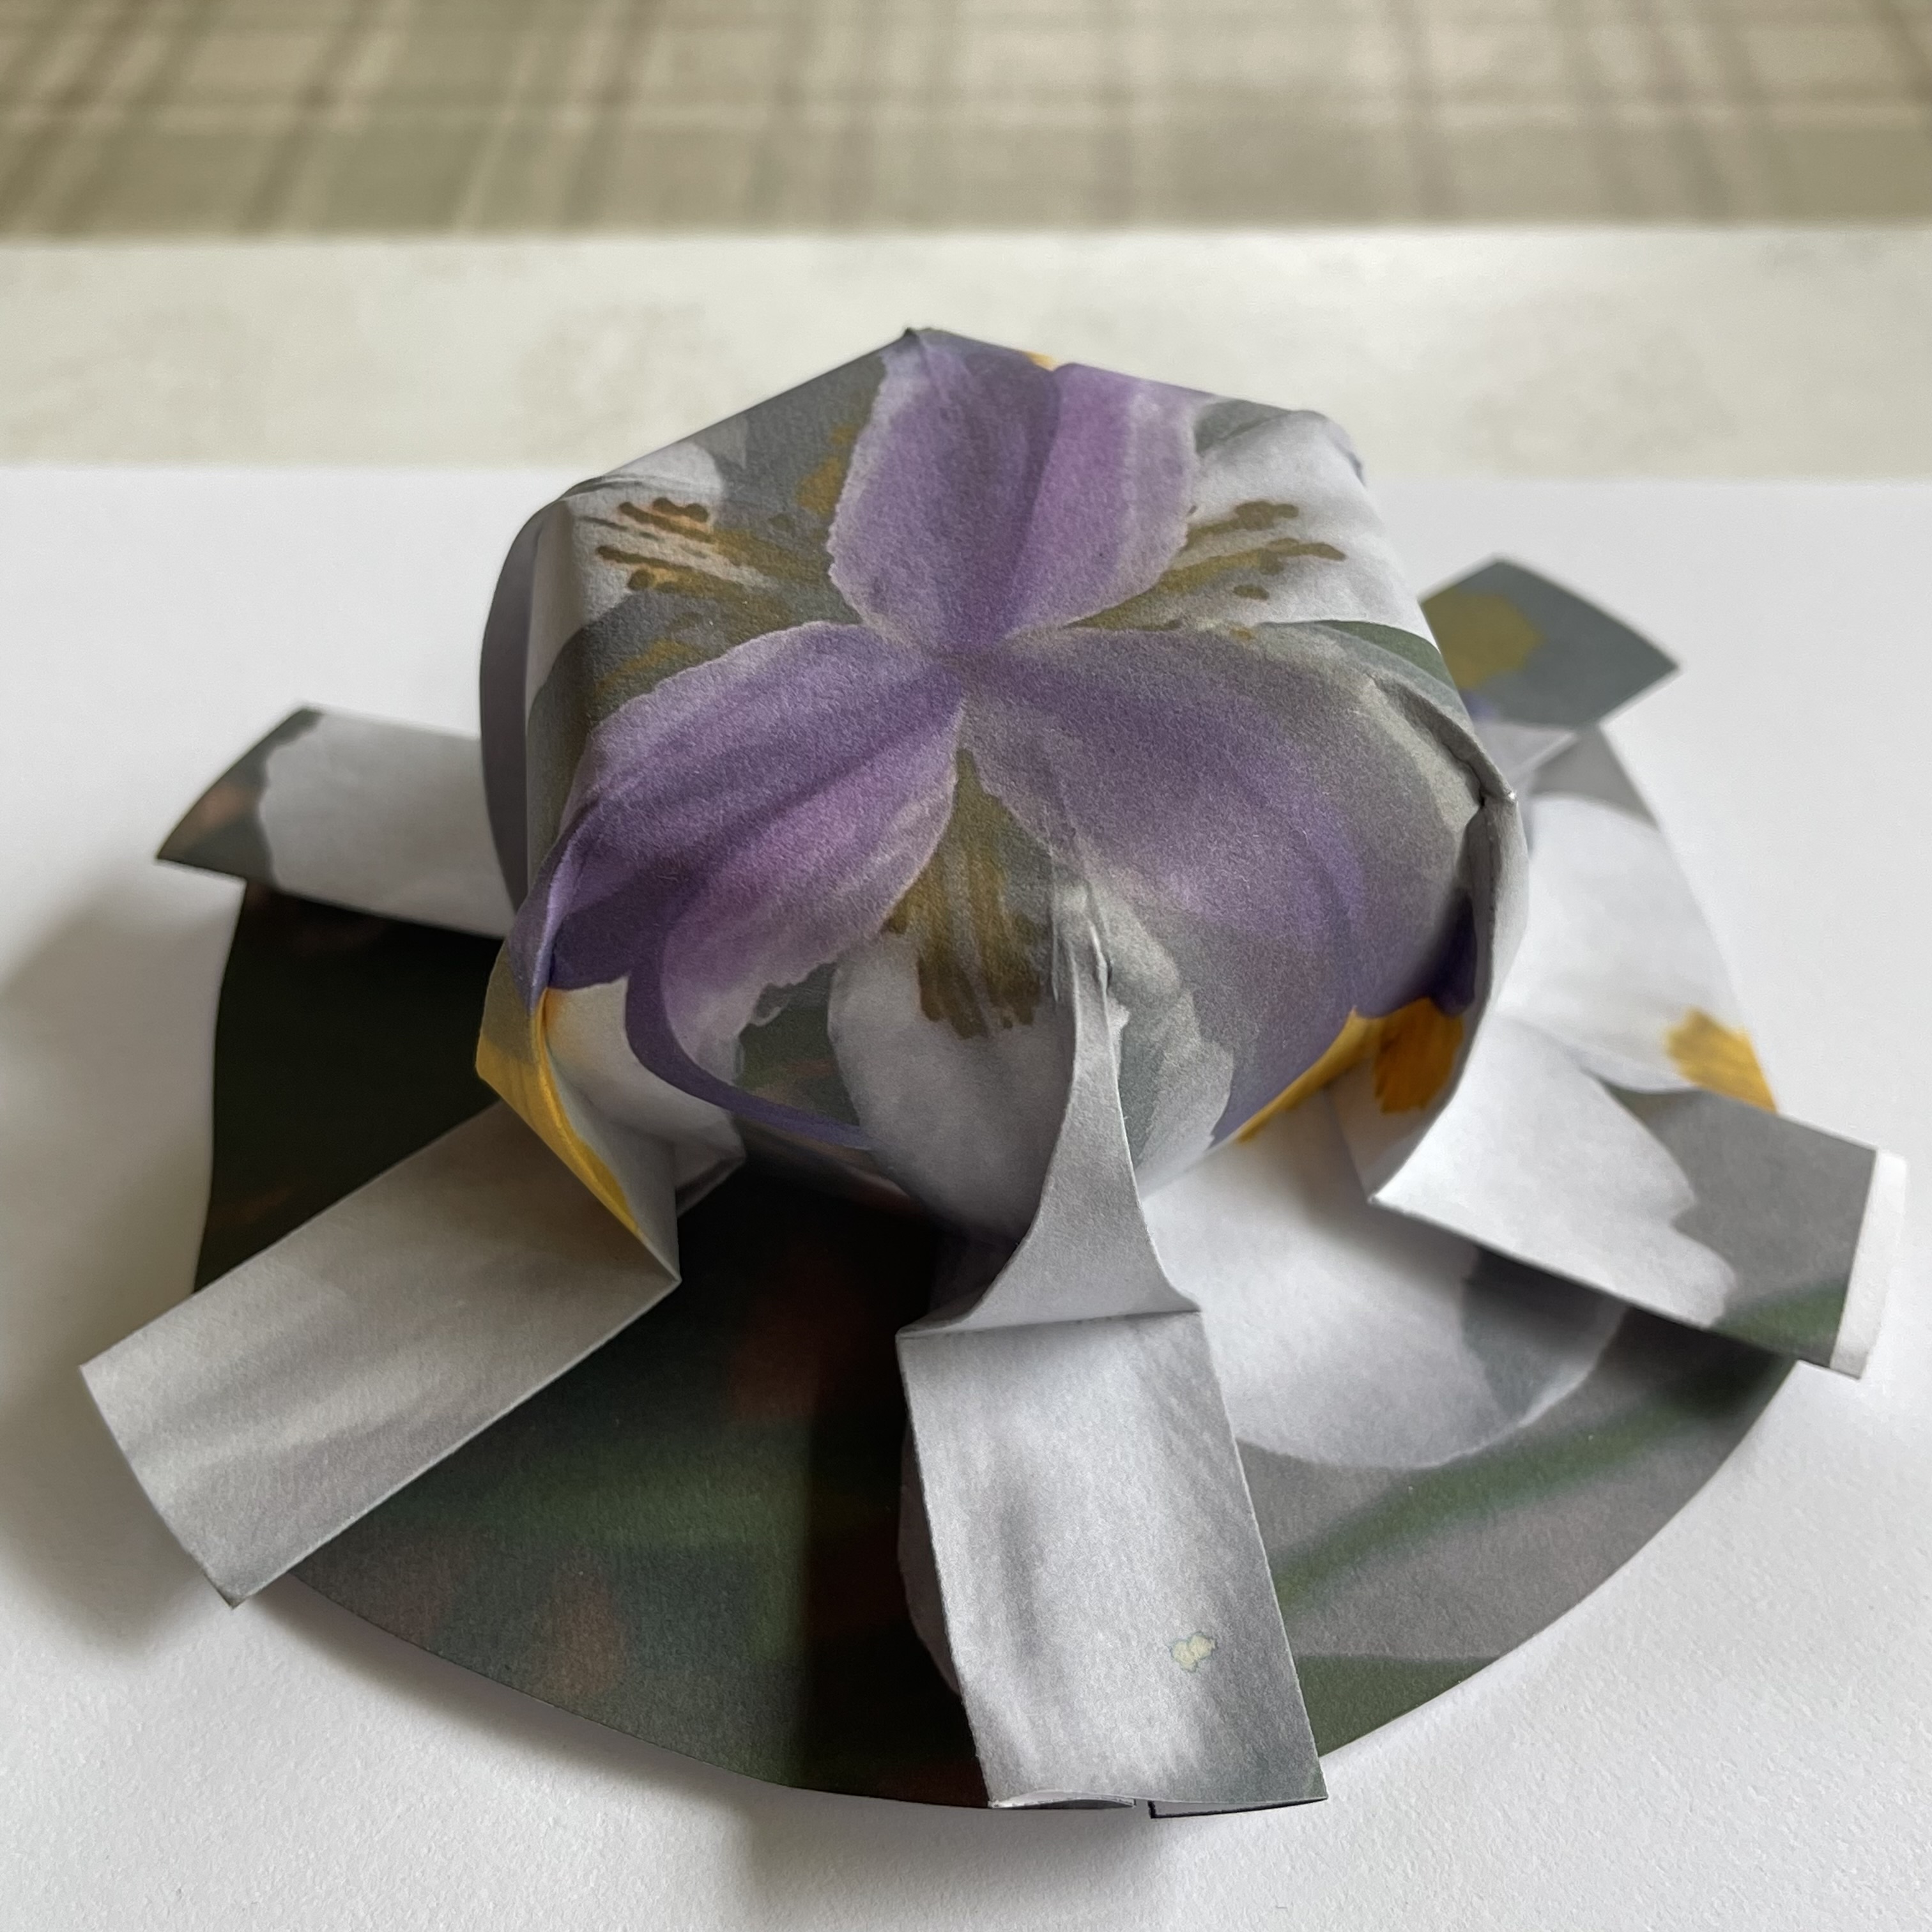 |
Example click to enlarge 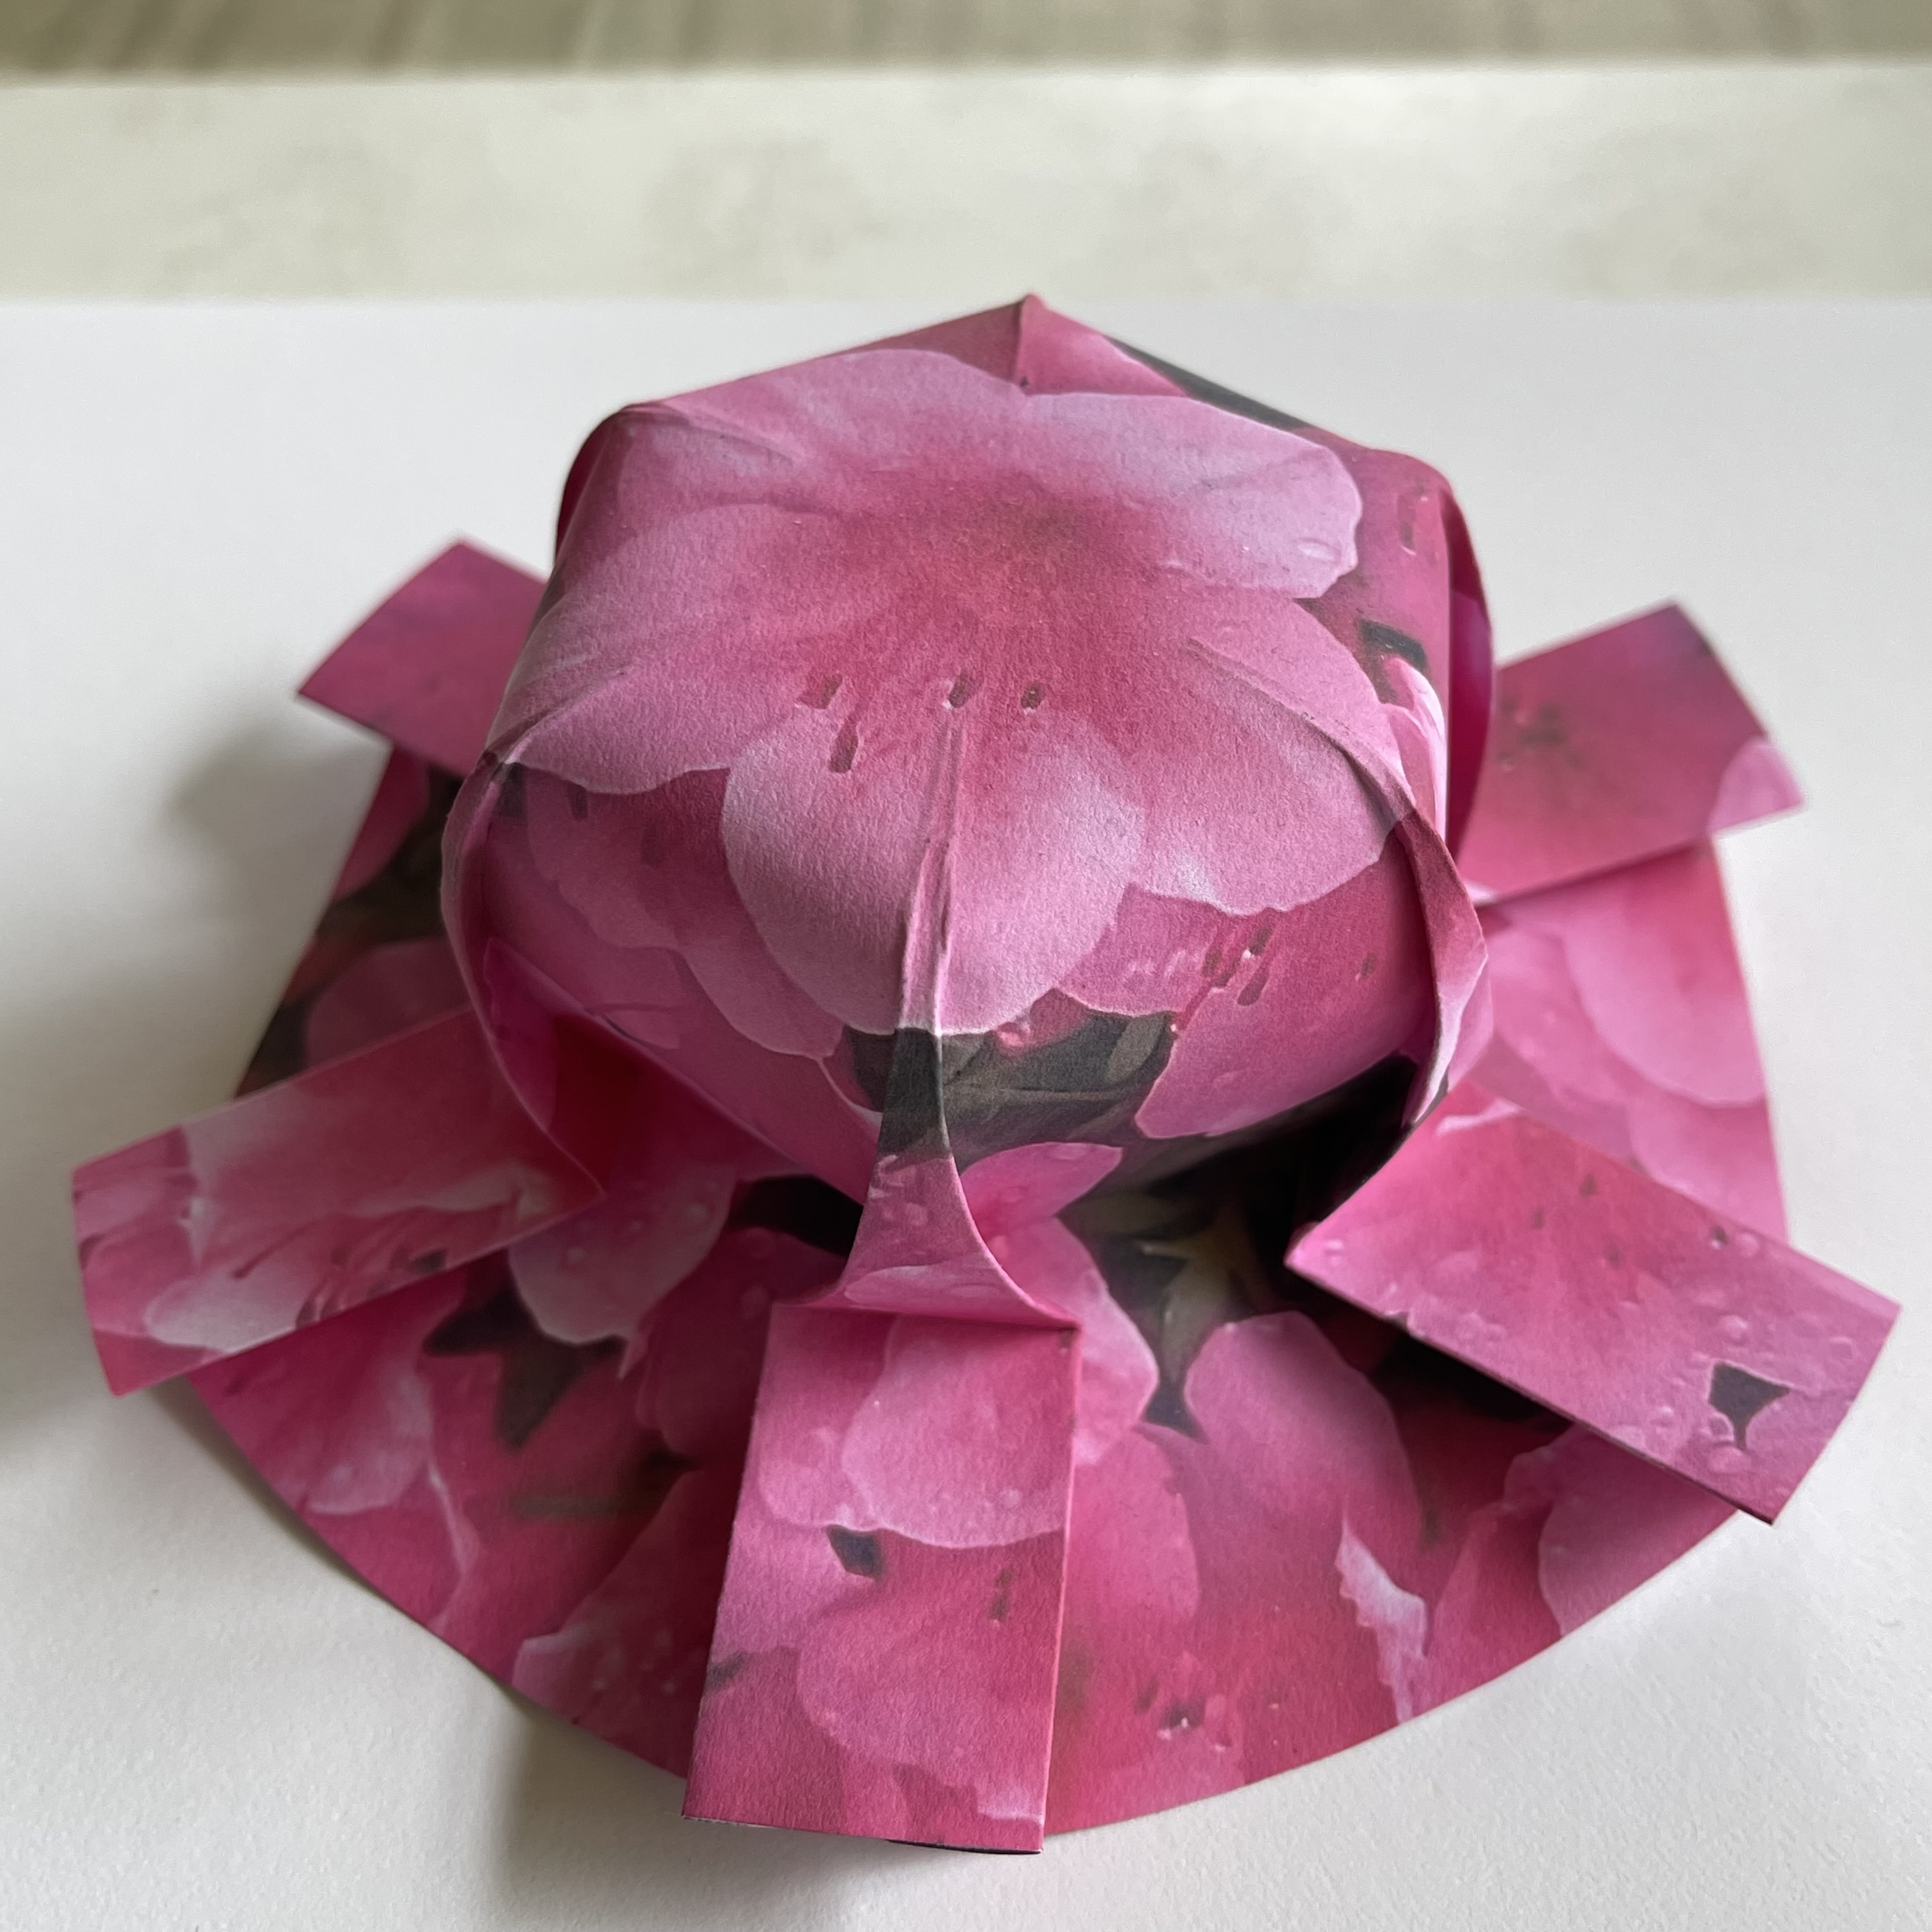 |
Example click to enlarge 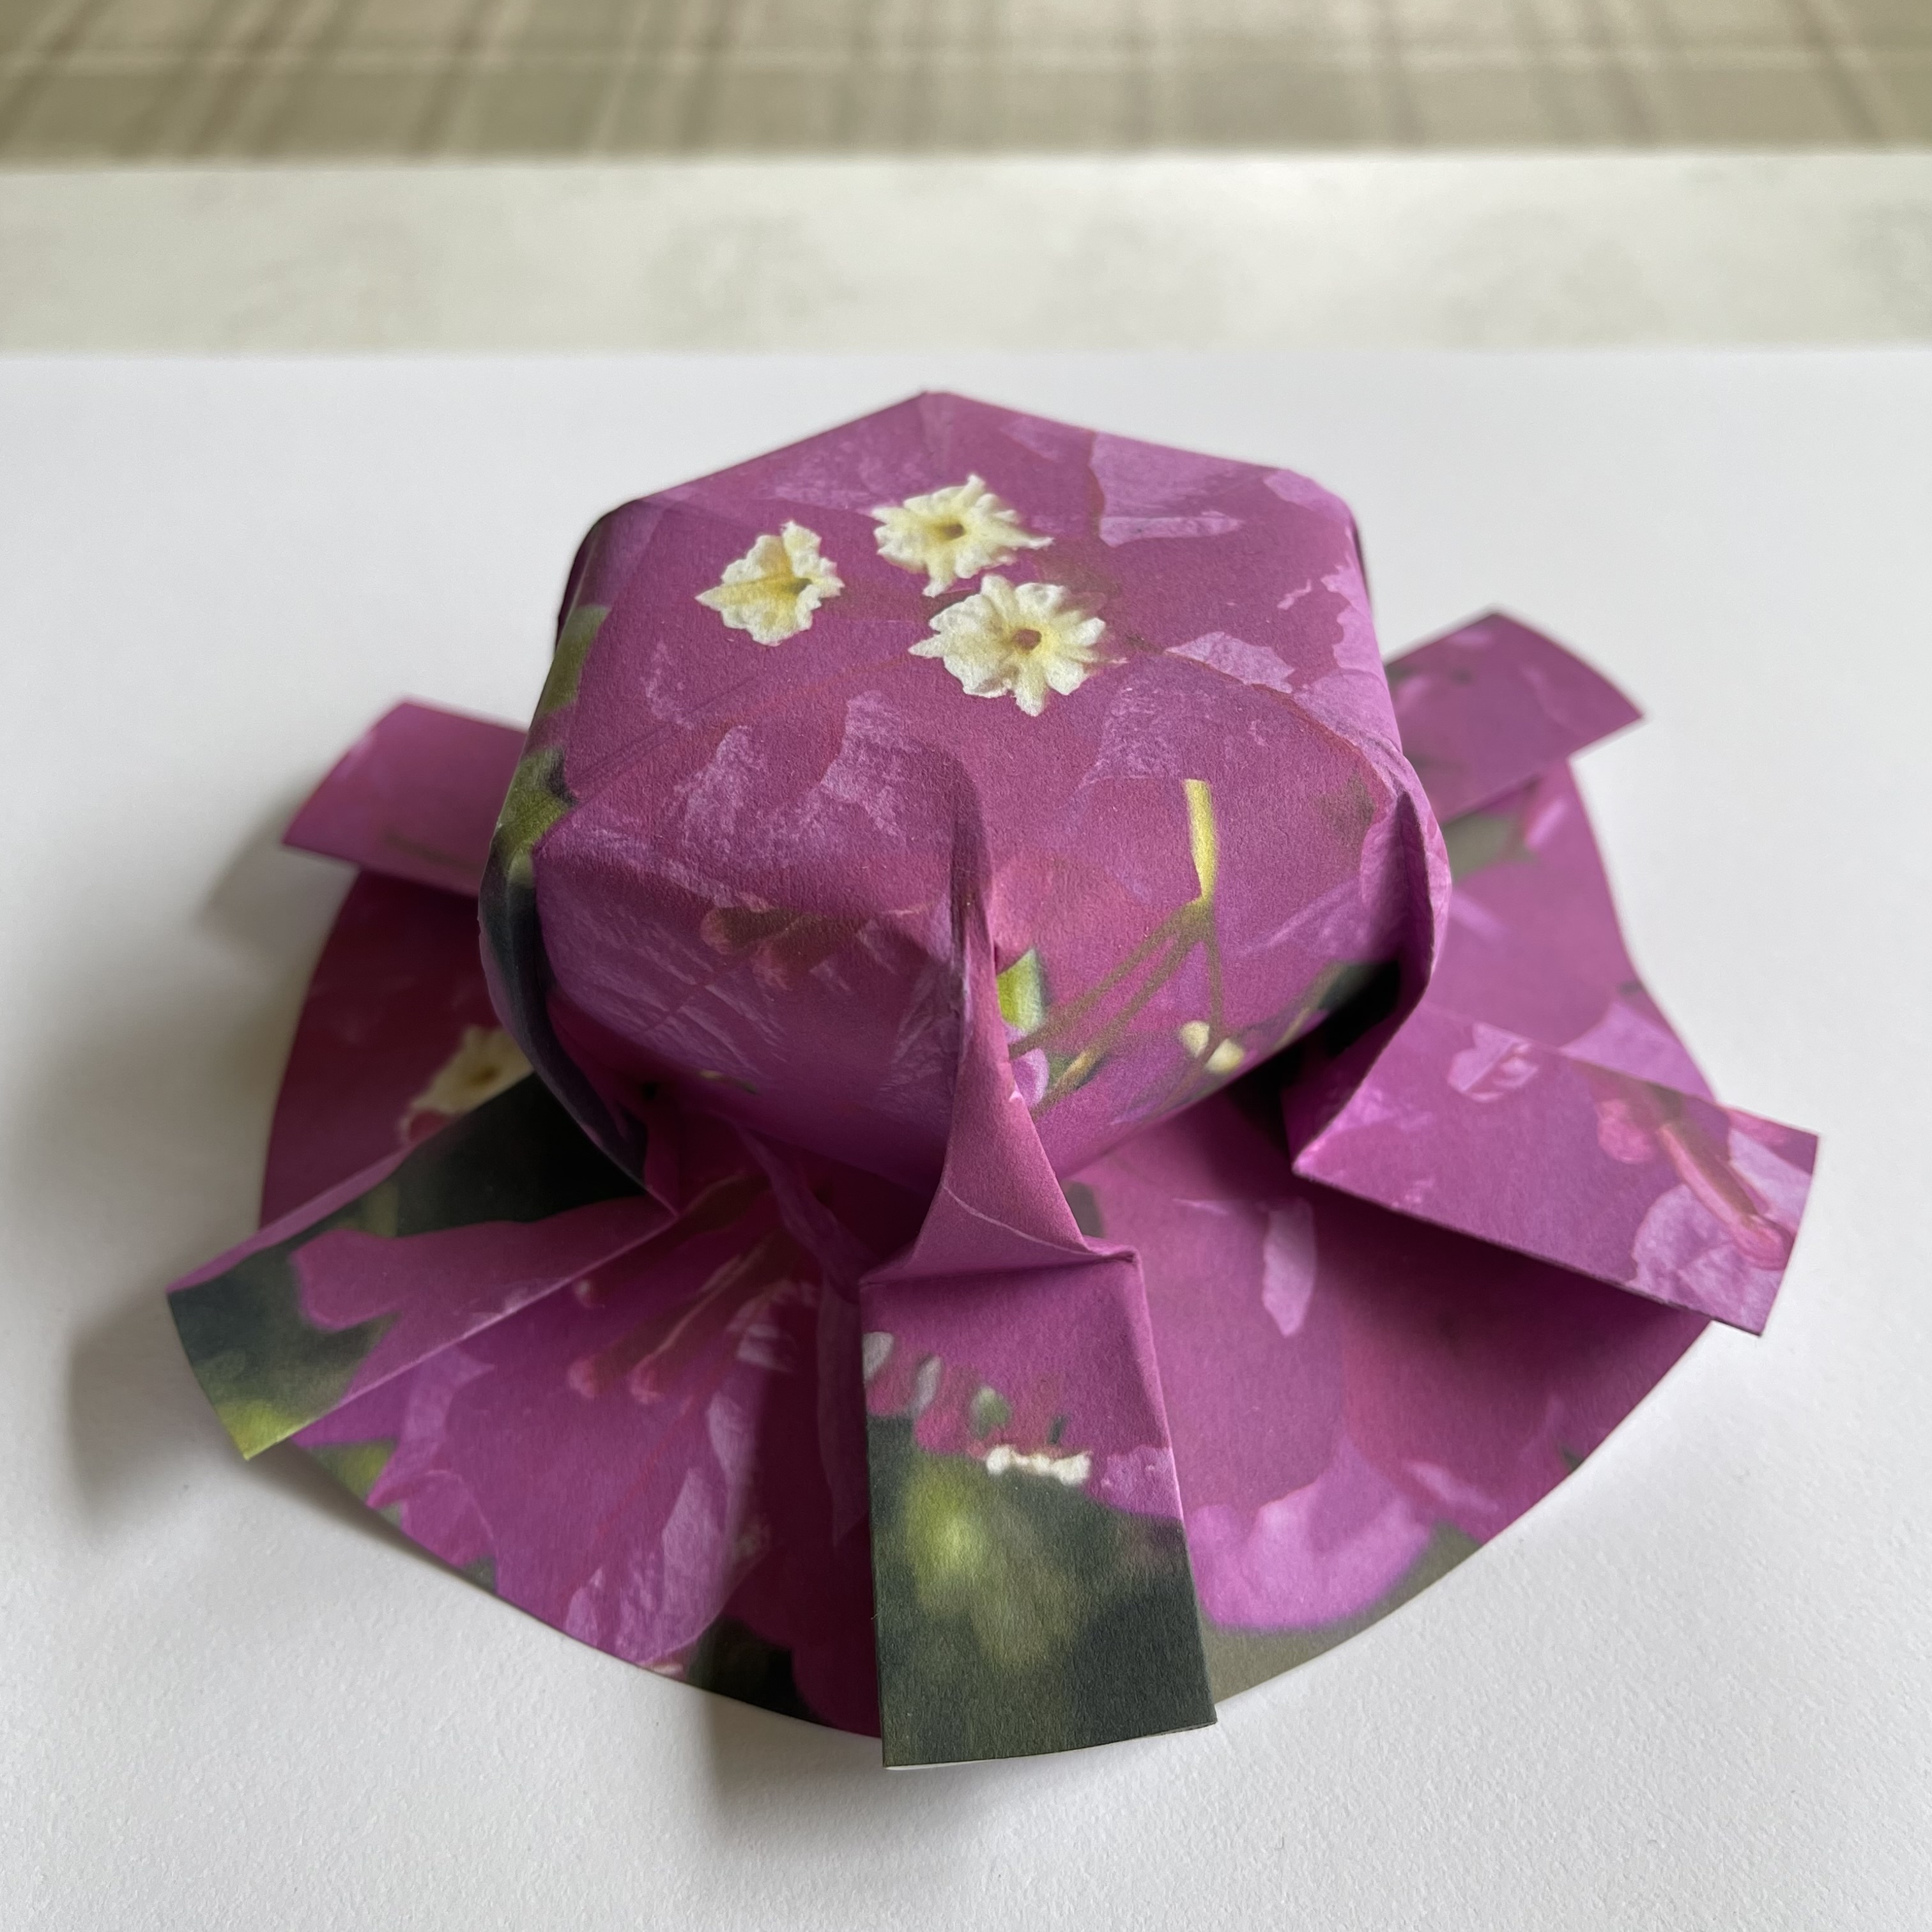 |
| Example click to enlarge 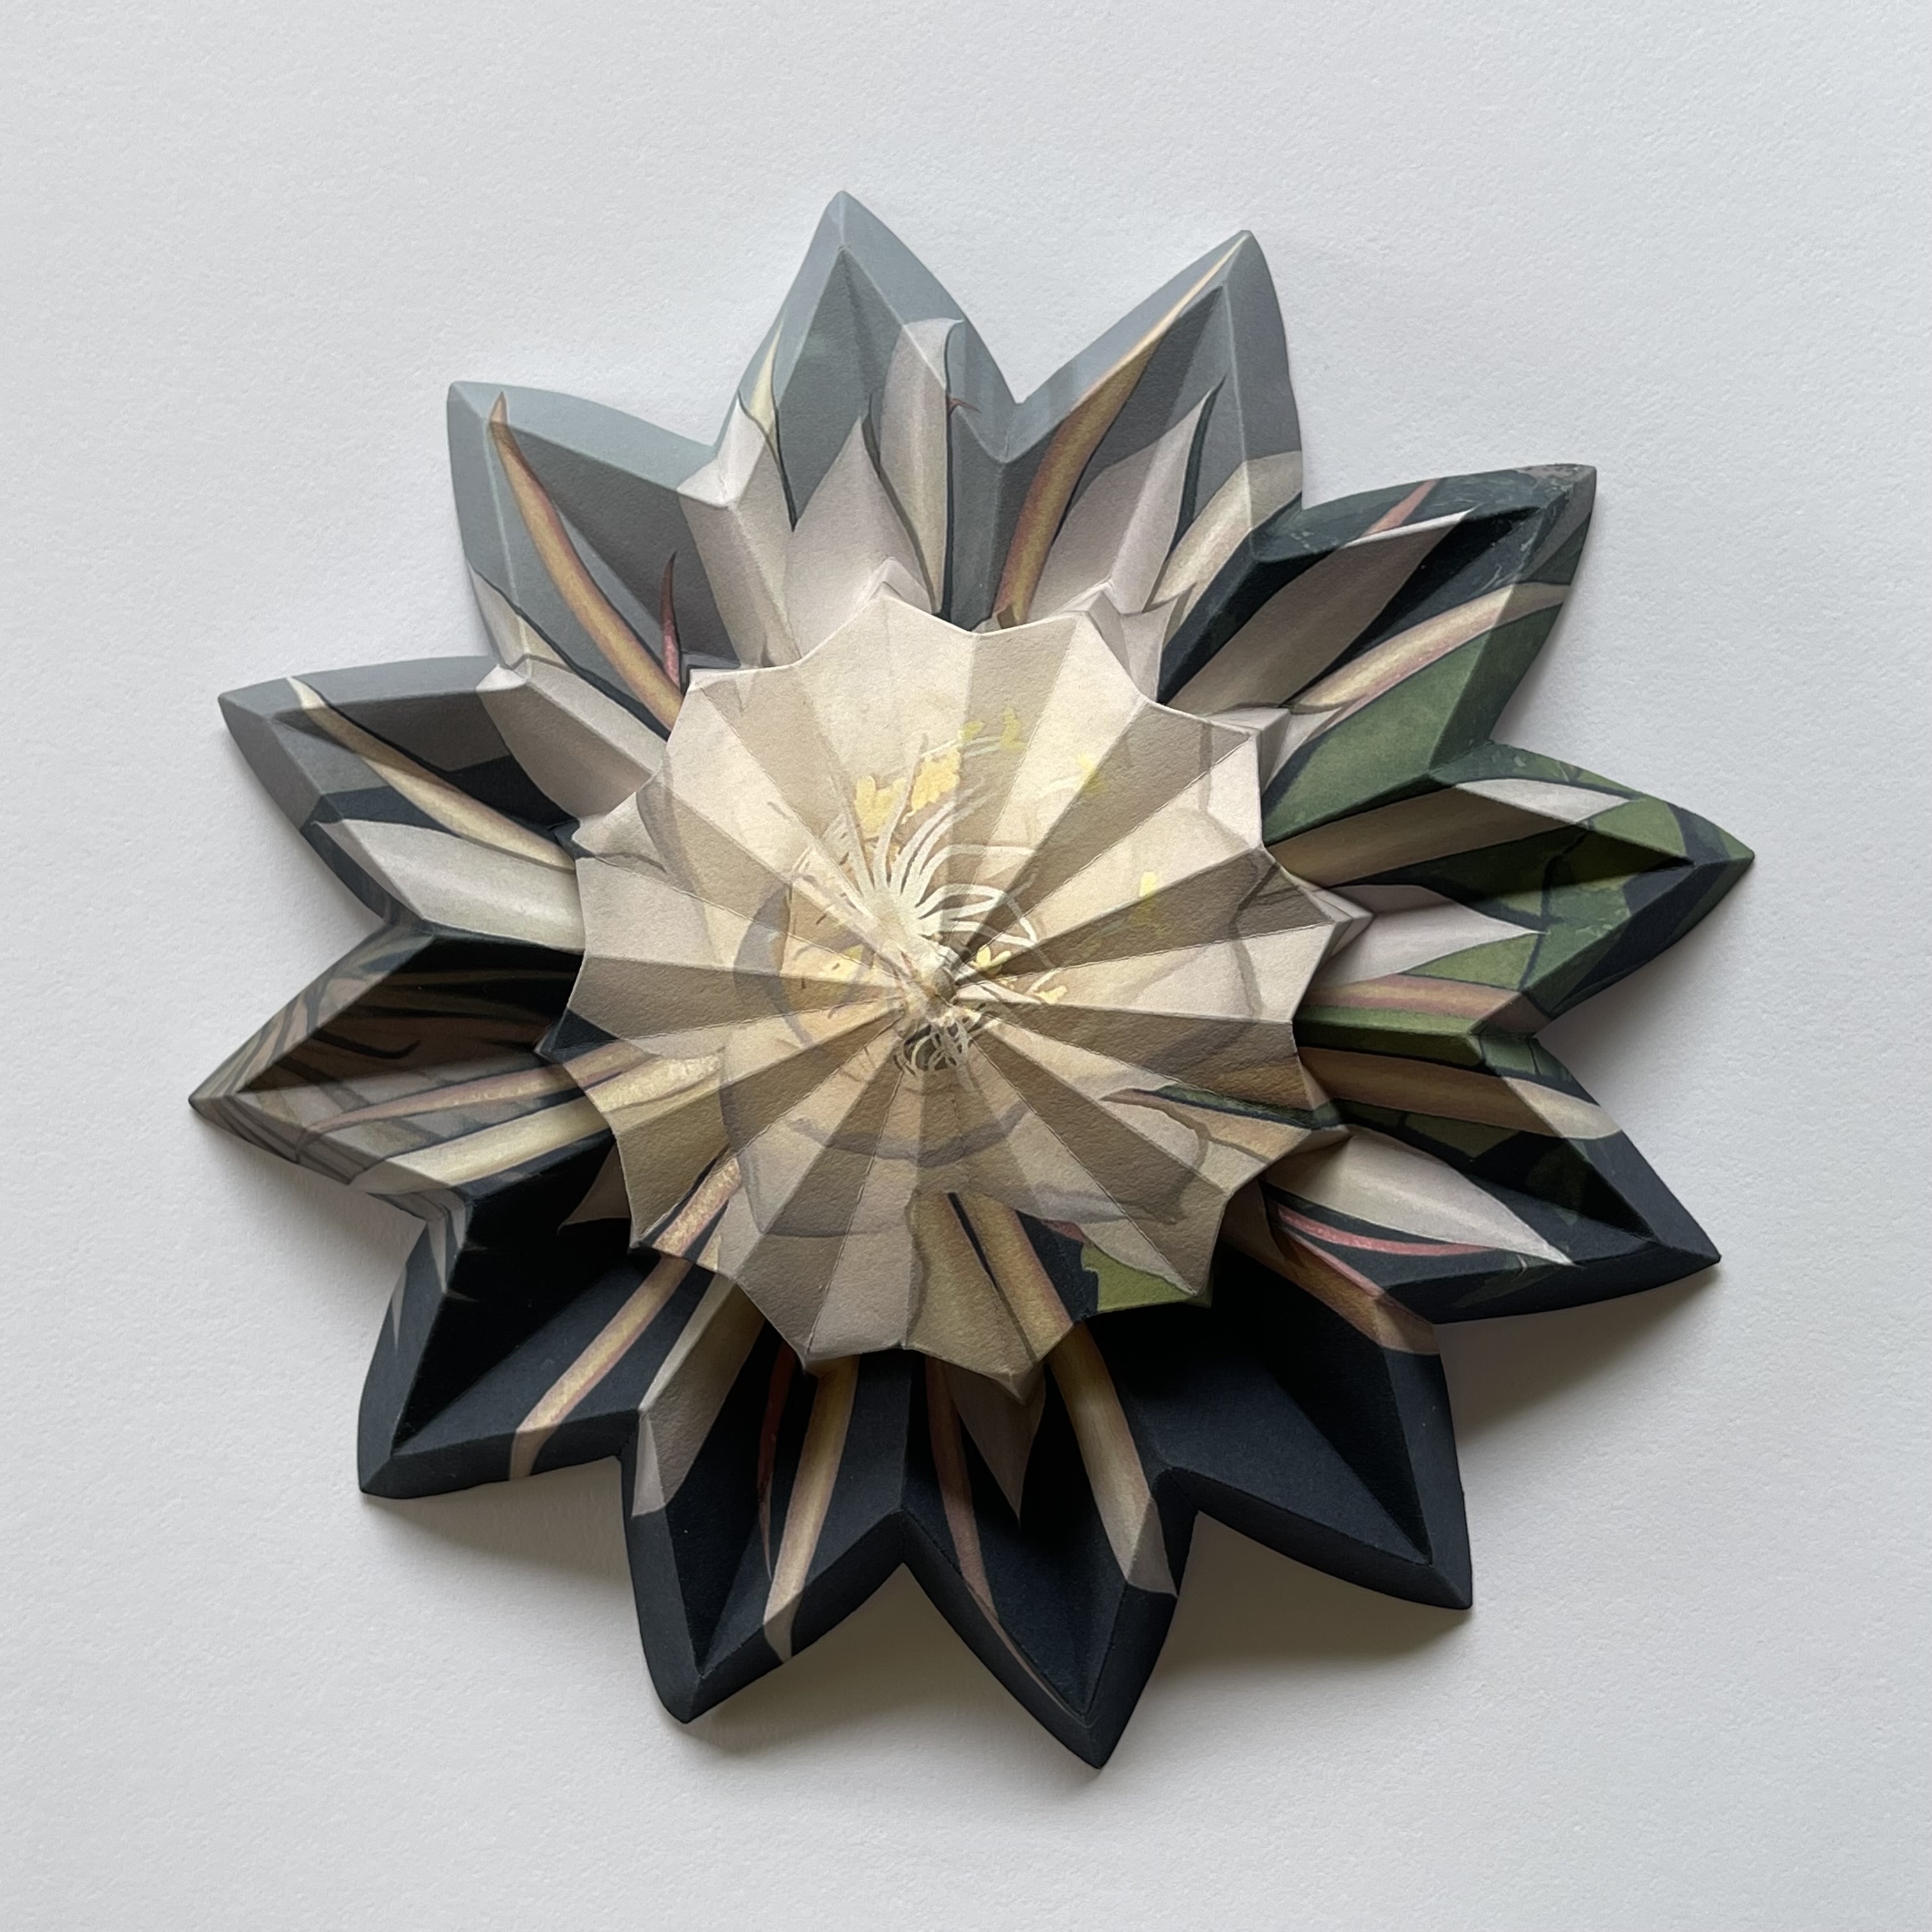 |
Example click to enlarge 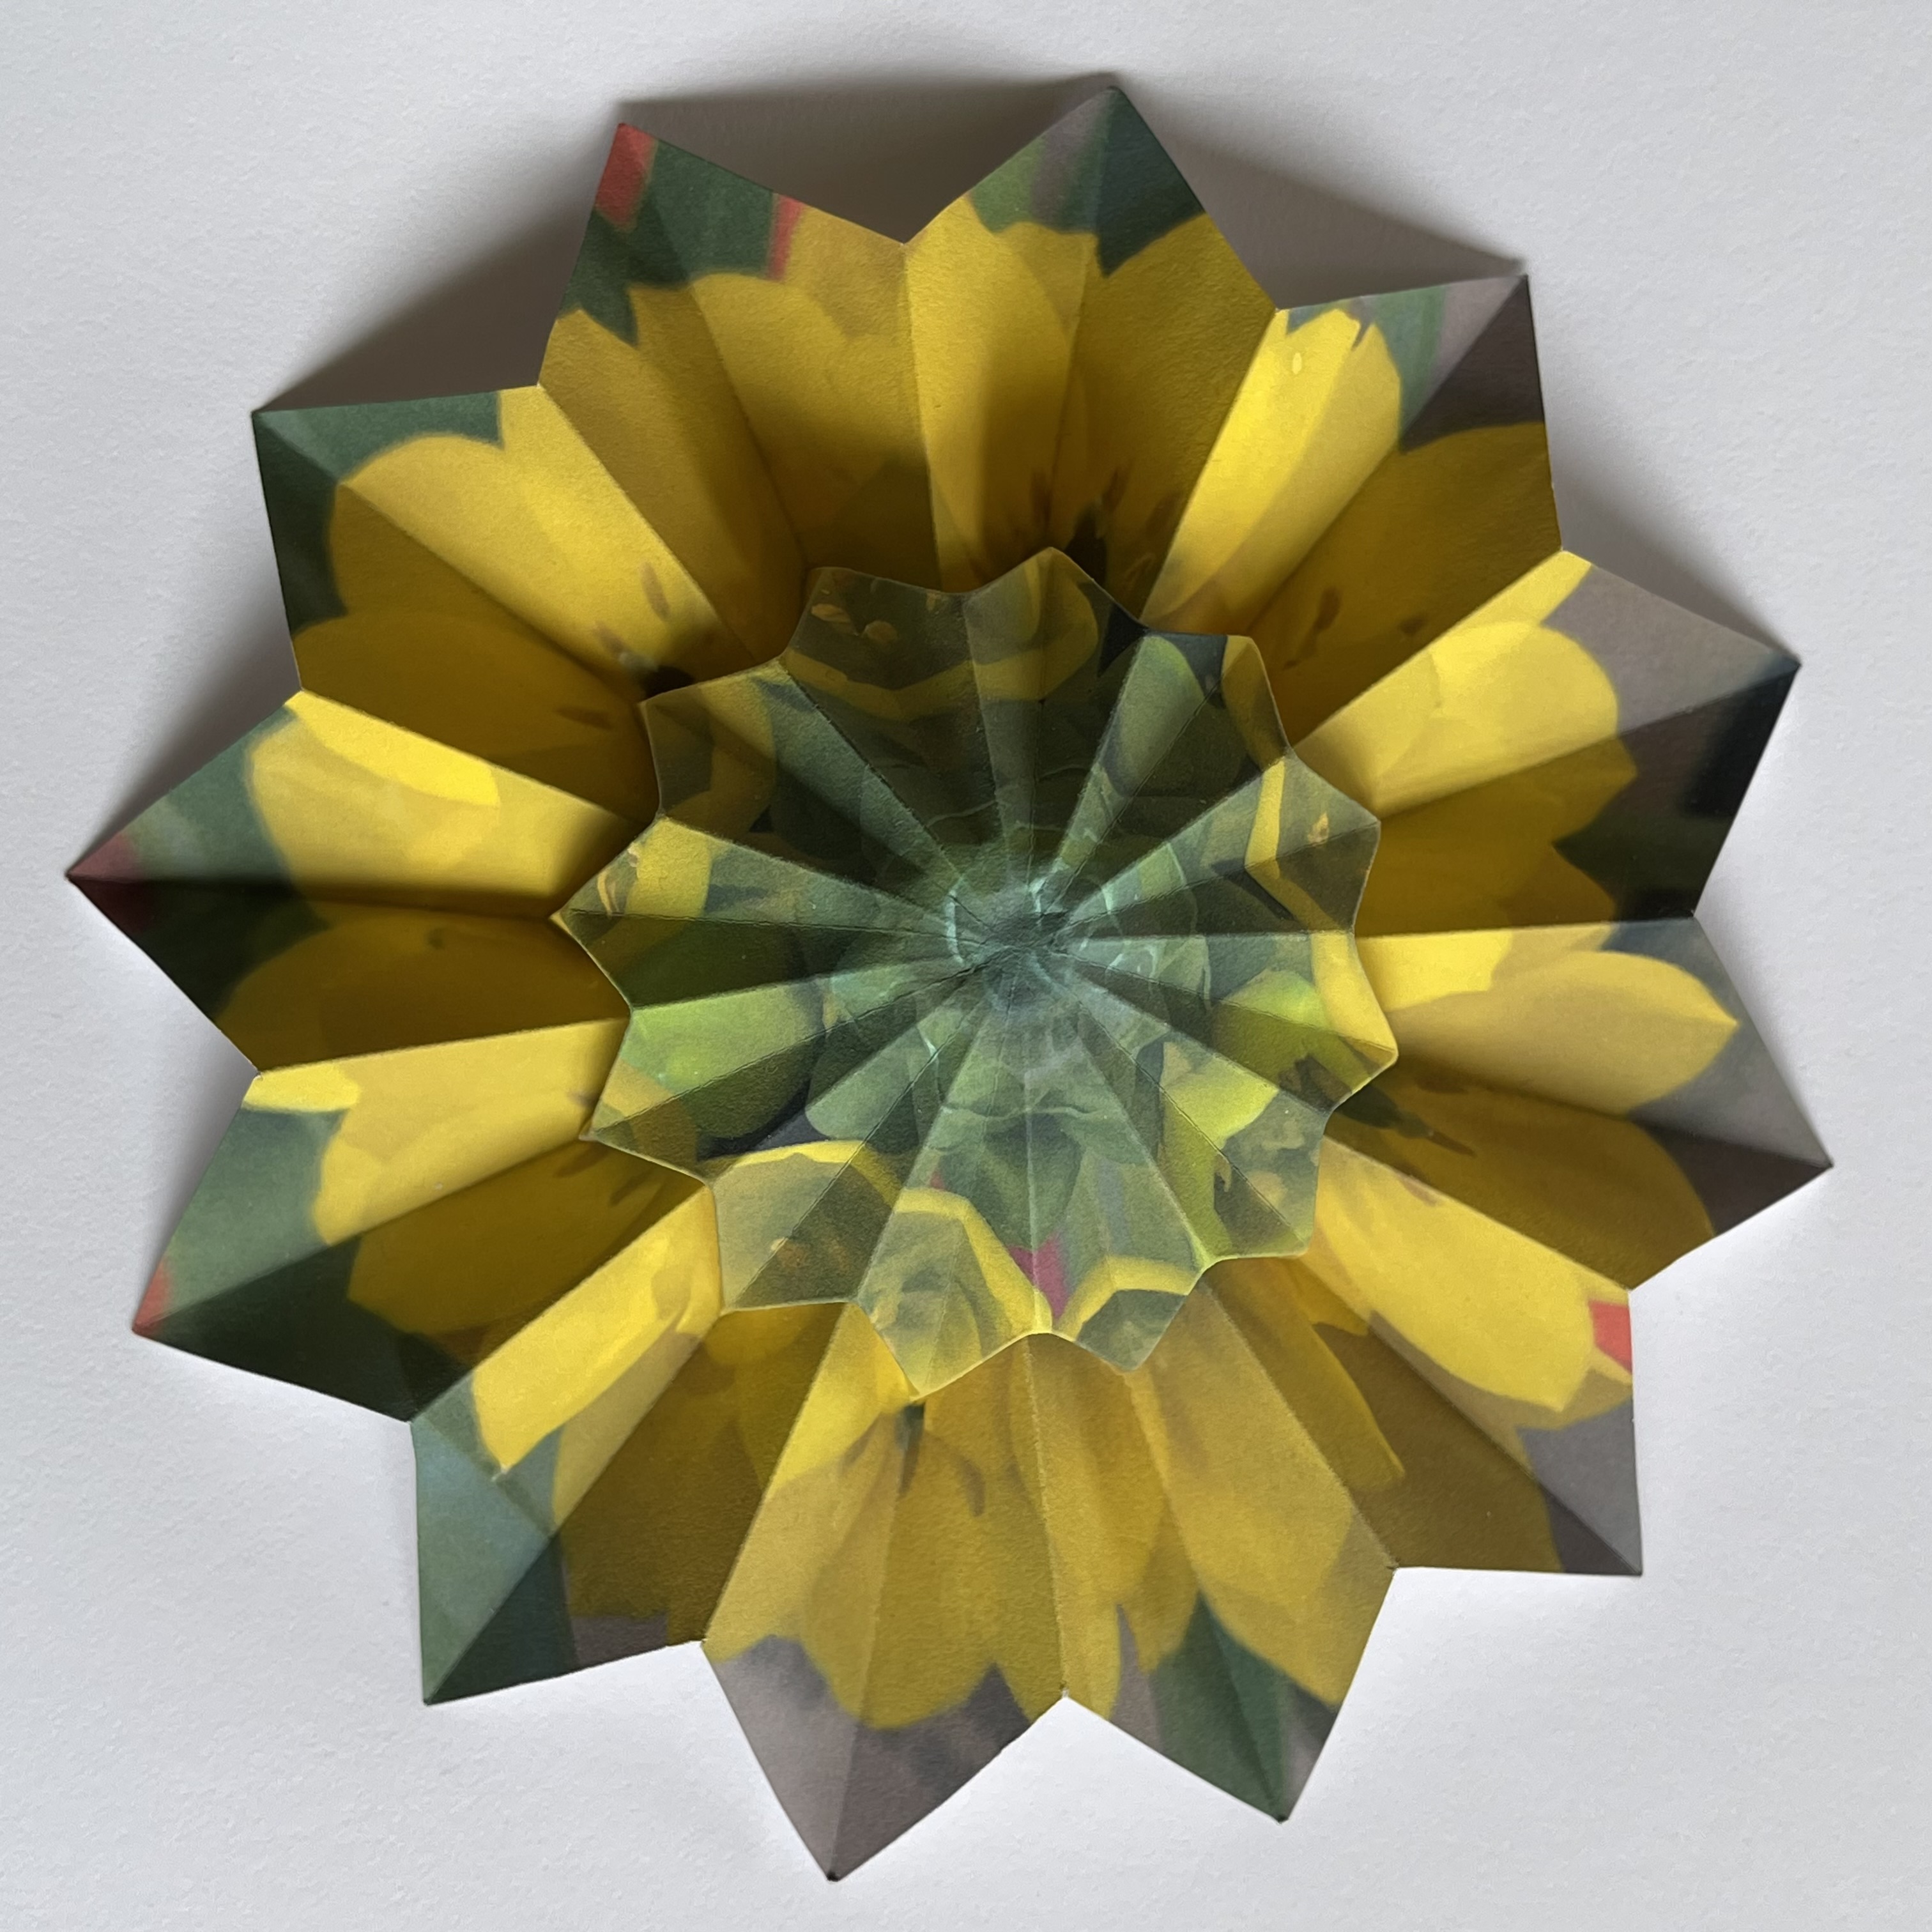 |
Example click to enlarge 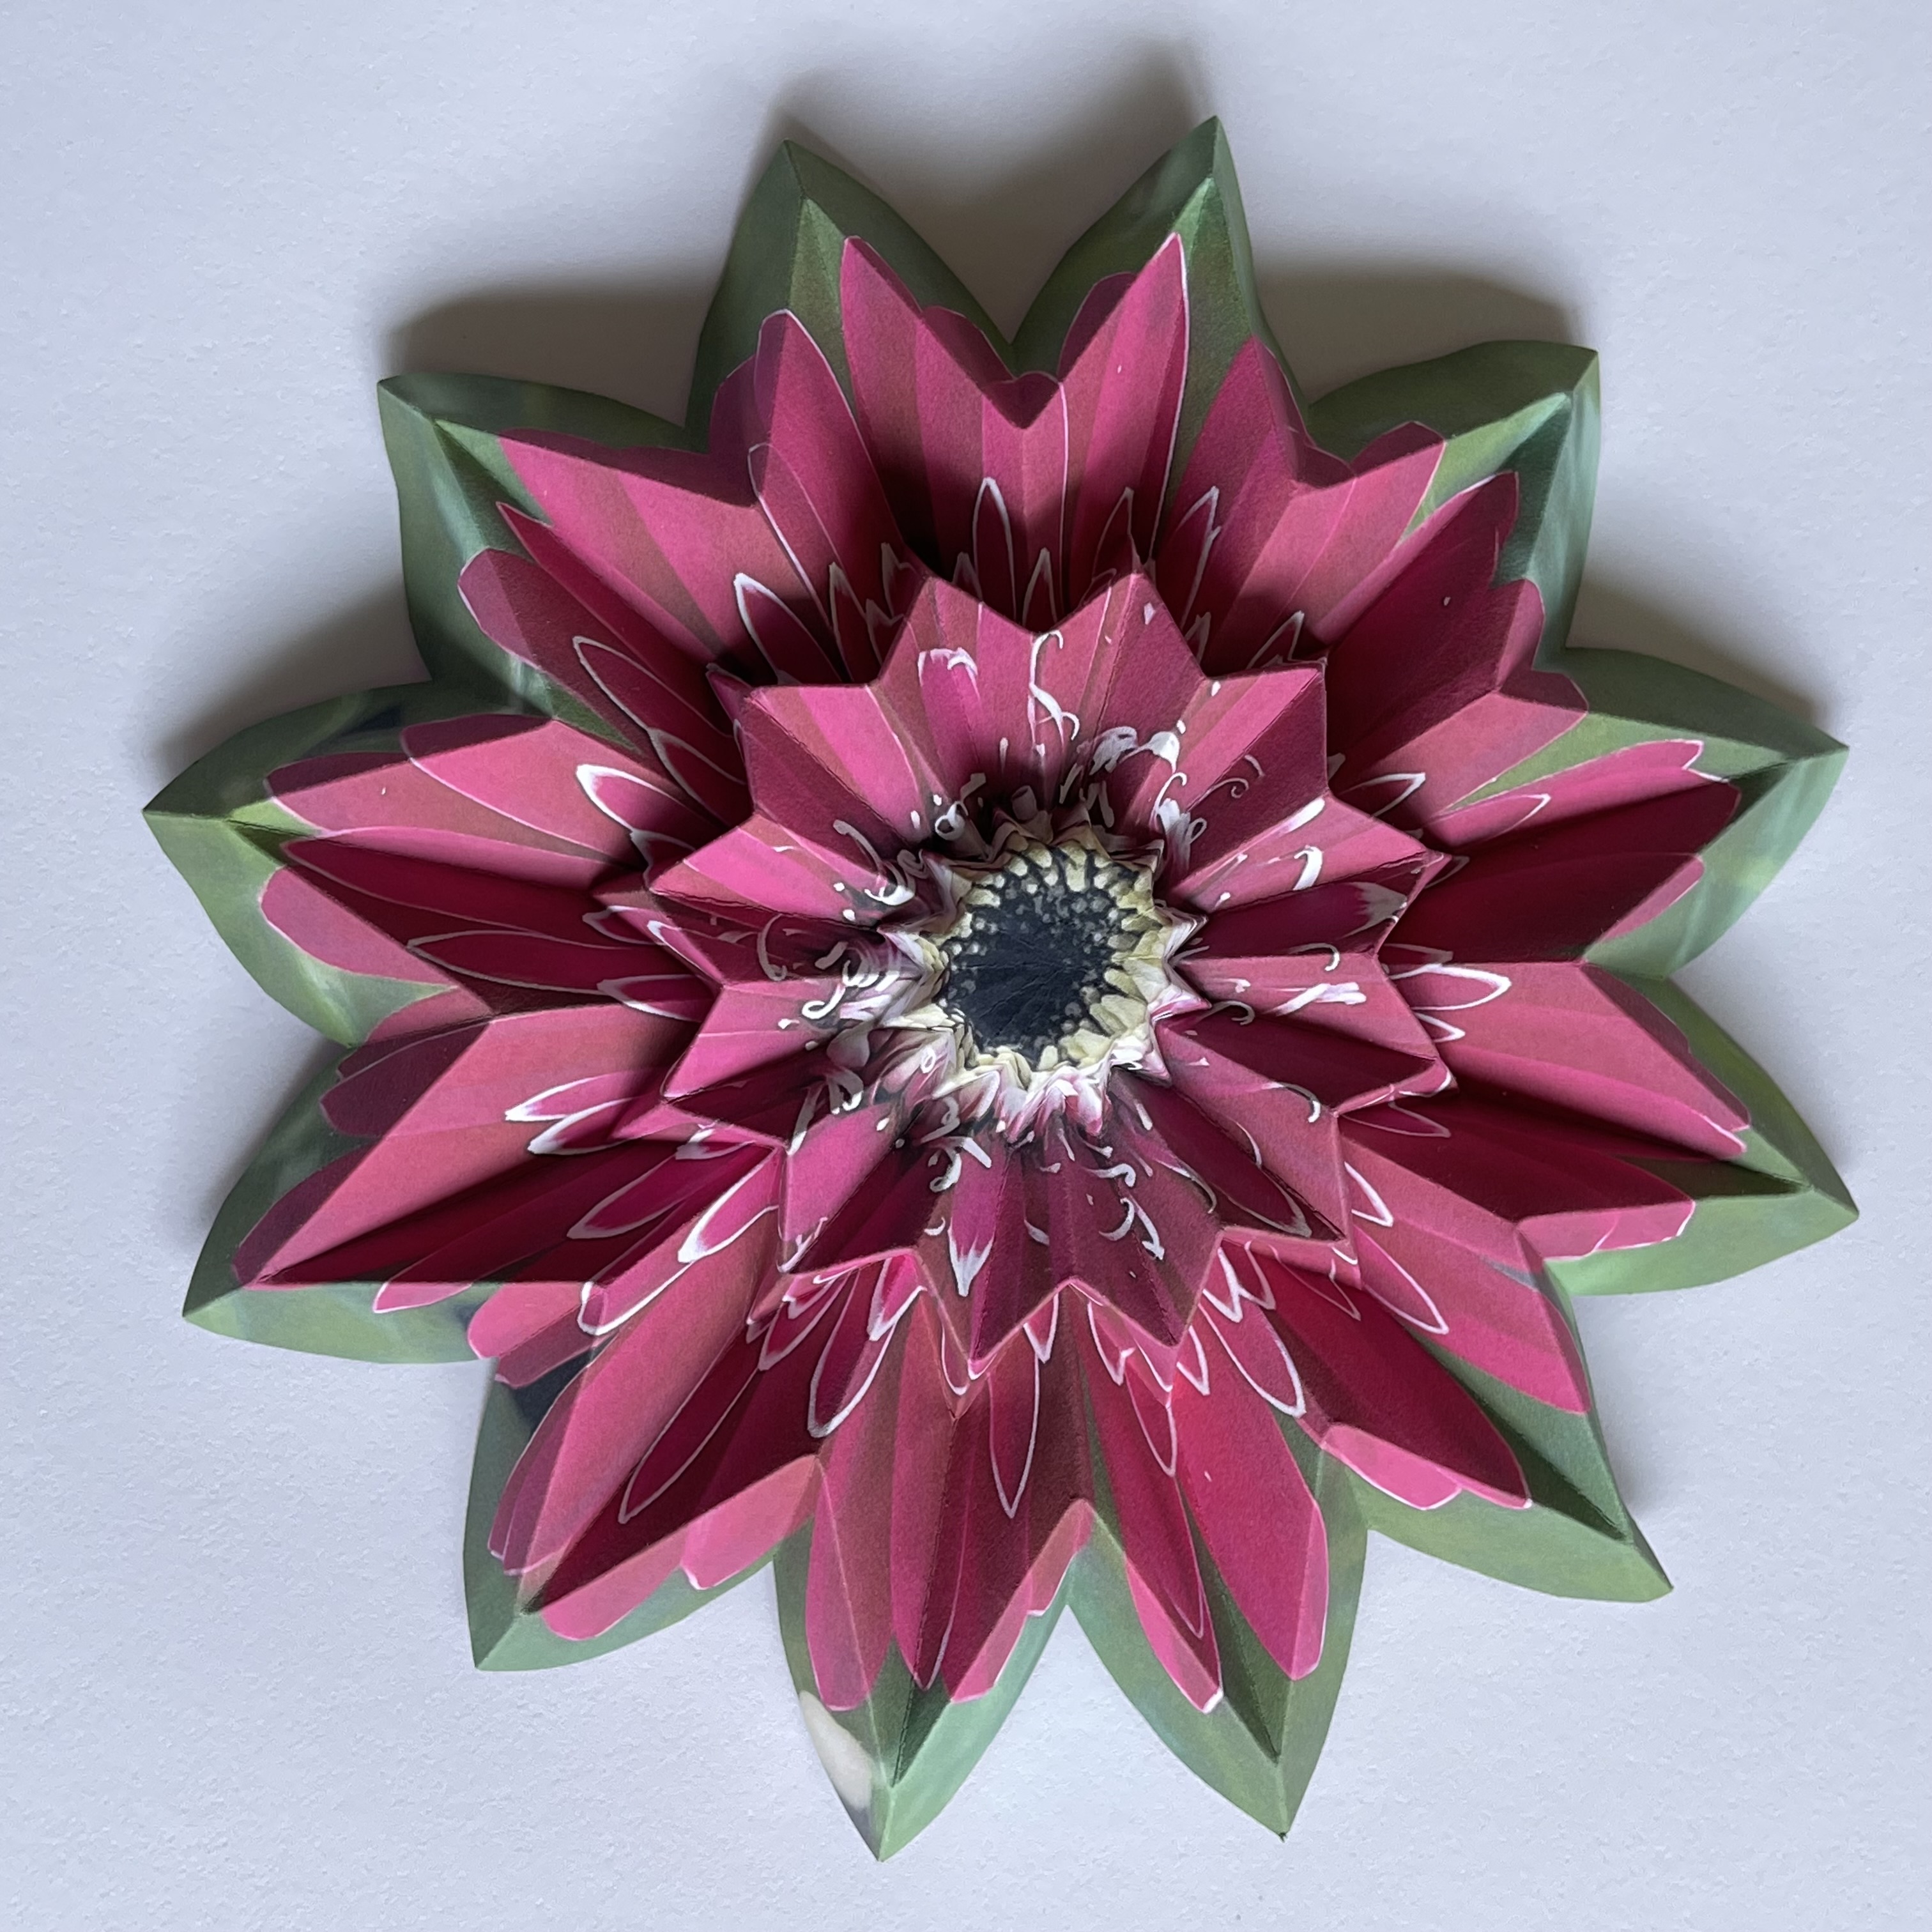 |
Example click to enlarge 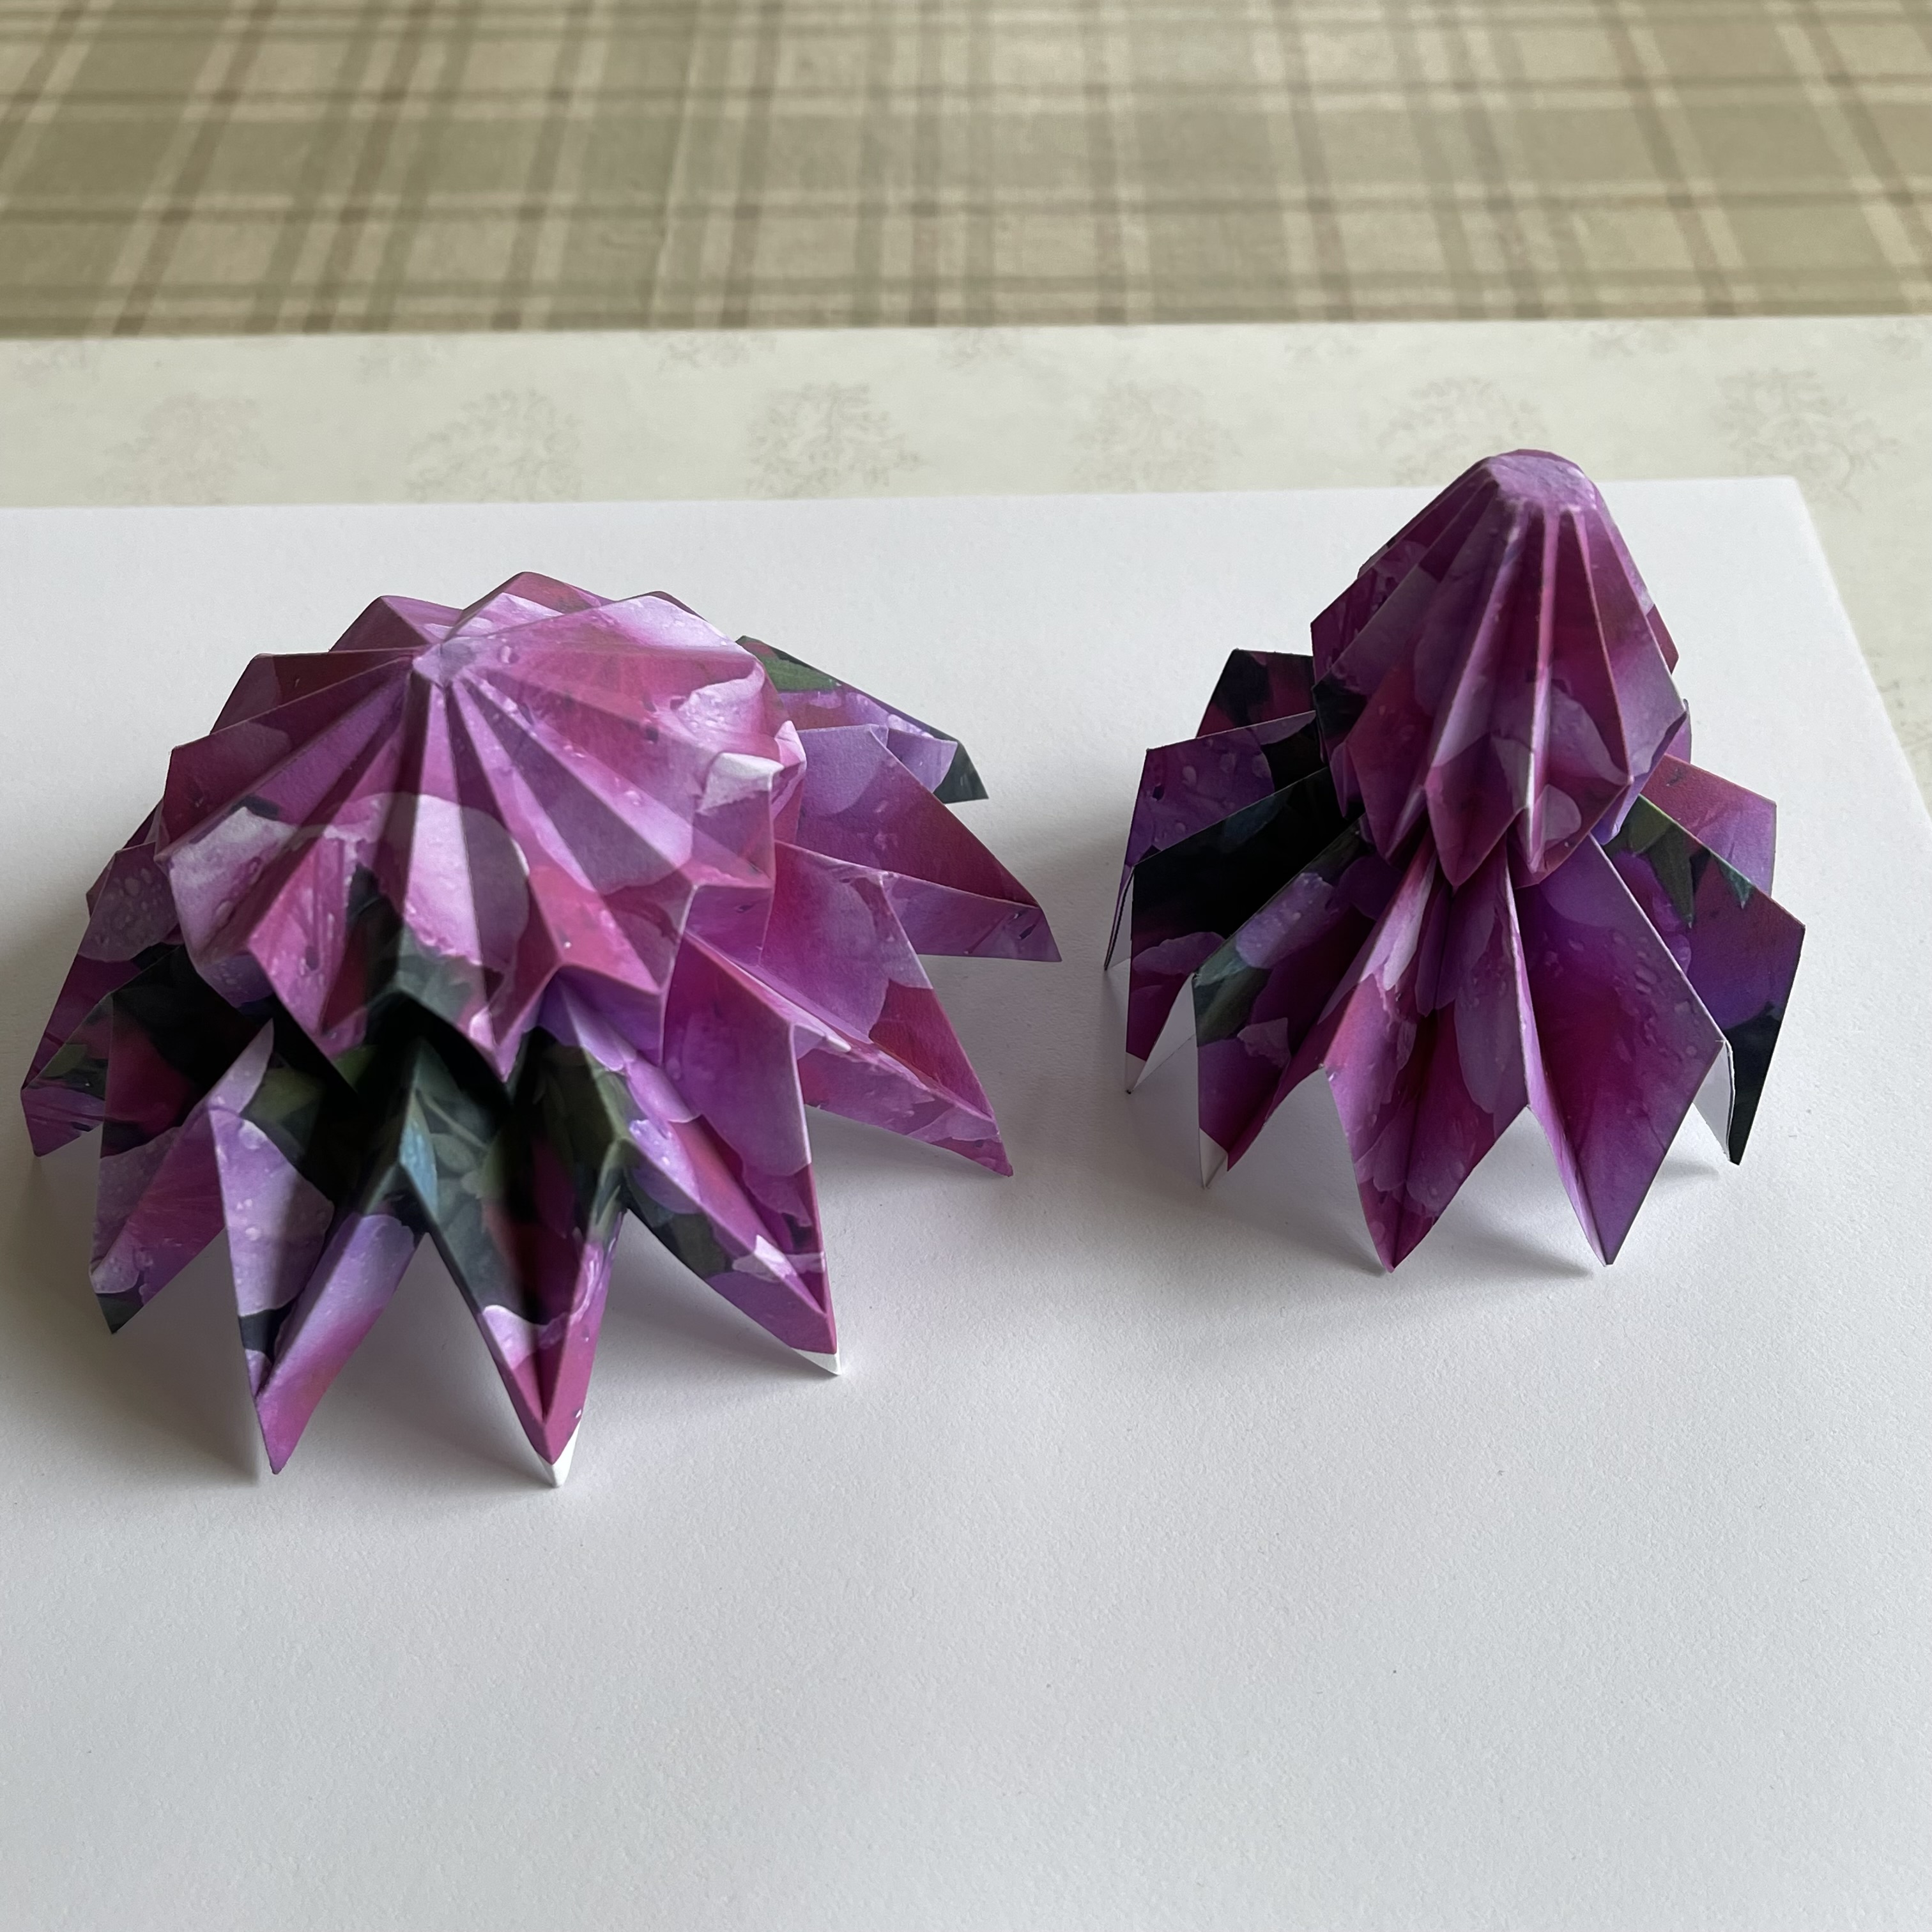 |
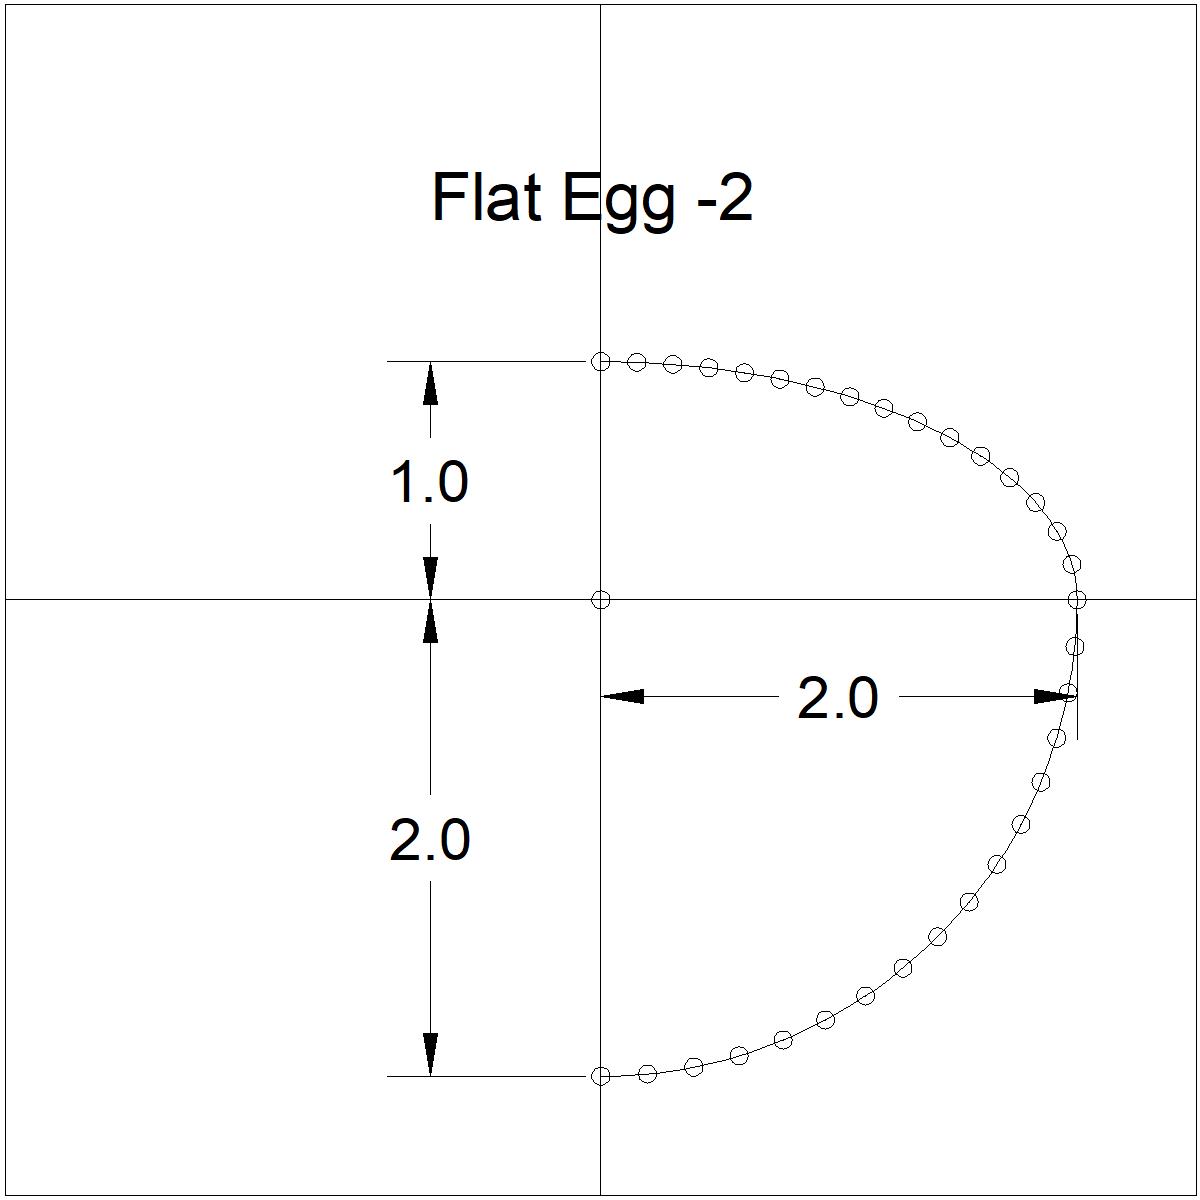
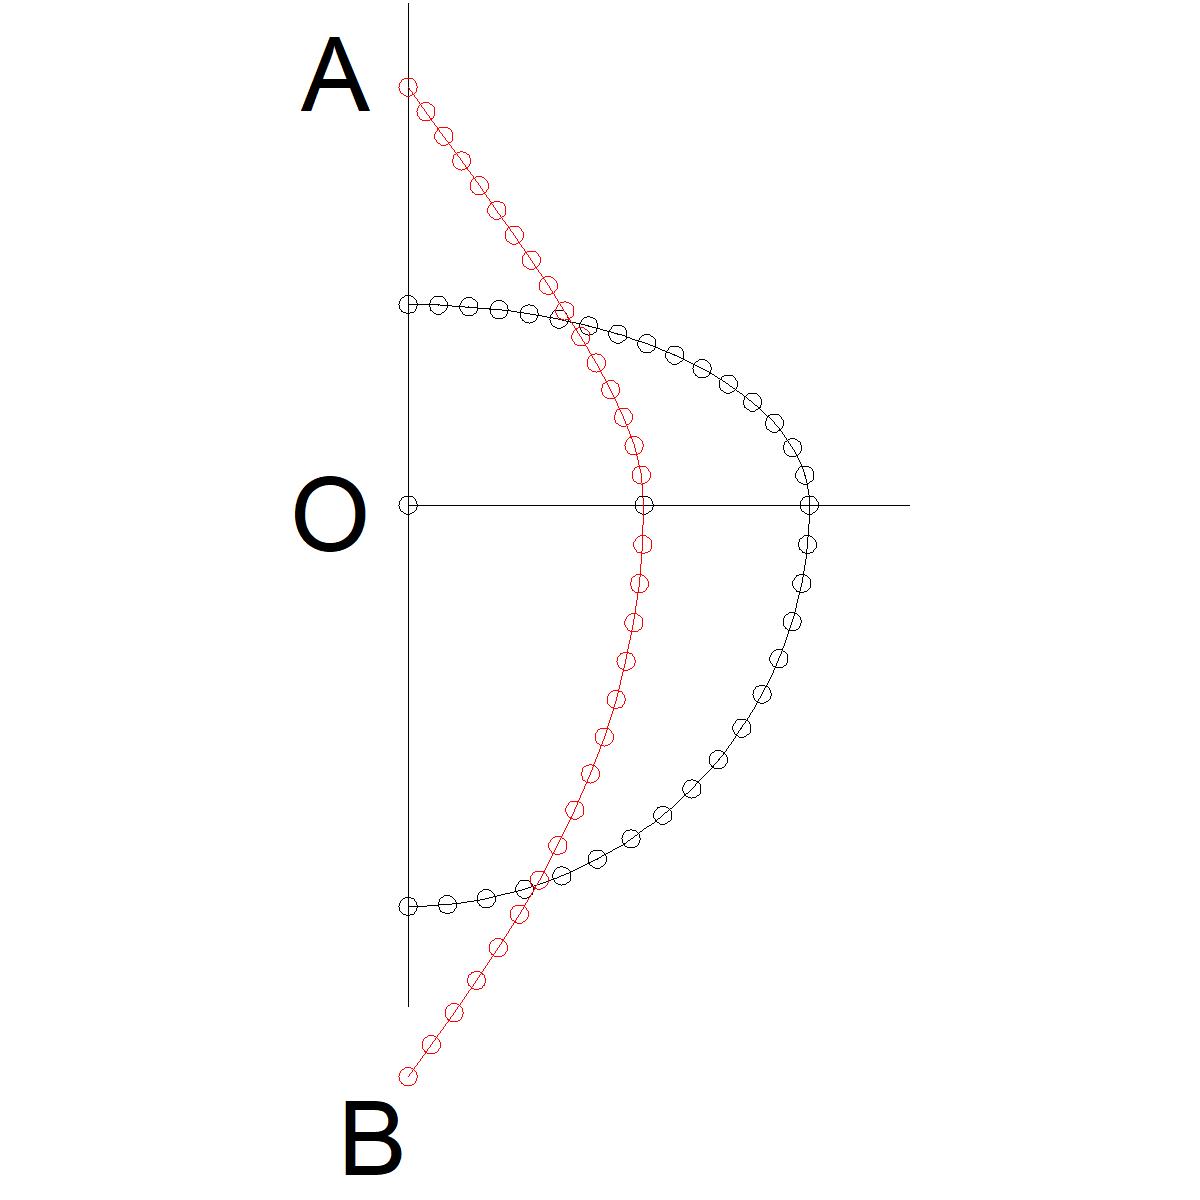
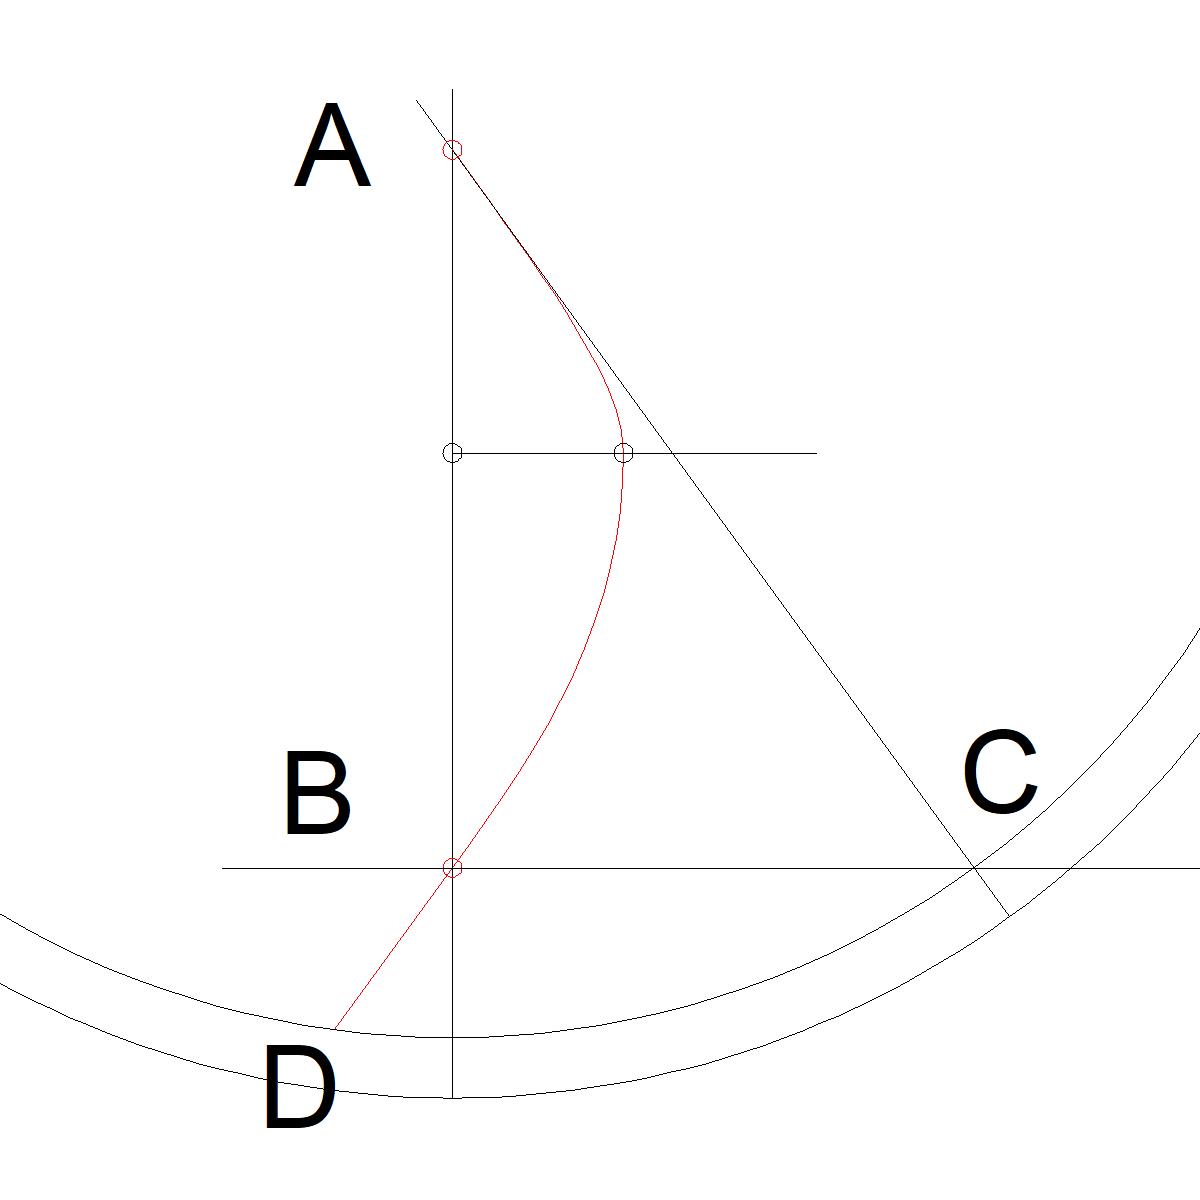
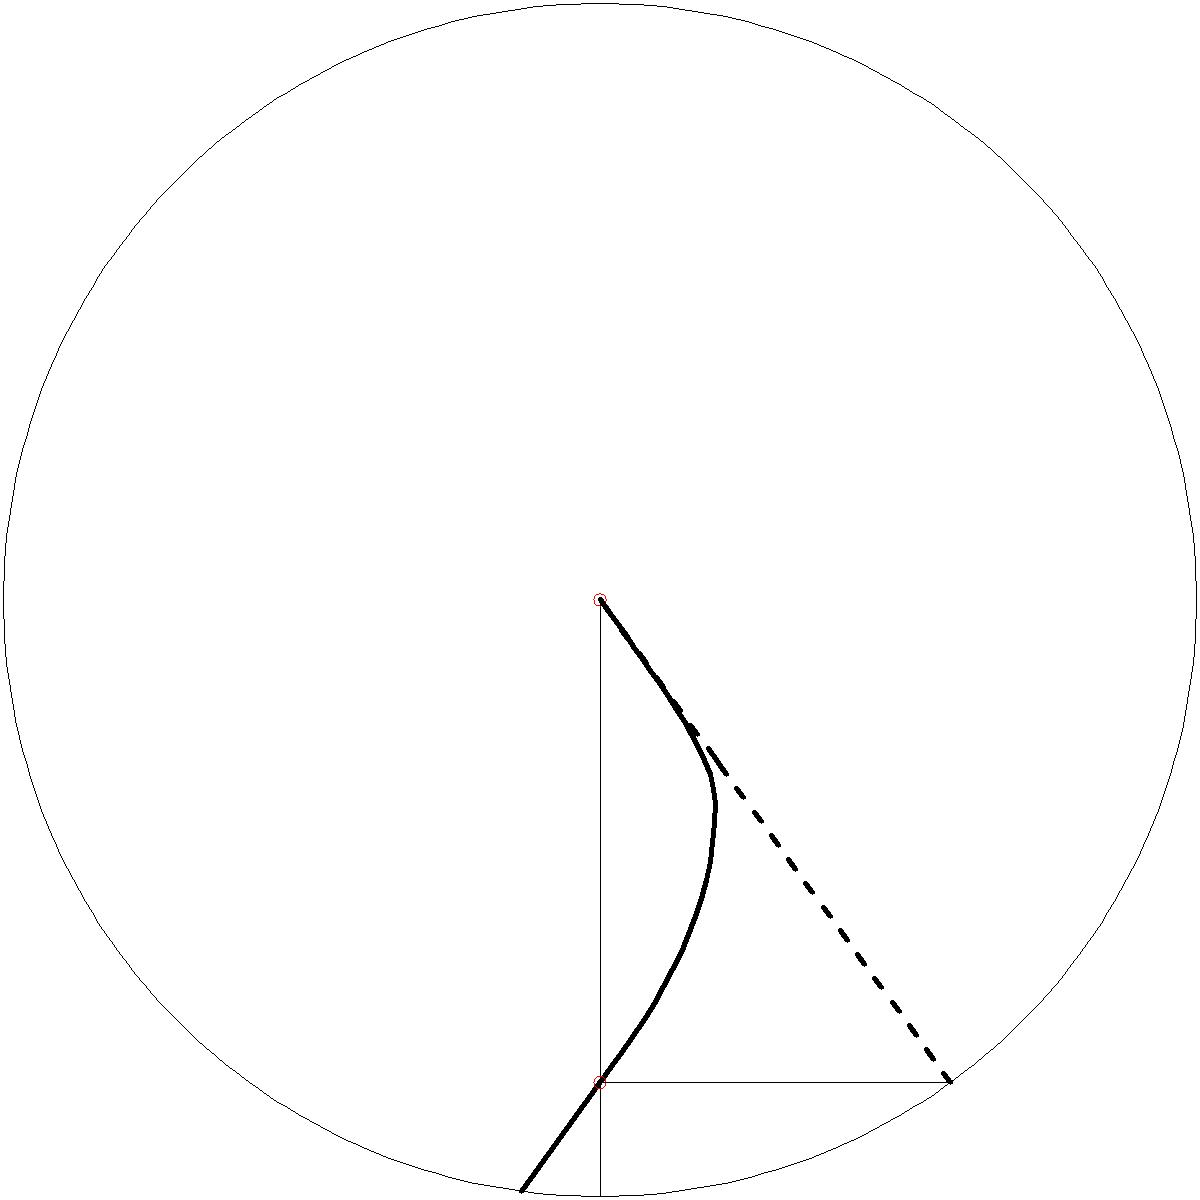
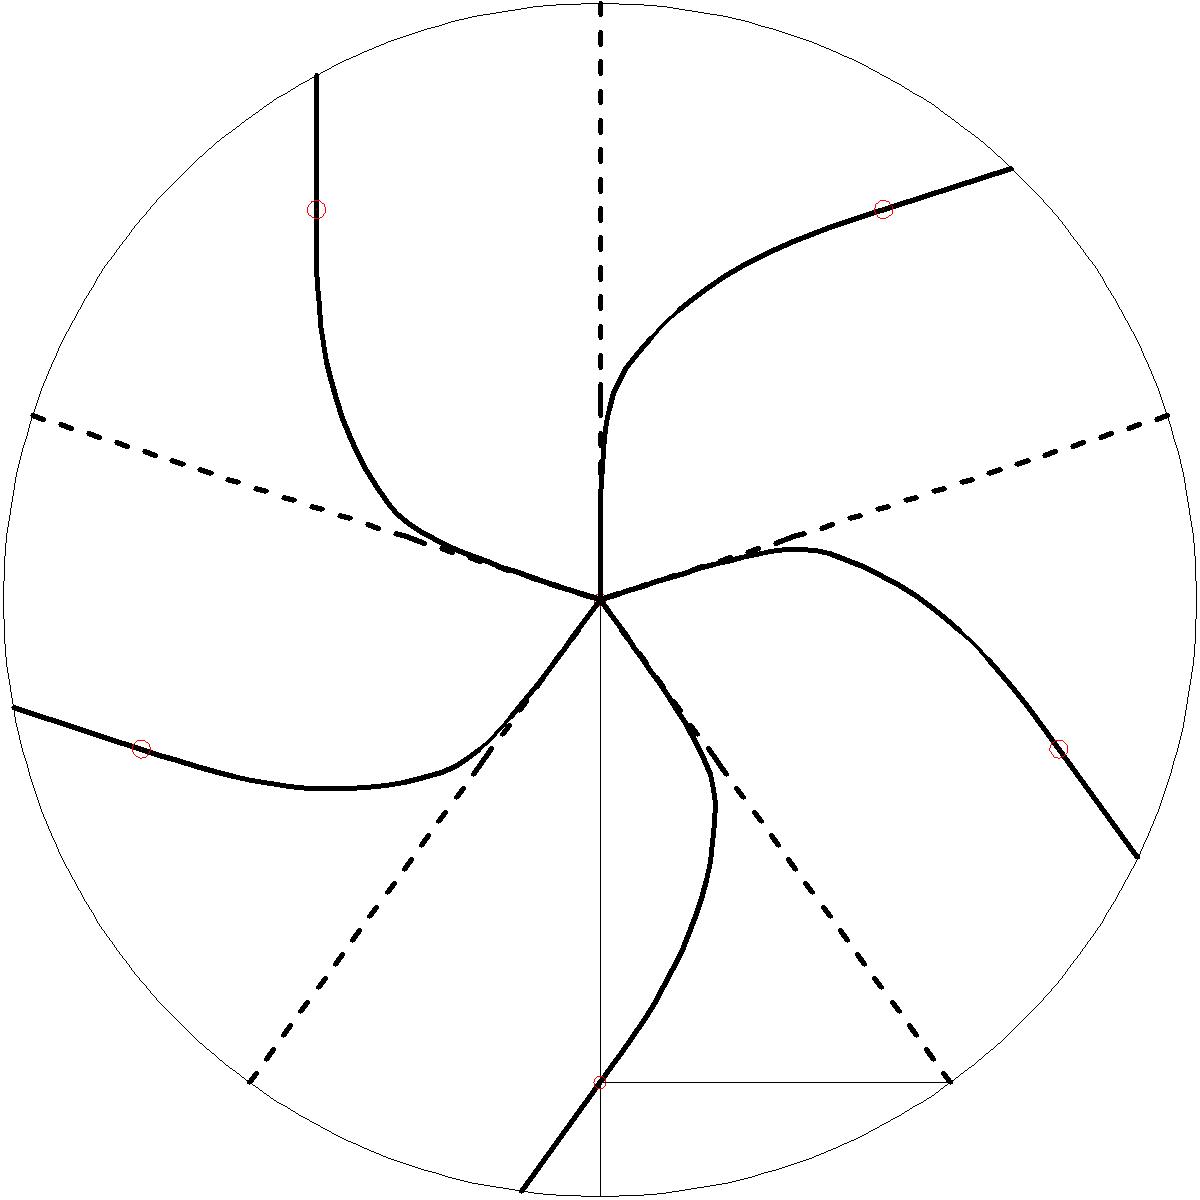
All the drawing presented here are created using AutoCAD. This section is for those who have access to AutoCAD. The steps are explained using example of flat_egg_2 , five axis case. Refer to the pictures below. step 1: prepare the axi-symetric pattern upper half is a quadrant of ellipse (1 : 2) ratio lower_half is a quadrant of circle Both are divided into 16 equal line sections by using DIVIDE command. step 2: Down load axisym_model.lsp to your work folder load axisym_model.lsp program (load "axisym_model") Then execute upper_half, then lower-half Use N=5 for latitude division (5 axis) end points of the computed line segments(in red color) : A & B Point "O" is the origin of the coordinate (0,0) modify these line segemnts into a single polyline using PEDIT. step 3: move all drawing objects so that point "A" now becomes the origin (0,0). Then copy-rotate line AB by 36 degrees ACW then copy-rotate line AB aroiund "B" 90 degrees CW. The intersecting point is "C". Draw a circle with radius AC. Extend the end of polyline AB to this circle, and intersecting point is "D". AC is the basic "valley line", and polyline AD , "mountain line". step 4: Clean up drawing and define the line weight for polylines. Here line weight is chosen to be 0.50 mm, and displayed on the screen. Use "polar" optipn of "Array" command, to make 5 axis object. step 5: The portion of the mountain crease lines along the periphery and the center area are almost linear. To reduce the effort of scoring these area, they are specified in the final diagram. |
- prepare axi-symmetric profile -
click to enlarge
 |
-excute axisym_model.lsp -
click to enlarge
 |
-Draw valley crease line-
click to enlarge
 |
- assign line weight 0.5 mm -
click to enlarge
 |
-Polar Array commands result -
click to enlarge
 |
-Specify quasi_linear area-
click to enlarge
 |